

My Crochet Universe · Pastel Lamb Series
Crochet Lamb Amigurumi: 9 Clear Stages From Curly Wool to Finished Charm
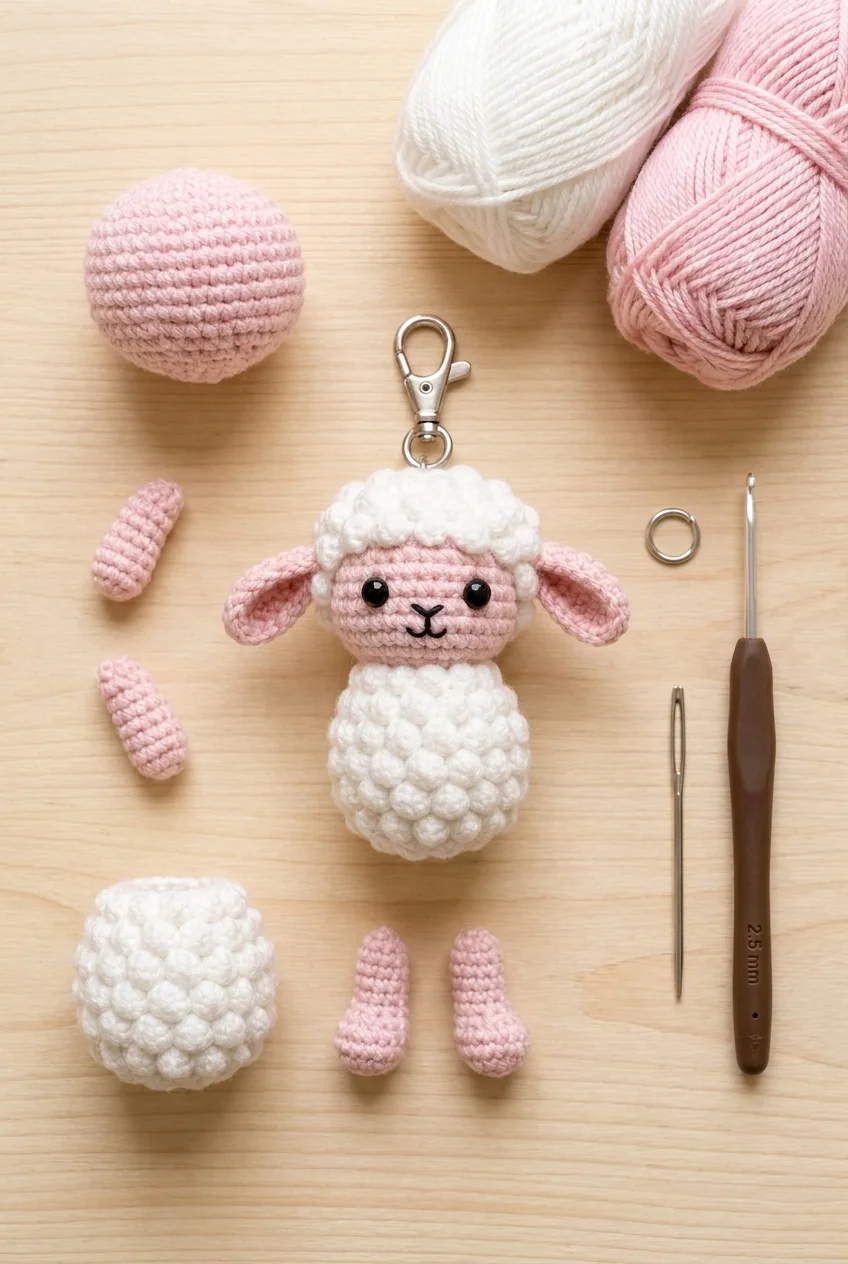
How a handful of crochet pieces becomes a tiny lamb
A finished crochet lamb keychain looks simple: a soft woolly body, a pink face, floppy ears, little limbs, and a metal clasp. But the charm comes from how those pieces are built and joined in the right order.
Understanding the overall journey before you begin makes an amigurumi project feel much less overwhelming. Here is the big-picture path from yarn to a finished fluffy lamb charm.
1. Gather the project materials
Begin by preparing the yarn colours for the wool and pink details, the stuffing, eyes or facial materials, sewing tools, and the keychain hardware.
Having everything ready prevents interruptions once you begin assembling. It also makes it easier to keep the lamb’s colour palette consistent across the face, ears, limbs, and body.
2. Crochet the smooth face section
The face is the heart of the character. It provides a smooth space for the eyes and embroidered muzzle, creating contrast against the fluffy fleece.
Keep the stitches even so the surface looks neat once the facial features are added.
3. Build the curly wool cap
The wool section gives the lamb its unmistakable sheep identity. Work the textured stitches carefully and make sure the raised curls sit on the outward-facing side.
As the piece grows, check that the texture looks balanced rather than crowded on one side.
4. Make the woolly body
The body repeats the soft fleece effect and gives the lamb its rounded, cuddly form. Stuffing and shaping help it look plump beneath the texture.
Aim for an even, stable body that will support the head and remain attractive when hanging from a clasp.
5. Crochet the floppy ears
The ears add movement and make the lamb silhouette instantly recognisable. Their soft pink colour links them to the face and keeps the design playful.
Make sure both ears match closely in size and shape before attaching them.
6. Prepare the arms and feet
Small arms and rounded feet bring proportion to the body. These smooth pink elements stand out beautifully against the white wool.
Lay all the pieces out before sewing. Seeing the lamb flat on your workspace helps you choose balanced placement.
7. Add the eyes and embroidered muzzle
Attach the eyes at a matching height and add the small nose-and-mouth detail with care. This is the moment when the crochet pieces start to become a character.
Pause after each detail and look at the expression from the front. A few millimetres can change the mood of a small amigurumi face.
8. Assemble and shape the lamb
Sew the wool cap, ears, arms, and feet into their final positions. Use secure, tidy stitches and check the character from all sides as you go.
The goal is a balanced lamb that looks sweet from the front while still having a clean profile and back view.
9. Attach the keychain clasp and do the final check
The clasp turns the lamb into a usable charm. Secure it firmly at the top so the character hangs upright.
Finally, arrange the wool texture, check the joins, confirm that the eyes and limbs are secure, and give the lamb one last gentle shape adjustment. Those finishing touches make it ready to gift, carry, or photograph.
Bring the whole lamb to life
Every stage has a role: smooth pink crochet creates the sweet face and limbs, fluffy white texture creates the fleece, and careful assembly turns separate parts into a tiny sheep with personality.
For the exact stitch instructions, complete assembly guidance, and the full project sequence, use the Pastel Lamb Keychain Pattern PDF.
Complete PDF-derived tutorial
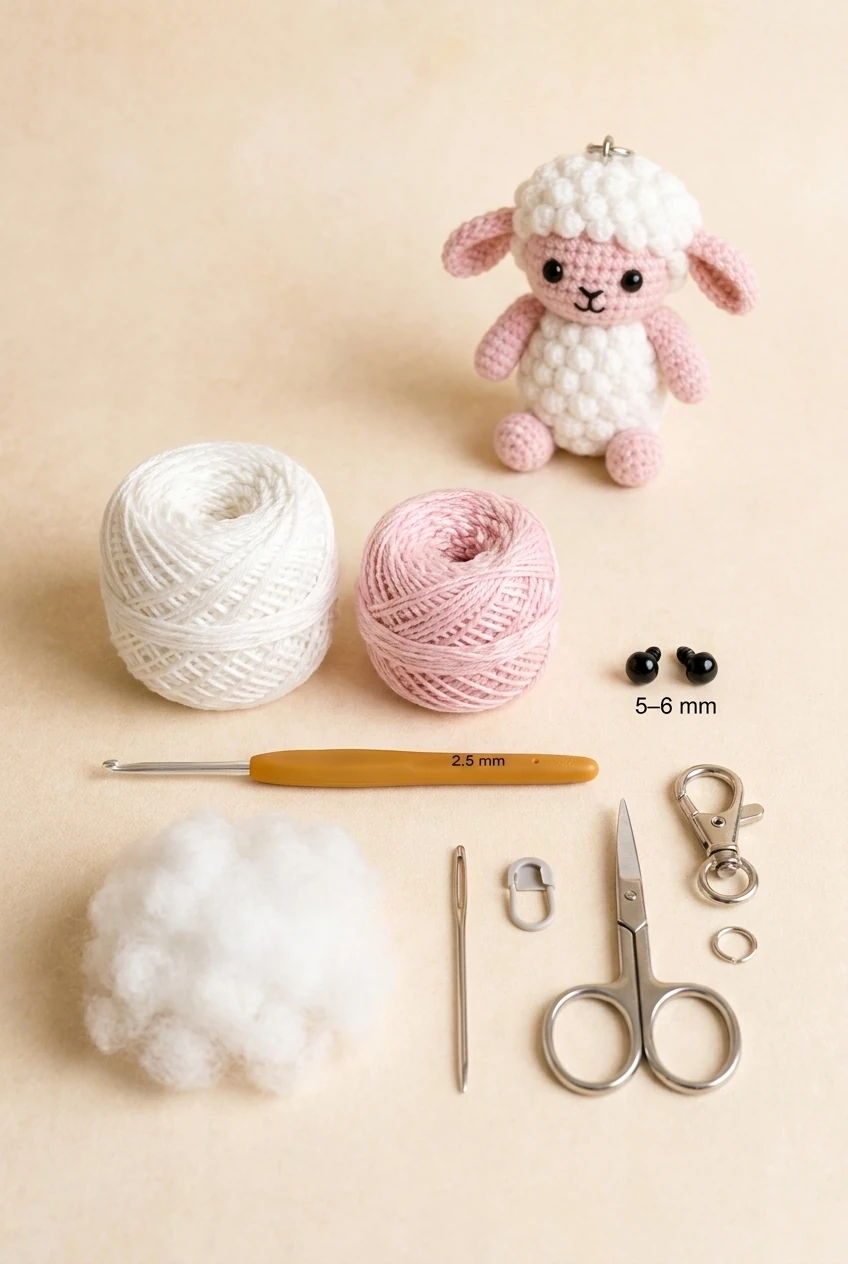
The pattern creates an approximately 8–9 cm lamb, excluding the keychain hardware. Use about 20–25 g white sport-weight cotton, 10–15 g pastel pink or blue sport-weight cotton, a 2.5 mm hook, 5–6 mm black safety eyes, fiberfill, tapestry needle, marker, scissors, lobster clasp, jump ring and optional black embroidery thread. Gauge is not critical; the fabric must be firm enough to hide stuffing. Work the main pieces in continuous spirals.
Stitch key and bobble method
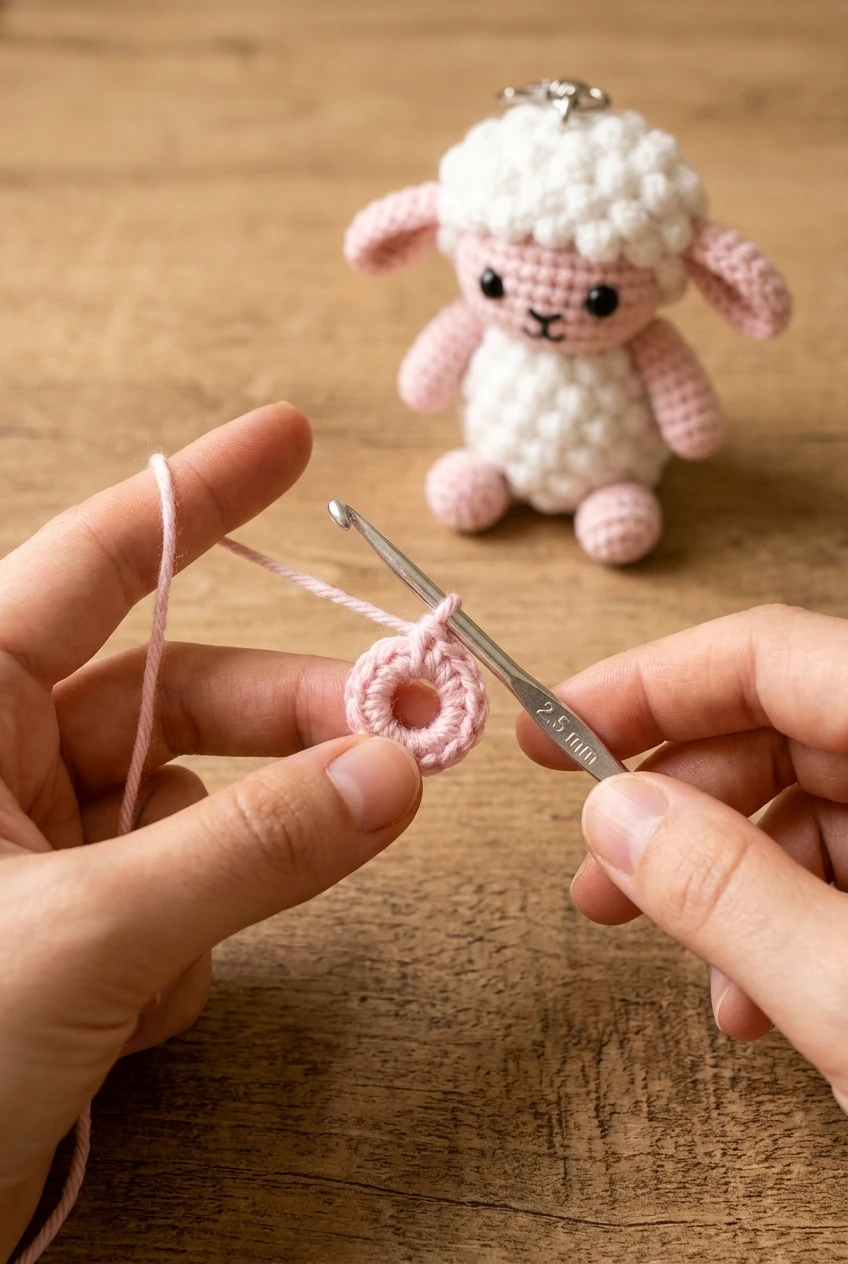
MR means magic ring, ch chain, sc single crochet, inc two single crochet in one stitch, dec invisible decrease, sl st slip stitch, FO fasten off and B bobble stitch. To make B, yarn over, insert the hook and pull up a loop; repeat three more times until five loops are on the hook, yarn over and pull through all loops, chain one, then skip the next stitch. The bobble replaces one stitch and the skipped stitch is recovered in the next round.
Head: 12 rounds
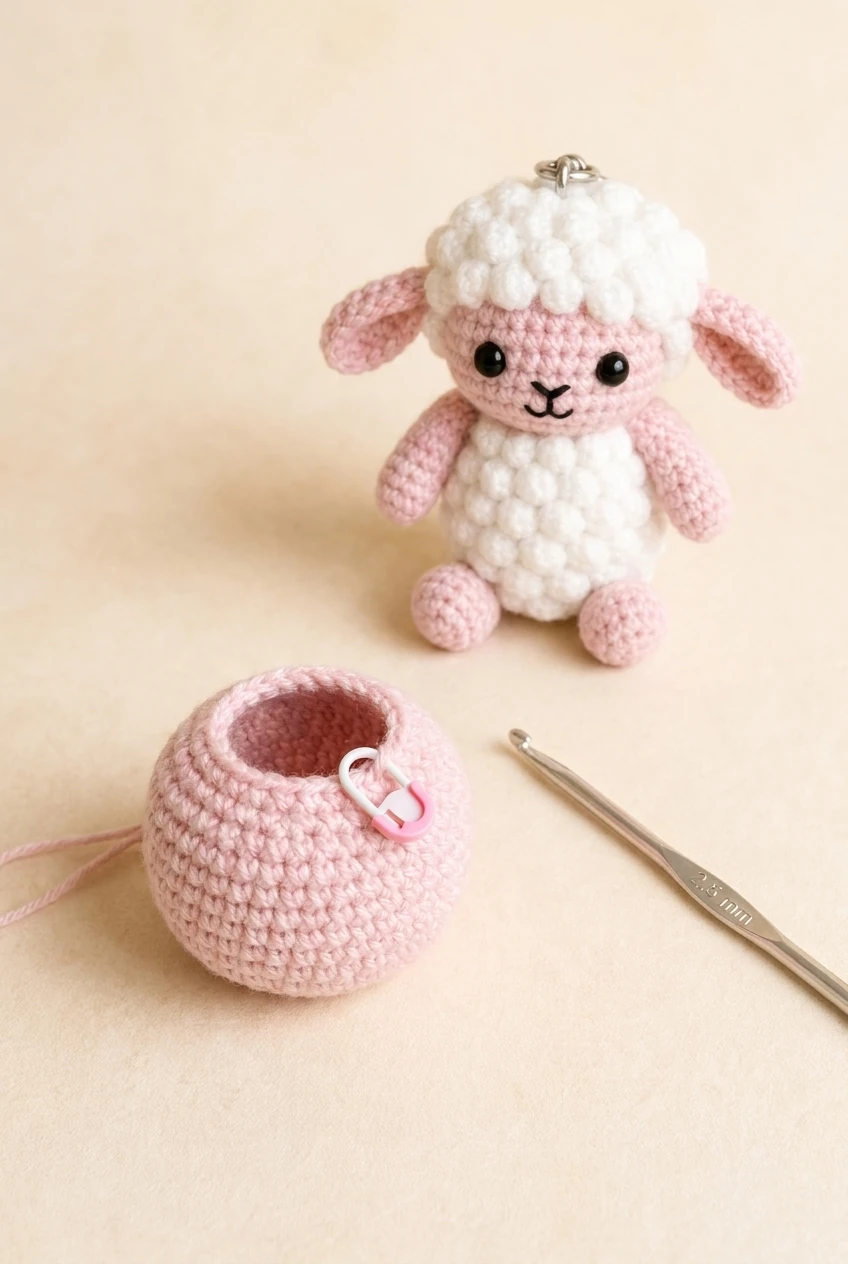
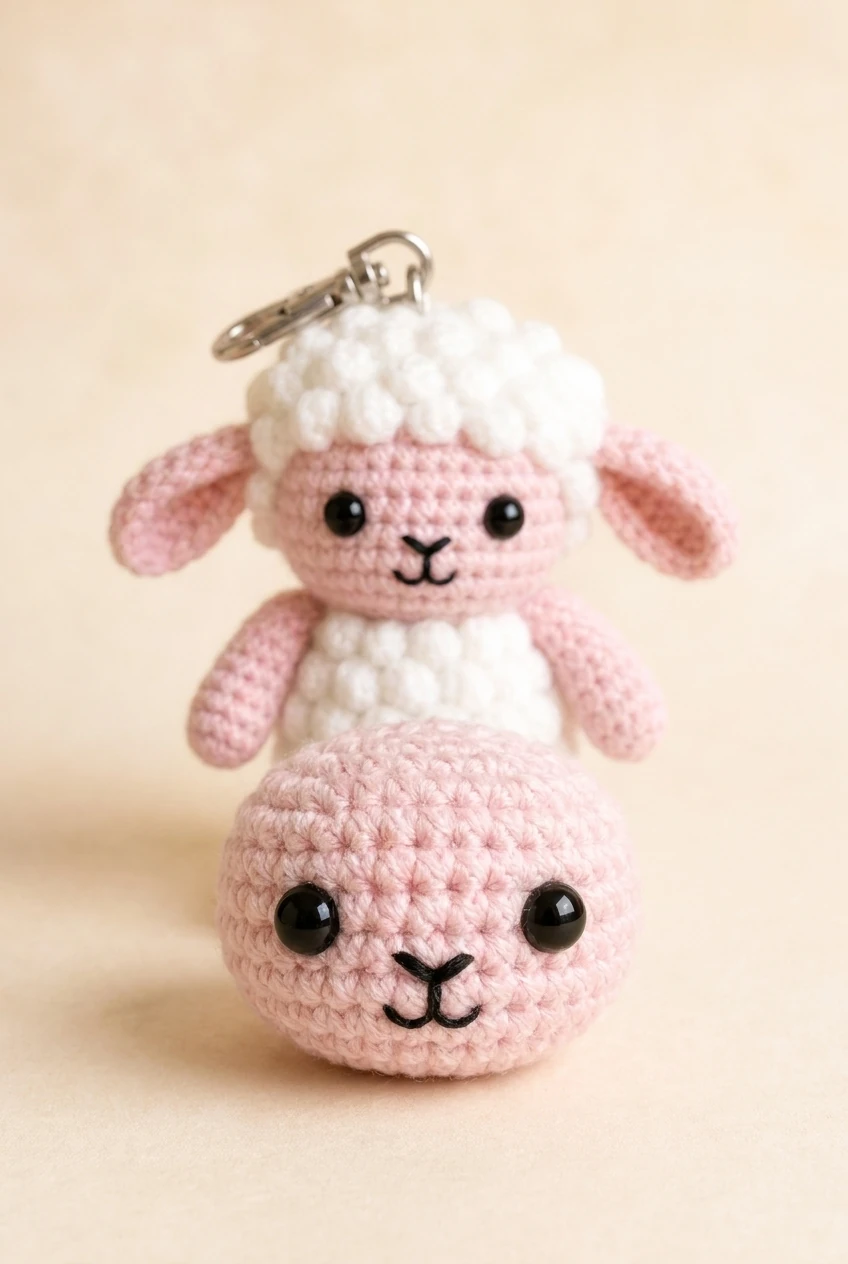
Round 1: MR, 6 sc (6). Round 2: inc around (12). Round 3: (sc, inc) × 6 (18). Round 4: (2 sc, inc) × 6 (24). Round 5: (3 sc, inc) × 6 (30). Rounds 6–8: sc around (30 each). Round 9: (3 sc, dec) × 6 (24). Round 10: (2 sc, dec) × 6 (18). Round 11: (sc, dec) × 6 (12). Round 12: dec around (6).
Insert the eyes between Rounds 7 and 8, about five stitches apart and symmetrically toward the front. Begin stuffing after Round 9, adding fiberfill gradually so the head is firm and round without stretching the stitches. After Round 12, fasten off with a long tail, close the six remaining stitches and hide the tail.
Ears: make two
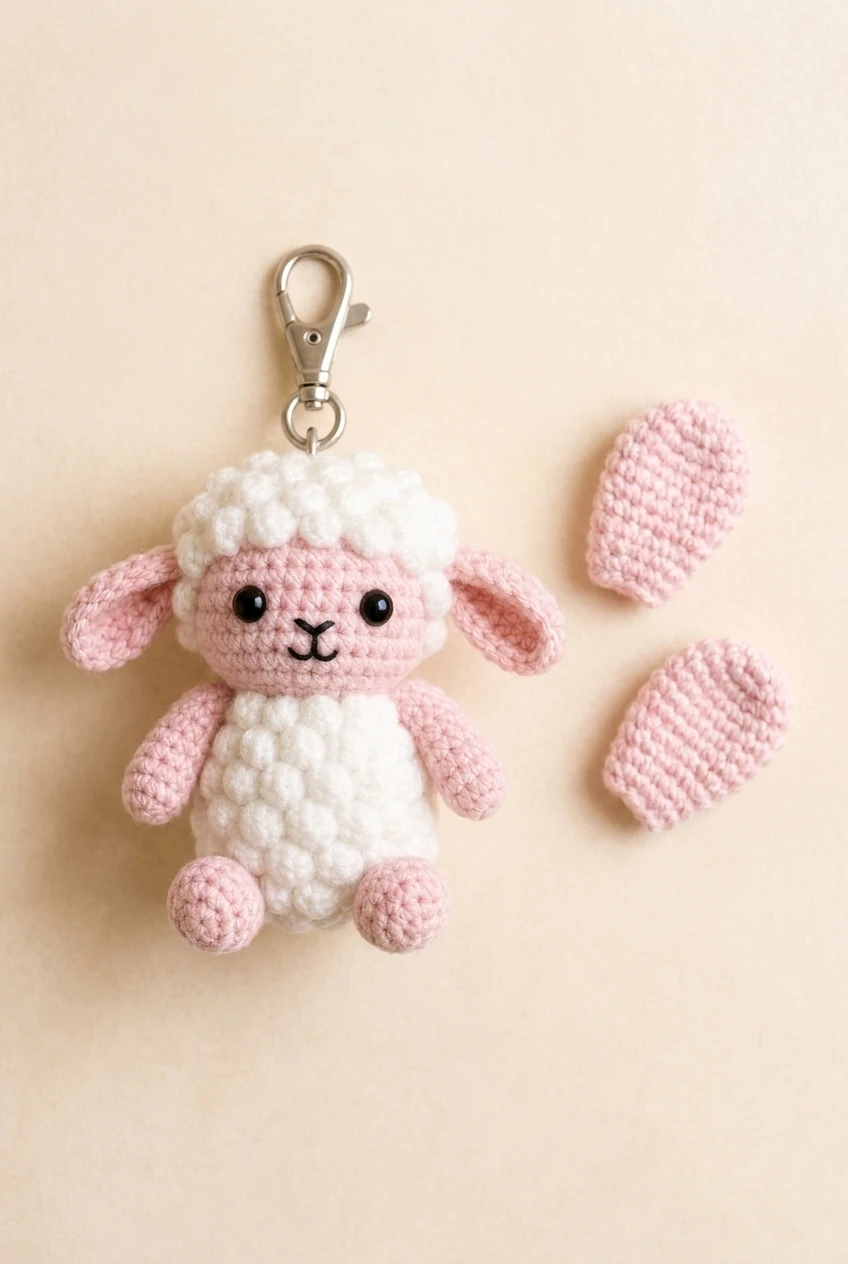
Use the accent colour. Round 1: MR, 6 sc (6). Round 2: inc around (12). Round 3: (sc, inc) × 6 (18). Round 4: sc around (18). Round 5: (sc, dec) × 6 (12). Round 6: dec around (6). Do not stuff heavily. Flatten the opening, sew it closed and leave a long tail. Attach one ear to each side of the head around Rounds 5–9, angled slightly outward and downward.
Body base and bobble wool
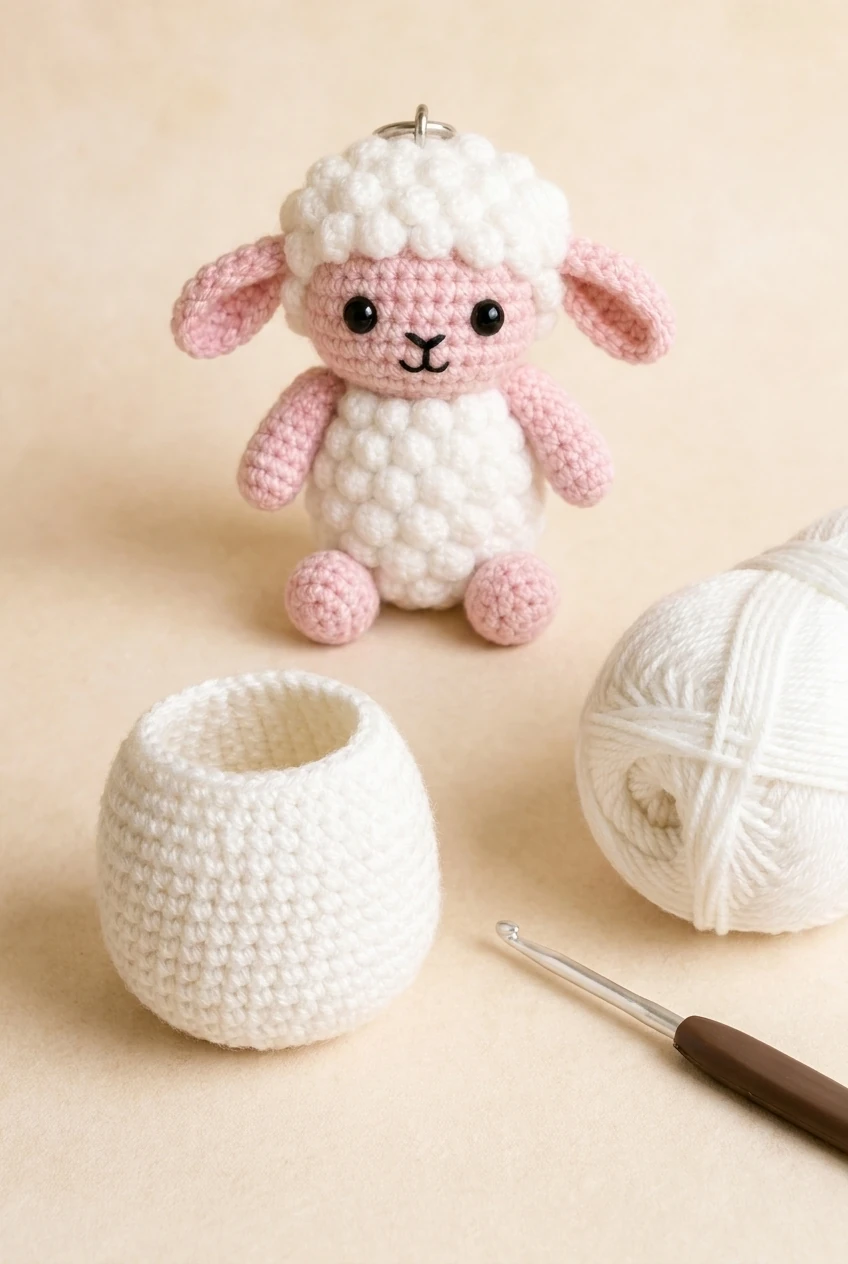
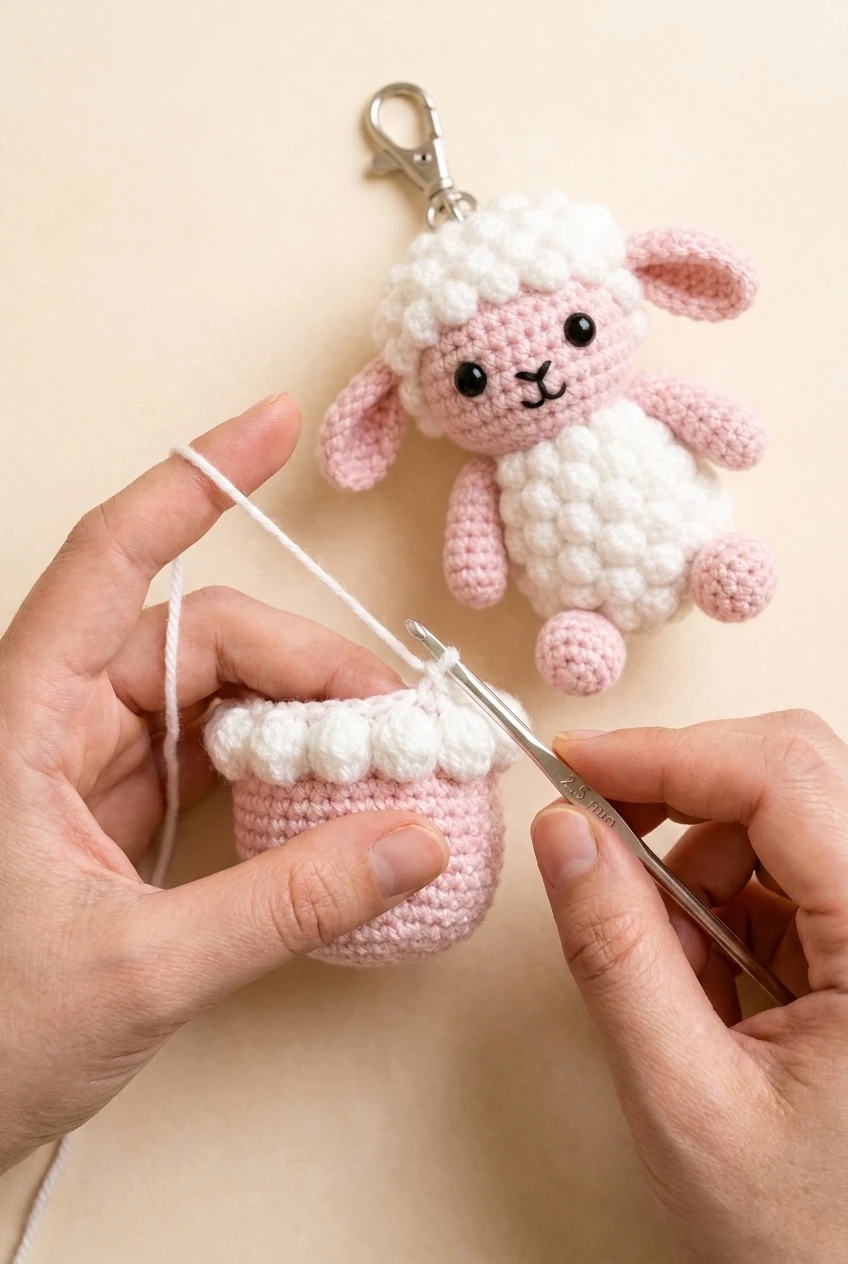
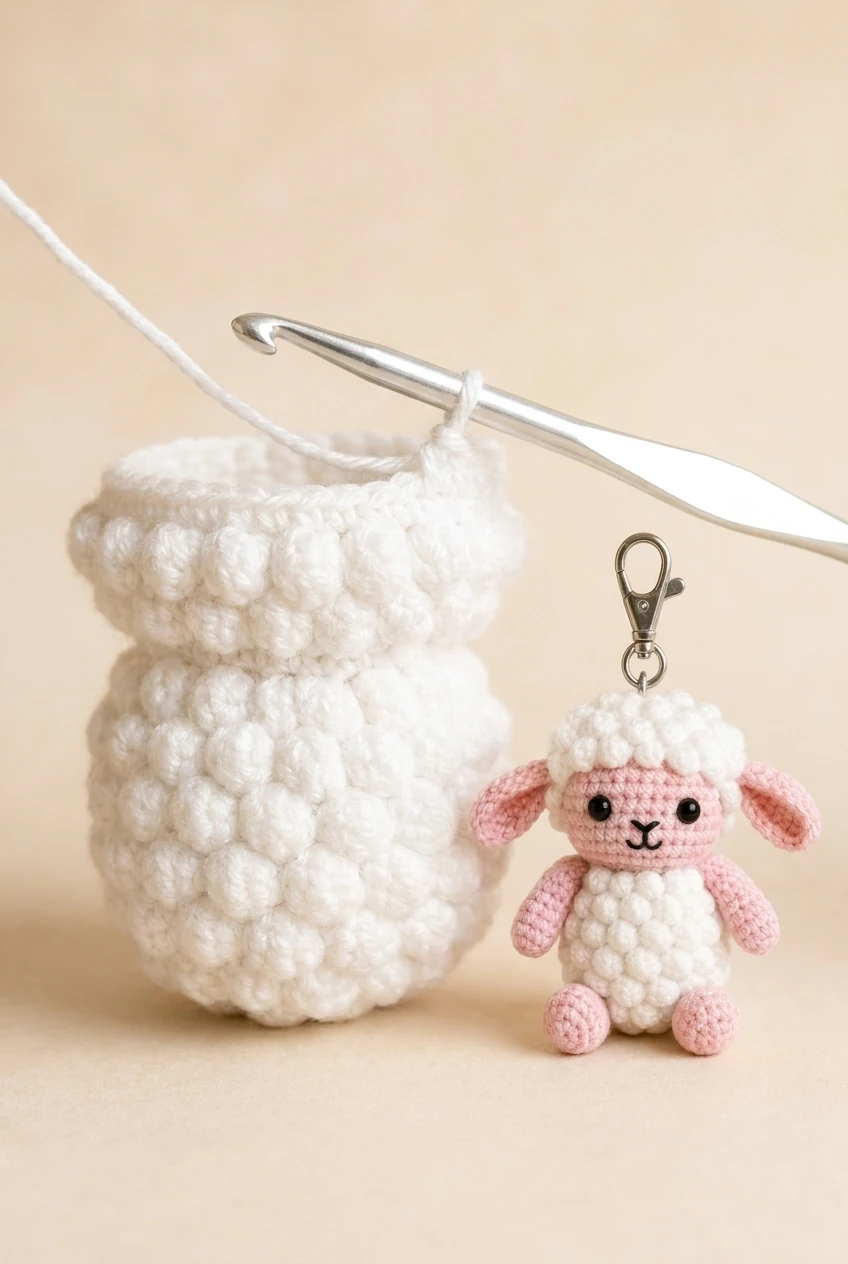
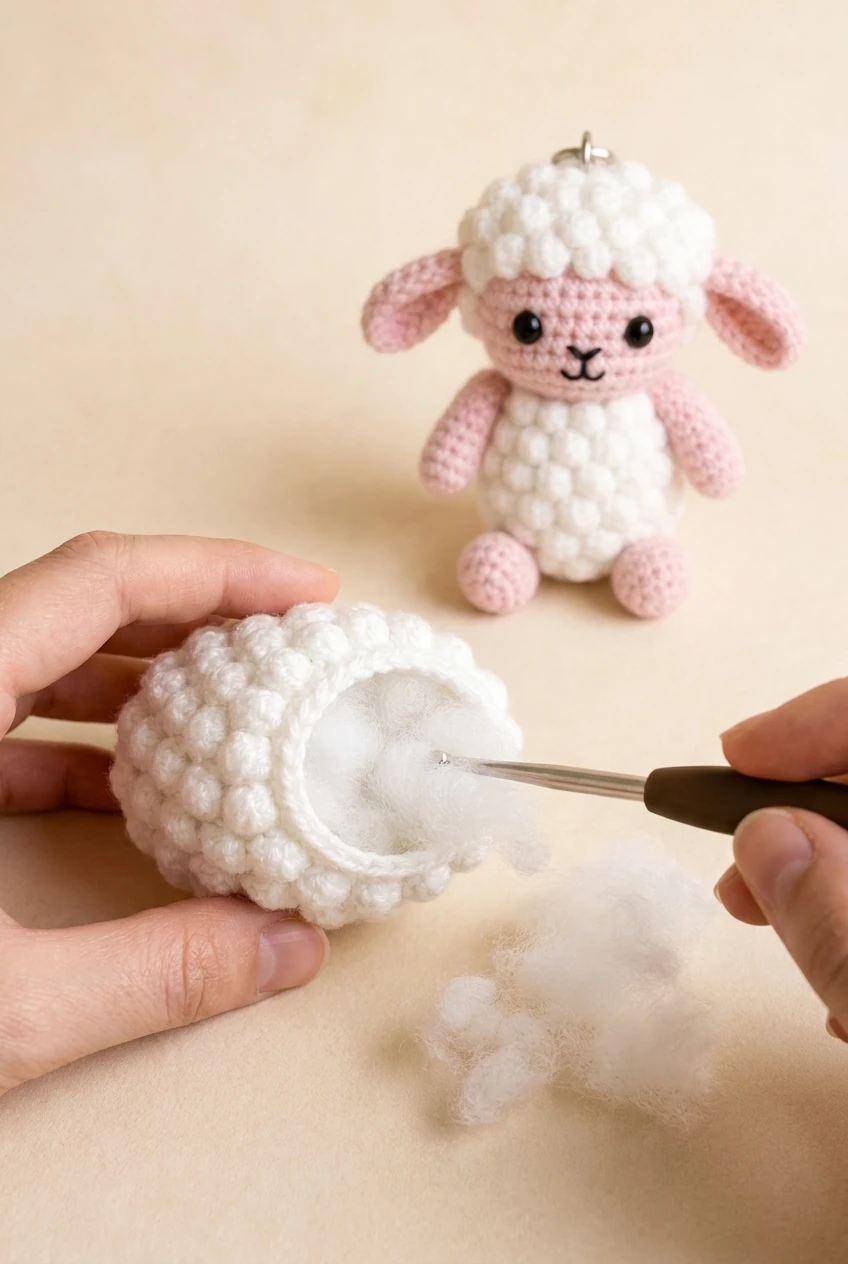
Use white. Round 1: MR, 6 sc (6). Round 2: inc around (12). Round 3: (sc, inc) × 6 (18). Round 4: (2 sc, inc) × 6 (24). Round 5: (3 sc, inc) × 6 (30).
Round 6: repeat B, ch 1, skip next stitch fifteen times, producing 15 bobbles over 30 base stitches. Round 7: sc in the top of the next bobble and sc in the previously skipped stitch; repeat fifteen times (30). Round 8 repeats the bobble sequence for a second row. Round 9 repeats the recovery round (30).
Round 10: (3 sc, dec) × 6 (24). Round 11: (2 sc, dec) × 6 (18). Round 12: (sc, dec) × 6 (12). Round 13: dec around (6). Begin firm stuffing after Round 10, shape a plump oval and do not overstuff. Close the remaining stitches and hide the tail.
Arms, legs and feet
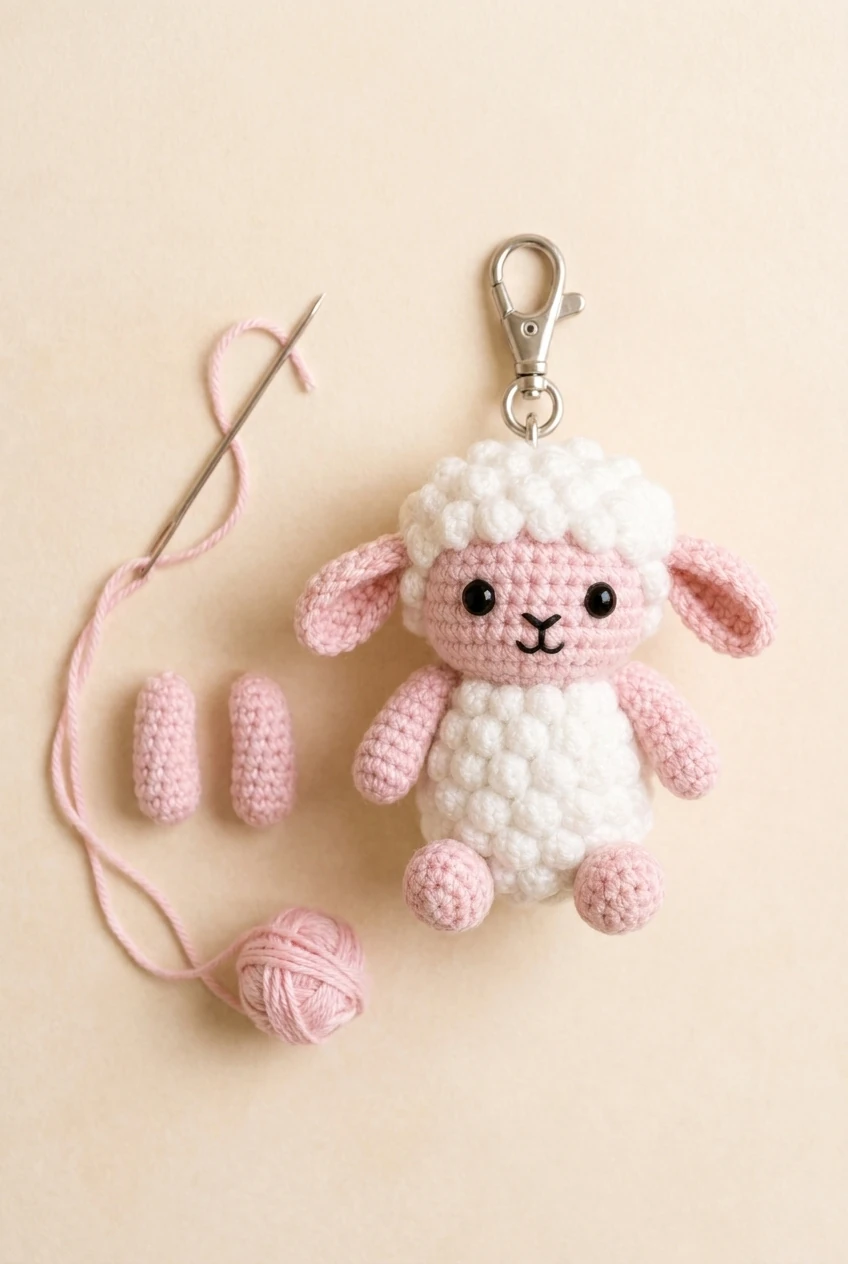
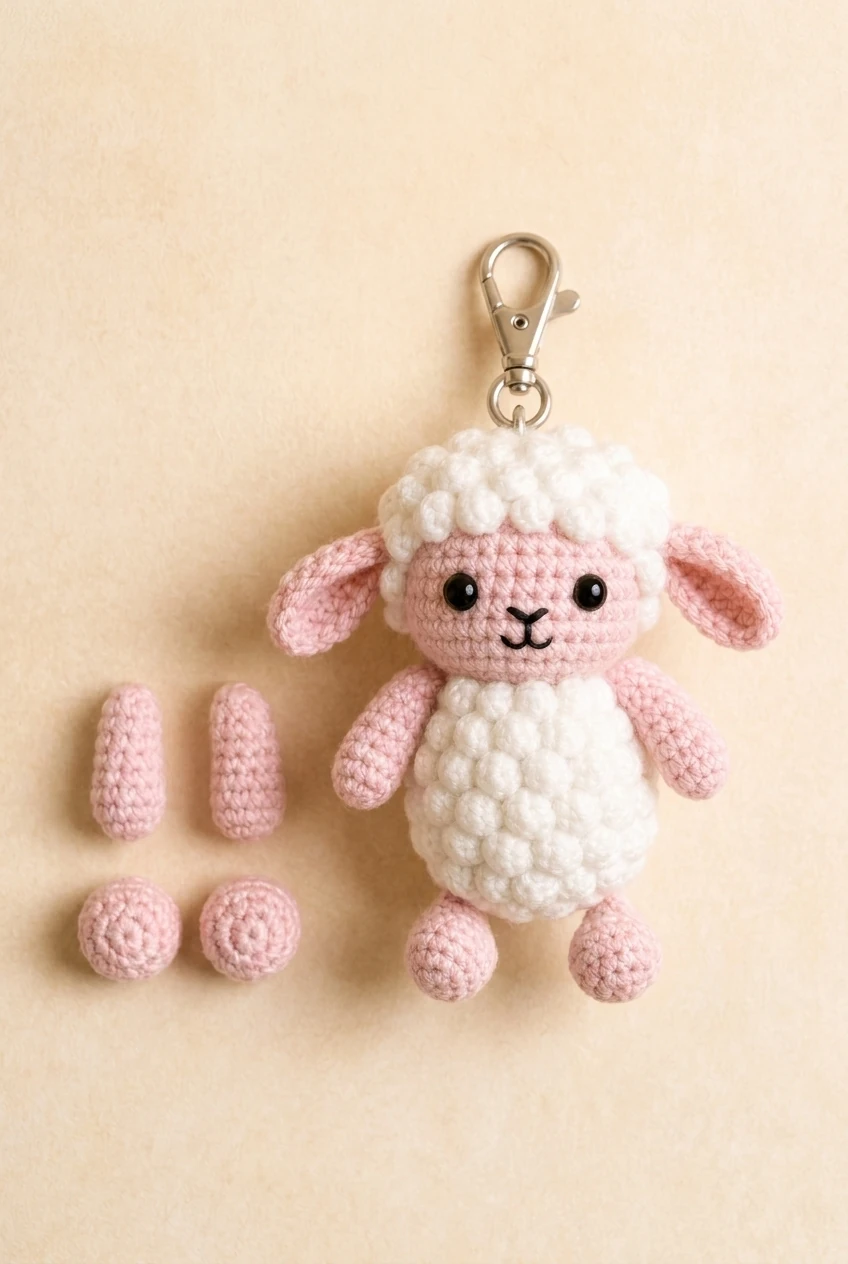
Arms, make two in the accent colour: Round 1 MR, 6 sc; Round 2 inc around (12); Round 3 sc around (12); Round 4 (sc, dec) × 4 (8); Round 5 sc around (8); Round 6 dec around (4). Stuff very lightly, flatten, sew closed and attach to the upper-middle sides just below the head.
Legs, make two: Round 1 MR, 6 sc; Round 2 inc around (12); Round 3 sc around (12); Round 4 (sc, dec) × 4 (8); Rounds 5–6 sc around (8); Round 7 dec around (4). Stuff lightly and attach near the lower left and right sides.
Feet, make two: Round 1 MR, 6 sc; Round 2 inc around (12); Round 3 sc around (12); Round 4 (2 sc, dec) × 3 (9); Round 5 sc around (9); Round 6 dec around (6). Stuff lightly, flatten and sew closed. Sew one foot to each leg and angle the feet slightly outward.
Wool cap and face
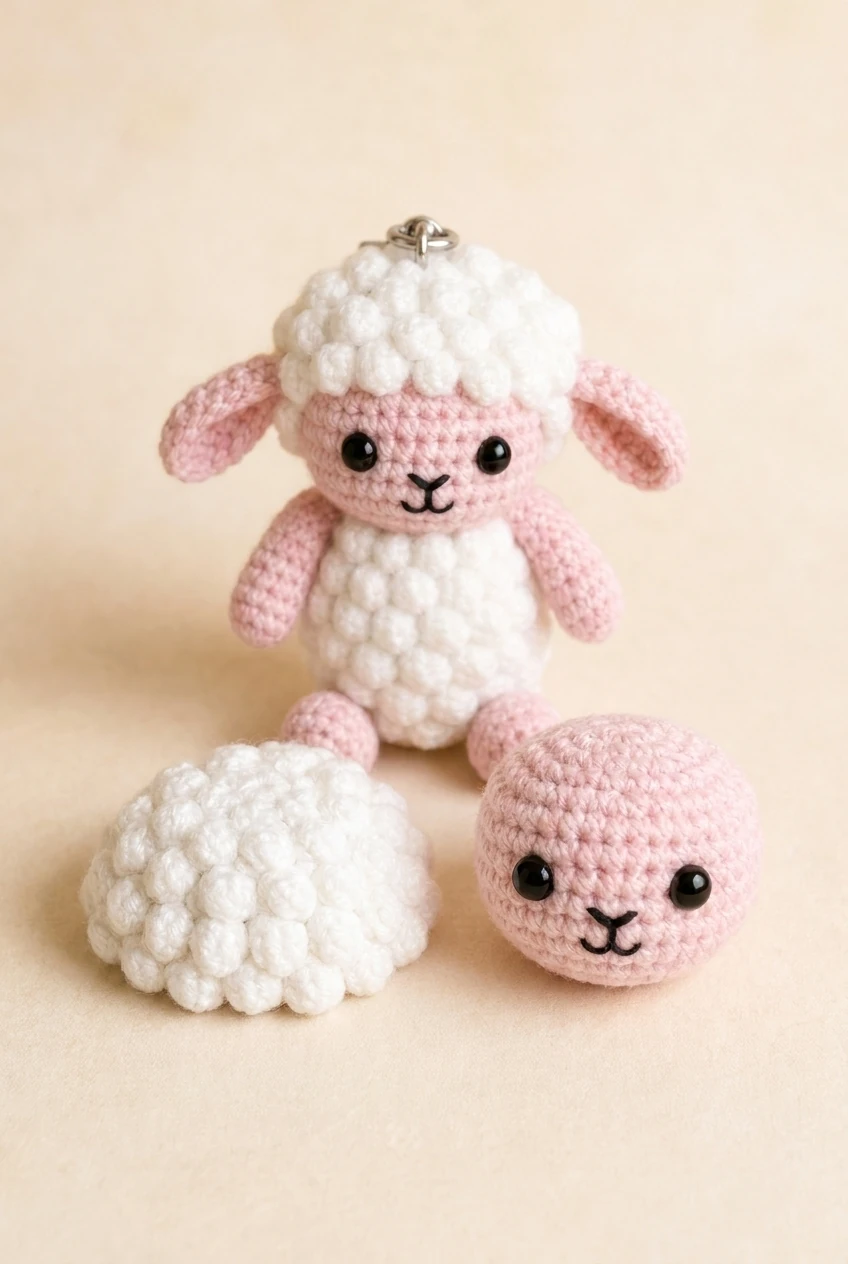
Use white for the cap. Round 1 MR, 6 sc. Round 2 inc around (12). Round 3 (sc, inc) × 6 (18). Round 4 (2 sc, inc) × 6 (24). Round 5 sc around (24). Round 6 repeat B, ch 1, skip next stitch around to make 12 bobbles. Round 7 sc in each bobble and each skipped stitch (24). Round 8 (2 sc, dec) × 6 (18).
Do not stuff the cap. Fasten off with a long tail, flatten slightly, centre it on the head and sew around the lower edge without hiding the bobbles. If desired, embroider a small horizontal or triangular nose below the eyes and a tiny mouth underneath.
Assembly and reinforced keychain
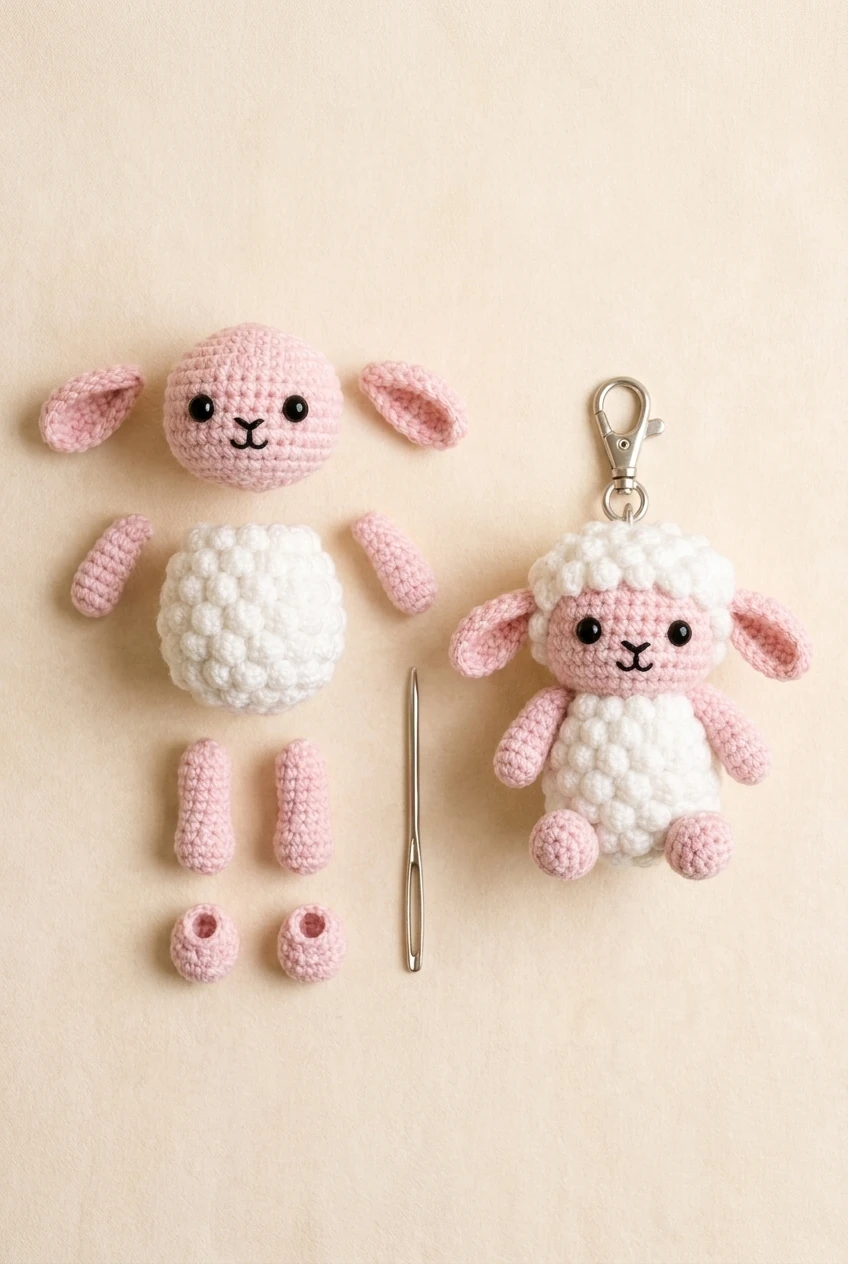
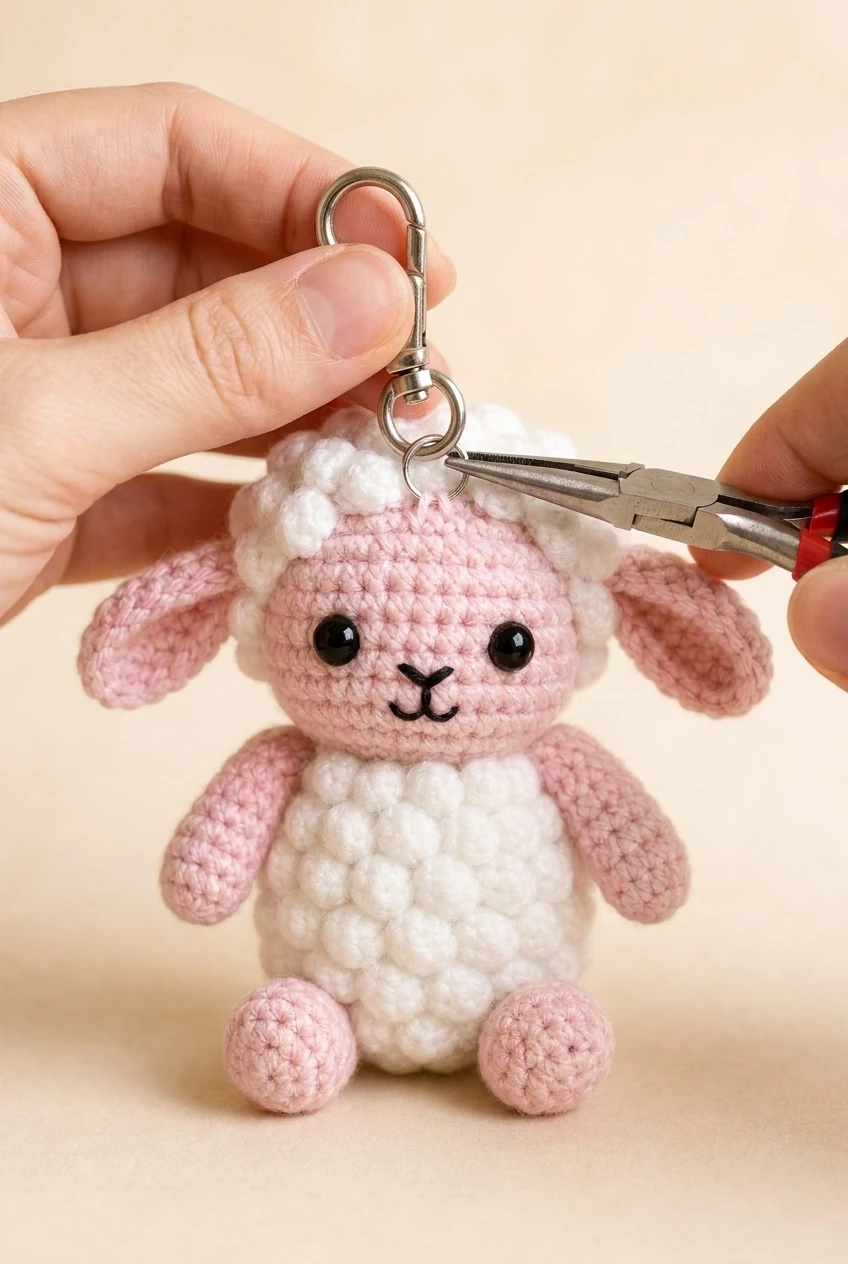
Sew the cap first, then the ears. Position the head above the body and sew around the complete neck connection with multiple passes. Add both arms at equal height, attach the legs near the lower sides and sew each foot to its corresponding leg.
Prepare a metal jump ring. Create or identify a reinforced yarn loop at the top centre of the head beneath the cap. Pass the jump ring through several strong crochet stitches—never one stitch—close it securely, add the lobster clasp and pull-test gently.
Finishing, care and safety
Confirm firm stuffing, locked eyes, secure limbs, symmetrical ears, centred cap, hidden tails, reinforced hardware and no visible stuffing. Shape with fingers without flattening bobbles. Spot-clean when possible; if washing is necessary, hand-wash gently and air-dry completely away from high heat. Inspect the jump ring, clasp, reinforced loop and seams regularly.
The charm contains small parts and is not suitable for children under three. Safety eyes are not a substitute for embroidered eyes when making toys for very young children. Optional variations include pastel blue instead of pink, an extra bobble-and-recovery pair for more fleece, a 2.0 mm hook with thinner yarn for a smaller charm, or a 3.0–3.5 mm hook with heavier yarn for a larger lamb.
Frequently asked questions
Is this suitable for beginners?
Yes, for a beginner comfortable with single crochet, increases, decreases and careful counting.
How large is the finished lamb?
Approximately 8–9 cm tall, excluding hardware.
What hook does the PDF use?
A 2.5 mm hook with sport-weight cotton.
How is the clasp secured?
A jump ring passes through several reinforced stitches beneath the cap.
Is it safe for children under three?
No. The safety eyes and metal hardware are small parts.
This crochet lamb detail supports a neat, durable and recognisable finished charm. This crochet lamb detail supports a neat, durable and recognisable finished charm. This crochet lamb Amigurumi detail supports a neat, durable and recognisable finished charm. This crochet lamb Amigurumi detail supports a neat, durable and recognisable finished charm. This crochet lamb Amigurumi detail supports a neat, durable and recognisable finished charm.
This crochet lamb Amigurumi detail supports a neat, durable and recognisable finished charm. This crochet lamb detail supports a neat, durable and recognisable finished charm. This crochet lamb detail supports a neat, durable and recognisable finished charm.
This crochet lamb Amigurumi detail supports a neat, durable and recognisable finished charm. This crochet lamb Amigurumi detail supports a neat, durable and recognisable finished charm. This crochet lamb Amigurumi detail supports a neat, durable and recognisable finished charm.
This crochet lamb Amigurumi detail supports a neat, durable and recognisable finished charm. This crochet lamb Amigurumi detail supports a neat, durable and recognisable finished charm. This crochet lamb Amigurumi detail supports a neat, durable and recognisable finished charm.
The crochet lamb Amigurumi is complete when the fleece, facial details, seams and reinforced clasp all pass the final inspection.




