

HIPPO COMFORTER • SOURCE-BASED TUTORIAL • US TERMS
Hippo Lovey Crochet Pattern: Step-by-Step Guide
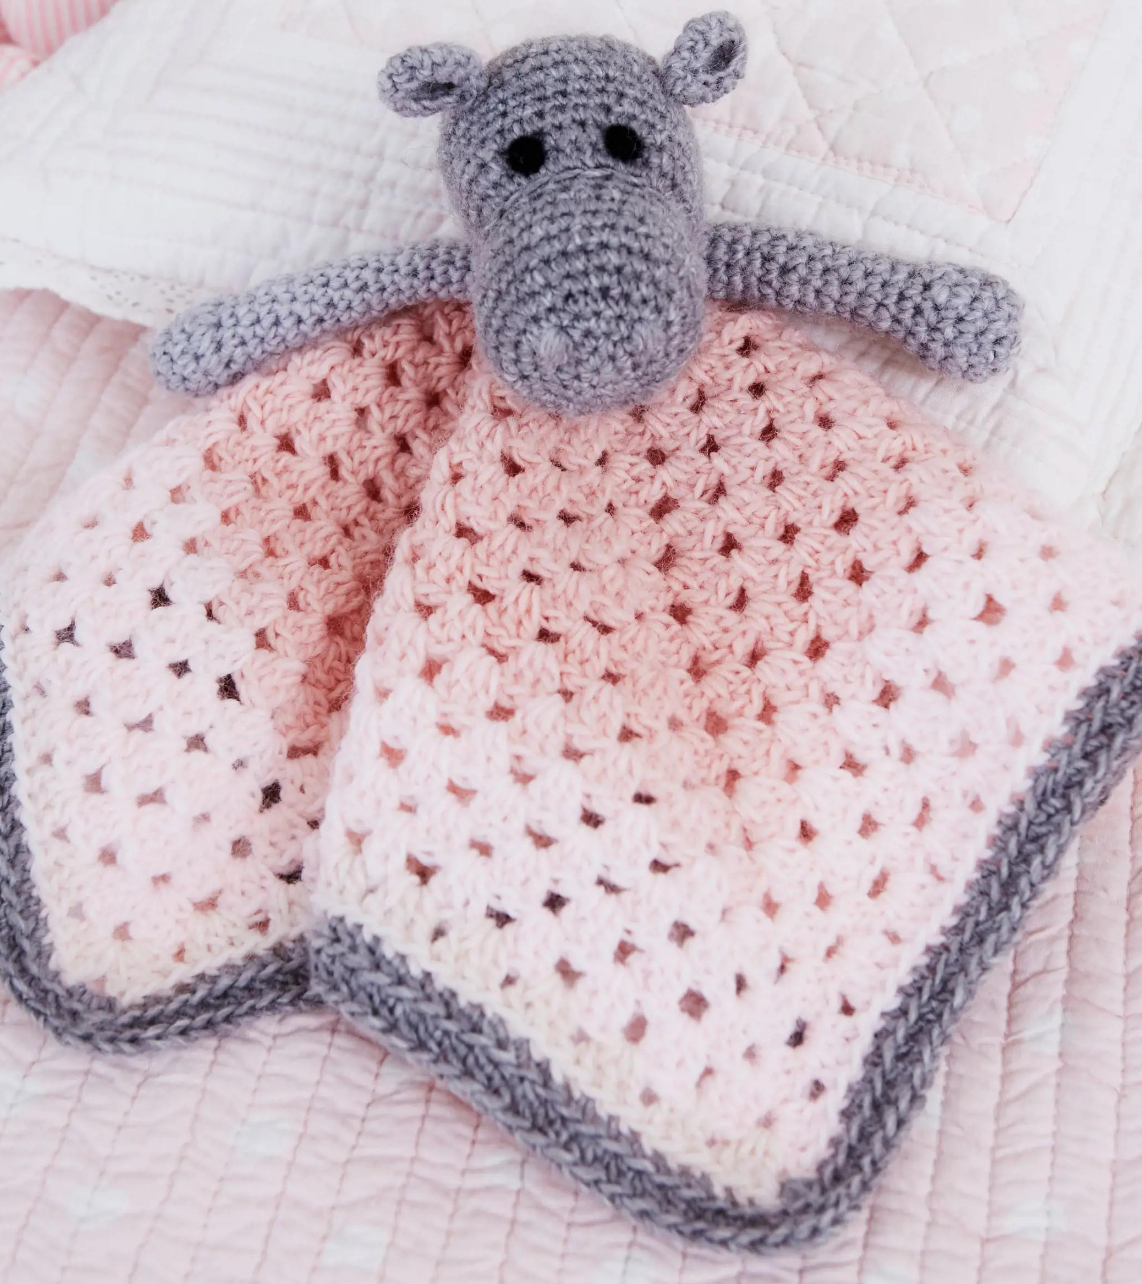
A soft gray hippo, a little pink granny square, and two wonderfully floppy arms: this hippo lovey crochet pattern brings amigurumi and blanket-making into one manageable project. The snout grows directly from the head, so there’s no separate muzzle to sew on.
You’ll work the small pieces in a spiral, make a square blanket in joined rounds, then add the embroidered face and secure everything together. This guide translates the supplied UK instructions into US terms and adds counting checkpoints, assembly tips, and practical troubleshooting.
Before You Start: Source, Skill Level, and Safe Use
This hippo lovey crochet pattern tutorial is based on the two supplied “Comforter” pages, which credit designer Lynne Rowe and photographer Angela Spain. It is an explanatory adaptation, not a new original design by My Crochet Universe. The construction has not been independently crocheted or tested for this guide.
Treat this as a confident-beginner or intermediate project rather than a first-ever attempt. Before starting the hippo lovey crochet pattern, you should be comfortable finding individual stitches, increasing, decreasing, and sewing securely. A stitch marker matters more here than speed.
Step 1 — Hippo Lovey Crochet Pattern Materials
The source hippo lovey crochet pattern specifies one 150 g / 480 m cake of DK-weight, 100% acrylic self-striping yarn in a pink-and-gray mix. Choose a cake with enough gray for the head, ears, arms, and edging, and pink for the blanket. Its alternative is one ball of gray DK and one ball of pink DK; individual ball sizes are not given.
- 3.5 mm crochet hook, plus a stitch marker for spiral rounds.
- A small amount of suitable toy stuffing; avoid loose pellets or weighted filling.
- Approximately 1 m of black yarn or embroidery thread for the eyes.
- Gray yarn for subtle nostril embroidery, a blunt yarn needle, and scissors.
The blanket section is approximately 32 × 32 cm / 12¾ × 12¾ in when flat; this measurement does not describe the overall height including the head. Source tension is 5.5 blanket rounds over 10 × 10 cm using the 3.5 mm hook. No separate single-crochet gauge or head size is supplied.
For the hippo lovey crochet pattern, use a small granny-square swatch to judge the blanket fabric, then measure the finished piece flat without stretching. Amigurumi fabric should conceal the filling. If stuffing shows through, adjust your tension or try a smaller hook for the head and limbs, recognizing that this changes their size.
Step 2 — Read the US Stitch Key
The most useful preparation for this hippo lovey crochet pattern is a terminology check. The supplied page uses UK double crochet for the head and limbs, but those stitches are US single crochet. Its UK treble stitches become US double crochet in the granny square.
| This guide (US) | Meaning / source equivalent |
|---|---|
| ch / sl st | Chain / slip stitch |
| sc | Single crochet; UK dc |
| dc | Double crochet; UK tr |
| inc | Work 2 sc into the same stitch |
| dec / sc2tog | Decrease 2 sc to 1; UK dc2tog |
| FLO / BLO | Front loop only / back loop only |
| st / sp / MR | Stitch / space / magic ring |
To make a standard sc2tog, insert the hook into the next stitch and pull up a loop; repeat in the following stitch, yarn over, and pull through all three loops. An invisible decrease through the front loops is an optional amigurumi variation; it is not the decrease method specified in the source.
Place your marker in the first stitch of every head or limb round and move it upward as you work. Spiral rounds have no joining slip stitch unless instructed. For the blanket, the beginning ch 3 counts as one dc; a beginning ch 1 on the border does not count as a stitch.
Step 3 — Hippo Lovey Crochet Pattern Head
Start with gray yarn and the 3.5 mm hook. Make a magic ring, ch 1 without counting it as a stitch, and work the first round below. Pull the ring closed, then continue in a spiral. The first five rounds of the hippo lovey crochet pattern build the back of the head before the snout expands later.
| Round | Work in US terms | Total |
|---|---|---|
| 1 | 6 sc into MR | 6 |
| 2 | Inc in each stitch | 12 |
| 3 | (Sc 1, inc) × 6 | 18 |
| 4 | (Sc 2, inc) × 6 | 24 |
| 5 | (Sc 3, inc) × 6 | 30 |
| 6–9 | Sc in every stitch for 4 rounds | 30 each |
| 10 | (Sc 3, dec) × 6 | 24 |
| 11 | Sc in every stitch | 24 |
| 12 — FLO | Sc 8, inc in each of next 8 stitches, sc 8 | 32 |
| 13–14 | Sc in every stitch for 2 rounds | 32 each |
| 15 | (Sc 7, inc) × 4 | 36 |
| 16–17 | Sc in every stitch for 2 rounds | 36 each |
| 18 | (Sc 7, dec) × 4 | 32 |
| 19 | (Sc 2, dec) × 8 | 24 |
| 20 | Sc in every stitch | 24 |
| 21 | (Sc 1, dec) × 8 | 16 |
| 22 | Sc in every stitch | 16 |
| 23 | Dec × 8 | 8 |
Shape the snout without adding another piece
Round 12 is the turning point in the hippo lovey crochet pattern. Work the entire round in FLO, including the first and last eight single crochets. The middle eight increases create extra width in one area. From Round 13 onward, return to both loops unless told otherwise.
Count at the end of Rounds 12, 15, and 19 before moving on. A missed increase at Round 12 affects every later count, and adding a random stitch near the end won’t restore the intended shaping. Frogging one round is easier than hiding a lopsided muzzle.
Stuff, close, and leave a sewing tail
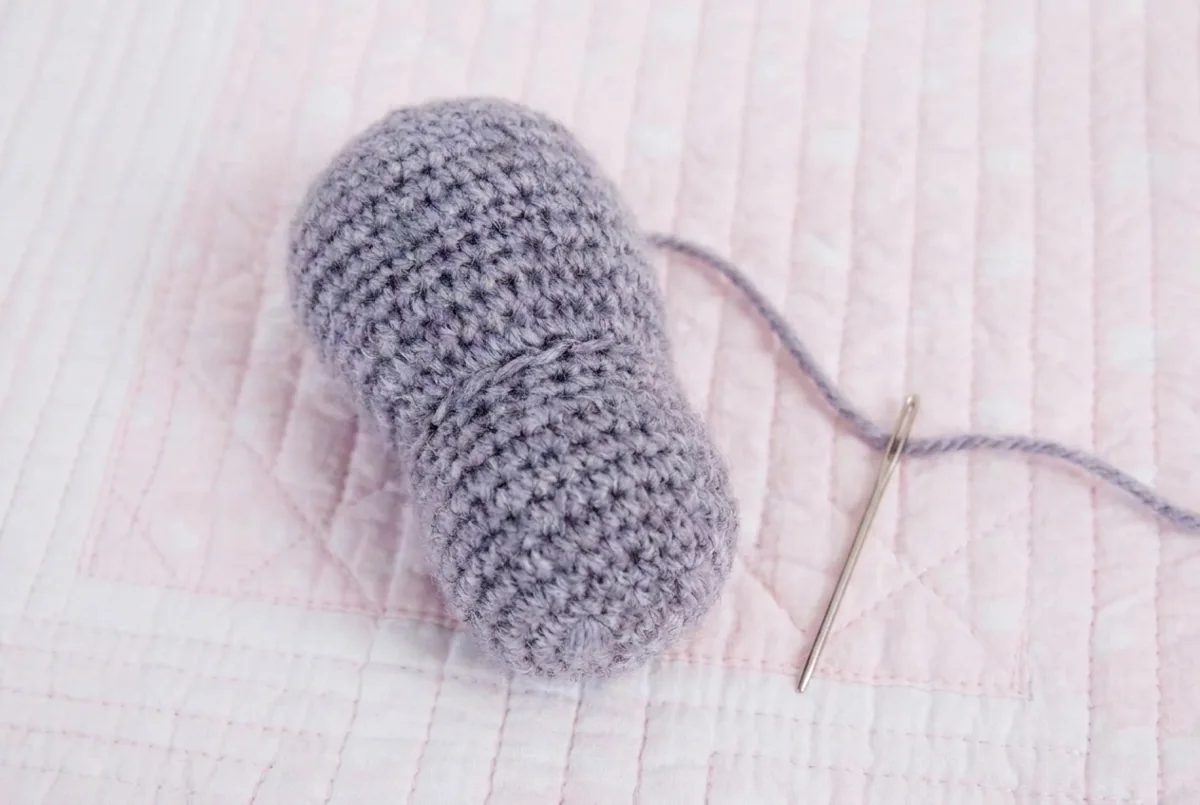
After Round 21, add stuffing in small pieces and distribute it into the head and snout. Keep the fabric firm enough to hold its shape without stretching open. Complete Rounds 22–23, slip stitch in the next stitch, and fasten off with enough yarn for closing and later attachment, or use a fresh matching sewing length.
Add a little more filling if necessary. Pass the tail through the front loops of the remaining eight stitches, draw the opening closed, and secure it. Before finishing this part of the hippo lovey crochet pattern, check that no hard lump of stuffing is distorting the face.
Step 4 — Make Two Small Ears
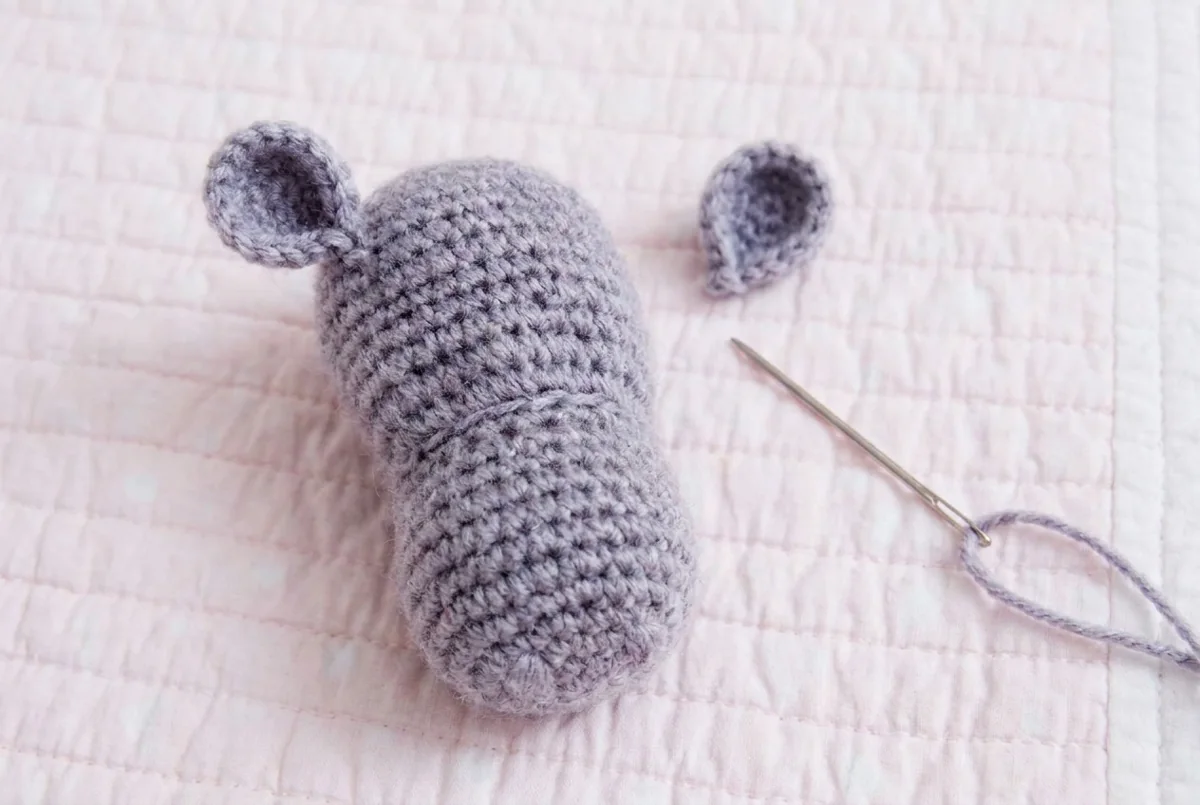
For each ear in the hippo lovey crochet pattern, begin as for head Rounds 1–2: work 6 sc into a magic ring, then increase in every stitch to make 12. On Round 3, work 1 sc in each of the 12 stitches. Slip stitch in the next stitch and fasten off, leaving a sewing tail.
Pinch one end of the small cup together and secure that pinch with a few stitches. Don’t stuff the ears. Pin them on opposite sides near the top of the head, then check their placement from the front before sewing around each base securely.
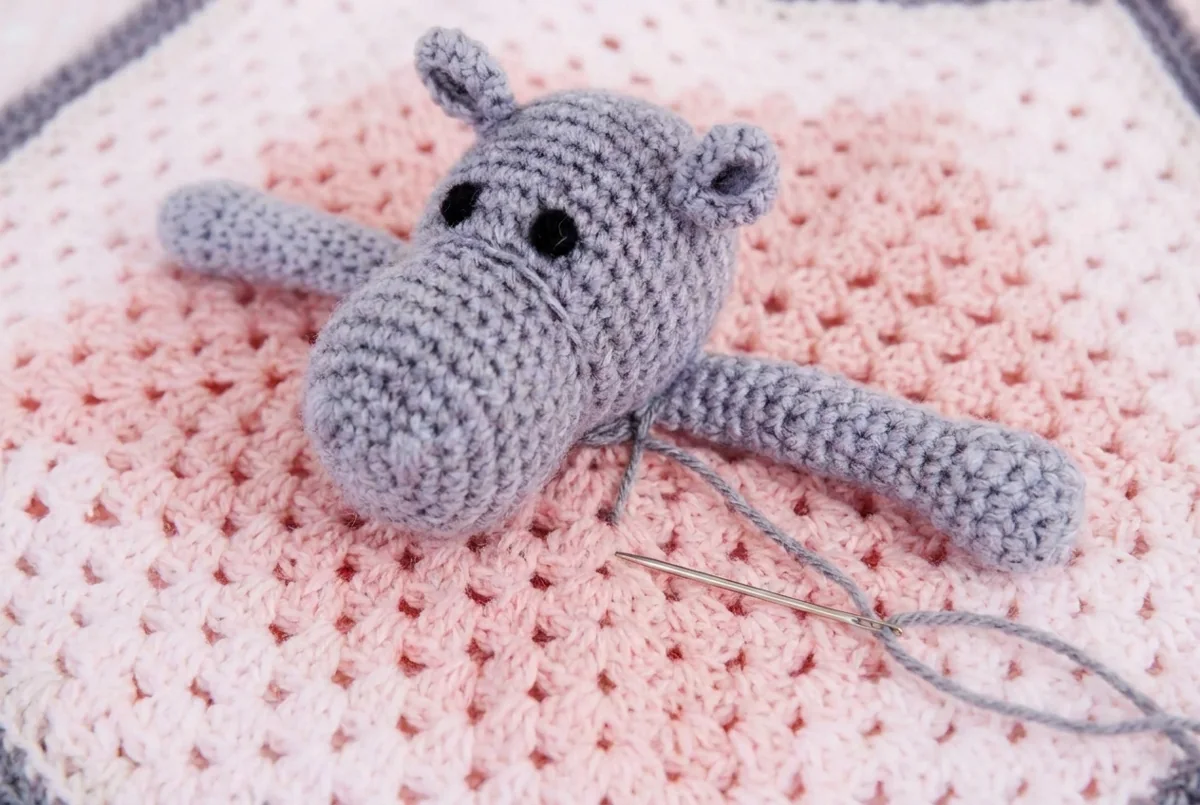
The hippo lovey crochet pattern source does not give an exact head round or stitch spacing for attachment. Use the original product photograph above to balance the placement. For this hippo lovey crochet pattern, matching the height of both ear bases matters more than forcing a guessed numerical position.
Step 5 — Make Two Arms
Start each arm of the hippo lovey crochet pattern with the same first two rounds as the head: 6 sc in a magic ring, then 6 increases for 12 stitches. Keep the work in a spiral and use your marker, because a seven-stitch tube becomes surprisingly easy to lose track of.
| Round | Work in US terms | Total |
|---|---|---|
| 1 | 6 sc into MR | 6 |
| 2 | Inc in every stitch | 12 |
| 3–4 | Sc around for 2 rounds | 12 each |
| 5 | (Sc 2, dec) × 3 | 9 |
| 6 | Sc 3, dec, sc 2, dec | 7 |
| 7–14 | Sc around for 8 rounds | 7 each |
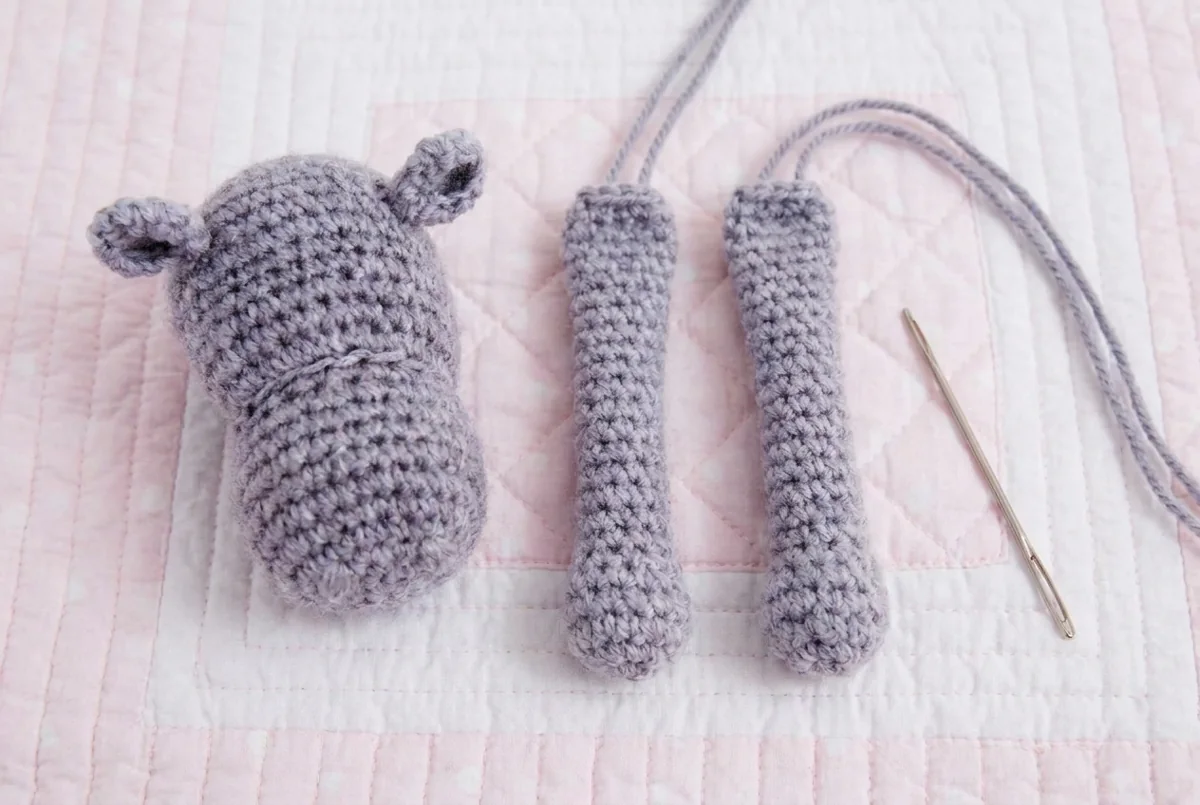
For each hippo lovey crochet pattern arm, after Round 14, slip stitch in the next stitch and fasten off with a sewing tail. Fill the arm with toy stuffing, using small amounts so the tube doesn’t become rigid. Flatten the open top and whipstitch its edges closed. Repeat for the second arm.
Sew the flat top seams to the base of the head, leaving approximately 3 cm between the arms, as the source directs. This gap helps define the underside attachment area. For the hippo lovey crochet pattern, check both arm lengths and seam security before attaching the head to the blanket.
Step 6 — Hippo Lovey Crochet Pattern Granny Square
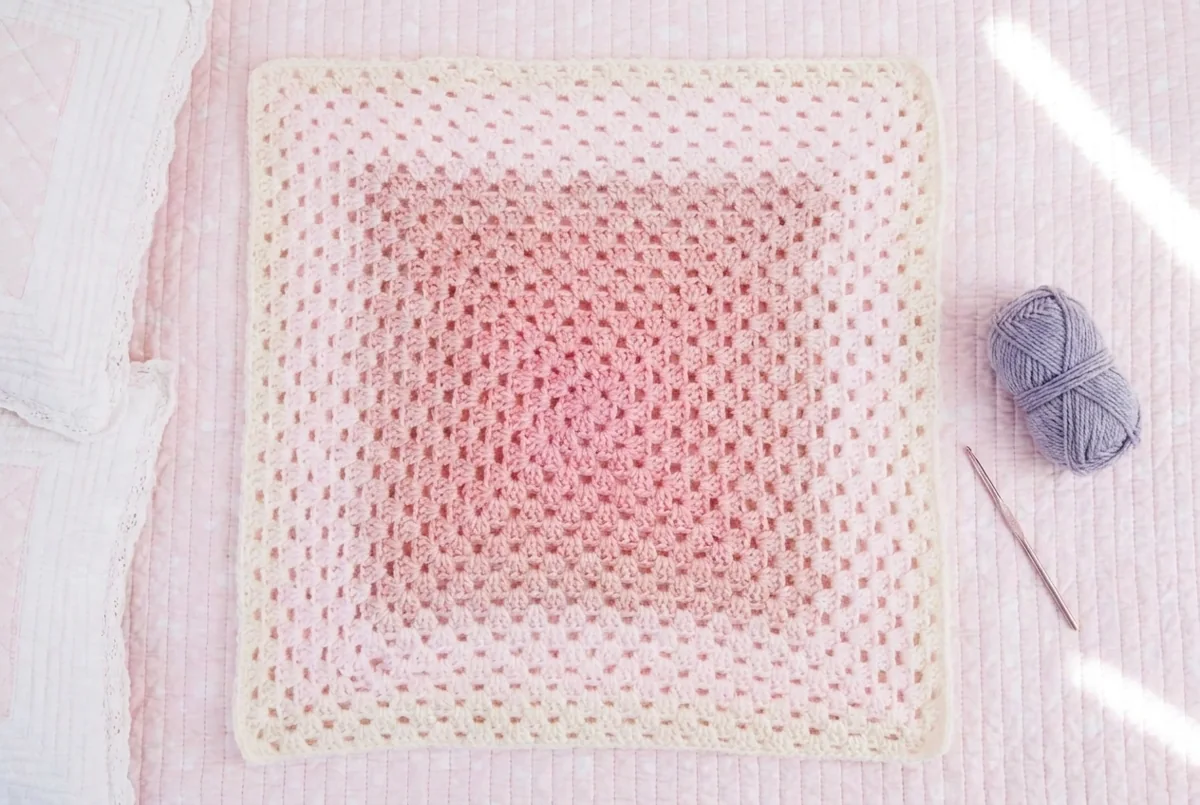
The blanket in the hippo lovey crochet pattern uses groups of 3 US dc, with ch 2 at each corner. There are no extra chains between the groups along a straight side. Work joined rounds without turning, and keep all four corners clearly marked while you learn the rhythm.
Round 1: establish four corners
With pink yarn, make a magic ring. Ch 3, work 2 dc into the ring, then ch 2. Work (3 dc, ch 2) into the ring three more times. Join with a slip stitch to the top of the beginning ch 3 and tighten the ring. You now have four 3-dc groups and four ch-2 corner spaces.
Round 2: grow the first side groups
Slip stitch across the next two dc and into the next corner space. Ch 3, then work (2 dc, ch 2, 3 dc) in that same space. Work (3 dc, ch 2, 3 dc) in each of the remaining three corners. Join to the top of the beginning ch 3. There are now 2 groups along each side.
Round 3: fill the first side gaps
Slip stitch across the next two dc and into the corner. Ch 3, then work (2 dc, ch 2, 3 dc) in that corner. Work 3 dc in the gap between the groups along the first side. Continue around, placing (3 dc, ch 2, 3 dc) in every corner and 3 dc in every side gap. Join as before: 3 groups per side.
Rounds 4–16: repeat the same growth rule
Begin each new round by slip stitching to the next corner. Make the starting corner with ch 3, then (2 dc, ch 2, 3 dc). Work 3 dc in every gap between groups until the next corner, then (3 dc, ch 2, 3 dc) in that corner. Repeat around and join. Round 4 ends with 4 groups per side.
Repeat that Round 4 method twelve more times to complete Round 16. For this hippo lovey crochet pattern, the round number matches the number of groups along each side: Round 8 has 8, Round 12 has 12, and Round 16 has 16 groups per side and four corner spaces. Fasten off the pink yarn.
Keep the same pink-and-gray appearance as the original product photograph. With self-striping yarn, use the pink section for the blanket and reserve gray for the hippo pieces and border. Let the cake supply the light-to-dark transitions; the source does not prescribe exact color-change round numbers.
Step 7 — Add Two Gray BLO Border Rounds
The gray edging gives the hippo lovey crochet pattern a tidy outline without a bulky ruffle. Work both border rounds in back loops only where stitches have loops. At the first round’s corner chain spaces, work directly into the space rather than searching for an individual back loop.
Border Round 1: 204 single crochets
Join gray with a slip stitch in any corner ch-2 space and ch 1. Work 3 sc in that same space, then 1 sc BLO in each stitch across the side. Continue around, working 3 sc in every corner space and 1 sc BLO in every dc along the sides. Join with a slip stitch in the back loop of the first sc.
You should have 204 sc: 16 groups × 3 dc × 4 sides gives 192 side stitches, plus 12 stitches in the four corners. Don’t add stitches in the gaps between groups. Counting those gaps as stitches is a common reason a border starts waving.
Border Round 2: 212 single crochets
Slip stitch into the next stitch so you are at the middle stitch of the first 3-sc corner. Ch 1 and work 3 sc BLO in that stitch. Work 1 sc BLO in every stitch until the middle stitch of the next corner, then 3 sc BLO there. Repeat around and join in the back loop of the first sc. Fasten off.
This hippo lovey crochet pattern border finishes with 212 sc, an increase of eight stitches. Marking the middle stitch of each corner in Round 1 makes Round 2 much less fiddly. For the hippo lovey crochet pattern border, keep the beginning chain and joining slip stitch out of your stitch total.
Step 8 — Embroider the Face and Assemble
Lay out all parts before the final sewing. In the hippo lovey crochet pattern, the eyes sit above the protruding snout, while the nostrils are embroidered in gray on its front. No precise embroidery coordinates are supplied, so use removable yarn markers to compare both sides first.
- Embroider two small eyes in black yarn or thread. Secure the ends internally without leaving loose loops. Do not add buttons or plastic eyes for a young child.
- Add a short gray nostril on each side of the front of the snout. Keep stitches compact and avoid long surface floats.
- Check the ears and arms are firmly sewn. Remove every pin and marker before finishing.
- Center the base of the head, between the arms, over the blanket center. Sew through sturdy crochet stitches, not just a single strand or the magic-ring tail.
- Work multiple secure passes around the attachment area, checking the underside so stitches do not form loose loops. Secure and bury the ends, then gently tug each attachment.
The hippo lovey crochet pattern head should sit centrally rather than pulling one corner upward. Don’t cinch the attachment so tightly that it gathers the blanket into a hard knot. This hippo lovey crochet pattern needs a secure connection, but the surrounding granny fabric should still lie comfortably.
After finishing the hippo lovey crochet pattern, wash according to the actual yarn and stuffing labels, support the wet fabric, and dry thoroughly. Reshape the blanket gently without steaming acrylic unless its manufacturer permits it. Inspect seams and embroidered details after washing and before each use; stop using the item if parts loosen or filling becomes accessible.
Troubleshooting Your Hippo Lovey Crochet Pattern
| Problem | Check before changing the pattern |
|---|---|
| Snout looks uneven | Recount Round 12: sc 8, eight increases, sc 8. All 24 original stitches are worked FLO. |
| Arm count is wrong | Round 6 consumes 9 stitches: 3 + 2 + 2 + 2. It produces 7 stitches. |
| Square curls into a bowl | Look for a missed corner increase, tight chains, or skipped side gaps. Lay it flat every few rounds. |
| Border waves | Check that Round 1 has 204 sc, with stitches only in dc tops and corner spaces—not extra stitches in side gaps. |
| Stuffing shows | Use less stuffing, firmer tension, or a smaller hook for the solid pieces. |
| Blanket feels twisted | Check that all corners have the same construction. A small visual skew can occur in unturned granny rounds; gentle reshaping may help. |
For the hippo lovey crochet pattern, keep the source’s DK yarn and pink-and-gray palette if you want the closest match to the supplied product. Substituting chunky chenille changes size, stitch definition, weight, and seam behavior. Match the stated yarn weight and check the actual care instructions before starting.
If you are losing a game of yarn chicken, finish a complete blanket round rather than stopping mid-side. A smaller square is a size variation, not the source’s sixteen-round blanket. Reserve gray for the head and arms before spending the remainder on edging.
For another small-piece project, visit our crochet snowman tutorial. For a coordinated handmade gift theme, explore the crochet baby romper guide or browse more baby crochet projects.
Hippo Lovey Crochet Pattern FAQ
Is this hippo lovey crochet pattern beginner-friendly?
It suits a confident beginner who already understands single crochet, double crochet, increases, decreases, and basic sewing. Practice a small granny square and a six-stitch magic ring first if either technique is new. The FLO shaping and narrow arms need careful counting rather than advanced stitches.
Is the pattern written in US or UK crochet terms?
This tutorial uses US terms throughout. The supplied source uses UK terms: its dc becomes US sc, its tr becomes US dc, and its dc2tog becomes US sc2tog. Do not mix the two systems when moving between the original screenshot and this hippo lovey crochet pattern guide.
How big is the blanket, and can I change the yarn?
The source gives approximately 32 × 32 cm for the blanket section with DK yarn and a 3.5 mm hook. Different yarn, hook size, and tension change that measurement. The head has no stated finished size, and the source does not give exact yarn consumption by component.
Is a hippo lovey safe in a baby’s crib?
No blanket or stuffed comforter should be placed in an infant’s sleep space. Keep this item for supervised awake interaction and follow current safe-sleep advice. Embroidered eyes, secure sewing, and washable yarn do not turn a handmade lovey into a certified safe-sleep product.
How do I attach the head securely to the blanket?
Center the base of the head between the arms over the blanket center. Sew through sturdy crochet stitches with multiple secure passes, rather than relying on the magic-ring tail alone. Secure and bury the ends, then gently check every attachment. Inspect seams before each use and stop using the item if anything loosens.
Finish Your Hippo Lovey Crochet Pattern
A neat finish comes from the small checks: a correctly shaped snout, matching arms, four even blanket corners, and secure embroidered details. Work through this hippo lovey crochet pattern one component at a time, check counts before stuffing, and give the center attachment the attention it deserves.
For your hippo lovey crochet pattern, follow the original pink-and-gray look and keep a note of your yarn and hook for future repairs. Share your finished project in the comments, and save the care details with the finished gift.
Stitch reference: Craft Yarn Council US crochet abbreviations. Pattern design credit: Lynne Rowe, as printed on the supplied source page. The finished-product image is the original supplied reference with its text header cropped away. Five additional stage illustrations are AI-generated from that reference; they are not photographs of a tested sample. This guide does not claim ownership of the source design.




