

My Crochet Universe · Pocket Panda series
Panda Keychain Crochet: 7 Clear Steps to Make Your Own
A practical, image-rich guide for crocheters who want a polished result.
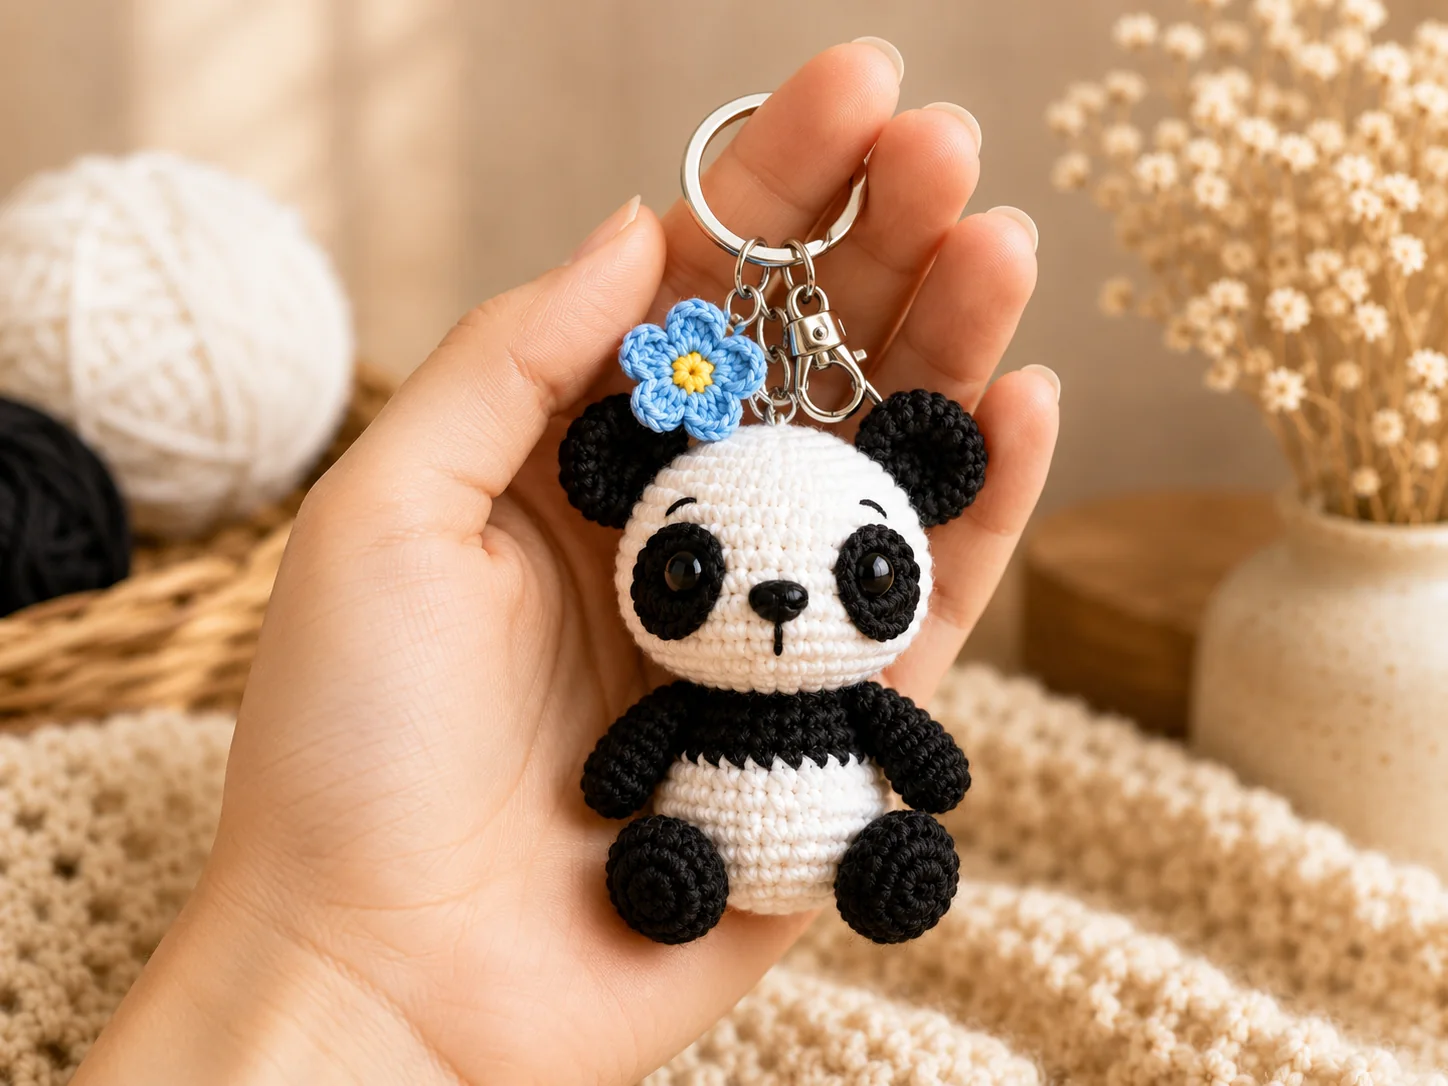
Start here: pattern essentials
Begin the panda keychain crochet tutorial by gathering every material and checking the hardware.
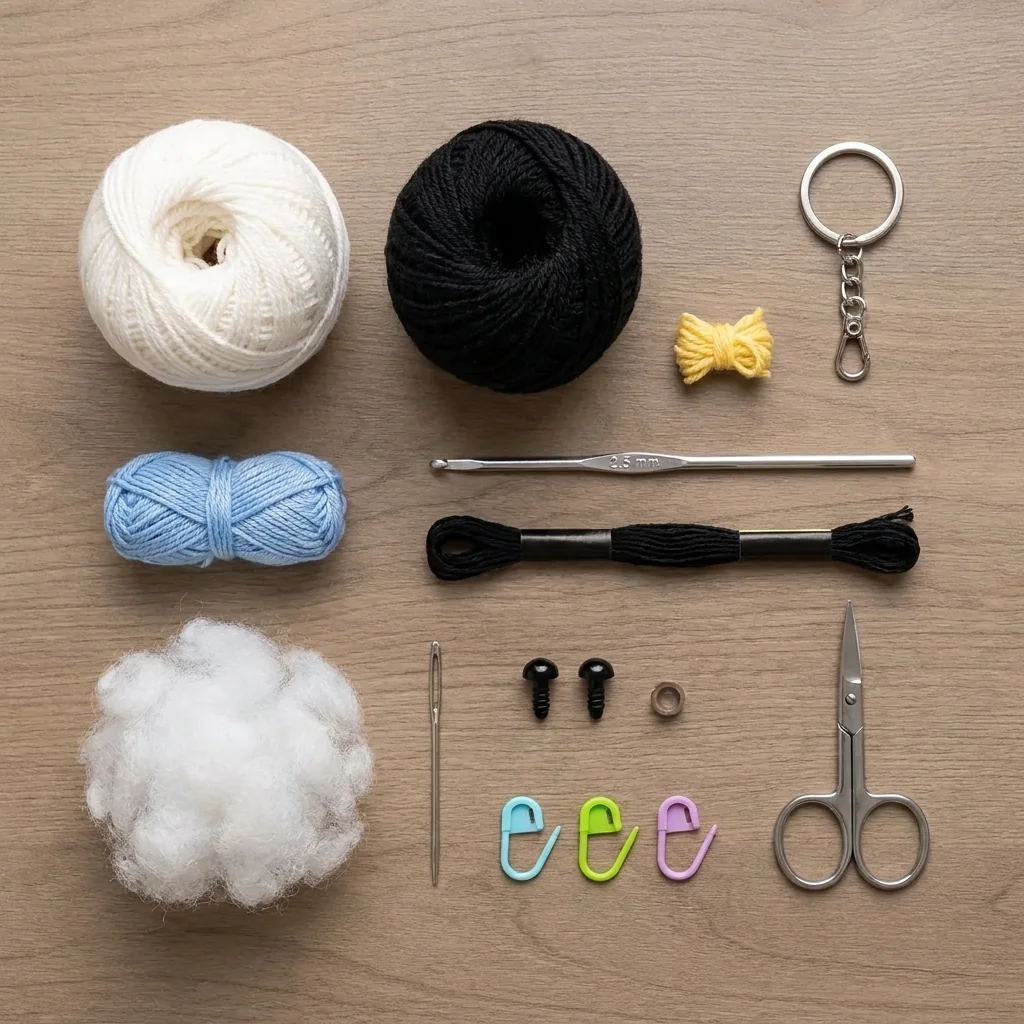
This panda keychain crochet project creates a seated panda approximately 8–10 cm (3–4 in) tall, excluding its hardware. Use US terms and work in continuous rounds unless a step says to join. The gauge is not critical, but the fabric must be tight enough to hide stuffing.
Materials: 20–25 g white worsted/medium #4 yarn, 20–25 g black worsted/medium #4 yarn, about 5 g light blue, a small yellow scrap, 2.5 mm hook, two 6–8 mm safety eyes or embroidery thread, polyester stuffing, keyring clasp, 3–5 chain links, jump ring, tapestry needle, stitch markers, scissors, and black detail thread.
Abbreviations: ch = chain; dc = double crochet; dec = decrease; inc = 2 sc in one stitch; MR = magic ring; rep = repeat; rnd(s) = round(s); sc = single crochet; sl st = slip stitch; st(s) = stitch(es).
Step 1: Set up for durable fabric
The panda keychain crochet head depends on accurate counting and a clearly moved stitch marker.
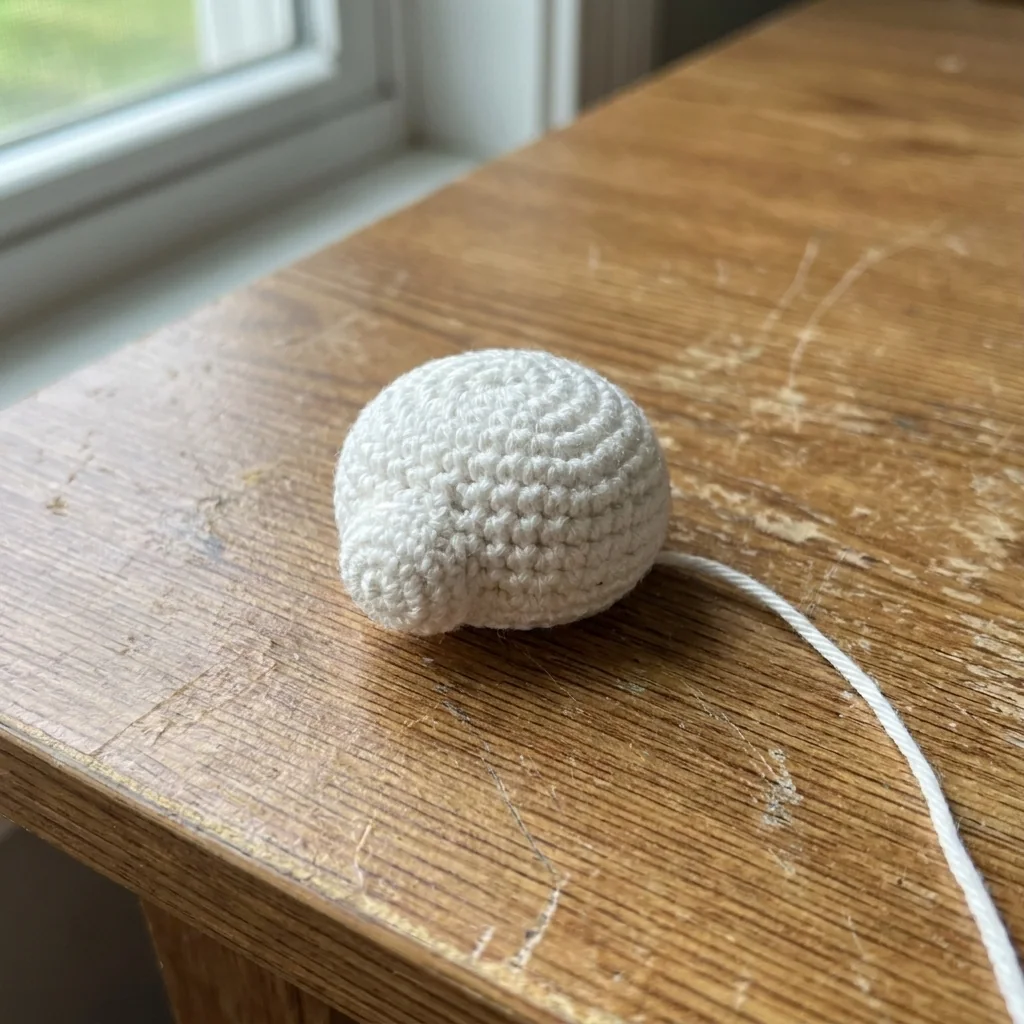
Mark the first stitch and move the marker after every round. Crochet tightly, switch to a smaller hook if gaps reveal stuffing, and reinforce every attachment because a keychain receives more handling than a shelf toy. Knot and weave every tail securely.
Step 2: Crochet the head
Light stuffing keeps the panda keychain crochet muzzle soft without becoming bulky.
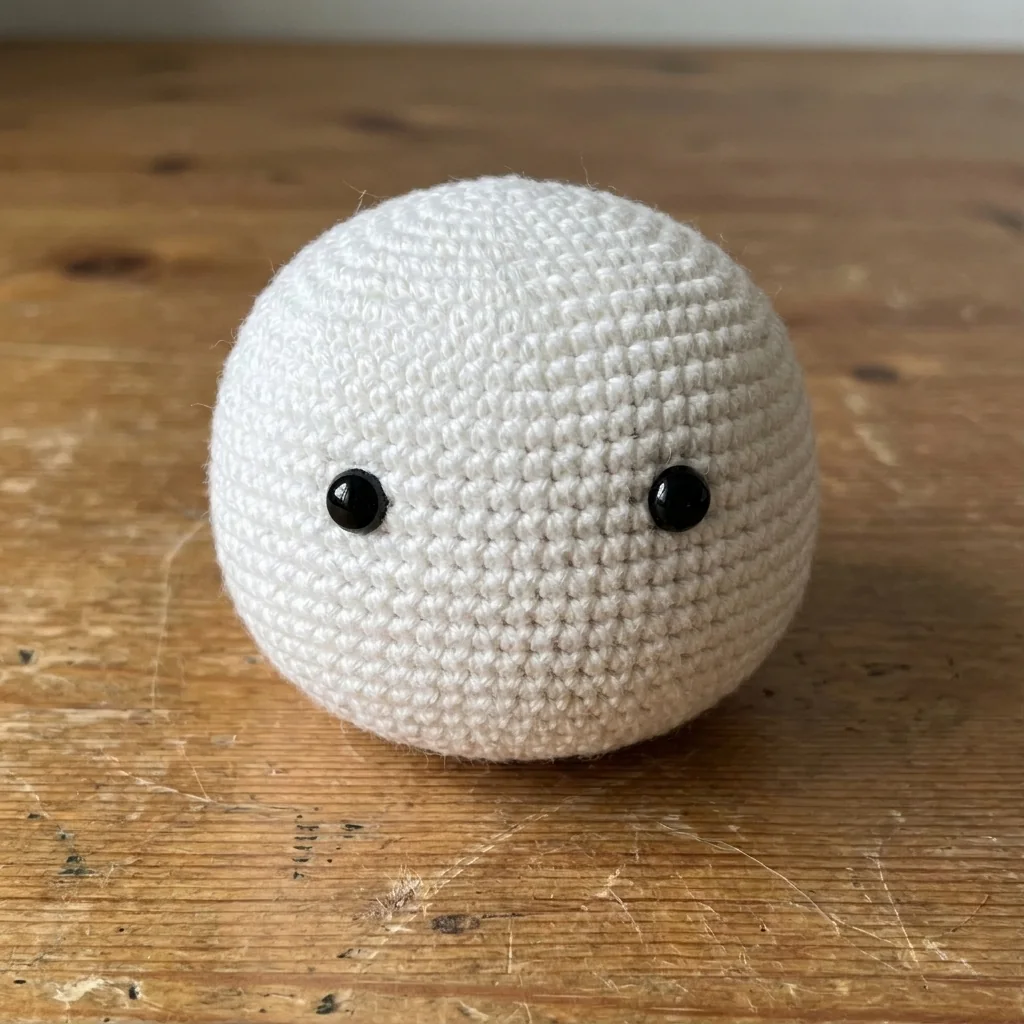
With white yarn, work a large round head in a continuous spiral.
- Rnd 1: 6 sc in a magic ring — 6.
- Rnd 2: inc in each stitch around — 12.
- Rnd 3: [sc, inc] × 6 — 18.
- Rnd 4: [2 sc, inc] × 6 — 24.
- Rnd 5: [3 sc, inc] × 6 — 30.
- Rnd 6: [4 sc, inc] × 6 — 36.
- Rnd 7: [5 sc, inc] × 6 — 42.
- Rnds 8–14: sc in each stitch around — 42.
- At the end of Rnd 10, place the eyes between Rnds 10 and 11, 6–7 stitches apart.
- Rnd 15: [5 sc, dec] × 6 — 36.
- Rnd 16: [4 sc, dec] × 6 — 30. Begin lightly stuffing and continue firmly while closing.
- Rnd 17: [3 sc, dec] × 6 — 24.
- Rnd 18: [2 sc, dec] × 6 — 18.
- Rnd 19: [sc, dec] × 6 — 12.
- Rnd 20: dec around — 6. Fasten off, close through front loops, and hide the tail.
For children under three, embroider the eyes instead of using plastic safety eyes. Remember that the metal keyring still presents a choking hazard.
Step 3: Make the muzzle
Matching eye patches give the panda keychain crochet face its recognizable expression.
With white yarn, make one small round muzzle. Rnd 1: 6 sc in MR — 6. Rnd 2: inc around — 12. Rnd 3: [sc, inc] × 6 — 18. Rnds 4–5: sc around — 18. Fasten off with a long sewing tail. Add a light amount of stuffing immediately before attaching.
Step 4: Make two eye patches
Flattened ears help the panda keychain crochet silhouette stay compact.
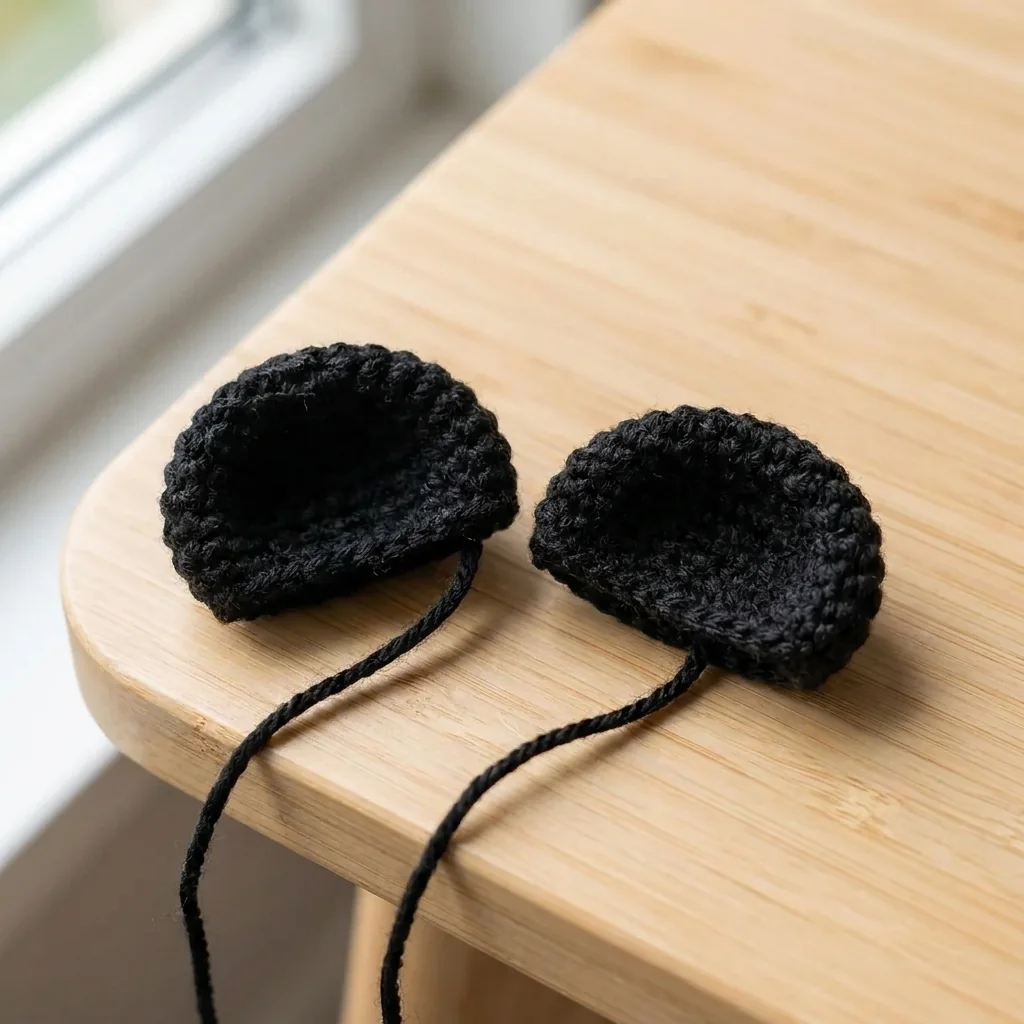
With black yarn, crochet two flat oval patches. For each patch: Rnd 1: 6 sc in MR — 6. Rnd 2: [sc, inc] × 3 — 9. Rnd 3: sc around — 9. Fasten off with a sewing tail, do not stuff, and shape gently with your fingers.
Step 5: Make two ears
A firm oval body supports the seated panda keychain crochet shape.
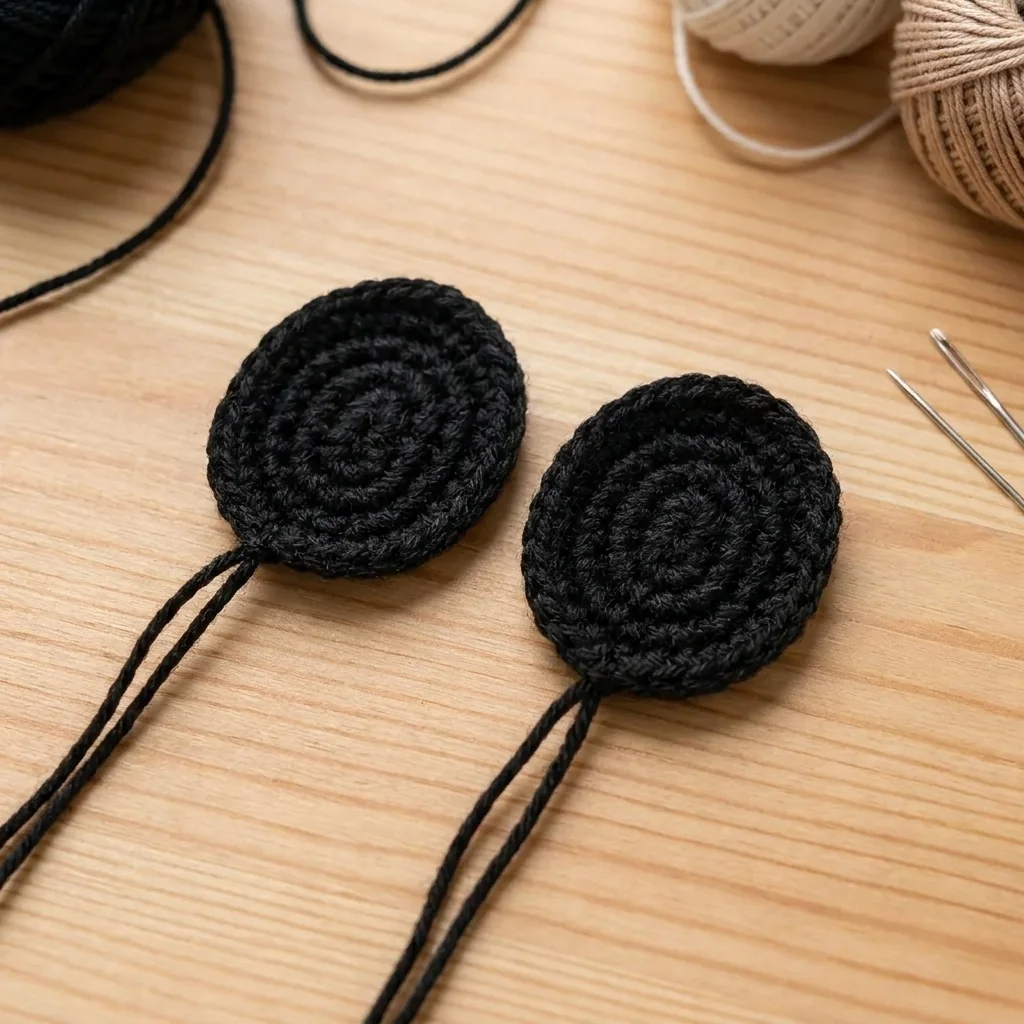
With black yarn: Rnd 1: 6 sc in MR — 6. Rnd 2: [2 sc, inc] × 2 — 8. Rnd 3: sc around — 8. Rnd 4: [3 sc, inc] × 2 — 10. Fasten off with long sewing tails. Do not stuff; flatten each ear lightly.
Step 6: Crochet the body
Lightly stuffed arms keep the panda keychain crochet figure balanced.
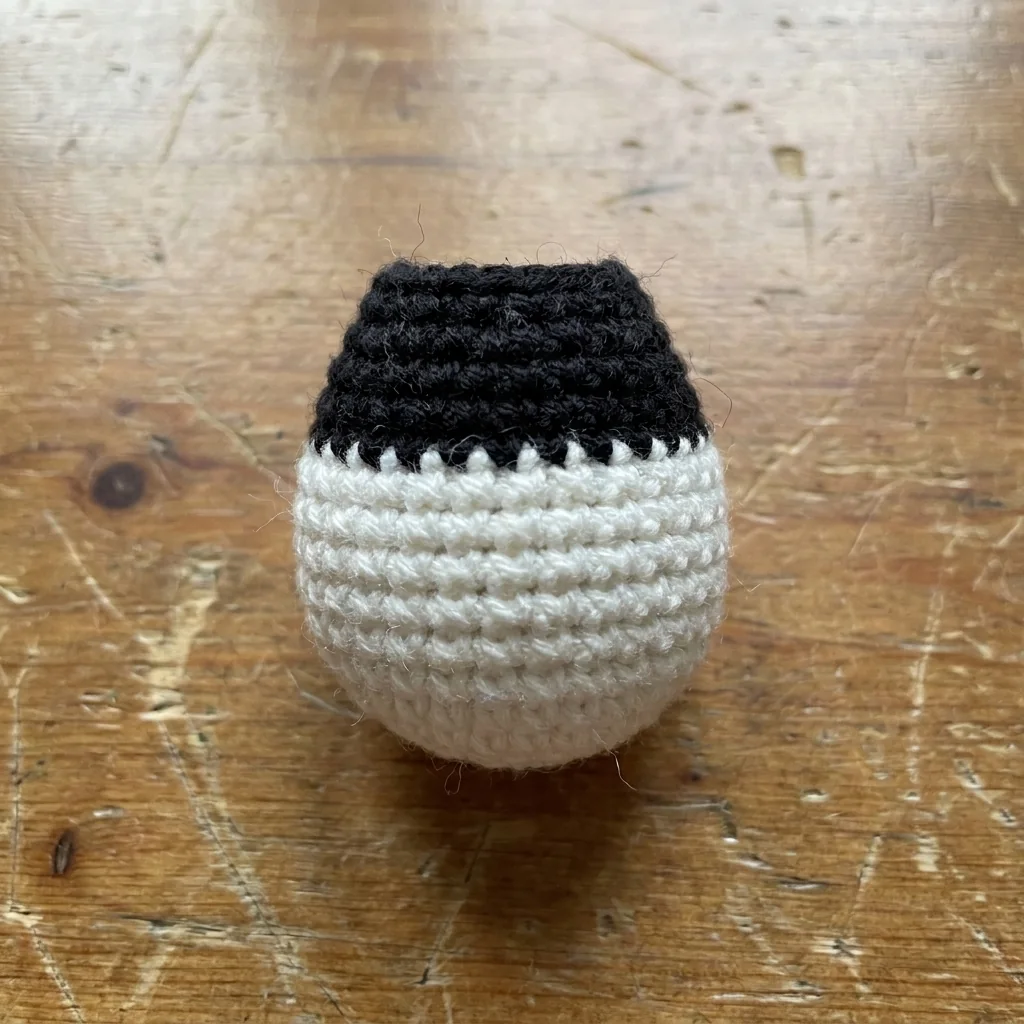
Start at the neck with black yarn, then change to white. Rnd 1: 6 sc in MR — 6. Rnd 2: inc around — 12. Rnd 3: [sc, inc] × 6 — 18. Rnd 4: [2 sc, inc] × 6 — 24. Rnd 5: [3 sc, inc] × 6 — 30. Rnds 6–8: sc around in black — 30. Change to white on the final pull-through of Rnd 8. Rnds 9–13: sc around in white — 30; begin firm stuffing and aim for a body height around 5–6 cm. Rnd 14: [3 sc, dec] × 6 — 24. Rnd 15: [2 sc, dec] × 6 — 18. Rnd 16: [sc, dec] × 6 — 12. Rnd 17: dec around — 6; fasten off, finish stuffing, and close. Keep the body oval and firm.
Step 7: Make two arms
Firm paws help the panda keychain crochet panda sit evenly.
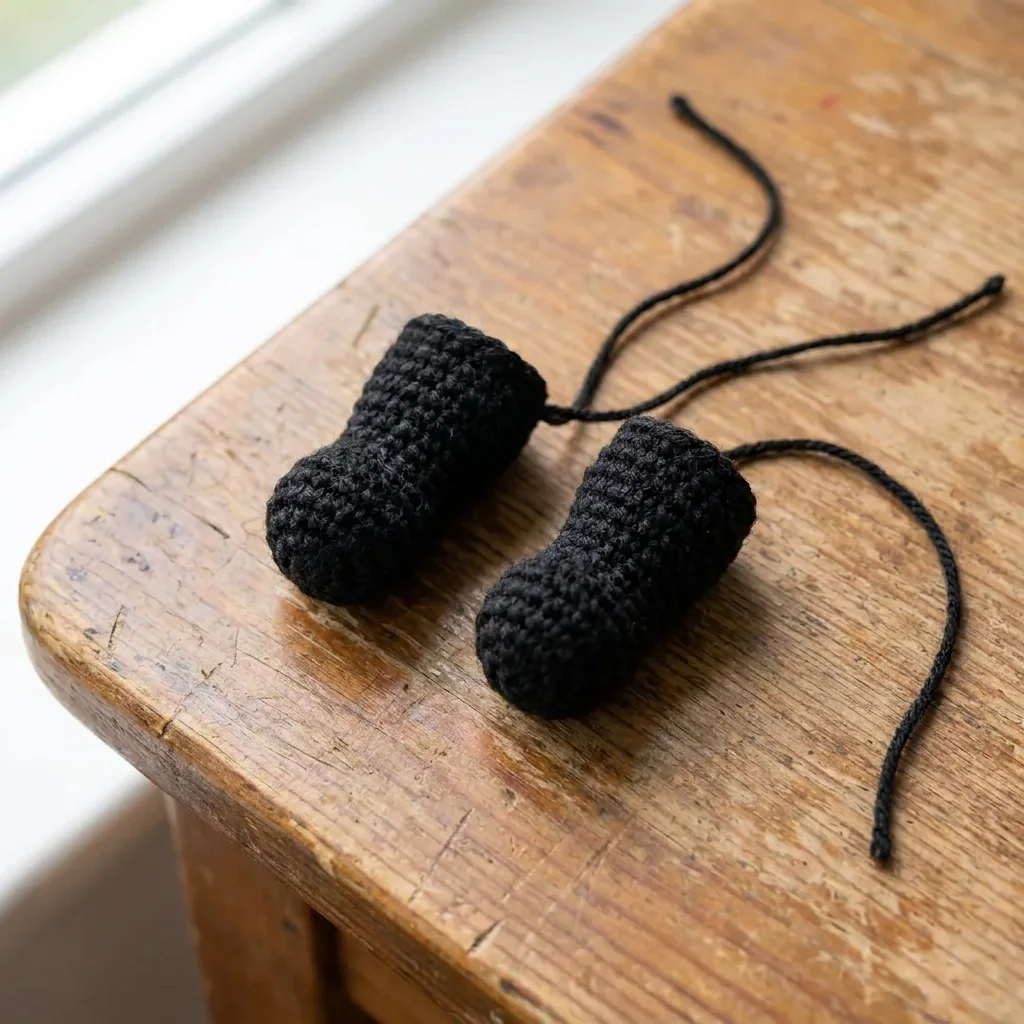
With black yarn: Rnd 1: 6 sc in MR — 6. Rnd 2: [2 sc, inc] × 2 — 8. Rnds 3–5: sc around — 8. Add a small amount of stuffing toward the paw end. Rnd 6: [2 sc, dec] × 2 — 6. Fasten off with long tails, close slightly, and keep the ends rounded.
Step 8: Make two legs
Check symmetry before securing the panda keychain crochet facial pieces.
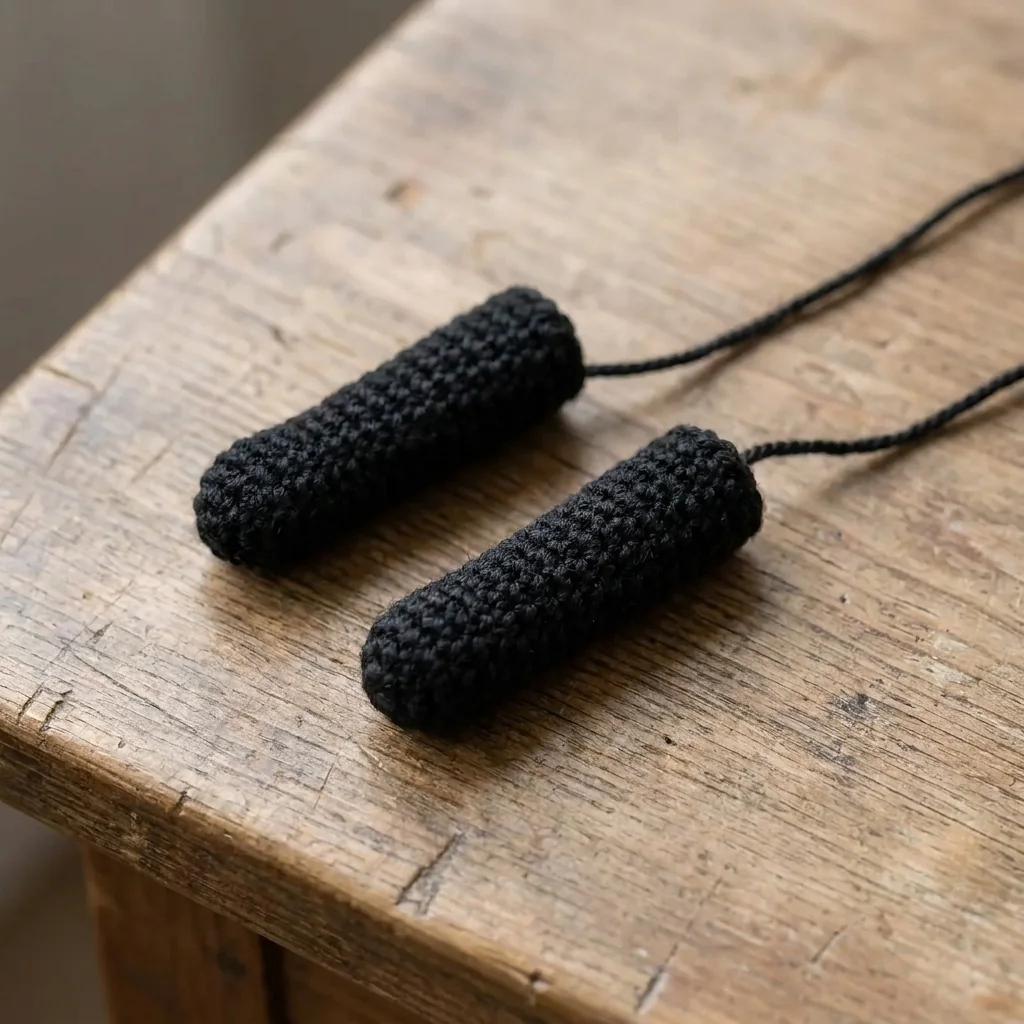
With black yarn: Rnd 1: 6 sc in MR — 6. Rnd 2: inc around — 12. Rnds 3–5: sc around — 12. Rnd 6: [2 sc, dec] × 3 — 9. Stuff firmly into a rounded paw. Rnd 7: [sc, dec] × 3 — 6. Fasten off with long tails, close slightly, and flatten the top where each leg joins the body.
Step 9: Assemble the face
Reinforced neck and limb seams protect the panda keychain crochet project during handling.
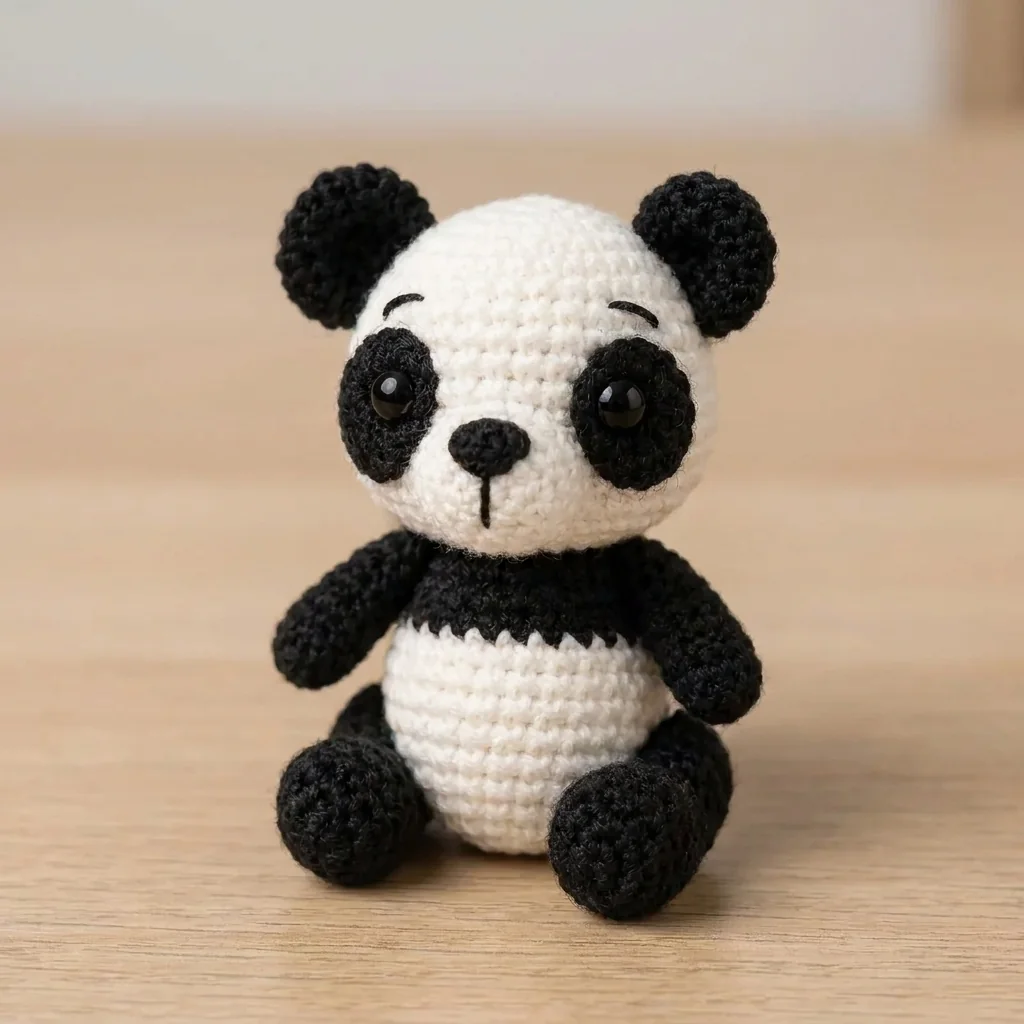
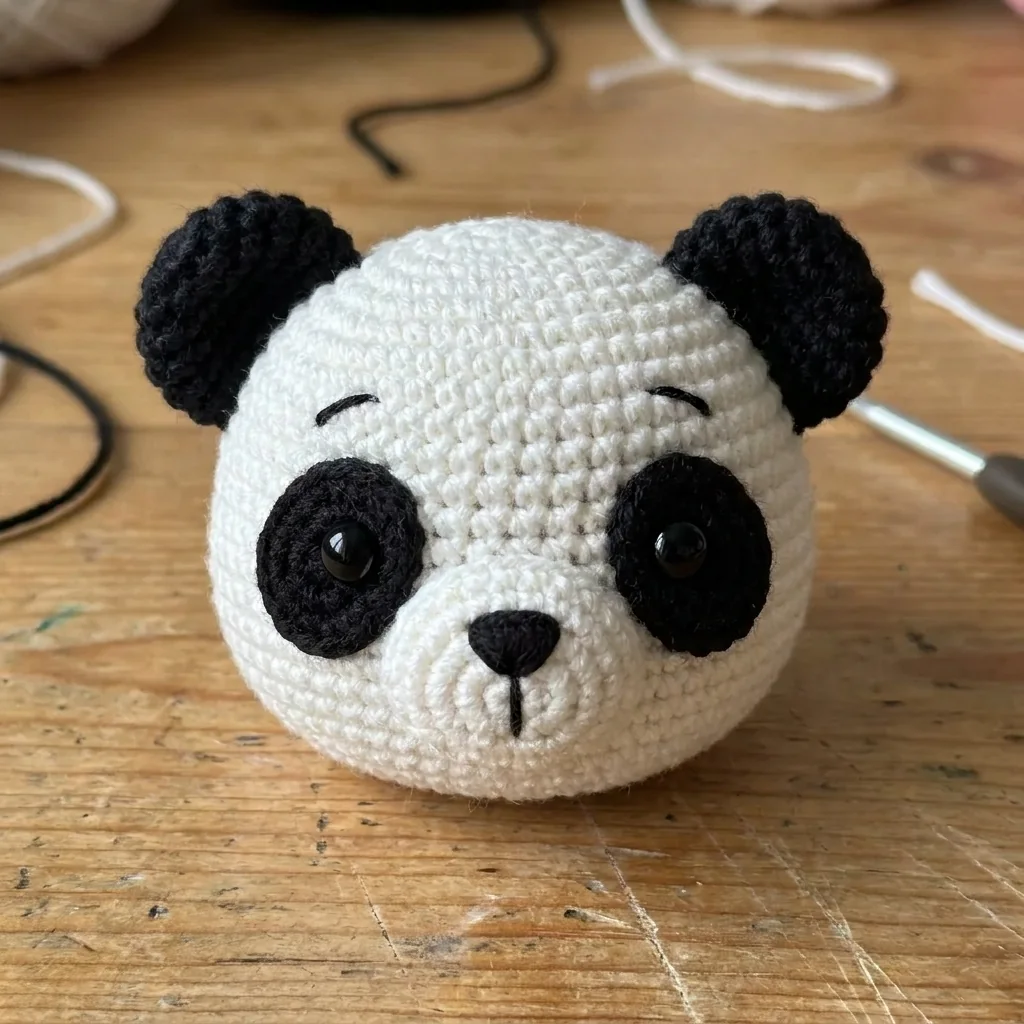
Position each black patch around one eye and whip stitch the edges smoothly and symmetrically. Center the muzzle between the patches with its lower edge about two rounds above the bottom of the head; add a little stuffing before closing. Embroider a small triangle nose, a short vertical line, a tiny V mouth, and simple curved eyebrows. Sew the ears about 4–5 stitches apart and angle them slightly outward. Check the expression from every angle before tying final knots.
Step 10: Attach head and limbs
The blue flower adds a bright focal point to the panda keychain crochet design.
Place the body beneath the head and align their centers. Sew one head stitch to one body stitch around the neck, adding a little stuffing if needed for an upright head. Attach the arms to the upper sides just below the neck, angled slightly forward at equal height. Sew the legs to the lower front so their flat tops meet the body. Test that the panda sits evenly, make several passes through each joint, and bury every yarn tail.
Step 11: Crochet the flower charm
Spread hardware strain across several stitches in the panda keychain crochet head.
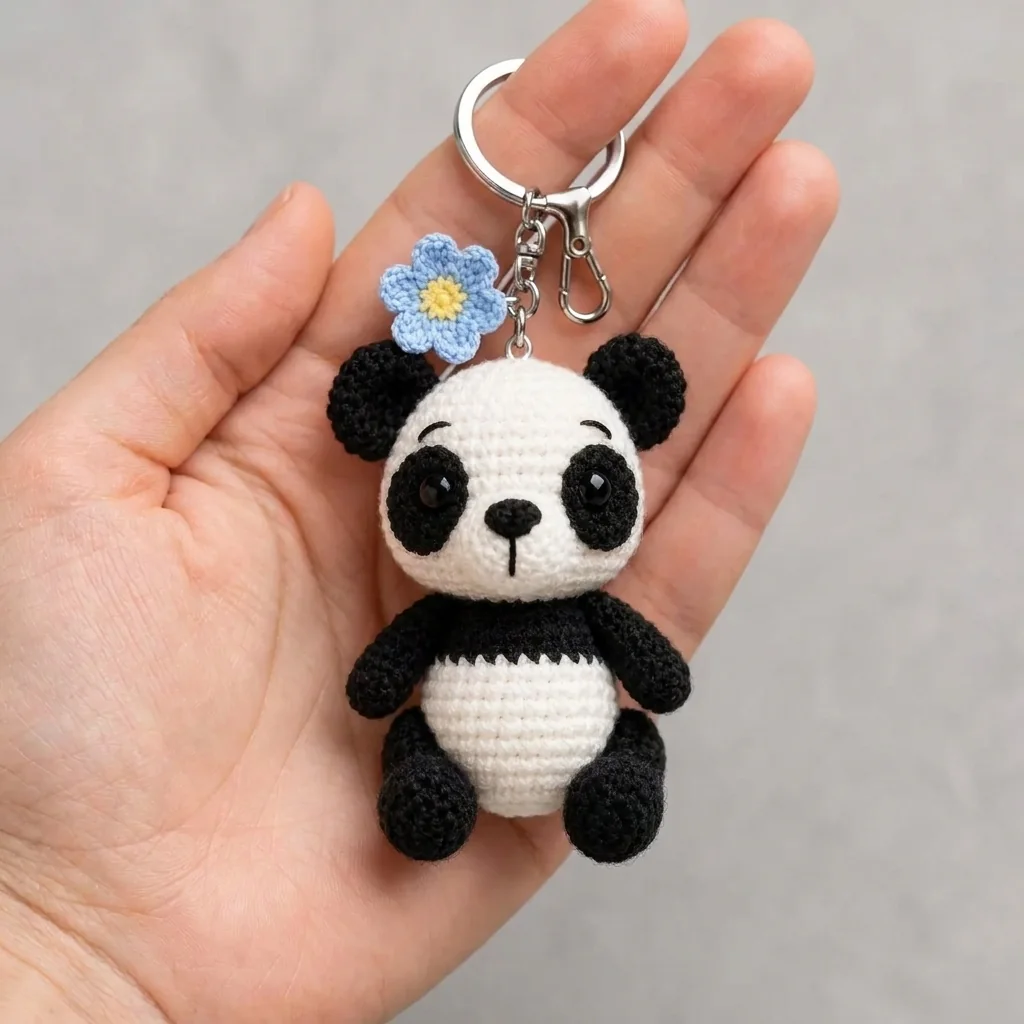
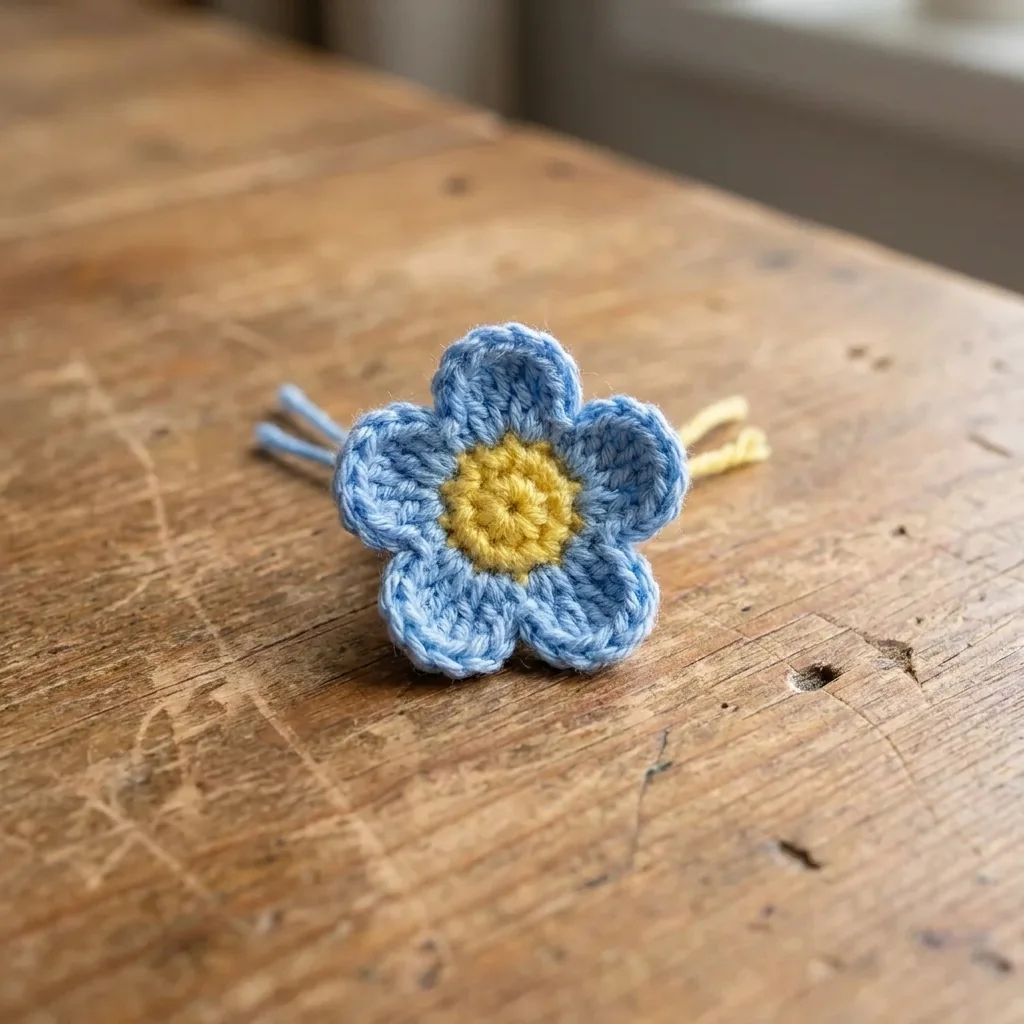
For the center, use yellow: 6 sc in MR, join with sl st, and fasten off — 6. Join blue and work [ch 2, 2 dc in the same stitch, ch 2, sl st in the next stitch] × 6 to make six petals. For a five-petal variation, make 5 sc in the center and repeat the petal sequence five times. Weave the ends to the back; lightly steam through a cloth if desired.
Step 12: Attach the keyring and finish
Complete the panda keychain crochet project with a firm tug test and final shape check.
Thread matching yarn through the back of the flower, tie it around one chain link near the keyring, knot several times, and weave in the ends. Stitch the top of the panda’s head firmly around the bottom jump ring. Pass through several nearby head stitches so the strain is not concentrated in one loop. Center the chain, tug firmly to test security, verify the height is about 8–10 cm, trim visible ends, and reshape by hand.
Safety, care, and selling notes
Safety eyes and metal hardware are choking hazards; the keychain is not suitable for children under three. Makers are responsible for seams, hardware, labels, warnings, age grading, taxes, and local laws. The source PDF permits personal use, gifts, and small-scale finished-item sales, but it may not be copied, shared, translated, uploaded, taught from, or resold. Written counts govern over illustrative result images.
Helpful answers
Frequently asked questions
What skill level is the panda keychain crochet project?
The pattern is rated adventurous beginner. It assumes familiarity with basic US crochet terms, continuous rounds, increasing, decreasing, stuffing, and sewing pieces together.
What size should the finished panda be?
The finished panda is approximately 8–10 cm or 3–4 inches tall, excluding the metal hardware. Tension and yarn choice can change the result.
Do the photo references replace the written counts?
No. The images are visual guides. The written rounds, stitch counts, measurements, and assembly instructions govern the panda keychain crochet tutorial.
Can I use embroidered eyes?
Yes, and the PDF specifically recommends embroidery instead of plastic safety eyes for a child-oriented soft figure. The keychain hardware remains a small-parts hazard.
How do I make the keyring connection durable?
Stitch around the bottom jump ring, pass through several nearby head stitches to spread strain, knot securely, weave in the ends, center the chain, and tug-test the connection.




