

MY CROCHET UNIVERSE · BABY CROCHET PATTERN
Crochet Bunny Bonnet Pattern for Babies Under One
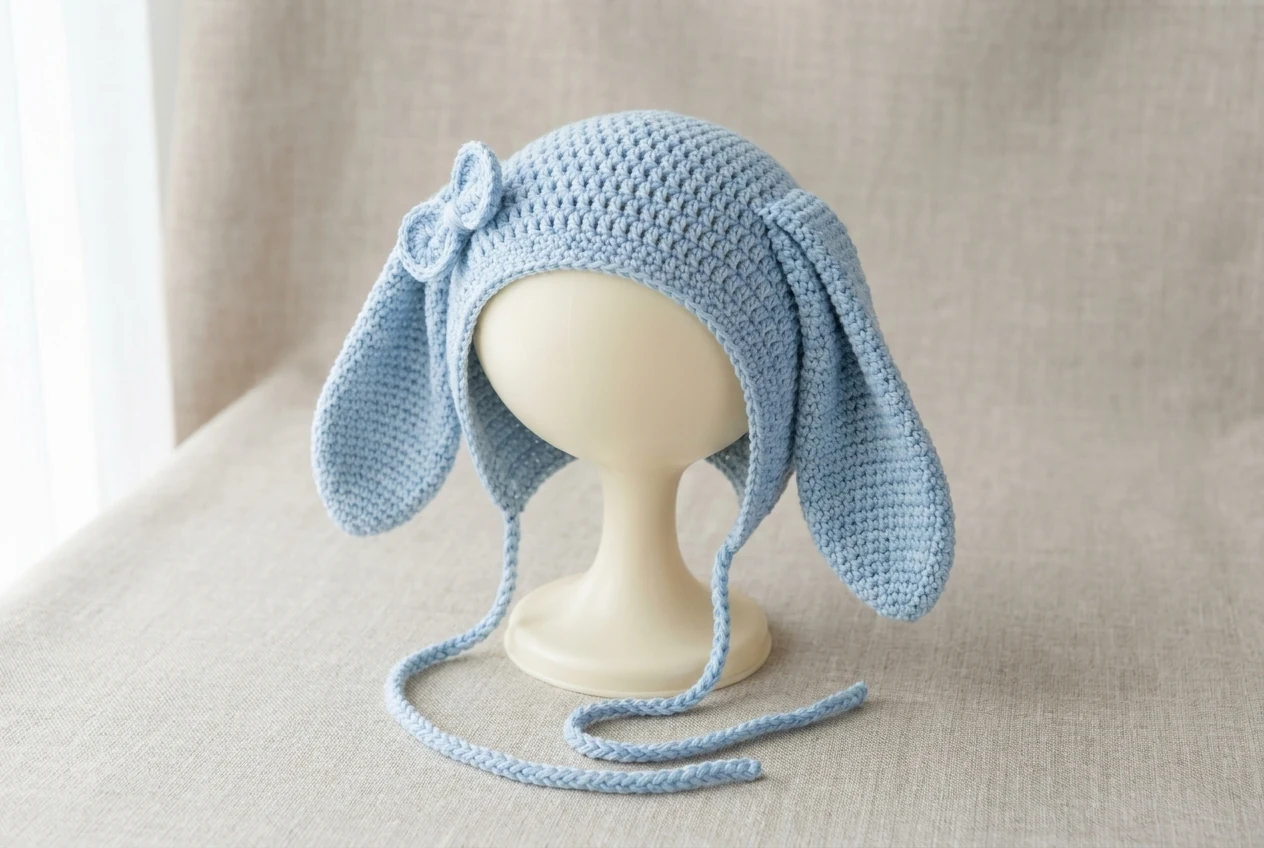
This crochet bunny bonnet pattern makes a pale-blue bonnet with a round crown, an open lower back, a raised face edge, long chain ties, two floppy bunny ears, and a compact crochet bow. The source labels the bonnet for babies under one year, but it does not provide gauge or finished measurements. Measure the baby’s head and compare the crown diameter and bonnet depth before finishing the ties.
In this crochet bunny bonnet pattern, the crown begins in joined double-crochet rounds. After the increase section, eight rows are worked flat to create the open-back bonnet shape. An alternating front-post and regular double-crochet edge adds texture around the face. The ears and bow are made separately and sewn on last.
Table of Contents
- Project details
- Materials
- Abbreviations
- Sizing
- Written pattern
- Step-by-step tutorial
- Assembly
- Safety
- Troubleshooting
- FAQ
Project Details
| Detail | Source information |
|---|---|
| Size label | Under one year |
| Construction | Round crown followed by flat rows |
| Decorations | Two long ears and one bow |
| Closure | Two chain ties |
| Main texture | Double crochet and front-post double crochet |
| Skill level | Confident beginner to intermediate |
The crochet bunny bonnet pattern is easiest to adjust at two checkpoints: after the circular crown and after the flat body rows. Do not wait until the edging is complete to test depth.
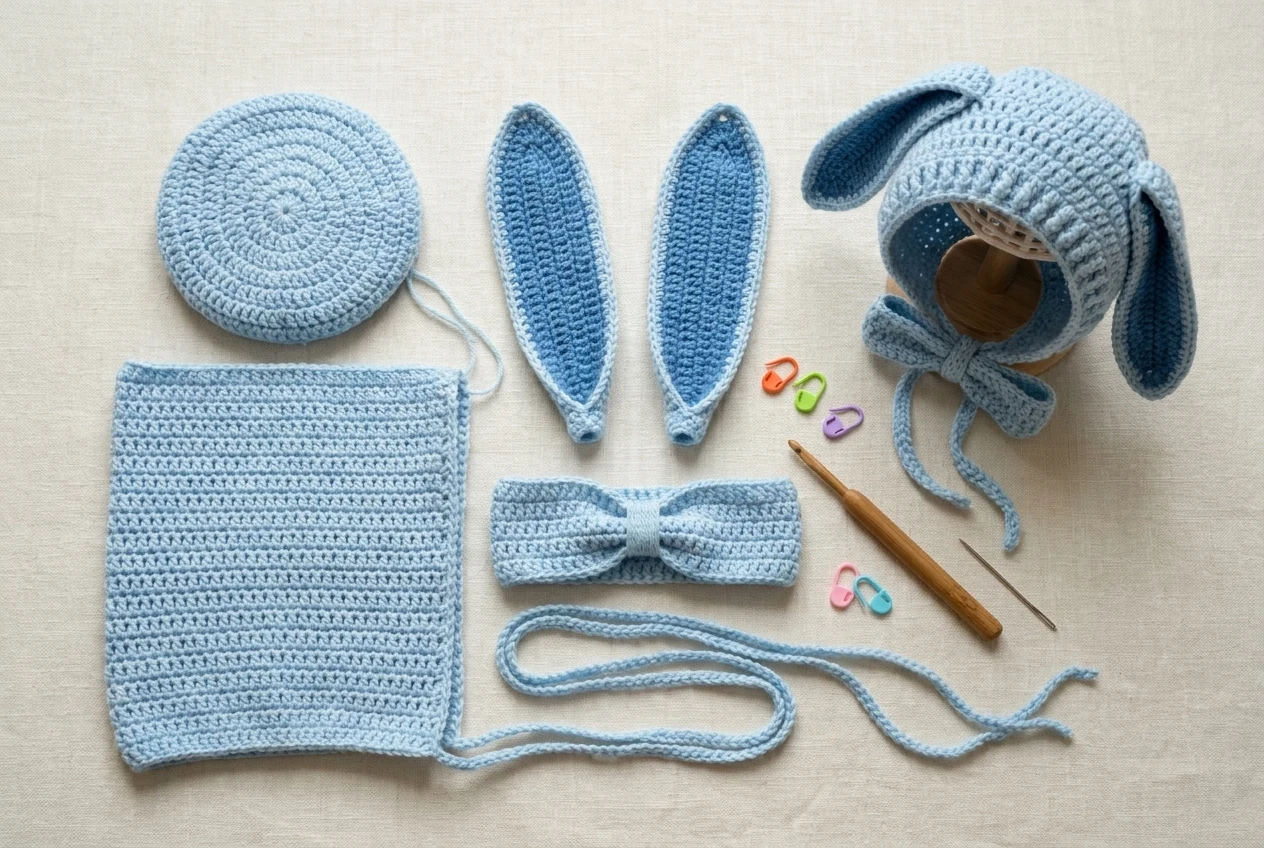
Materials
- Smooth baby-safe yarn in pale blue and white; the source does not state a yarn weight.
- A crochet hook that produces a firm but flexible fabric with your chosen yarn.
- Tapestry needle, scissors, removable stitch markers, and a tape measure.
- Brown embroidery floss for the nose and mouth.
- Black embroidery floss for infant-safe eyes; avoid detachable safety eyes on items for babies.
- Optional soft fuzzy white yarn for the cuff or edging, provided fibers do not shed.
For this crochet bunny bonnet pattern, a smooth yarn shows the crown increases and raised edge clearly. If you use fuzzy yarn, reserve it for a narrow trim so the stitch structure and tie condition remain easy to inspect.
Abbreviations
| Source symbol | US term used here |
|---|---|
| ch | chain |
| sl / sl st | slip stitch |
| X | single crochet (sc) |
| V | single-crochet increase |
| A | single-crochet decrease |
| T | half double crochet (hdc) |
| F | double crochet (dc) |
| FV | double-crochet increase |
| FA | double-crochet decrease (dc2tog) |
| FLO | front loop only |
| front-post dc | double crochet around the post from the front |
The bonnet source repeats the label “R6.” This article calls those two lines Source Round 6a and Source Round 6b. The likely stitch progression is 72 stitches after 6a and 84 after 6b, followed by one plain round.
Sizing and Gauge
Before starting the full crochet bunny bonnet pattern, measure head circumference, crown-to-forehead depth, and the desired face-opening length. A crochet circle is usually checked by laying it flat and measuring across the widest point. Stop increasing when the crown approaches the required diameter, then begin the plain round and flat rows.
The age label “under one year” covers a wide range. A newborn bonnet and an 11-month bonnet cannot be assumed to share the same measurements. Yarn thickness can also change the diameter by several centimeters even when the stitch count is identical.
If your measured crown becomes large before the source’s final increase round, stop increasing early and work a plain round. If it remains small, add a carefully spaced increase round after confirming your gauge. Record changes so the ears and face edge remain centered.
Written Pattern
Bonnet crown and body
- Source Round 1: Magic ring, 12 dc. [12]
- Source Round 2: Dc inc in every stitch. [24]
- Source Round 3: Repeat (1 dc, dc inc) 12 times. [36]
- Source Round 4: Repeat (1 dc, dc inc, 1 dc) 12 times. [48]
- Source Round 5: Repeat (3 dc, dc inc) 12 times. [60]
- Source Round 6a: Repeat (4 dc, dc inc) 12 times. [72]
- Source Round 6b: The source labels the next line “R6” again and writes
12(5FV). In common chart shorthand this reads as (5 dc, dc inc) 12 times. [84] - Source Round 7: Dc in every stitch for one round. [84]
- Source Rows 8–15: Work 8 rows of dc back and forth, turning after each row. This creates the open lower-back section of the bonnet rather than a closed tube.
- Source Round/Row 16: Along the face edge, alternate 1 front-post dc and 1 regular dc to make the raised trim. Without cutting the yarn, ch 60 for the first tie. Starting in the second chain from the hook, slip stitch back to the bonnet. Work along the lower edge to the other side and make the second tie to match.
Bonnet bow
Ch 48 and join carefully without twisting. Work 4 rounds of dc. Leave a long tail, flatten the tube, wrap the tail tightly around the center to form a bow, and sew the wrap securely.
Long bunny ears — make two
- Ear Round 1, contrast/inner-ear color: Ch 28. Starting in the third chain from the hook, work 25 dc and 6 dc in the end chain so the work turns around the tip.
- Ear Round 2, main bonnet color: Ch 2, work 25 dc, 6 dc increases around the curved tip, then 25 dc down the second side.
- Ear Round 3: Ch 1, work 25 sc, repeat (sc, sc inc) 6 times around the tip, then 25 sc down the second side. Ch 1 and fasten off, leaving a long sewing tail.
Make the second ear to match. Pin both ears before sewing so the tips fall at the same height.
Crochet Bunny Bonnet Pattern Step-by-Step Tutorial
Step 1 — Crochet Bunny Bonnet Pattern: Crochet a flat circular crown
The crochet bunny bonnet pattern begins with 12 double crochets in a magic ring. Mark the first stitch and distribute increases evenly. The circle should lie flat. A bowl shape means the circle needs more increases for your tension; ruffling means it has too many.
Step 2 — Crochet Bunny Bonnet Pattern: Create the open lower back
After the plain double-crochet round, stop joining and work Rows 8–15 back and forth. Turning creates the open section that sits below the back of the head. Keep the two row edges straight because they frame the neck opening and ties.
Step 3 — Crochet Bunny Bonnet Pattern: Add the raised face edge
Alternate one front-post double crochet and one regular double crochet. The post stitch forms a raised vertical line, while the normal double crochet sits back. Do not pull the post stitch tight; the edge should frame the face without shrinking.
Step 4 — Crochet Bunny Bonnet Pattern: Crochet matching ties
The source uses 60 chains for each tie and slip stitches back along the chain. Measure the finished tie before use. Chain length changes with tension, so stitch count alone does not guarantee a safe final length.
Step 5 — Crochet Bunny Bonnet Pattern: Make the long ears
The first row forms the inner ear and turns around the tip with six double crochets in the end chain. The main-color round widens the tip with increases, and the final single-crochet round smooths the edge. Make both ears with the same yarn tension and leave long tails for sewing.
Step 6 — Crochet Bunny Bonnet Pattern: Shape the bow
The 48-chain bow is a short crocheted tube worked for four rounds, flattened, and cinched in the center. Wrap the center several times, then sew through the wraps so they cannot loosen.
Step 7 — Crochet Bunny Bonnet Pattern: Pin before sewing
Place the bonnet on a neutral form. Pin the ears at equal distances from the crown center and let them hang naturally. Add the bow only after the ears are attached. Sew with small stitches through the base of each decoration.
Finishing and Blocking
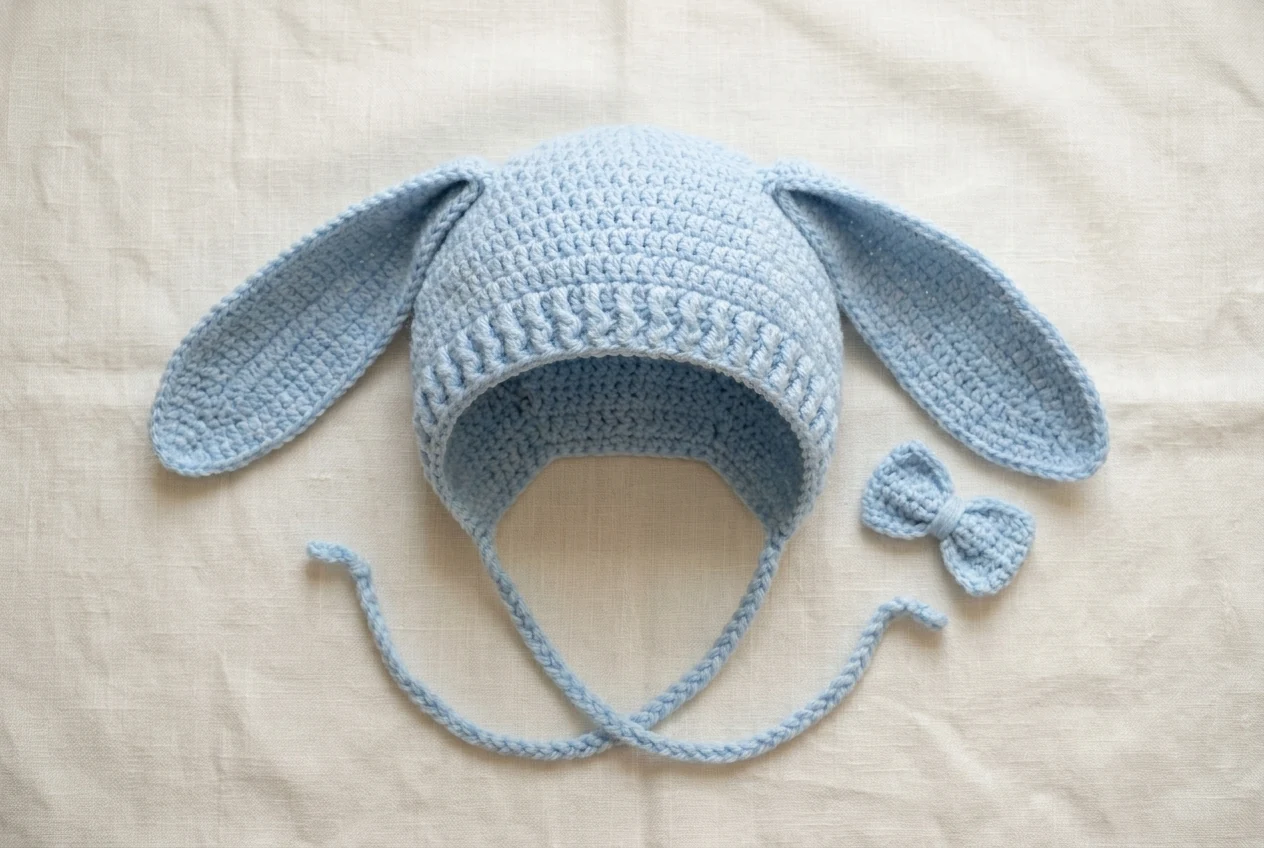
To finish the crochet bunny bonnet pattern, weave crown and body tails into stitches of the same color. Damp-block the bonnet on a rounded form that matches the intended head size. Do not stretch the face opening or ties. Arrange the ears in the desired direction and let everything dry completely.
For the neatest result, steam only when the yarn label permits it and keep heat away from synthetic fibers. Excess heat can flatten the post-stitch texture or permanently change acrylic yarn.
Baby Safety
The crochet bunny bonnet pattern is for supervised wear, so complete every safety check below:
- A bonnet is not sleepwear. Remove it before naps, nighttime sleep, or unsupervised rest.
- Long ties can entangle. Shorten them if needed and use the bonnet only with direct adult supervision.
- Check the ear and bow stitching before every wear.
- Keep the face opening clear of the eyes, nose, and mouth.
- Use soft, non-shedding yarn and avoid scratchy embellishments.
- Stop using the bonnet if it leaves pressure marks or becomes too small.
Troubleshooting
The crown ruffles
Too many increases are being worked for the yarn and hook combination. Verify that the increase repeat was not accidentally added twice. If the count is correct, test a smaller number of increases on a swatch.
The crown cups too early
The increase rounds may be missing stitches, or your tension may be very tight. Recount before changing hook size.
The opening is too wide
Work fewer flat rows or add a controlled edging that does not stretch. Do not pull the ties to force an oversized bonnet to fit.
The face edge flares
Use a smaller hook for the final textured row, or slightly reduce the number of stitches after testing. Keep the front-post stitches at normal height.
The ears twist
Block both ears flat before attaching. Pin the inner-color side facing forward and sew across a broad base instead of using one tight point.
The bow collapses
Flatten the four-round tube evenly and wrap the center tightly. Add hidden stitches through the center layers before sewing it to the bonnet.
FAQ
Open a question to see the answer. These notes cover sizing, materials, modifications, and related pieces.
Final Checklist
- Crown diameter and bonnet depth were measured on the intended size.
- Flat rows create a centered lower-back opening.
- Face edge lies smoothly without flaring or tightening.
- Ears are symmetrical and securely sewn.
- Ties are evaluated for safe supervised use.
This crochet bunny bonnet pattern is most successful when you measure after the crown and again before the textured edge. Preserve the source structure, adjust only from real measurements, and treat ties as supervised decorative details.




