

MY CROCHET UNIVERSE · BABY CROCHET PATTERN
Crochet Bunny Baby Set Pattern: Bonnet and Booties
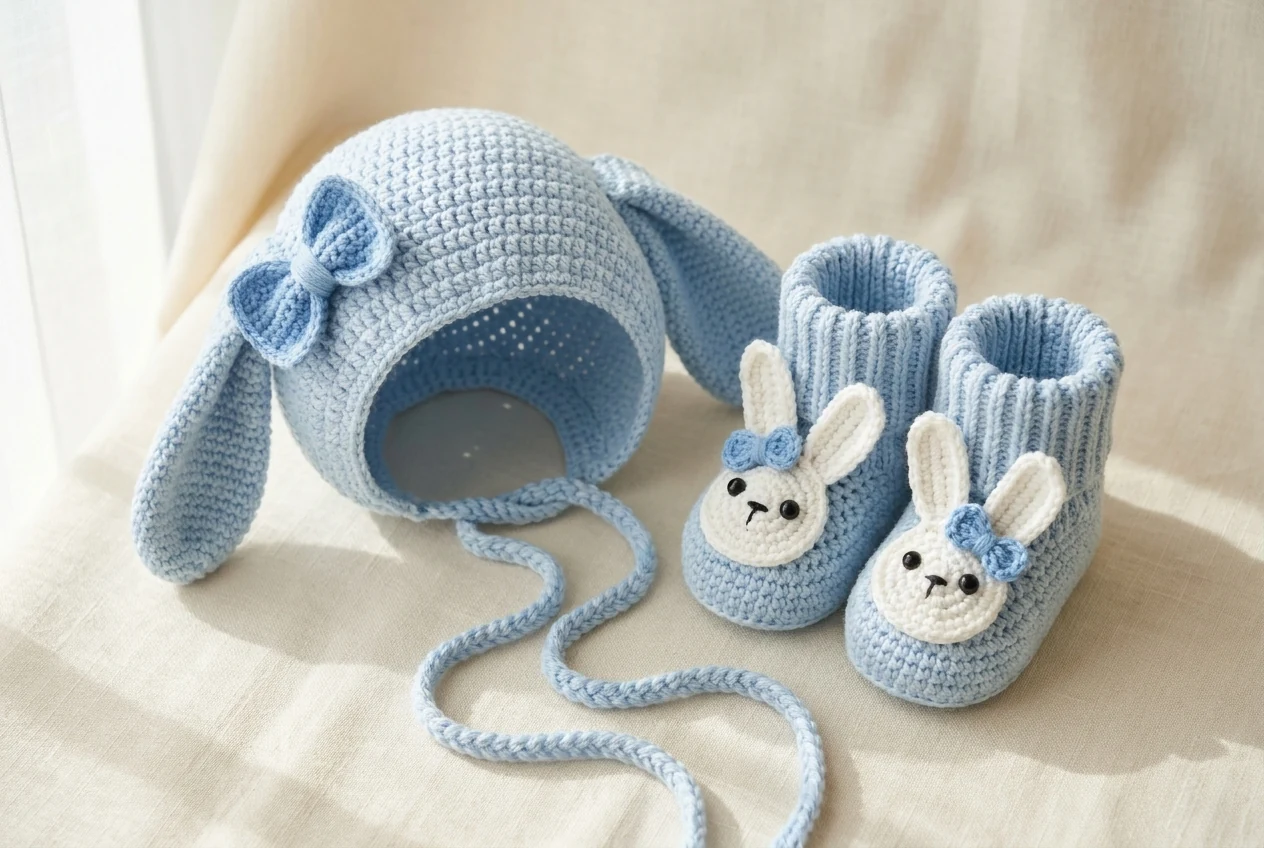
This crochet bunny baby set pattern turns the supplied notes into one coordinated project: a pale-blue bunny bonnet and a pair of tall-cuff bunny booties. The booties are labeled for 3–6 months in the source, while the bonnet is labeled for babies under one year. Because the original notes do not include gauge or finished measurements, treat those ages as design labels rather than guaranteed sizing.
The crochet bunny baby set pattern uses the same powder-blue and white palette, long rabbit ears, small crocheted bows, and raised post-stitch texture. Make both pieces from the same yarn lot so the shades and fabric density match. If the set is intended for a baby, embroider every facial detail and keep ties out of reach during sleep.
Table of Contents
- Project overview
- Materials
- Abbreviations
- Gauge and sizing
- Booties instructions
- Bonnet instructions
- Step-by-step tutorial
- Safety
- Troubleshooting
- FAQ
Project Overview
| Detail | Information from the source |
|---|---|
| Set pieces | One bonnet and two booties |
| Bootie size label | 3–6 months |
| Bonnet size label | Under one year |
| Main techniques | Oval crochet, joined rounds, flat rows, increases, decreases, front-post double crochet, applique |
| Terminology | US crochet terms in this article |
| Skill level | Confident beginner to intermediate |
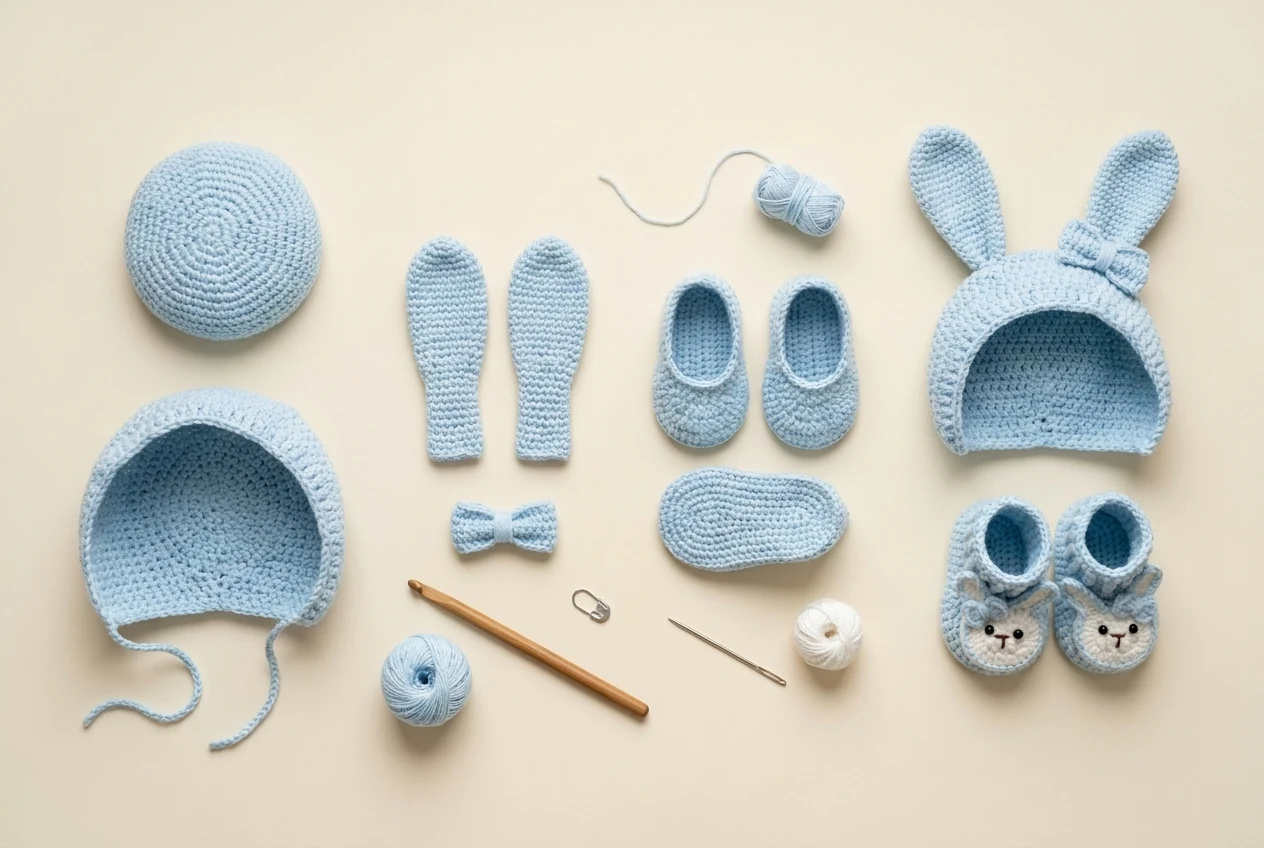
The construction order in this crochet bunny baby set pattern matters. Begin with the bootie soles so you can test the chosen yarn and hook on a small piece. Continue through the shaped uppers and cuffs, then crochet the bunny appliques. For the bonnet, form a round crown, stop joining to create the open back, add the textured face edge and ties, then sew on the ears and bow.
Materials
- Smooth baby-safe yarn in pale blue and white; the source does not state a yarn weight.
- A crochet hook that produces a firm but flexible fabric with your chosen yarn.
- Tapestry needle, scissors, removable stitch markers, and a tape measure.
- Brown embroidery floss for the nose and mouth.
- Black embroidery floss for infant-safe eyes; avoid detachable safety eyes on items for babies.
- Optional soft fuzzy white yarn for the cuff or edging, provided fibers do not shed.
For this crochet bunny baby set pattern, use the same hook for all pieces unless the cuff feels too loose. A slightly smaller hook can make the bootie fabric firmer, but changing hook size also changes the finished dimensions. Wash and dry a test swatch as you plan to wash the completed set.
Abbreviations
| Source symbol | US term used here |
|---|---|
| ch | chain |
| sl / sl st | slip stitch |
| X | single crochet (sc) |
| V | single-crochet increase |
| A | single-crochet decrease |
| T | half double crochet (hdc) |
| F | double crochet (dc) |
| FV | double-crochet increase |
| FA | double-crochet decrease (dc2tog) |
| FLO | front loop only |
| front-post dc | double crochet around the post from the front |
Read a repeat such as (dc2tog, dc) 6 times as one decrease followed by one double crochet, repeated six times. A “dc increase” means two double crochets worked into the same stitch.
Gauge and Sizing
The source does not provide gauge for the crochet bunny baby set pattern. Before committing to the crochet bunny baby set pattern, crochet the first three sole rounds and measure the sole against a well-fitting baby shoe or a foot measurement. Do not choose size only by age; babies grow at different rates, and yarn substitutions can change the sole dramatically.
For the bonnet, measure from the center back of the head to the forehead and compare that depth with the crown plus body rows. The source expansion reaches a likely 84 stitches before the flat rows, but your diameter depends on yarn, hook, and tension. Stop an increase round early or add another controlled increase round only after measuring, not by guessing.
Booties Instructions
In the crochet bunny baby set pattern, the following instructions make a pair. Work both soles first, compare them, and then alternate between the two booties every few rounds. This reduces the chance that changing tension makes one bootie larger.
Sole — make two
- Round 1: Ch 14. Starting in the third chain from the hook, work 3 dc in that chain, 10 dc, 7 dc in the last chain, 10 dc along the opposite side of the foundation chain, and 3 dc in the remaining end space. Join.
- Round 2: Work 3 dc increases, 10 dc, 3 dc increases, 1 dc, 3 dc increases, 10 dc, and 3 dc increases. Join.
- Round 3: Work (sc, sc inc) 3 times, 3 sc, 3 hdc, 4 dc, (dc inc, dc) 6 times, 1 dc inc, 4 dc, 3 hdc, 3 sc, then (sc inc, sc) 3 times. Join.
Bootie upper — make two
- Round 1: Working in the front loop only, 2 dc, dc2tog, 50 dc, dc2tog, 2 dc.
- Round 2: 1 dc, dc2tog, 15 dc, (dc2tog, dc) 6 times, dc2tog, 15 dc, dc2tog, 1 dc.
- Round 3: 15 sc, 2 hdc, (dc2tog, dc) 4 times, dc2tog, 2 hdc, 14 sc.
- Round 4: 14 sc, 2 hdc, dc2tog 5 times, 2 hdc, 14 sc.
- Round 5: 11 sc, 2 hdc, dc2tog 5 times, 2 hdc, 11 sc.
- Round 6: 32 dc.
- Rounds 7–9: Alternate 1 front-post dc and 1 regular dc around to create the raised cuff texture.
- Tie: Ch 60 as written in the source. Check the finished length before use and secure the ends carefully.
Bunny face and ears — make one applique for each bootie
- Round 1: Ch 6. Starting in the third chain from the hook, dc inc, 2 dc, 6 dc in the end chain, 2 dc along the opposite side, then 4 dc in the first-chain end.
- Round 2: Ch 2, 2 dc increases, 2 dc, 6 dc increases, 2 dc, 4 dc increases.
- Round 3: Sl st in the next 3 stitches. Ch 9; starting in the third chain, work 1 hdc, 4 dc, 1 hdc, 1 sc, then sl st across 4 face stitches. Ch 9 again; starting in the third chain, work 1 hdc, 4 dc, 1 hdc, 1 sc, then sl st to the face and fasten off.
- Round 4: Join the edging color and slip stitch evenly around the applique and both ears.
Small bow — make one for each bootie
Start with a magic ring. Ch 2, work 3 dc into the ring, ch 2, sl st into the ring; repeat once. Pull the ring closed, wrap the center, and leave a tail for sewing.
Bootie assembly
Center one bunny face over each toe after the upper shaping is complete. Pin the face at four points before sewing. Keep all stitches inside the applique edge so the outline stays smooth. Sew the ears down only at the base if you want them to stand, or tack the upper edges as well for a flatter, more secure infant version.
Embroider the eyes, nose, and short mouth before attaching the applique whenever possible. This keeps embroidery tails hidden between the face and the bootie. Place the bows beside one ear, mirroring the placement on the second bootie.
Bonnet Instructions
Bonnet crown and body
- Source Round 1: Magic ring, 12 dc. [12]
- Source Round 2: Dc inc in every stitch. [24]
- Source Round 3: Repeat (1 dc, dc inc) 12 times. [36]
- Source Round 4: Repeat (1 dc, dc inc, 1 dc) 12 times. [48]
- Source Round 5: Repeat (3 dc, dc inc) 12 times. [60]
- Source Round 6a: Repeat (4 dc, dc inc) 12 times. [72]
- Source Round 6b: The source labels the next line “R6” again and writes
12(5FV). In common chart shorthand this reads as (5 dc, dc inc) 12 times. [84] - Source Round 7: Dc in every stitch for one round. [84]
- Source Rows 8–15: Work 8 rows of dc back and forth, turning after each row. This creates the open lower-back section of the bonnet rather than a closed tube.
- Source Round/Row 16: Along the face edge, alternate 1 front-post dc and 1 regular dc to make the raised trim. Without cutting the yarn, ch 60 for the first tie. Starting in the second chain from the hook, slip stitch back to the bonnet. Work along the lower edge to the other side and make the second tie to match.
Bonnet bow
Ch 48 and join carefully without twisting. Work 4 rounds of dc. Leave a long tail, flatten the tube, wrap the tail tightly around the center to form a bow, and sew the wrap securely.
Long bunny ears — make two
- Ear Round 1, contrast/inner-ear color: Ch 28. Starting in the third chain from the hook, work 25 dc and 6 dc in the end chain so the work turns around the tip.
- Ear Round 2, main bonnet color: Ch 2, work 25 dc, 6 dc increases around the curved tip, then 25 dc down the second side.
- Ear Round 3: Ch 1, work 25 sc, repeat (sc, sc inc) 6 times around the tip, then 25 sc down the second side. Ch 1 and fasten off, leaving a long sewing tail.
Make the second ear to match. Pin both ears before sewing so the tips fall at the same height.
Bonnet assembly
Block the bonnet lightly before adding the decorations. Fold each ear lengthwise very gently to find its center, then position the pair symmetrically above the face opening. Sew through the bonnet fabric without pulling so tightly that the crown puckers. Add the bow near one ear only after both ears are secure.
Test the two ties for equal length. If the chain twists, dampen it, smooth it flat, and let it dry before use. For a decorative photo prop, the long ties match the source. For everyday infant wear, consider a shorter closure that complies with your local safety guidance.
Crochet Bunny Baby Set Pattern Step-by-Step Tutorial
Use this crochet bunny baby set pattern tutorial in order. Finish and compare matching pieces at every checkpoint instead of making one complete bootie before beginning the second.
Step 1 — Crochet Bunny Baby Set Pattern: Test the yarn and size
Crochet the first three sole rounds, measure the oval, and compare it with an actual foot measurement. Wash a small swatch if the finished set will be machine washed.
Step 2 — Crochet Bunny Baby Set Pattern: Make both soles
Work both oval soles before moving to the uppers. Stack them together after every round and correct any mismatch immediately.
Step 3 — Crochet Bunny Baby Set Pattern: Shape both booties
Turn into the front loops, center the toe decreases, and alternate between the two shoes every round. Complete the raised cuffs to the same height.
Step 4 — Crochet Bunny Baby Set Pattern: Add the bunny faces
Make two face-and-ear appliques and two small bows. Embroider the faces first, then pin and sew the appliques at matching positions.
Step 5 — Crochet Bunny Baby Set Pattern: Build the bonnet
Crochet the round crown, check its diameter, and work the eight open-back rows. Add the raised face edge and make two equal ties.
Step 6 — Crochet Bunny Baby Set Pattern: Make ears and bow
Crochet two long ears from the same notes and compare their length. Make the 48-chain bow tube, flatten it, and secure the center wrap.
Step 7 — Crochet Bunny Baby Set Pattern: Assemble symmetrically
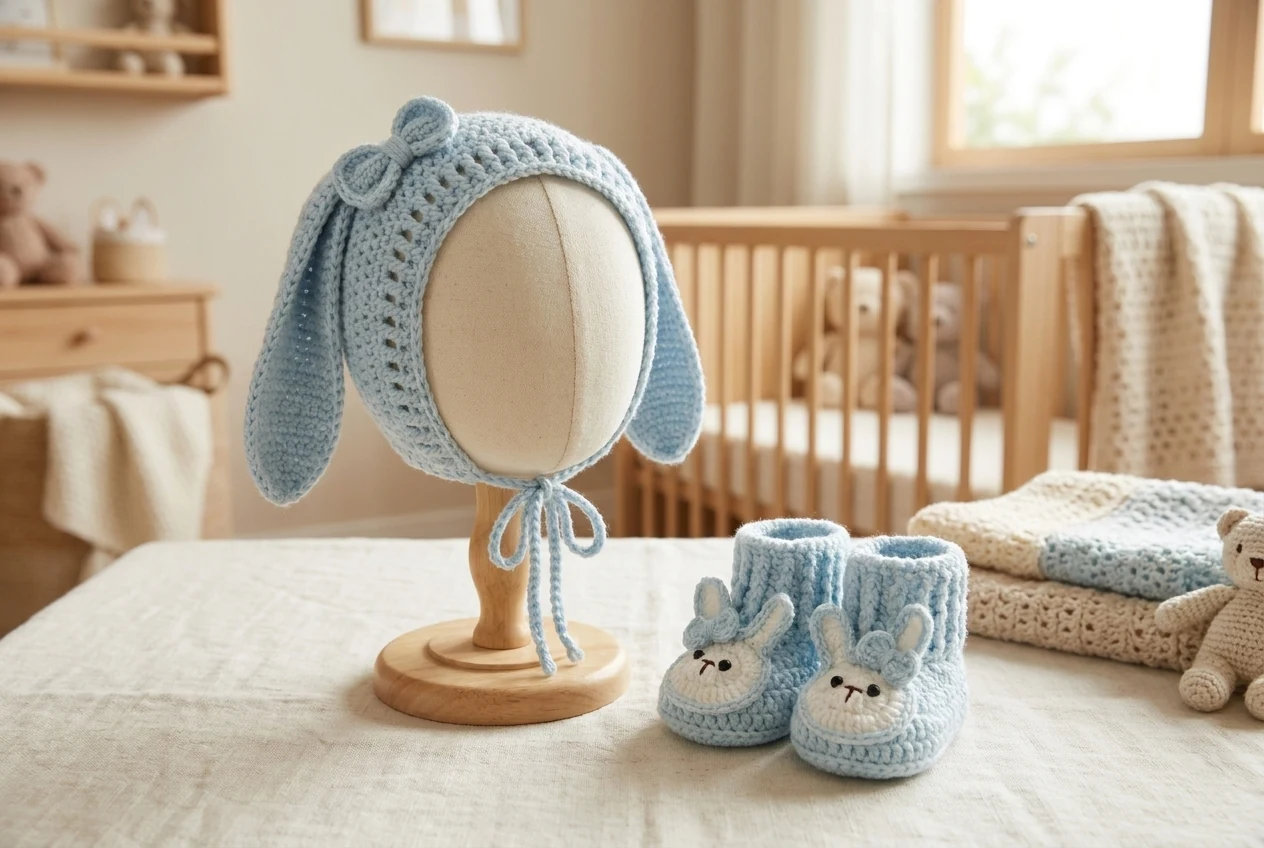
Place the bonnet on a rounded form. Pin the ears at equal distances from the crown center, sew them securely, and add the bow last.
Step 8 — Crochet Bunny Baby Set Pattern: Finish and inspect
Weave in every tail, wash gently, shape, and dry flat. Recheck facial embroidery, appliques, bow, ears, cuffs, and ties before supervised use.
A consistent finishing method in the crochet bunny baby set pattern makes the pieces look like a true set. Use the same invisible joining technique, embroidery color, and edge tension on all three items.
At this stage, place every piece from the crochet bunny baby set pattern together and compare the blue shade, bow position, ear direction, and overall finish before washing.
Baby Safety
- The photographed source uses plastic eyes, but embroidered eyes are safer for infant items.
- Do not leave a baby unattended in a bonnet, especially during sleep or in a car seat.
- Long ties can present an entanglement hazard. Keep them short, supervised, and away from the neck when the bonnet is not actively worn.
- Check every applique, bow, and ear before each use.
- Avoid yarn that sheds fibers or has metallic, sequined, or scratchy strands.
- Booties are decorative warmth, not protective walking shoes. The crocheted sole can be slippery on hard floors.
Troubleshooting
The two soles are different sizes
Count every end increase and mark the first stitch. Make both soles in the same sitting with the same hook. If one sole is still larger, unravel to the first mismatched round rather than hiding the difference in the upper.
The toe shaping is off-center
The source sequence assumes the round starts in the intended position. Lay the bootie flat after every decrease round. If the center decreases drift, verify the beginning of the round and the count before continuing.
The bonnet is too shallow
Add depth with extra plain rows, not extra crown increases. More increases make the bonnet wider; more even rows make it deeper.
The post-stitch edge flares
Use relaxed but even loops for front-post double crochet. If the edge still flares, try a smaller hook only for the edging or skip evenly spaced stitches after testing on a swatch.
FAQ
Open a question to see the answer. These notes cover sizing, materials, modifications, and related pieces.
Final Checklist
- Both booties match in sole length, cuff height, and applique placement.
- The bonnet fits without pressing the forehead or covering the eyes.
- Every facial detail is embroidered and secure.
- Long ties are supervised and never used during sleep.
- All yarn tails are woven through several stitches and trimmed inside the work.
The finished crochet bunny baby set pattern is especially effective when the pale-blue texture stays consistent across the bonnet and booties. Measure early, preserve the source sequence, and prioritize a safe, comfortable fit over the age label.




