

8 Design Details That Make This Shell-Stitch Crochet Pattern Worth Stitching
A shell-stitch crochet pattern is defined by the decisions behind its repeats, transitions, shaping, and finishing—not only by the finished photograph. This cap uses eight clear choices to connect a lacy dome with a stable band, curved brim, button-back opening, and covered crown accent.
This article treats the product accurately as a digital crochet pattern. The phrase shell-stitch crochet pattern identifies the planning topic; it is not a guarantee of fit, sun protection, delivery, availability, or finished performance.
In this article
- Detail 1: A Clean Magic-Ring Crown Start
- Detail 2: Brick-Style Shell Mesh
- Detail 3: One Controlled 8-to-16 Increase
- Detail 4: A Direct Shell-to-Single-Crochet Transition
- Detail 5: Counted Front and Back Placement
- Detail 6: A Seven-Row Curved Brim
- Detail 7: A Button-Back Opening and Strap
- Detail 8: A Covered Crown Button
Detail 1: A Clean Magic-Ring Crown Start
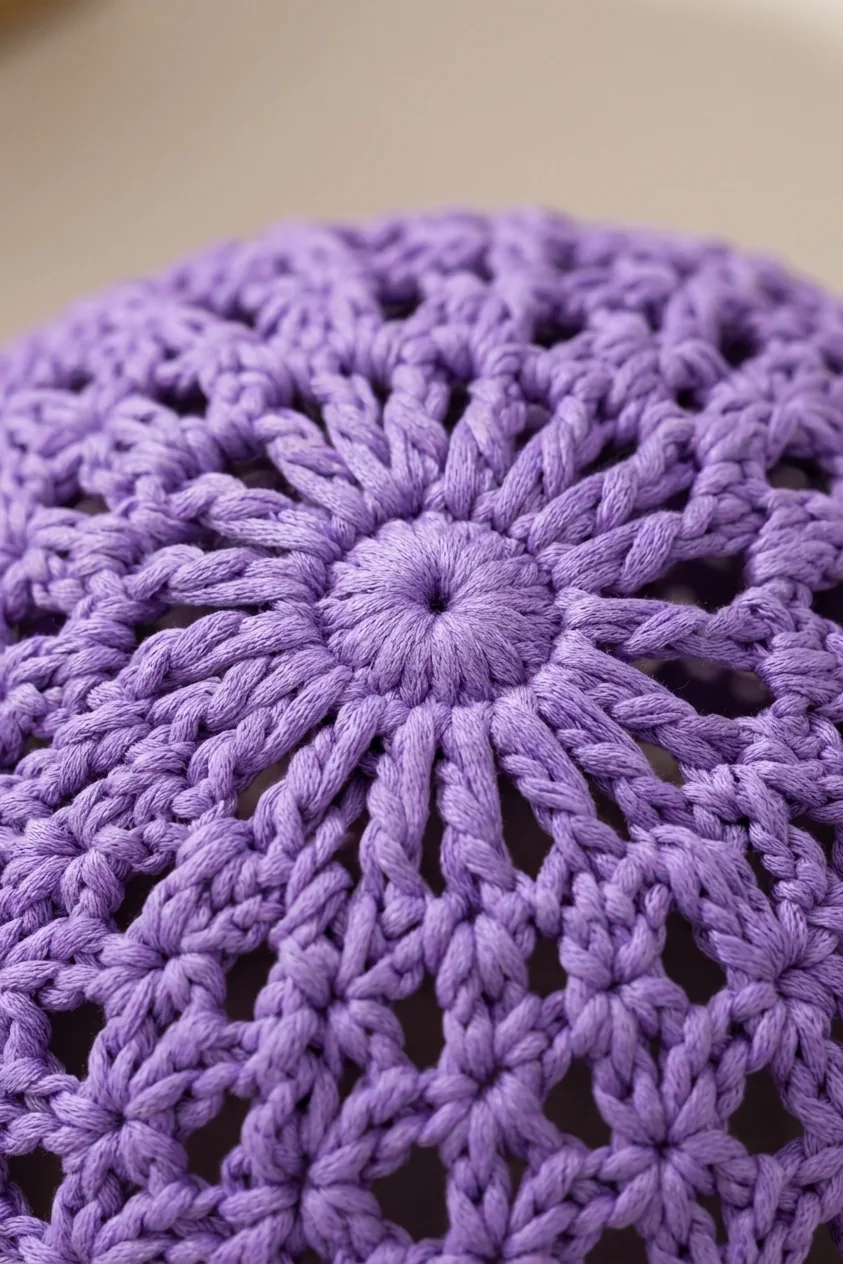
The first round organizes eight groups around a magic ring, allowing the center to close neatly. This concentrates the shaping at the apex instead of beginning with a long chain or sewn seam.
The covered button later hides and reinforces the visual center, but the ring should still be closed and secured correctly before decoration.
shell-stitch crochet pattern planning note
Record color, yarn, blocked gauge, recipient measurements, and any modification before cutting yarn. Keep your changes separate from the original pattern instructions.
Pause at this point and examine detail 1: a clean magic-ring crown start in natural light. Count the repeat, compare both sides, and note the active size before moving on. A removable marker and a one-line project note prevent small orientation errors from becoming several rounds of rework.
The supporting visual is an independently generated instructional reference based on the supplied finished-cap image. It is not a cropped pattern page and should not replace the official written instructions. Your yarn, tension, and blocking method may produce a slightly different texture while still meeting the verified measurements.
Detail 2: Brick-Style Shell Mesh
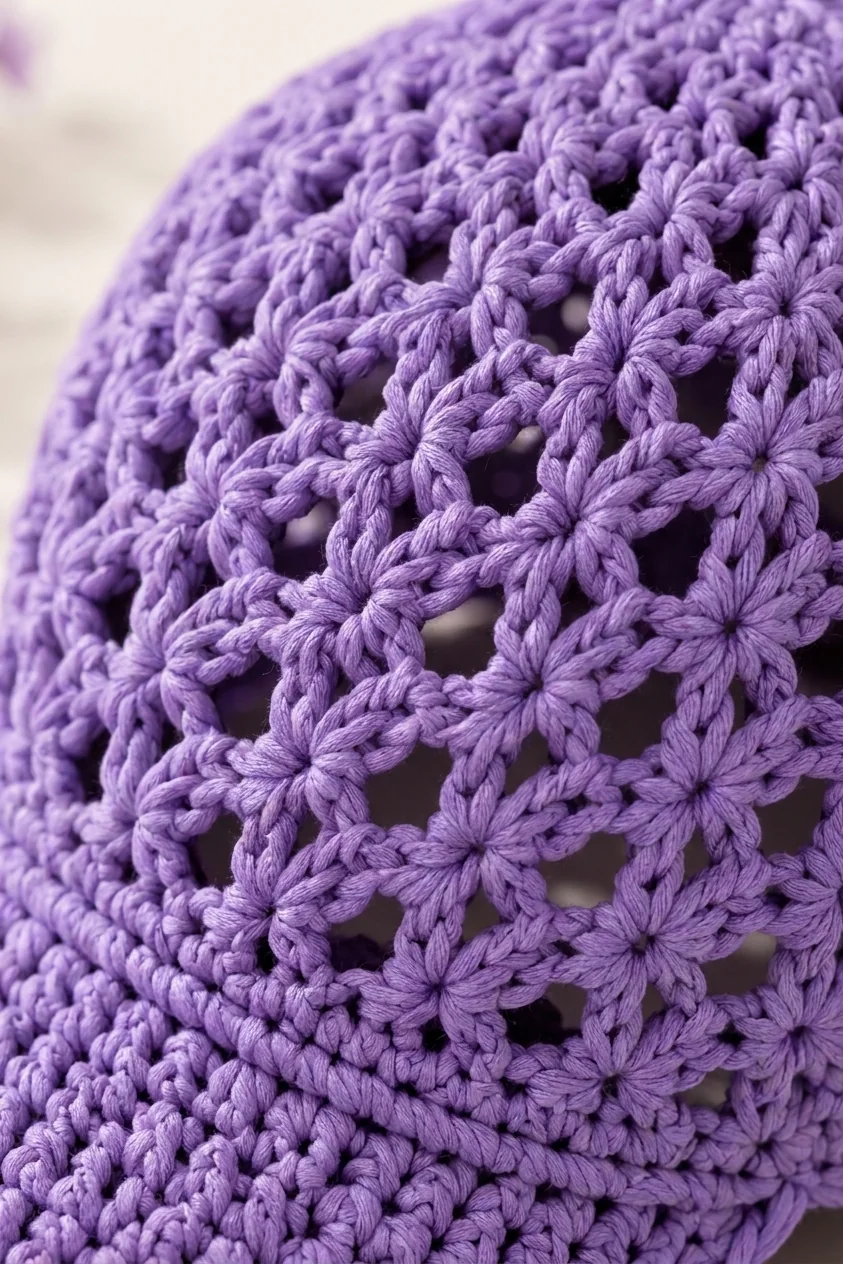
The crown sides alternate shell placement: one round positions shells over prior chain-one spaces, and the next centers them over previous shells. The offset avoids rigid vertical columns and creates a repeating mesh.
Sixteen shells remain constant while the dome grows to depth. Counting units at the join keeps the texture balanced.
shell-stitch crochet pattern planning note
Record color, yarn, blocked gauge, recipient measurements, and any modification before cutting yarn. Keep your changes separate from the original pattern instructions.
Pause at this point and examine detail 2: brick-style shell mesh in natural light. Count the repeat, compare both sides, and note the active size before moving on. A removable marker and a one-line project note prevent small orientation errors from becoming several rounds of rework.
The supporting visual is an independently generated instructional reference based on the supplied finished-cap image. It is not a cropped pattern page and should not replace the official written instructions. Your yarn, tension, and blocking method may produce a slightly different texture while still meeting the verified measurements.
Detail 3: One Controlled 8-to-16 Increase
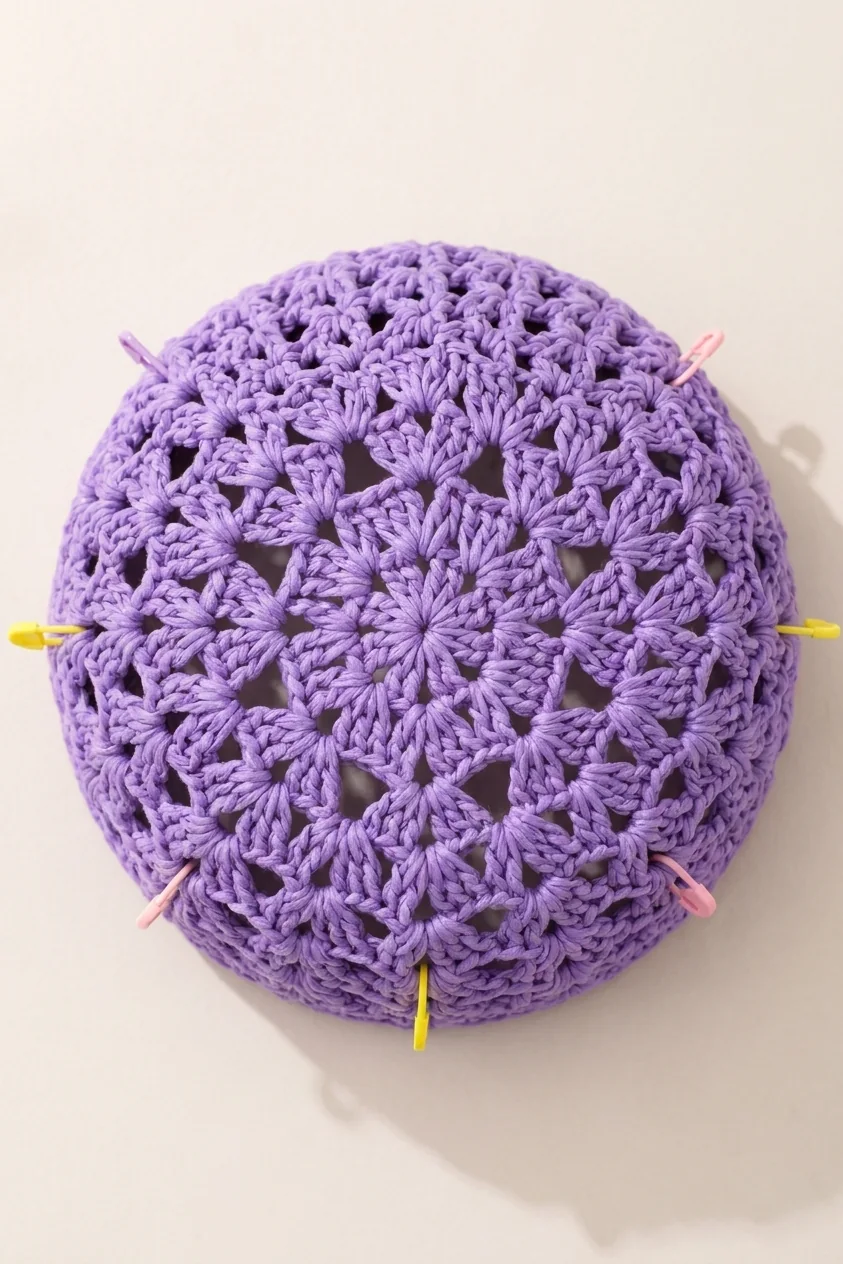
Instead of increasing across many later rounds, the design doubles from eight to sixteen shells in Round 3. Marking all eight increase points makes the change visible and countable.
After the increase, the maker can focus on maintaining a stable repeat while measuring depth. Physical shell gauge still requires confirmation.
shell-stitch crochet pattern planning note
Record color, yarn, blocked gauge, recipient measurements, and any modification before cutting yarn. Keep your changes separate from the original pattern instructions.
Pause at this point and examine detail 3: one controlled 8-to-16 increase in natural light. Count the repeat, compare both sides, and note the active size before moving on. A removable marker and a one-line project note prevent small orientation errors from becoming several rounds of rework.
The supporting visual is an independently generated instructional reference based on the supplied finished-cap image. It is not a cropped pattern page and should not replace the official written instructions. Your yarn, tension, and blocking method may produce a slightly different texture while still meeting the verified measurements.
Detail 4: A Direct Shell-to-Single-Crochet Transition
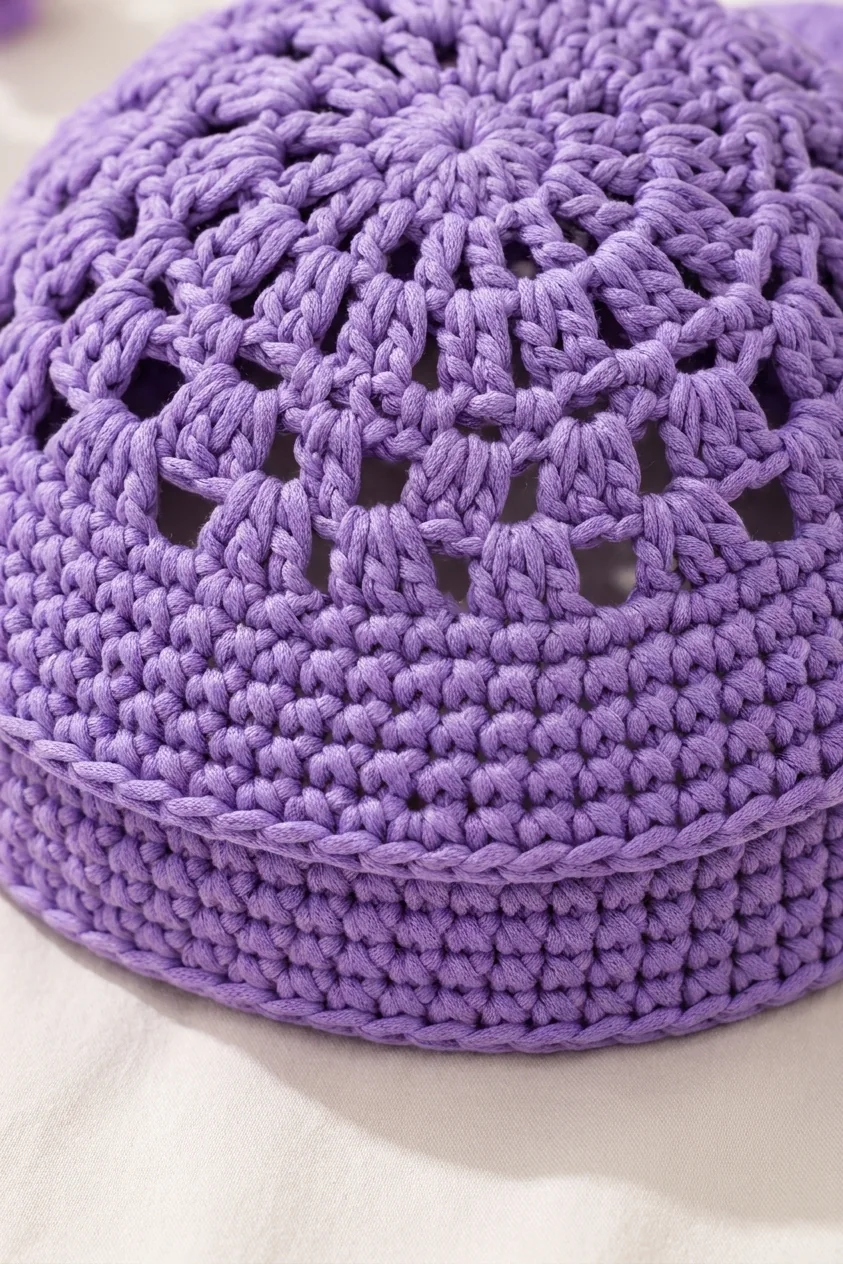
Sixteen shell units convert directly into 112 stitches for S/M or 120 for L/XL, followed by two plain band rounds. The dense section stabilizes the open crown and creates a foundation for the opening and brim.
The different distribution—seven stitches per shell for S/M and alternating eight/seven for L/XL—shows why size-specific counts should not be improvised.
shell-stitch crochet pattern planning note
Record color, yarn, blocked gauge, recipient measurements, and any modification before cutting yarn. Keep your changes separate from the original pattern instructions.
Pause at this point and examine detail 4: a direct shell-to-single-crochet transition in natural light. Count the repeat, compare both sides, and note the active size before moving on. A removable marker and a one-line project note prevent small orientation errors from becoming several rounds of rework.
The supporting visual is an independently generated instructional reference based on the supplied finished-cap image. It is not a cropped pattern page and should not replace the official written instructions. Your yarn, tension, and blocking method may produce a slightly different texture while still meeting the verified measurements.
Detail 5: Counted Front and Back Placement
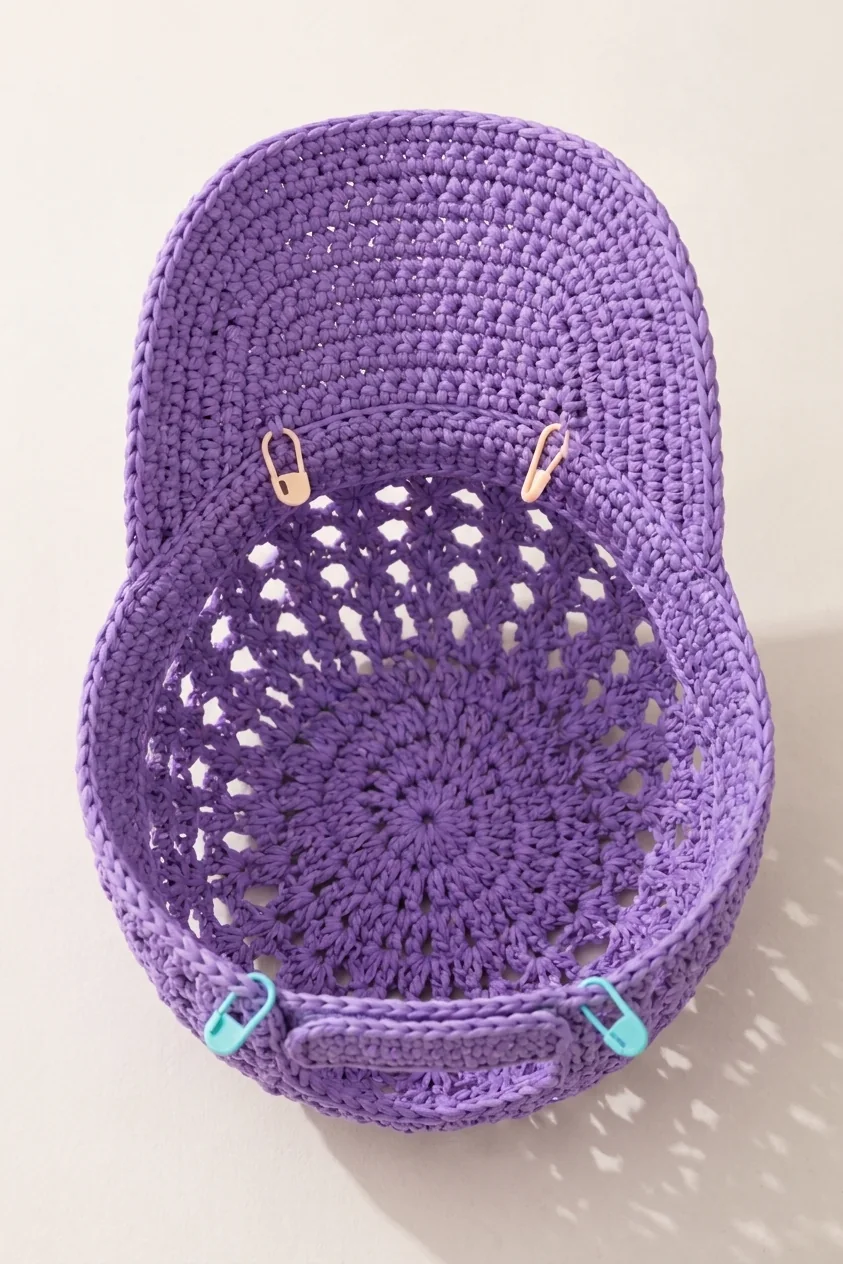
The pattern marks 34 consecutive front stitches for the brim and sixteen centered back stitches to leave unworked. Placement comes from counting, not visual guessing.
This makes the brim and opening relate to the same center line. Markers should be checked from both front and back before flat rows begin.
shell-stitch crochet pattern planning note
Record color, yarn, blocked gauge, recipient measurements, and any modification before cutting yarn. Keep your changes separate from the original pattern instructions.
Pause at this point and examine detail 5: counted front and back placement in natural light. Count the repeat, compare both sides, and note the active size before moving on. A removable marker and a one-line project note prevent small orientation errors from becoming several rounds of rework.
The supporting visual is an independently generated instructional reference based on the supplied finished-cap image. It is not a cropped pattern page and should not replace the official written instructions. Your yarn, tension, and blocking method may produce a slightly different texture while still meeting the verified measurements.
Detail 6: A Seven-Row Curved Brim
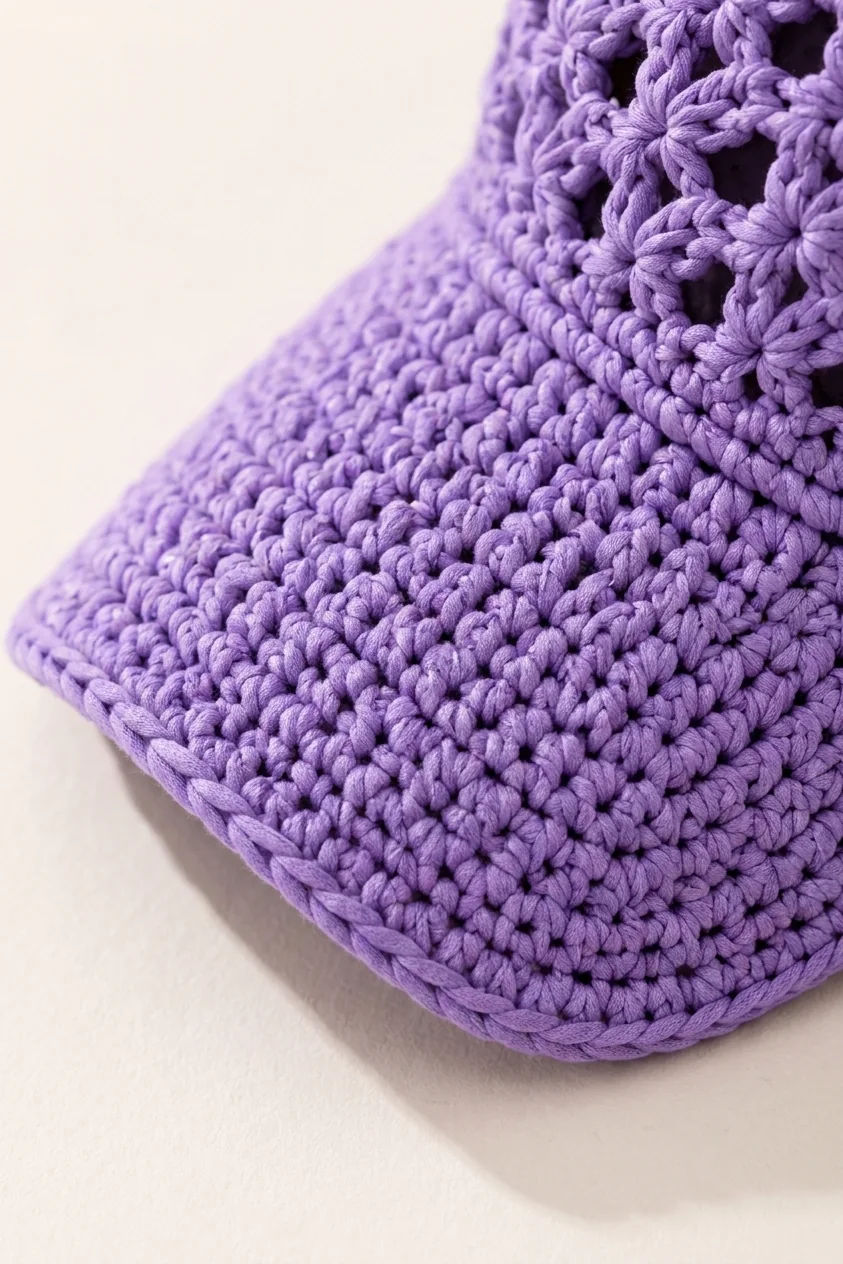
Increases at both edges on Rows 2, 4, and 6 grow the brim from 34 to 40 stitches. Even rows between increases control the curve, while the perimeter round finishes both sides and the front edge.
The design also supports several stiffness options. Compare them carefully before choosing an insert.
shell-stitch crochet pattern planning note
Record color, yarn, blocked gauge, recipient measurements, and any modification before cutting yarn. Keep your changes separate from the original pattern instructions.
Pause at this point and examine detail 6: a seven-row curved brim in natural light. Count the repeat, compare both sides, and note the active size before moving on. A removable marker and a one-line project note prevent small orientation errors from becoming several rounds of rework.
The supporting visual is an independently generated instructional reference based on the supplied finished-cap image. It is not a cropped pattern page and should not replace the official written instructions. Your yarn, tension, and blocking method may produce a slightly different texture while still meeting the verified measurements.
Detail 7: A Button-Back Opening and Strap
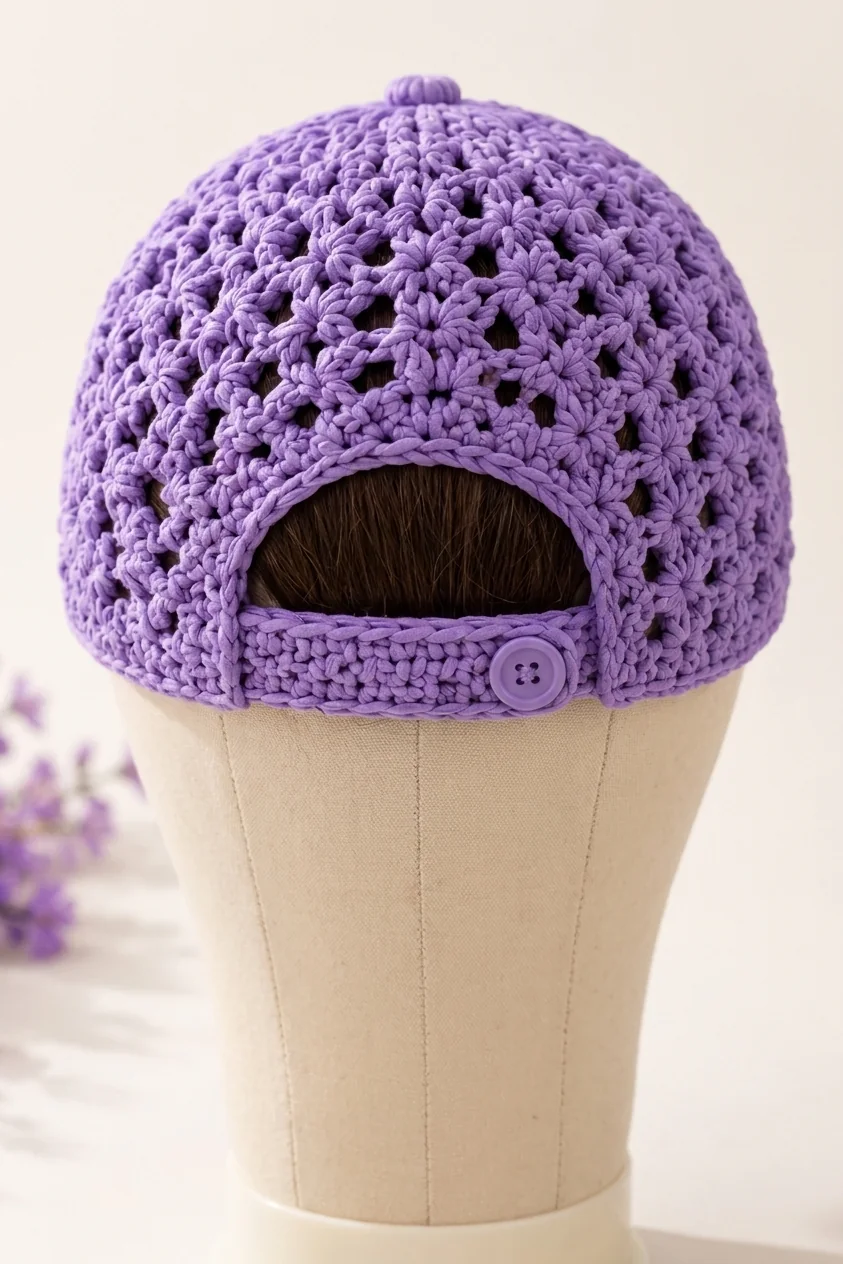
Six flat rows leave an opening intended to measure 8 × 6 cm, and a nine-stitch strap adds a chain-two buttonhole. The aligned 15 mm button closes the upper edge while leaving room for a ponytail or low bun.
This feature is part of the adult design, not evidence of universal adjustability. Fit still depends on blocked circumference and opening dimensions.
shell-stitch crochet pattern planning note
Record color, yarn, blocked gauge, recipient measurements, and any modification before cutting yarn. Keep your changes separate from the original pattern instructions.
Pause at this point and examine detail 7: a button-back opening and strap in natural light. Count the repeat, compare both sides, and note the active size before moving on. A removable marker and a one-line project note prevent small orientation errors from becoming several rounds of rework.
The supporting visual is an independently generated instructional reference based on the supplied finished-cap image. It is not a cropped pattern page and should not replace the official written instructions. Your yarn, tension, and blocking method may produce a slightly different texture while still meeting the verified measurements.
Detail 8: A Covered Crown Button
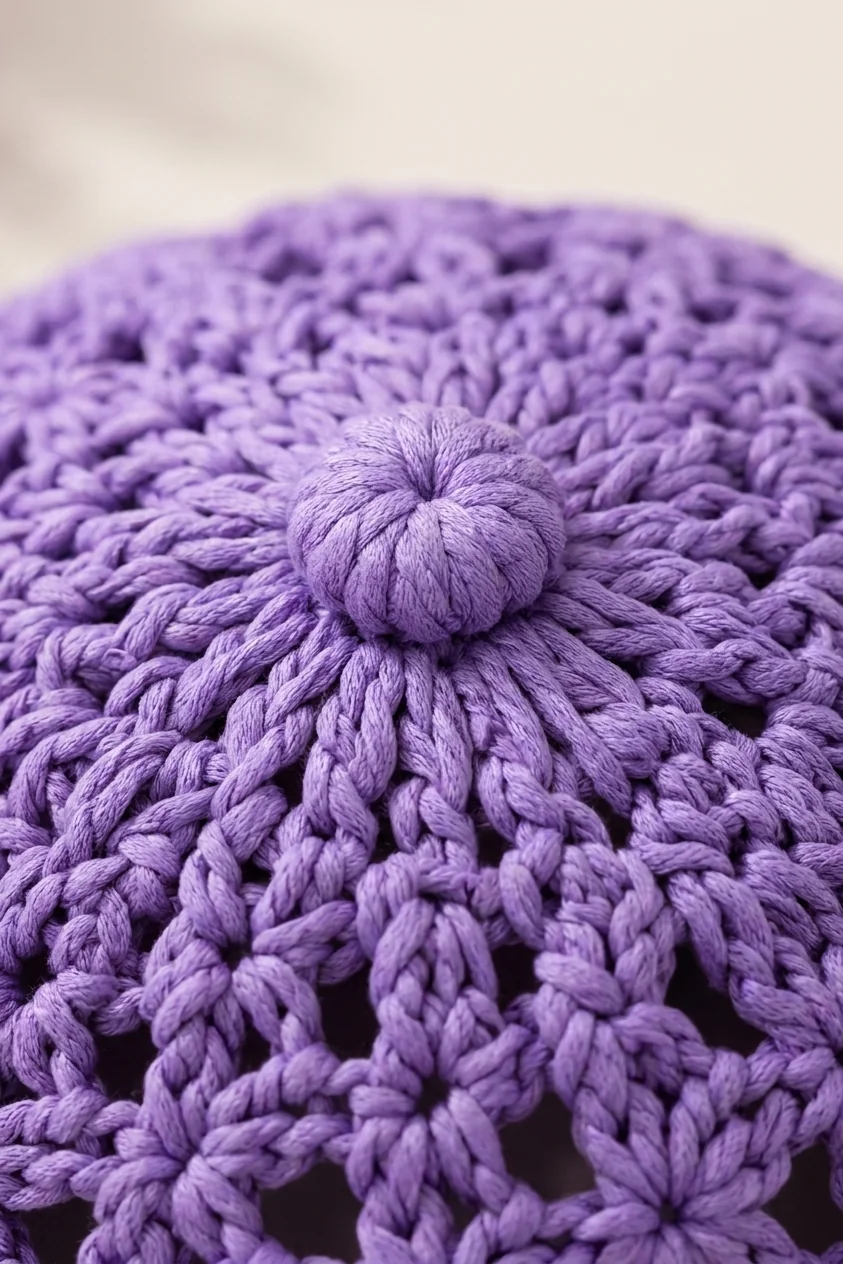
The four-round button grows from six to twelve stitches, works one even round, then decreases back toward six. A small amount of matching yarn scrap fills the shape.
Sewn over the magic-ring closure, it turns a structural center into a deliberate finishing point. It should be attached firmly and inspected with the same care as the back button.
shell-stitch crochet pattern planning note
Record color, yarn, blocked gauge, recipient measurements, and any modification before cutting yarn. Keep your changes separate from the original pattern instructions.
Pause at this point and examine detail 8: a covered crown button in natural light. Count the repeat, compare both sides, and note the active size before moving on. A removable marker and a one-line project note prevent small orientation errors from becoming several rounds of rework.
The supporting visual is an independently generated instructional reference based on the supplied finished-cap image. It is not a cropped pattern page and should not replace the official written instructions. Your yarn, tension, and blocking method may produce a slightly different texture while still meeting the verified measurements.
Practical Notes
Once the structure is complete, explore five ways to style a lavender crochet sun cap. For brim materials and sizing, review the six practical DK-cotton checks. Pattern quality should still be confirmed with real samples in both adult sizes.
Pause at this point and examine the final plan in natural light. Count the repeat, compare both sides, and note the active size before moving on. A removable marker and a one-line project note prevent small orientation errors from becoming several rounds of rework.
The supporting visual is an independently generated instructional reference based on the supplied finished-cap image. It is not a cropped pattern page and should not replace the official written instructions. Your yarn, tension, and blocking method may produce a slightly different texture while still meeting the verified measurements.
Frequently Asked Questions
Can I skip the covered button?
Yes, as a personal visual modification, provided the crown center is securely closed and all tails are woven.
Can the brim be a contrasting color?
Yes after confirming compatible yarn weight, gauge, care, and colorfastness.
Can I lengthen the brim?
That changes leverage, stiffness, yarn use, and proportion. Swatch and physically test rather than adding rows blindly.
Can the button-back become elastic?
That construction is not supplied. Assess fit, attachment, durability, and safety independently.
Will the mesh hold shape without blocking?
Blocking is part of the supplied finishing sequence. Final behavior depends on yarn, gauge, and use.
Final Checklist
- ✓ Magic ring closes cleanly.
- ✓ Shell count remains sixteen through crown sides.
- ✓ Transition band lies flat.
- ✓ Front and back sections share a center line.
- ✓ Brim increases are balanced.
- ✓ Buttons and optional insert are secure.
- ✓ Finished measurements are verified after blocking.
Ready to make the cap?
The listing contains the complete illustrated digital pattern, size-specific stitch counts, and construction sequence. It is a pattern, not a finished hat.




