

My Crochet Universe · Structured handbag series
Crochet Crescent Bag Guide: 9 Clear Stages From Oval Base to Handle
A polished, image-rich guide for a modern handmade bag.
A bag is not just a rectangle with straps
The crochet crescent bag guide starts with tension that is firm enough to support the final handle.
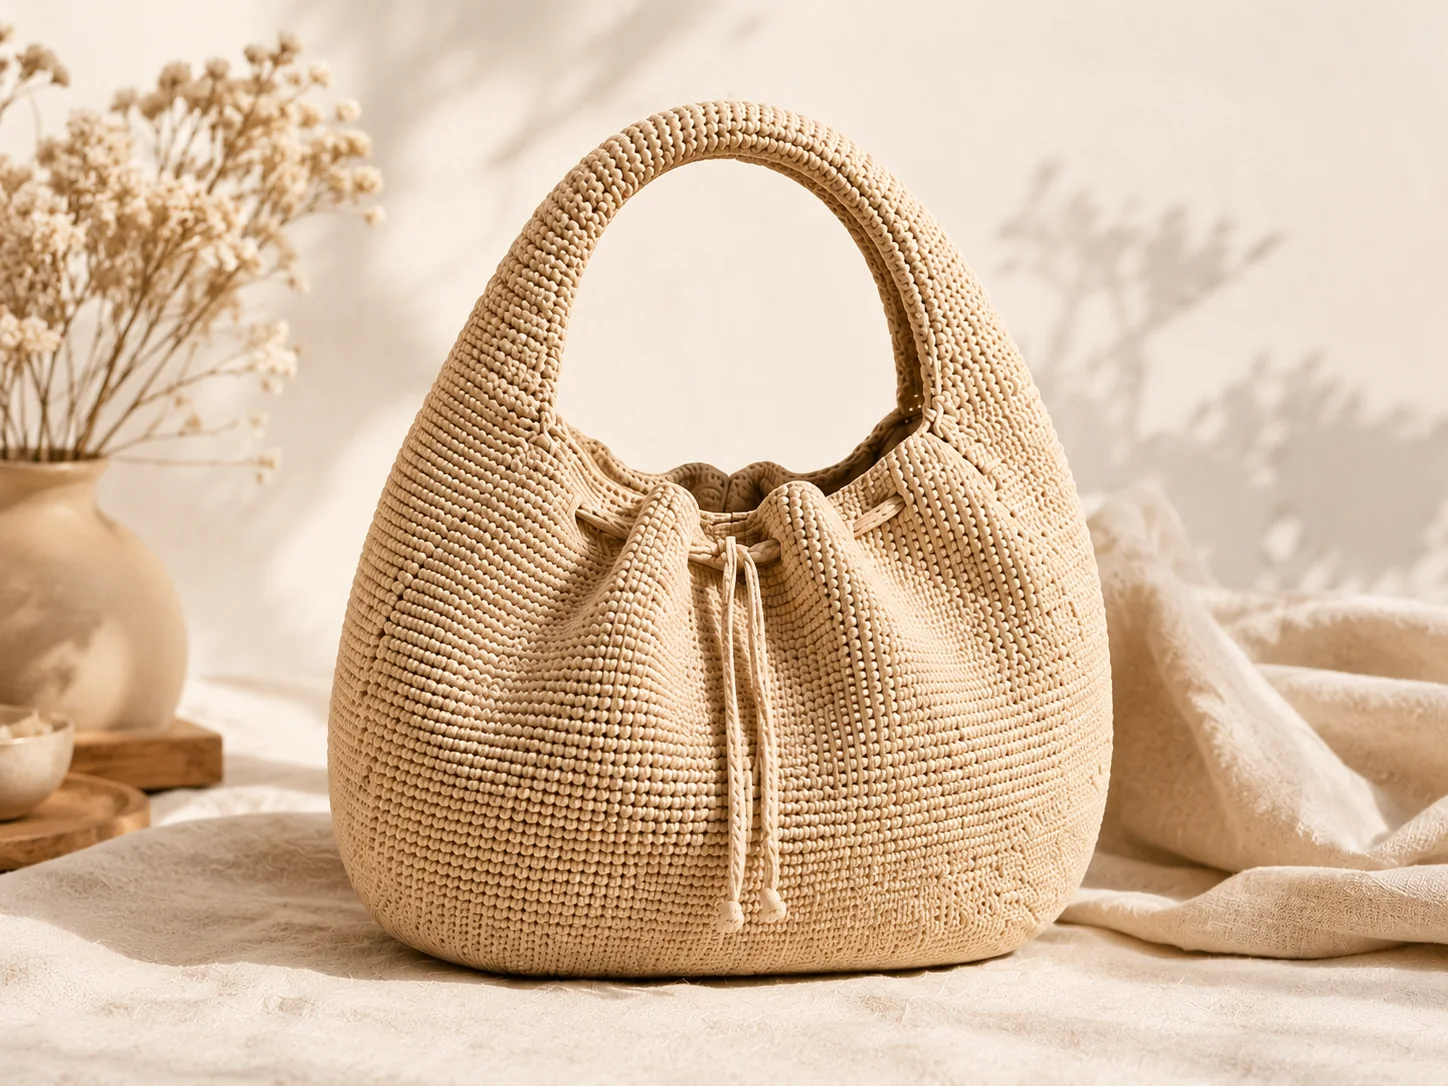
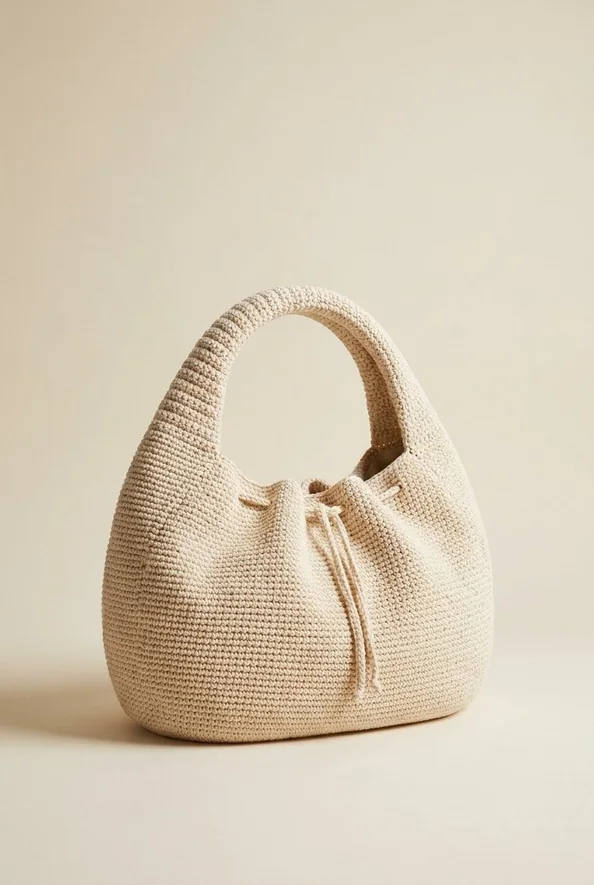
The finished crescent bag looks simple from across the room. That is usually the sign of a design with a lot happening underneath.
Its shape begins as a flat oval. Then the fabric turns upward. The body grows quietly in dense rounds. Eyelets appear for the drawstring. The sides narrow, the top opening dips, and eventually the same crochet fabric becomes a padded arch handle.
If you have ever looked at a structured crochet bag and thought, “I understand the stitches, but I do not understand how the shape happens,” this is the useful overview. You will see the logic of the build without getting the full round-by-round recipe away. The exact stitch counts, measurements, markers, and photo checkpoints remain in the complete paid PDF pattern.
- Before you begin: why tension changes everything
- Stage 1: Set the gauge and foundation chain
- Stage 2: Build the oval base
- Stage 3: Stabilize and turn the sides
- Stage 4: Grow the structured body
- Stage 5: Add drawstring eyelets
- Stage 6: Mark the opening and handle zones
- Stage 7: Taper the side panels
- Stage 8: Build the padded circular handle
- Stage 9: Add the drawstring and shape the bag
- FAQ
Before you begin: why tension changes everything
Accurate markers keep the crochet crescent bag oval and side shaping symmetrical.
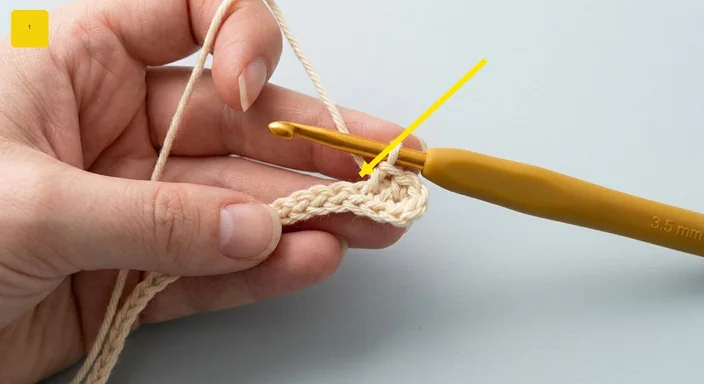
This bag is worked in dense single crochet, mainly in continuous rounds. That sounds simple, but dense fabric is the entire reason the finished handbag can hold a sculptural shape.
Use cotton yarn that gives you a firm, closed surface. Keep a locking stitch marker in the first stitch of each round and move it consistently. If your swatch feels loose, use a smaller hook before you start. A bag is very patient about showing you tension problems later, but it is much nicer to solve them now.
If you have not chosen yarn yet, start with five essential tests for a structured crochet bag.
Stage 1: Set the gauge and foundation chain
The crochet crescent bag body stays stable when every plain round keeps the same count.
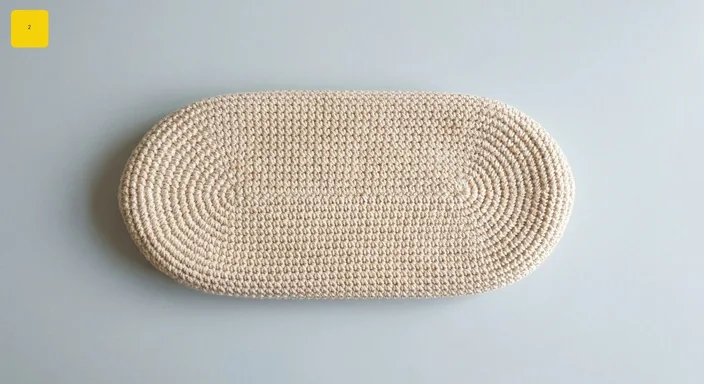
The project begins with a foundation chain that becomes the long center of the oval base. It is a small beginning for a bag that eventually becomes much larger, which is part of the charm.
At this stage, do not chase speed. Check the chain width and make sure it is even. A tight, neat foundation makes the next stages easier because the oval curves have something stable to grow from.
Stage 2: Build the oval base
Eyelet spacing controls how the crochet crescent bag guide gathers at the top.
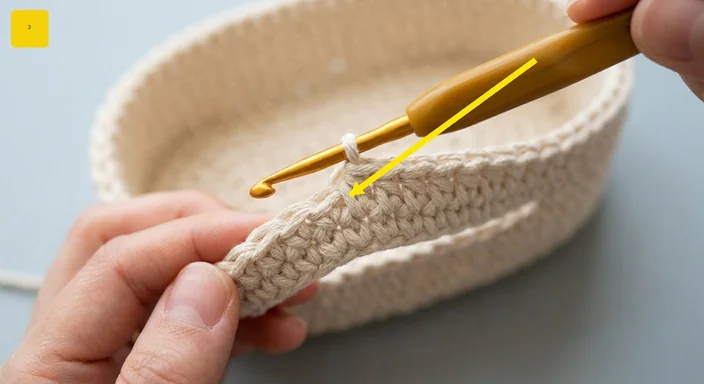
The base is created by crocheting along one side of the foundation chain, working around the first curved end, then turning to work along the opposite free loops.
This is the moment when the piece stops looking like a chain and starts looking like a bag base. In the following rounds, increases are distributed around the curves while the long sides stay relatively straight. The goal is a flat oval — not a bowl, not a ruffle.
Lay it on a table after each expansion stage. If it cups, it needs more room on the curves. If it ripples, it may have too much. The exact stitch placement is in the PDF, but your eyes can still tell you whether the fabric is behaving.
Stage 3: Stabilize and turn the sides
Balanced decreases create the signature crochet crescent bag guide side taper.
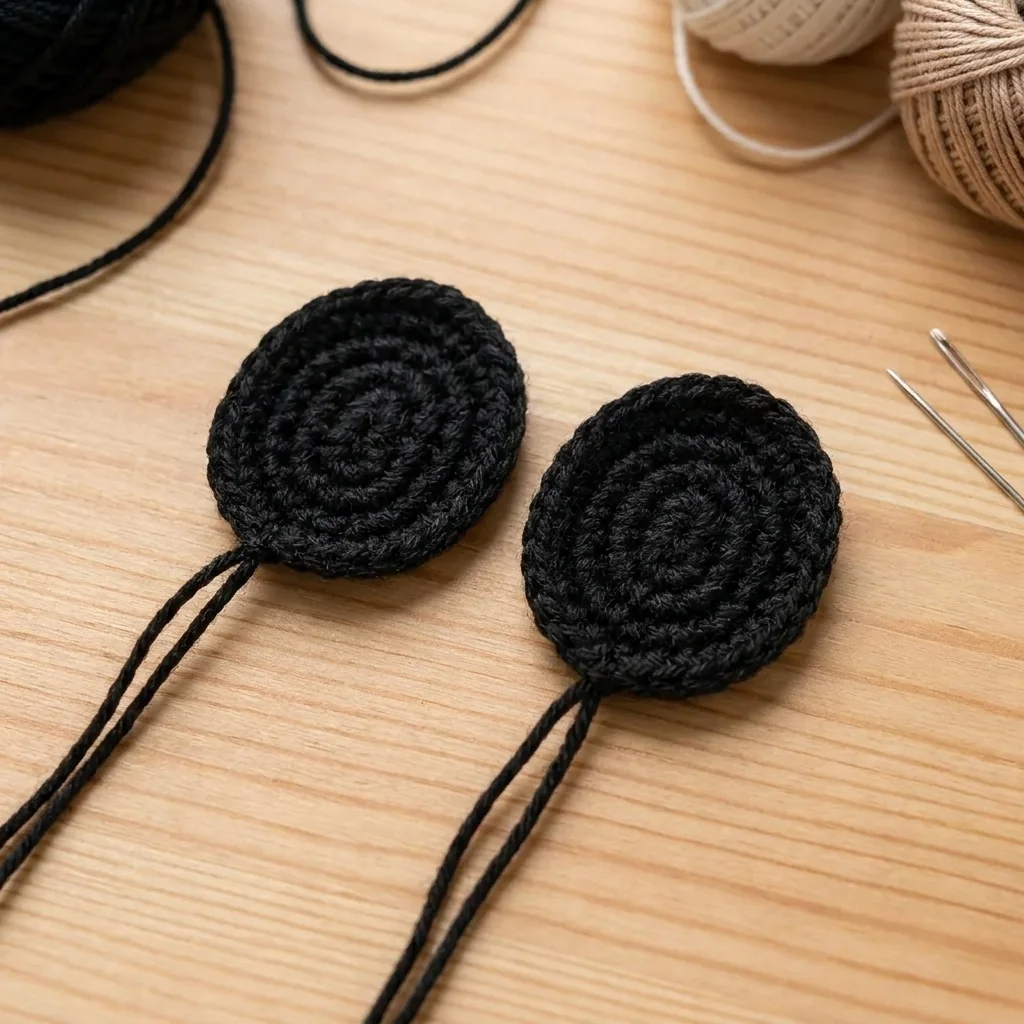
Once the oval is the correct size, one plain round settles the base. Then comes the turning round, worked through the back loops only.
This is one of those small technical moves that changes everything. The back-loop ridge creates a clean edge between the base and body and encourages the fabric to rise instead of continuing outward.
It is the crochet equivalent of telling the bag, “We are going up now.”
Stage 4: Grow the structured body
The padded arch gives the crochet crescent bag its recognizable silhouette.
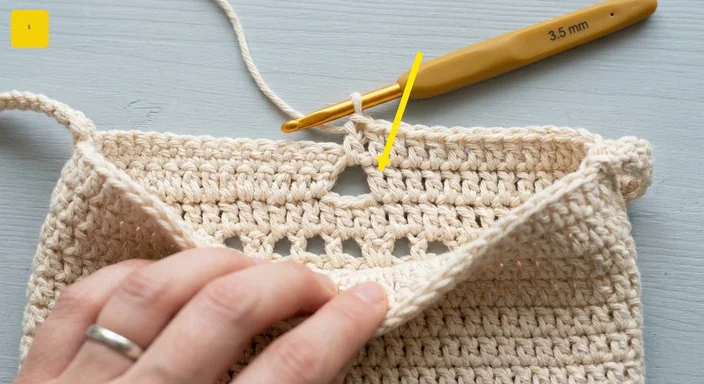
The main body is built in steady rounds with no dramatic shaping. This is where the bag gains height, volume, and confidence.
Check it occasionally rather than crocheting blindly for hours. Measure from the base ridge. Hold the work upright. Make sure the sides are not leaning or twisting. The body should feel roomy but controlled.
This stage can feel repetitive, but it is also calming. Put on a podcast, keep your marker moving, and let the structure build one round at a time.
Stage 5: Add drawstring eyelets
Careful blocking completes the crochet crescent bag without flattening its texture.
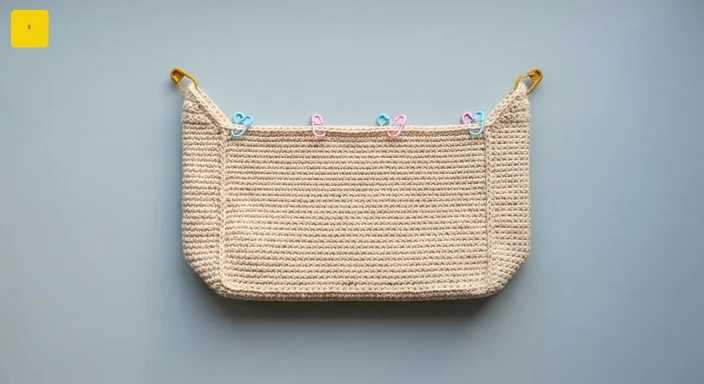
Near the upper body, a row of evenly spaced eyelets creates the path for the drawstring. This is the functional detail that lets the opening gather while keeping the crescent silhouette soft.
Mark the front and back center eyelets. Those markers help later when you flatten the bag and divide the opening from the handle sections. Small markers now prevent big guesswork later.
Stage 6: Mark the opening and handle zones
Final measurements confirm that the crochet crescent bag matches the intended proportion.
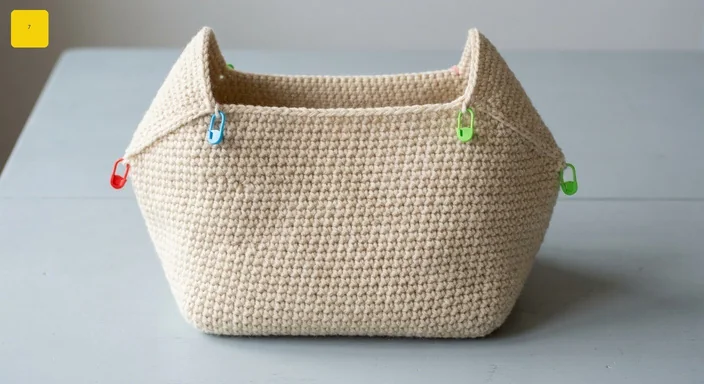
This is the part that makes the design feel clever. Lay the bag flat, line up the front and back centers, and divide the top into zones: front opening, back opening, and two side sections that will become the handle.
Nothing dramatic happens to the stitch count immediately. You are simply teaching the fabric where it is about to change direction.
Take your time here. Symmetry is the whole game. If the zones are not centered, the handle will show it.
Stage 7: Taper the side panels
The crochet crescent bag starts with tension that is firm enough to support the final handle.
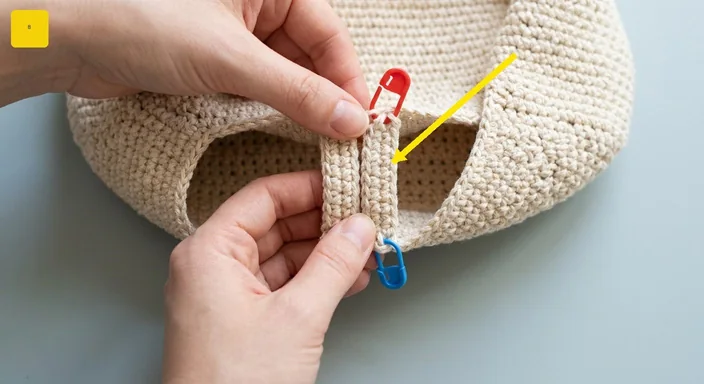
The shaping begins at the side sections. Decreases narrow those two panels while the front and back opening areas stay more open. Gradually, the sides pinch inward and the top edge starts to develop its distinctive crescent dip.
This is the stage where you should pause often, flatten the bag, and look at it from above. The two sides should mirror each other. If one side gets ahead, fix it now rather than hoping the handle will hide it.
For an honest checklist of what to inspect while finishing, see seven proven crochet bag finishing details.
Stage 8: Build the padded circular handle
Accurate markers keep the crochet crescent bag oval and side shaping symmetrical.
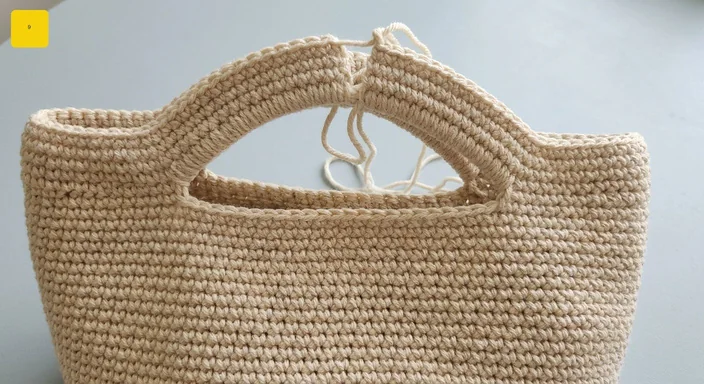
Eventually, the tapered side sections narrow to small anchor points. From there, the handle is worked as a thick, continuous strap that rises, curves inward, and meets above the opening.
This is not a separate strap sewn onto the bag. It grows from the bag itself, which is why the final silhouette feels so clean.
As the strap grows, roll it gently between your fingers. This helps the fabric become rounded and evenly padded. When the two sides meet, the handle is joined and the seam is woven in carefully so the arch stays smooth.
Stage 9: Add the drawstring and shape the bag
The crochet crescent bag body stays stable when every plain round keeps the same count.
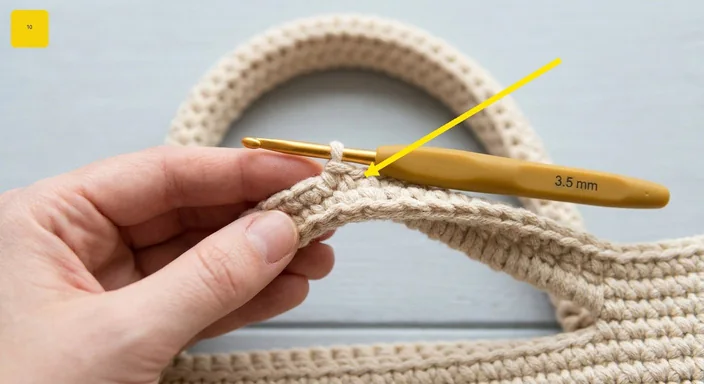
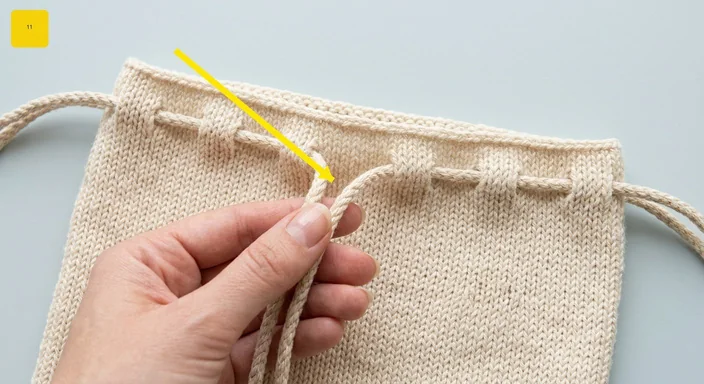
The final stage is the part that turns construction into an accessory. A long crochet cord is threaded through the eyelets, leaving the ends balanced at the front. Pulling the cords gathers the opening softly under the handle.
Then shape the bag. Fill it with towels or tissue, lightly steam it from a distance if needed, smooth the base, and check the handle arch. You can add an optional base insert for extra stability.
Once it is dry and the ends are hidden, the bag is ready to carry.
And once you are carrying it, you may want to know what actually fits inside this crochet crescent shape or five smart ways to style a neutral handmade bag.
Helpful answers
Frequently asked questions
Is this crochet crescent bag suitable for beginners?
It is best for a confident beginner or intermediate crocheter who is comfortable with single crochet, increases, decreases, continuous rounds, and careful stitch counting.
Why is the back-loop-only round important?
It creates a ridge that defines the base and helps the body turn upward, giving the bag a clearer structured shape.
Can I make the bag taller?
You can add plain body rounds before the upper shaping, but this may change the final proportions. The PDF gives the intended measurements and sequence.
Do I need a base insert?
No. It is optional, but useful if you want extra support at the base or plan to carry slightly heavier essentials.
How do I keep the handle symmetrical?
Use markers carefully, flatten the bag frequently, compare both sides during the taper, and shape the handle with your hands as it grows.
Does the drawstring fully secure the bag?
It gathers the opening well for everyday use, but it is not the same as a zipper. Use an inner pouch for very small valuables if needed.
The full pattern is there for the moments where guessing is not fun
Eyelet spacing controls how the crochet crescent bag gathers at the top.
You now know how the bag moves from chain to crescent: oval base, turning ridge, structured body, eyelets, marked zones, taper, padded handle, drawstring, and shaping.
If you want the exact rounds, stitch counts, measurements, marker placement, and photo checkpoints for every stage, the complete Structured Crochet Crescent Handbag PDF pattern is available in my Etsy shop. Get the complete digital pattern.
The shape looks effortless because the construction is not.
Complete technical round reference
Balanced decreases create the signature crochet crescent bag side taper.
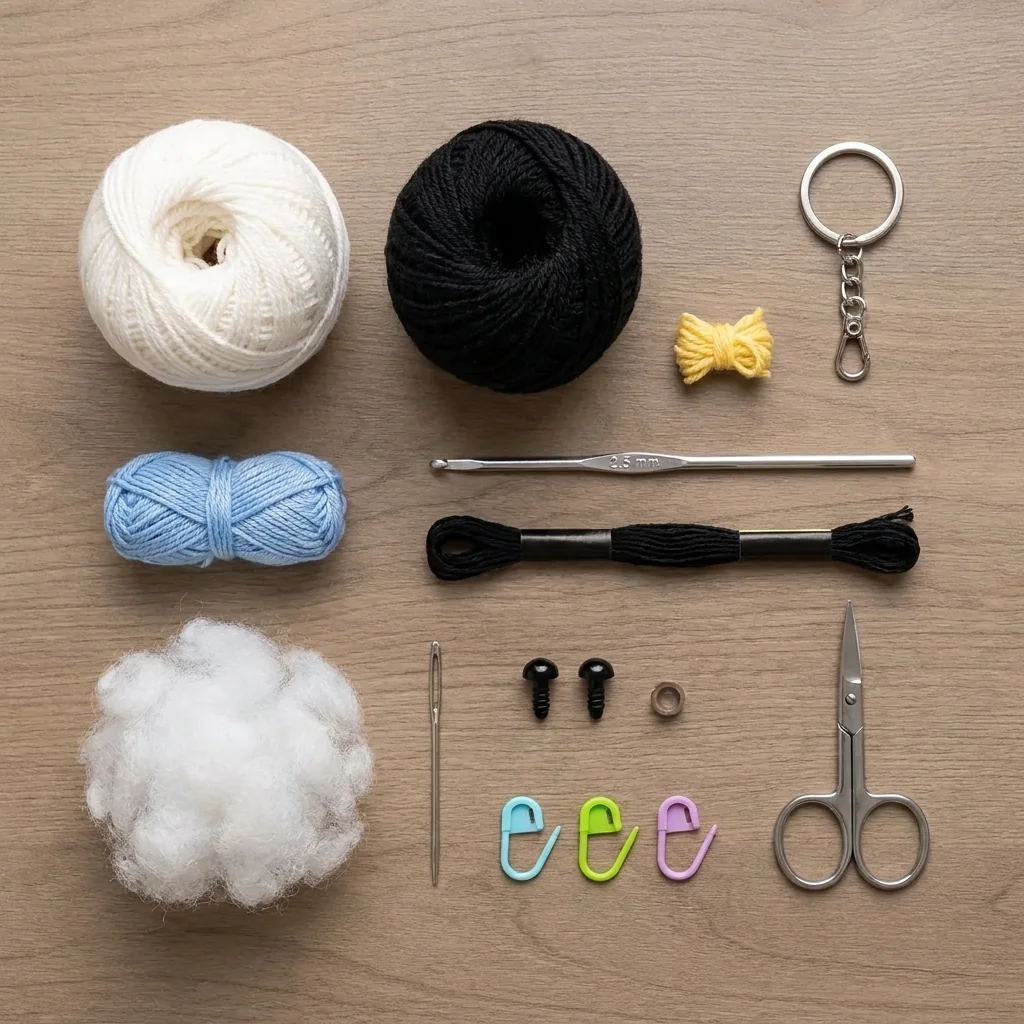
Use DK/category 3, 100% cotton yarn (approximately 350–450 g or 700–900 m), a 3.5 mm hook, yarn and tapestry needles, 4–8 locking markers, and optional plastic mesh or firm felt. Work tightly in continuous rounds of US single crochet unless a step says otherwise. Move the first-stitch marker after every round.
Stage 1: Gauge and foundation
The padded arch gives the crochet crescent bag its recognizable silhouette.
Use tight, even tension so the fabric is firm. Drop to a 3.25 mm hook if gaps appear. Chain 21; the chain should measure about 12–13 cm.
Stage 2: Form and expand the oval base
Careful blocking completes the crochet crescent bag without flattening its texture.
Round 1 — 40 stitches: Single crochet in the second chain from the hook and mark it as side A. Single crochet in the next 18 chains. Work 3 single crochet in the last chain, rotate, work along the unused loops with 18 single crochet, then work 2 single crochet in the first chain. Do not join.
Round 2 — 48 stitches: Single crochet 19 along the long side. Distribute 4 increases across the first rounded end, single crochet 19 across the opposite side, then distribute 4 increases across the second rounded end.
Round 3 — 56 stitches: Single crochet 19, place approximately 4 increases around the first curve, single crochet 19, and repeat approximately 4 increases around the second curve. Flatten and confirm 56 stitches.
Round 4 — 64 stitches: Single crochet 19, distribute approximately 4 increases around each curve, and work the opposite long side evenly. The base should measure approximately 16–17 cm and lie flat.
Stage 3: Stabilize and turn the body
Final measurements confirm that the crochet crescent bag matches the intended proportion.
Round 5 — 64 stitches: Single crochet through both loops with no increases. Round 6 — 64 stitches: Work back-loop-only single crochet around to create the crisp base ridge and turn the sides upward.
Stage 4: Build the structured body
The crochet crescent bag starts with tension that is firm enough to support the final handle.
Rounds 7–24 — 64 stitches each: Single crochet through both loops for 18 rounds. After Round 12, height from the base ridge should be about 7–8 cm. After Round 24, aim for 14–15 cm high and approximately 40–42 cm around the widest point. Add 2–4 plain rounds here only if a taller body is desired.
Stage 5: Create the drawstring eyelets
Accurate markers keep the crochet crescent bag oval and side shaping symmetrical.
Round 25 — 64 positions: Repeat “single crochet in the next 6 stitches, chain 1, skip 1 stitch” eight times, adjusting the final spacing slightly if needed. You should have 56 single crochet plus eight chain-1 spaces. Mark the center-front and center-back eyelets.
Round 26 — 64 stitches: Single crochet in every single crochet and work one single crochet into every chain-1 space. Do not work into skipped stitches. Rounds 27–32 — 64 stitches each: Work six plain rounds. Total body height should reach about 19–20 cm.
Stage 6: Mark the opening and handle zones
The crochet crescent bag body stays stable when every plain round keeps the same count.
Divide the round into four 16-stitch sections: front opening, first handle side, back opening, and second handle side. Center the front and back sections using the marked eyelets. Round 33 — 64 stitches: Work evenly and mark the eighth stitch of each handle-side section as a side peak.
Stage 7: Taper the side panels
Eyelet spacing controls how the crochet crescent bag gathers at the top.
Round 34 — 60 stitches: Reduce each 16-stitch handle side to 14 stitches with one decrease at each end; keep both 16-stitch opening sections unchanged. Round 35 — 56 stitches: Reduce each 14-stitch side to 12. Round 36 — 52 stitches: Reduce each 12-stitch side to 10. Round 37 — 48 stitches: Reduce each 10-stitch side to 8. Keep decreases symmetrical.
Round 38 — 48 stitches: Work evenly. Rounds 39–44 — 48 stitches each: Work six plain rounds while molding the two 8-stitch side segments upward. Height should be about 22–23 cm; optional extra plain rounds change the handle proportion.
Stage 8: Narrow and build the padded handle
Balanced decreases create the signature crochet crescent bag side taper.
Round 45 — 44 stitches: Reduce each 8-stitch handle segment to 6. Round 46 — 40 stitches: Reduce each 6-stitch segment to 4. Round 47 — 36 stitches: Work two decreases over each 4-stitch column to leave 2 stitches. Round 48 — 32 opening stitches plus two marked anchors: Decrease each 2-stitch column to one anchor stitch; mark both anchors.
To establish the strap loop, single crochet into the first anchor and 6–8 adjacent stitches, skip 4–6 stitches across the low opening, then single crochet into the second anchor and 6–8 adjacent stitches. Aim for approximately 18–20 stitches around the new handle loop. Work approximately 18–20 more rounds at the same count, rolling the strap between your fingers so it becomes round and firm, until the ends nearly meet with a 4–5 cm gap.
Join the handle by aligning opposite edges and working paired single-crochet decreases through both layers around the meeting edge. Fasten off with a 15–20 cm tail, close any small gap with a yarn needle, and bury the tail inside the padded handle.
Stage 9: Drawstring, finishing, and care
The padded arch gives the crochet crescent bag its recognizable silhouette.
Chain until the cord measures approximately 90–110 cm, then slip stitch back along the chain for a sturdy round cord. Thread it through the Round 25 eyelets so both ends emerge at the front. Weave in all ends. For light blocking, stuff the bag with towels, hover steam above the cotton, and shape by hand without pressing the texture flat. Add a fitted plastic-mesh or firm-felt base insert if desired.
Final measurements are approximately 16–18 cm at the base, 24–28 cm across the widest point, and 24–28 cm from base to handle top. Store the bag lightly stuffed, avoid overloading the handle, spot-clean or hand-wash in cool water, then reshape and dry while stuffed.
Count every crochet crescent bag round before moving the marker. Shape the crochet crescent bag gently after the handle seam is secure.




