

MY CROCHET UNIVERSE · CROCHET BAG GUIDE
Cat Bucket Bag Pattern PDF: Size Secrets for Perfect Bags
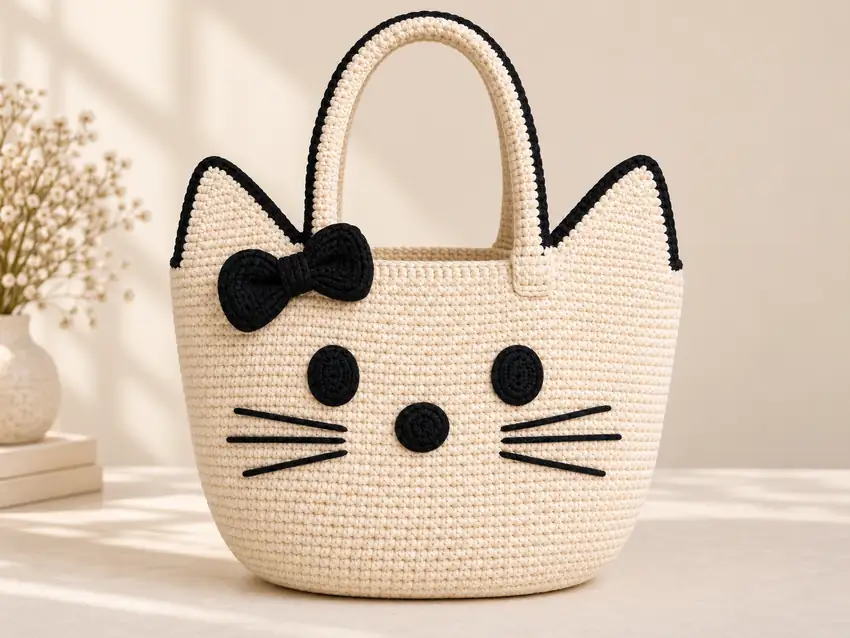
Ever spent weeks crocheting a bag only to realize it’s either too small for your essentials or awkwardly large? Yeah, been there—done that, got the frogged WIP to prove it. That’s why I’m excited to share the size secret pros never actually talk about openly. It’s not about fancy stitches or expensive yarn (though those help!). It’s about understanding the relationship between your stitch pattern, yarn choice, and finished dimensions. Today, we’re diving deep into creating the perfect cat-shaped bucket bag every single time, with or without a pattern.
In this guide, you’ll discover professional techniques for determining bag sizing before you even pick up your hook. We’ll cover stitch density, yarn weight considerations, and the magic formula for handles that don’t stretch out after one use. Whether you’re designing your own cat bucket bag or using our pattern PDF, these principles will elevate your work from “that’s nice” to “how did you do that?” Ready to transform your crochet bags from hit-or-miss to consistently perfect? Let’s get started!
Table of Contents
Understanding Bag Sizing Fundamentals
So what’s the secret that separates amateur bags from professional ones? It’s not a single technique but rather a combination of understanding three key elements: stitch pattern, yarn choice, and construction method. Most crocheters focus solely on the pattern instructions without considering how these elements interact. That’s why two people can follow the exact same pattern and end up with bags that fit completely differently. For a deeper yarn comparison, see our crochet bag yarn tests. If you are following the cat bucket bag pattern PDF, use its stated measurements as your starting point.
The first thing to understand is that crochet stitches aren’t standardized like knitting. A double crochet stitch in one person’s hands can be significantly different in size compared to another’s. This is why gauge swatches aren’t just suggestions—they’re essential. I’ve learned this the hard way after creating an adorable cat bucket bag that could barely hold my phone, let alone keys and wallet. The frustration of having to frog an entire project because of sizing issues? Real.
When working with a cat-shaped bucket bag pattern PDF, pay special attention to the measurements provided. Unlike rectangular or simple curved bags, cat bags often have structural elements that require precise sizing—like the ear sections and the curved base that gives it that distinctive bucket shape. These features compound any sizing errors, making them more pronounced than in simpler designs.
The Importance of Blocking
Blocking isn’t just for making your stitches look pretty; it’s a crucial step in achieving consistent sizing. Especially with bags, blocking helps even out tension and sets the stitches into their final form. I once skipped blocking on a cat bucket bag thinking it would “stretch into shape” as I used it. Big mistake. The bag ended up with one side significantly larger than the other, and it never lay flat. Now, I always block my bag pieces before assembly, and the difference is night and day.
The Stitch Density Secret
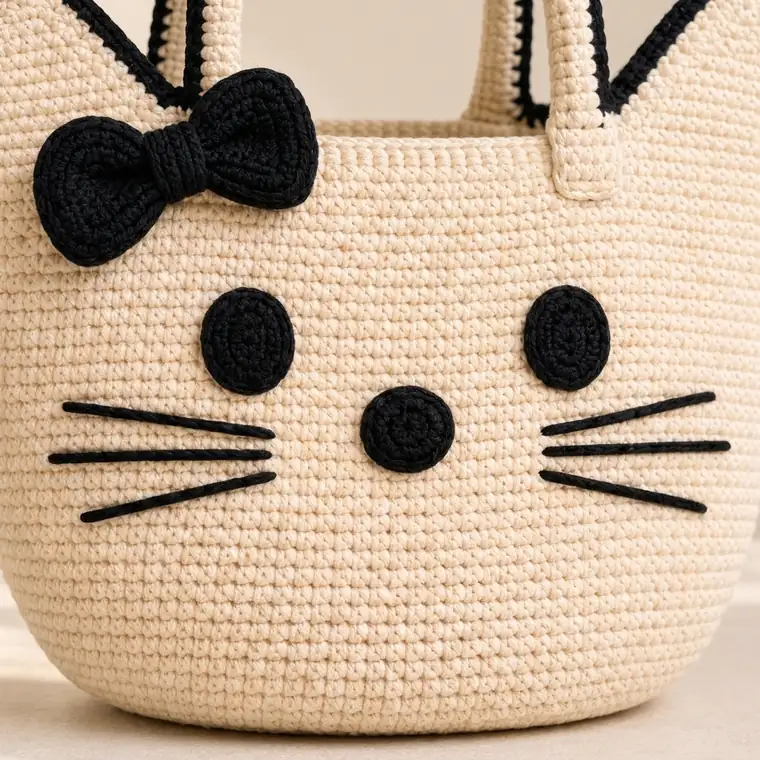
Here’s where the real magic happens—stitch density. This refers to how many stitches and rows you have per inch, and it’s the single most overlooked factor in bag sizing. Most patterns provide a gauge, but few explain how to adjust it for your personal tension. When I first started designing bags, I assumed that if I followed the gauge, my bag would be the right size. Wrong. My tension tends to be looser than average, so I need to go down a hook size or add extra stitches to compensate.
For cat-shaped bucket bags, stitch density affects both the structure and the drape. A dense stitch pattern creates a stiffer bag that holds its shape well, while a looser pattern results in a softer, more slouchy bag. The cat shape, with its structured base and defined ears, often benefits from a slightly denser stitch to maintain those features. Our cat bucket bag pattern PDF includes stitch density recommendations, but feel free to adjust based on your desired final look.
Calculating Your Personal Gauge
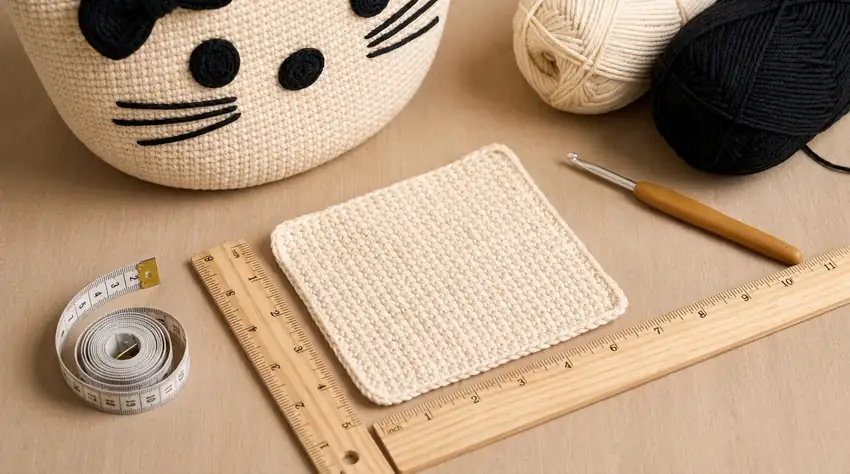
To find your personal gauge, create a swatch that’s at least 4×4 inches using the same yarn and hook size you plan for your bag. Measure how many stitches and rows you have in a 4-inch square, then divide by 4 to get your per-inch measurement. Compare this to the pattern’s gauge. If your stitch count is higher, you’re working tighter than the pattern; if lower, you’re looser. Adjust your hook size accordingly—smaller for tighter, larger for looser.
Pro tip: Don’t just measure horizontally! Check your row gauge too, especially for the height of your cat’s ears or the bag’s depth. I’ve had bags where the width was perfect but the height was way off because I neglected row gauge.
Yarn Weight and Your Bag’s Structure
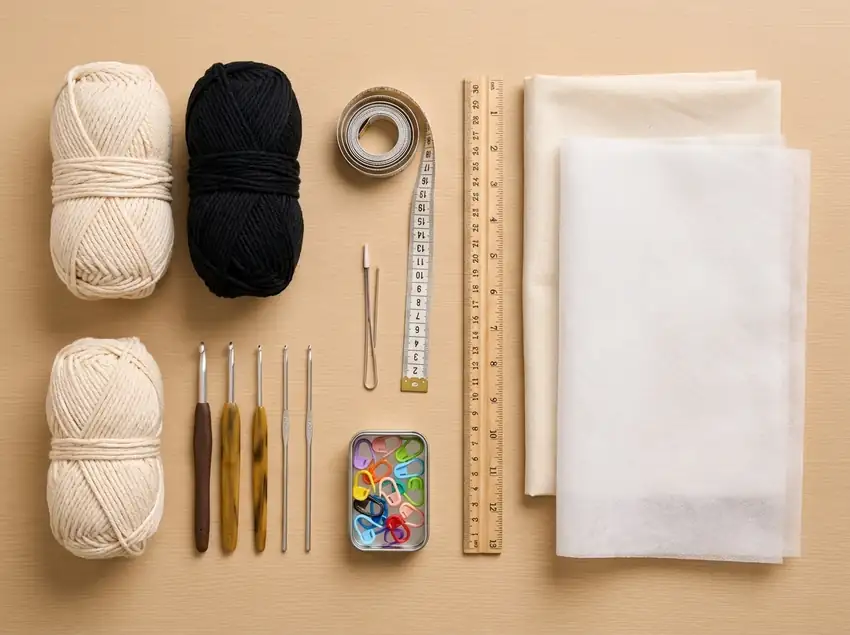
Yarn weight plays a huge role in how your finished bag behaves. A lightweight yarn like lace or fingering weight will create a delicate, slouchy bag even with a dense stitch pattern, while a bulky yarn will result in a stiff, structured bag regardless of your stitch density. For cat-shaped bucket bags that need to hold their shape, medium-weight yarns (worsted weight) are often the sweet spot—they provide enough body without being overly stiff. For weight categories, compare the Craft Yarn Council standard yarn weights.
I learned this lesson when I tried making a cat bucket bag with a lightweight cotton yarn. The pattern called for a size H hook, but even with a tight tension, the bag stretched out significantly once I put anything in it. The cute cat ears drooped, and the whole thing lost its shape. Switching to a medium-weight acrylic-blend yarn with the same hook size made all the difference—suddenly the bag had the structure I wanted.
Yarn Content Matters Too
Beyond weight, consider the fiber content. Natural fibers like cotton, linen, and wool tend to stretch more than synthetic fibers like acrylic and polyester. They also behave differently when blocked. For example, cotton will soften with washing and use, while acrylic tends to maintain its original shape longer. When designing our cat bucket bag pattern PDF, we tested multiple yarn types to find the best balance of durability, drape, and stitch definition.
If you want your cat bag to maintain its structure over time, especially if you plan to carry heavier items, consider using a yarn with some synthetic content or a wool blend that’s been treated for durability. I’ve had bags made with 100% cotton that started sagging after just a few weeks of regular use, while similar bags made with acrylic blends stayed crisp for years.
Handle Construction That Actually Works
Handles are where many bags fail—literally. There’s nothing more disappointing than having a beautiful cat bucket bag whose handles stretch out or break after minimal use. The secret to durable handles lies in both construction technique and reinforcement. Most beginners simply crochet a long strip for handles, but this leads to stretching and potential breakage.
For our cat bucket bag pattern PDF, we use a double-thick handle construction that’s both sturdy and comfortable. First, we crochet the handle with a slightly tighter tension than the bag itself. Then, we line it with interfacing or create a second handle layer that’s stitched together. This prevents stretching while maintaining flexibility. I learned this the hard way when I made a handle that stretched to twice its length after carrying my wallet for a single day—definitely not the look I was going for!
Handle Attachment Points
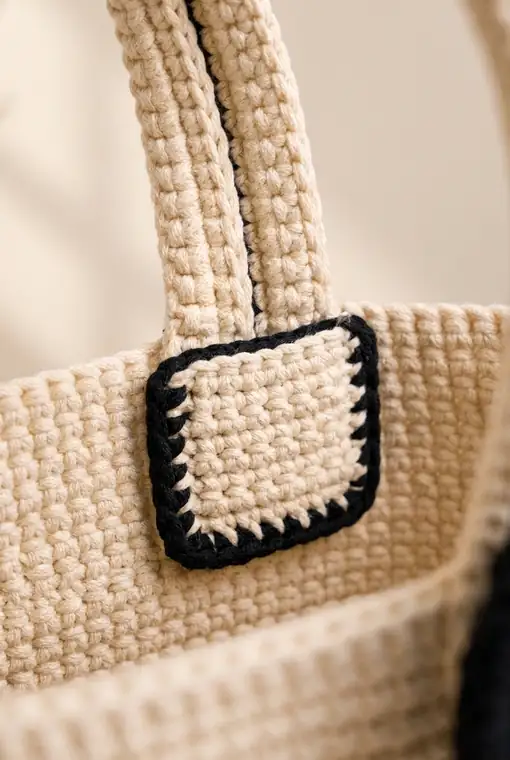
How you attach handles to the bag is just as important as the handle construction itself. Weak attachment points can lead to handles pulling out, ruining your bag’s structure and potentially causing you to drop everything. For cat bucket bags, the attachment points are often at the top of the “head” section, which needs to support the weight of the entire bag.
Reinforce these areas by adding extra stitches or creating small patches of dense stitching where handles attach. Our pattern includes specific instructions for creating these reinforcements, but the general principle is to distribute the weight across multiple stitches rather than concentrating it on one or two. I’ve added a small circle of single crochet stitches around each handle attachment point on every bag I’ve made since learning this technique—no more handle disasters!
Lining Techniques for Shape and Support
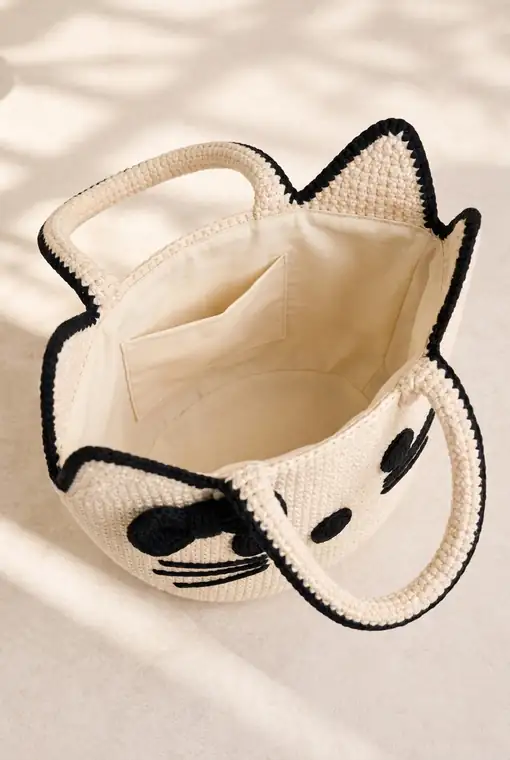
While you can certainly use a cat bucket bag without a lining, adding one makes a world of difference in both structure and functionality. A lining provides internal support, prevents your contents from snagging on the crochet stitches, and gives your bag a more finished, professional look. For our cat bucket bag pattern PDF, we include instructions for a fully lined interior with pockets.
The key to a good lining is ensuring it fits the bag perfectly. This means you’ll need to use the same gauge and dimensions as your outer crochet piece. I’ve made the mistake of guessing at lining size before, and the result was a bag that either bunched up inside or was so tight it couldn’t be used properly. Now, I always create my lining based on the exact measurements of my blocked crochet pieces.
Adding Structure with Interfacing
For bags that need to hold their shape, especially cat bucket bags with their distinctive form, consider adding interfacing between your outer fabric and lining. Medium-weight interfacing provides just enough structure to help your bag maintain its shape without making it stiff or uncomfortable. For the cat shape, which has curves and angles that need to stay defined, interfacing is almost a necessity.
I’ve experimented with different types of interfacing, and my favorite for crochet bags is Pellon SF101. It’s lightweight but provides excellent support, and it doesn’t add bulk that might distort your stitch pattern. Cut your interfacing to match your lining pieces, then baste or fuse it in place before assembling the lining. The difference in how your finished bag behaves is remarkable—suddenly those cat ears stand up proudly instead of flopping over!
Common Bag Sizing Mistakes and Fixes
Even experienced crocheters make sizing mistakes—trust me, I’ve frogged more bags than I can count. The key is recognizing these mistakes early and knowing how to fix them. Here are the most common bag sizing issues I’ve encountered and how to address them:
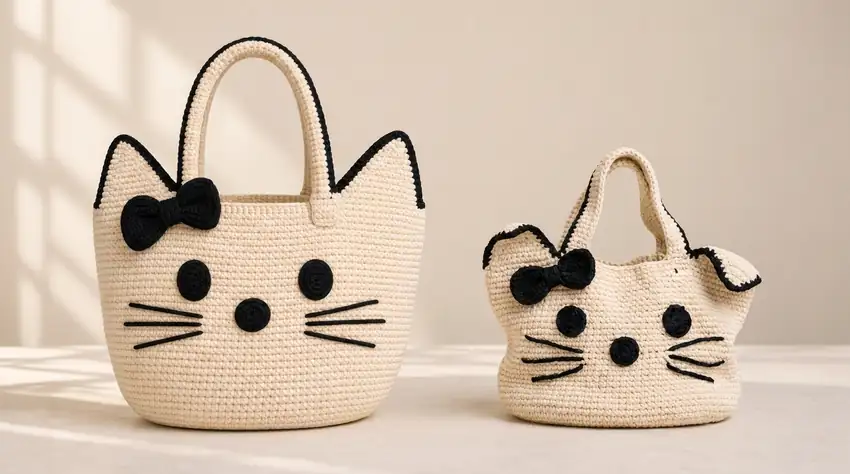
Mistake: The bag is too small for its intended use This usually happens when the crocheter follows the pattern exactly without considering their personal tension or the yarn’s characteristics. The fix? Either make a larger version or adjust your gauge. For our cat bucket bag pattern PDF, we provide measurements for both standard and large sizes to accommodate different needs.
Mistake: The bag stretches out of shape after use This is almost always due to using yarn that’s too lightweight or handles that aren’t properly reinforced. The solution is to either add a lining with interfacing for structure or to create sturdier handles using the double-thick method mentioned earlier. I’ve had bags that started sagging but were saved by adding a simple interfaced lining.
Mistake: The bag is stiff and uncomfortable This occurs when the stitch pattern is too dense or the yarn is too heavy. To fix this, try using a larger hook size or a lighter weight yarn. For cat bucket bags that need to maintain some structure while remaining comfortable, a medium-weight yarn with a slightly looser gauge often works best. I’ve found that a size I hook with worsted weight acrylic gives me the perfect balance of structure and flexibility.
Pro Tip: The “Wear Test”
Before finalizing your bag, do a wear test. Put in everything you typically carry—wallet, keys, phone, maybe a small notebook—and see how the bag behaves. Does it sag? Are the handles digging into your shoulder? Does the cat shape maintain its form? This real-world test will reveal any sizing issues that might not be apparent during the construction process. I’ve caught many potential problems this way, saving myself from finishing bags that wouldn’t work in real life.
FAQ About Cat Bucket Bag Patterns
Q5. Is lining necessary for a cat-shaped bucket bag, or can I leave it unlined?
A: While you can certainly use a cat bucket bag without lining, adding one makes a huge difference in both functionality and appearance. A lining protects your contents from snags on the crochet stitches, provides internal structure, and gives your bag a more professional finish. For cat bucket bags that need to maintain their shape, lining with interfacing is almost essential. I’ve made both lined and unlined versions, and the lined ones always look more polished and perform better in real use.
Q4. How do I prevent handles from stretching out on my cat bucket bag?
A: Reinforce handles by making them double-thick with a tight tension. You can also line them with plastic canvas or insert a thin piece of interfacing before sewing them closed. For extra durability, add a small patch of dense stitching where handles attach to the bag. I’ve had handles last for years with these techniques, even when carrying heavy items regularly. The key is distributing weight across multiple stitches rather than concentrating it on one or two.
Q3. What’s the best way to add structure to a cat bucket bag without making it stiff?
A: The secret is using lightweight interfacing between your lining and outer fabric. Pellon SF101 or similar products provide excellent structure without adding bulk. You can also create a “boxed bottom” for your bag, which gives it a more defined shape. For cat bucket bags, this helps maintain the characteristic curve that gives the bag its name. I’ve found that combining interfacing with a boxed bottom gives the perfect amount of structure while keeping the bag comfortable to carry.
Q2. Can I adjust the size of a cat bucket bag pattern if I need a larger or smaller bag?
A: Absolutely! To make a larger or smaller version, adjust your gauge swatch. If you want a bag that’s 25% larger, make your gauge swatch 25% larger in both stitches and rows. For example, if the pattern calls for 4 stitches per inch, aim for 5 stitches per inch instead. Remember to adjust all measurements proportionally, including the handle length and ear dimensions. I’ve resized many patterns this way to suit different needs, and it works beautifully as long as you maintain consistent proportions.
Q1. How do I know which yarn weight to use for a cat-shaped bucket bag pattern PDF?
A: The best yarn weight depends on the desired final look and function. For a structured bag that holds its shape, medium-weight (worsted weight) yarn works well. If you prefer a softer, more slouchy bag, try a bulky weight. For delicate, lightweight bags, use a light (DK) weight. Just remember that lighter weights may require lining or interfacing for structure. Our cat bucket bag pattern PDF specifically recommends worsted weight for the best balance of durability and drape.
Conclusion: Your Perfect Bag Awaits
Mastering bag sizing isn’t about following patterns blindly—it’s about understanding the relationship between your stitches, yarn, and construction techniques. The size secret pros never share is that there’s no one-size-fits-all approach; instead, it’s about adapting these principles to your personal tension and the specific project at hand. Whether you’re using our cat bucket bag pattern PDF or designing your own, these techniques will help you create bags that fit perfectly every time.
Remember that practice makes perfect. I’ve made my share of sizing mistakes over the years, but each one taught me something valuable about how different elements interact in crochet bag construction. Don’t be discouraged if your first attempt isn’t perfect—adjust, learn, and try again. That’s how we all improve!
Ready to create your own perfectly sized cat-shaped bucket bag? Our pattern PDF includes all the expert guidance you need, from stitch density calculations to handle reinforcement techniques. Grab your hook, choose your favorite yarn, and let’s make something amazing together!




