

MY CROCHET UNIVERSE · FREE CROCHET WEARABLE TUTORIAL
Crochet Cotton Tank Top Pattern: Step-by-Step Guide
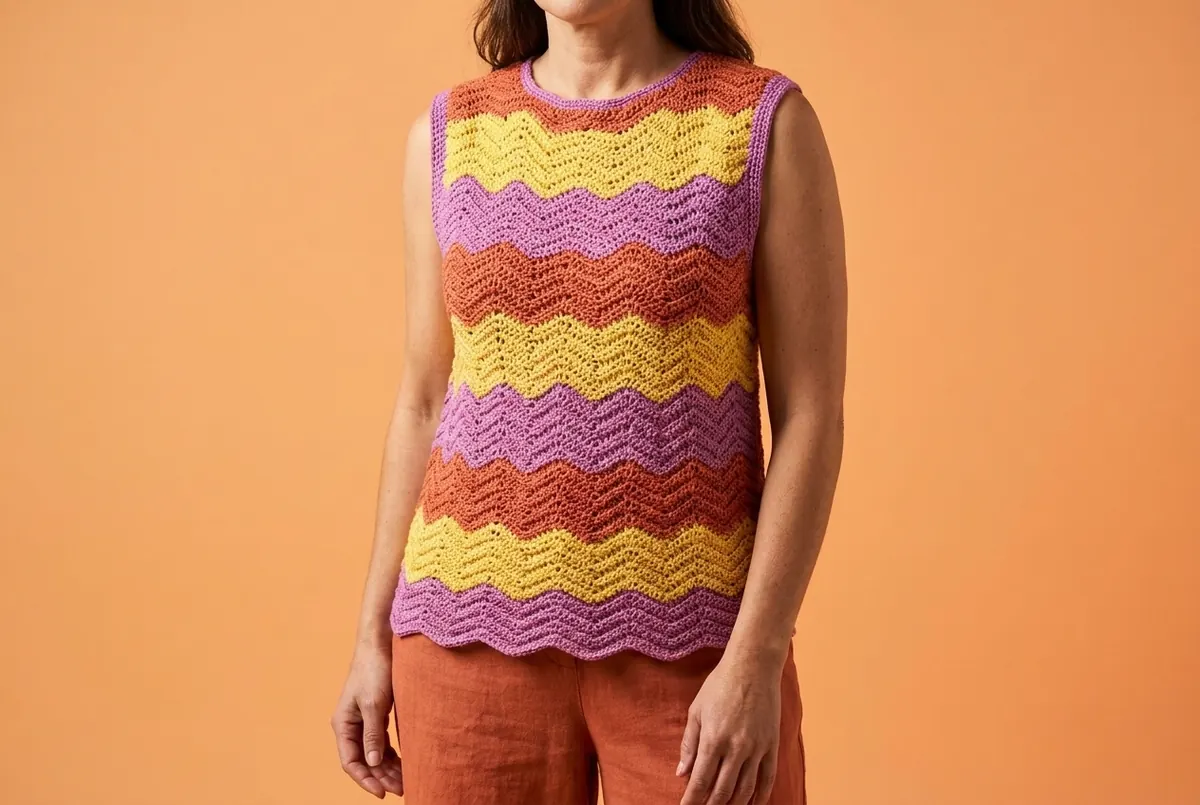
A crochet cotton tank top pattern is one of those warm-weather projects that looks ambitious but becomes pleasantly rhythmic once the wave repeat clicks. This version uses breathable DK cotton, cheerful terracotta, yellow, and purple stripes, and two flat panels—no complicated sleeves and no sewing machine required.
You’ll crochet a back and a front from the lower edge upward, create the armholes, shape a comfortable scoop neck, join the shoulders and sides, then finish every opening with a neat single-crochet border. The written instructions cover four grouped sizes from XS/S through 2X, with exact foundation counts, a measured gauge, color sequencing, shaping checkpoints, and practical fixes for the places where a WIP can start behaving badly.
Crochet Cotton Tank Top Pattern Note
This is an independently written tutorial developed from the supplied visual reference and classic chevron-crochet construction. The generated photographs are visual aids; always follow the written counts and your measured gauge. Make a swatch before beginning the garment.
Crochet Cotton Tank Top Pattern Overview
This crochet cotton tank top pattern is worked bottom-up in rows. Both panels begin with a multiple of 14 stitches, so the chevron stays balanced from one side seam to the other. The body has a little positive ease for airflow, while the shoulders remain wide enough to cover a standard bra strap.
| Size | XS/S | M | L/XL | 2X |
|---|---|---|---|---|
| To fit bust | 28–34 in | 36–38 in | 40–46 in | 48–50 in |
| Finished bust | 37⅓ in | 43½ in | 49¾ in | 56 in |
| Finished length | 23¼ in | 24 in | 24½ in | 25¼ in |
| Foundation sts per panel | 84 | 98 | 112 | 126 |
Choose the Crochet Cotton Tank Top Pattern Size
Measure a favorite non-stretch tank laid flat, double its bust width, and compare it with the finished bust row. Cotton relaxes slightly after blocking but has less spring than wool. If you fall between sizes, choose the larger size for an easy fit or the smaller size for a closer fit, then confirm with a full-width swatch.
Materials, Yarn, and Gauge
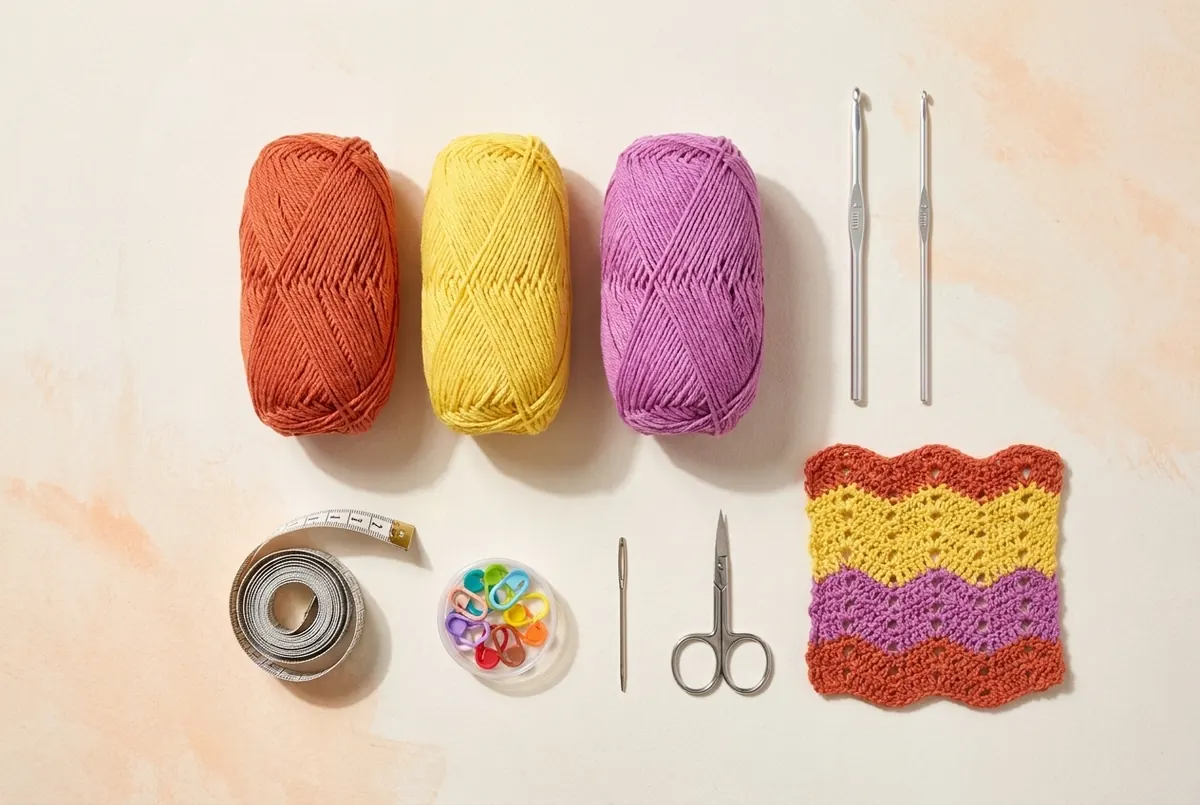
- Yarn: DK / light #3 cotton, approximately 120 m (131 yd) per 50 g ball.
- Color A, terracotta: 3 (3, 4, 4) balls.
- Color B, orchid purple: 2 (3, 3, 3) balls.
- Color C, sunny yellow: 2 (3, 3, 3) balls.
- Hooks: 4 mm (US G/6) for panels and 3 mm (US C/2 or D/3) for edging.
- Notions: stitch markers, scissors, tapestry needle, tape measure, rust-proof blocking pins.
Crochet Cotton Tank Top Pattern Gauge
In the blocked chevron pattern, 18 stitches and 12 rows measure 4 × 4 in (10 × 10 cm) using the 4 mm hook. Gauge controls both fit and yarn use. If 18 stitches measure less than 4 inches, move up a hook size; if they measure more, move down. Wash and dry the swatch as you plan to treat the finished top before measuring it again.
Crochet Cotton Tank Top Pattern Abbreviations
Instant Digital PDF · Pattern Only
Prefer a printable, premium version?
Keep the size table, shaping rows, color chart, finishing checklist, and tutorial photographs together on your device or in your project bag.
How the Crochet Cotton Tank Top Pattern Stitch Works
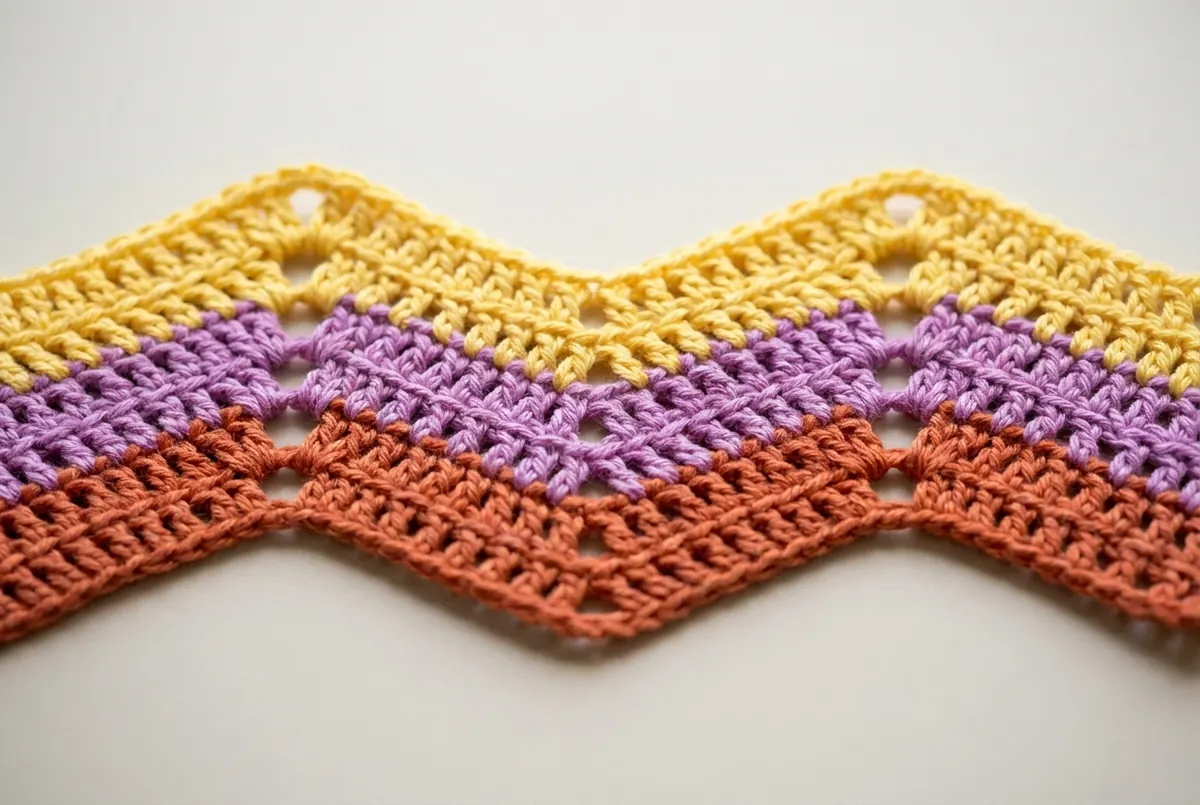
The entire crochet cotton tank top pattern grows from one balanced 14-stitch repeat. In each repeat, the middle two stitches are doubled to create a peak, while the first two and final two stitches are decreased to create valleys. Keep the turning chain loose so the edge stays the same height as the rest of the row.
Crochet Cotton Tank Top Pattern Chevron Row — 14-Stitch Repeat
Work the pattern row on every row. Because you turn after each row, the texture stays reversible enough for a garment panel. Count after the first, fourth, and eighth row of every stripe. Now, here’s where most crocheters trip up: the two doubled stitches at a peak are separate stitches, so each receives two double crochets. Missing one increase slowly narrows the panel.
Crochet Cotton Tank Top Pattern Color Sequence
- Rows 1–8: Purple
- Rows 9–16: Yellow
- Rows 17–24: Terracotta
- Rows 25–32: Purple
- Rows 33–40: Yellow
- Rows 41–48: Terracotta
- Rows 49–56: Purple
- Rows 57–64: Yellow
- Rows 65–66: Terracotta
Clean color changes
On the final yarn-over of the last dc2tog, draw through the new color. Cut the old yarn with a 6-inch tail. Do not carry unused colors for eight rows; those floats can snag and add bulk. Weave tails into matching-color stitches after blocking.
Step 1: Crochet the Back Panel
Start the crochet cotton tank top pattern with the back panel. It’s your best opportunity to learn the repeat and confirm the final width before shaping the front neckline.
Crochet Cotton Tank Top Pattern Foundation and Lower Body
- With Purple and the 4 mm hook, work 84 (98, 112, 126) foundation double crochet. If you prefer chains, ch 86 (100, 114, 128), dc in the third chain from the hook and in every chain across.
- Work the Chevron Pattern Row across. Place a marker after every 14-stitch repeat until you can read the peaks and valleys without counting.
- Continue in the color sequence through Row 40. Your panel should measure about 13⅓ inches (34 cm) tall before the armhole opening.
- Lay the panel flat without stretching it. It should measure approximately 18⅔ (21¾, 24⅞, 28) inches wide after a light steam or wet-block test.
Crochet Cotton Tank Top Pattern Armhole Setup
For Row 41, slip stitch loosely across the first 7 stitches, ch 2, then work the established chevron pattern over the next 70 (84, 98, 112) stitches, leaving the final 7 stitches unworked. Turn. Continue over these center stitches through Row 58. On partial repeats at an edge, work double crochets evenly while preserving the nearest complete peak or valley; the edging will smooth tiny differences.
Crochet Cotton Tank Top Pattern Back Neck and Shoulders
Row 59 creates the shallow back neck. Work in pattern across the first 21 (28, 35, 42) stitches, then turn and leave the center 28 stitches and opposite shoulder unworked. Continue that shoulder through Row 66 and fasten off. Rejoin yarn at the far neck edge and work the second shoulder over the final 21 (28, 35, 42) stitches through Row 66. Count both shoulder edges—they must contain the same number of rows.
Step 2: Crochet the Front Panel
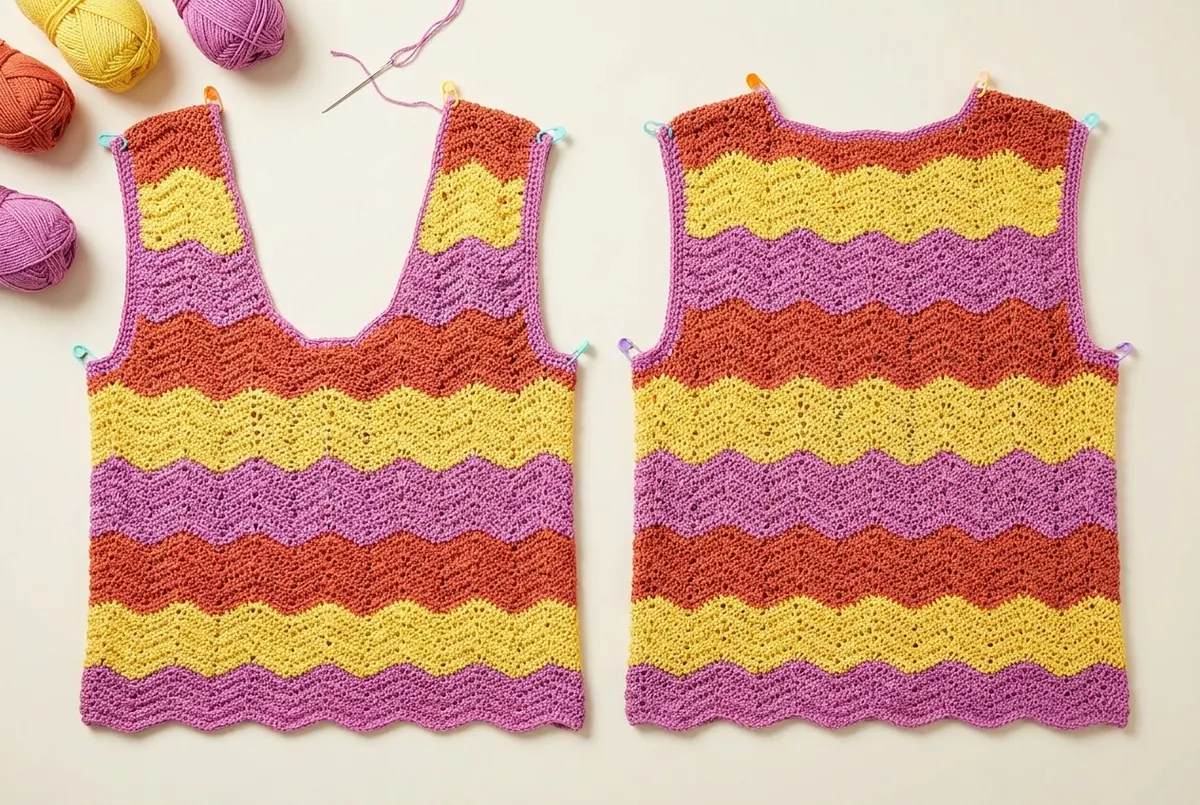
Work the foundation, lower body, and armhole setup of the crochet cotton tank top pattern exactly as for the back through Row 54. The deeper front neckline begins twelve rows before the shoulder edge.
Divide the Crochet Cotton Tank Top Pattern for the Scoop Neckline
- Row 55: Work across the first 28 (35, 42, 49) stitches. Turn, leaving the center 14 stitches and opposite shoulder unworked.
- Rows 56–62: Work in established pattern, decreasing one stitch at the neck edge on every row. For a RS neck edge, use dc2tog over the final 2 stitches. For a WS neck edge, use dc2tog over the first 2 stitches.
- After seven decreases, 21 (28, 35, 42) stitches remain for the shoulder.
- Rows 63–66: Work even and fasten off.
- Rejoin yarn at the opposite side of the center opening. Mirror the shaping for the second shoulder, checking that both neckline slopes end at the same row.
Fit checkpoint
Pin or clip the front and back shoulders together and hold the panels against your body over a close-fitting top. The neckline edging adds roughly ¼ inch. If you want a higher neck, start the front split on Row 58 and make four neck-edge decreases instead of seven.
Blocking before seaming is optional, but I recommend a light block now. It makes the wave points easier to align and exposes any accidental narrow stripe before you commit to the seams. Fair warning: cotton can feel heavier when wet. Support the panel fully when moving it to the blocking mat.
Instant Digital PDF · Pattern Only
Take every row to your project bag
The printable crochet cotton tank top pattern keeps the front and back shaping sequences together, plus a finishing checklist you can tick off as you work.
Step 3: Join the Shoulders and Side Seams
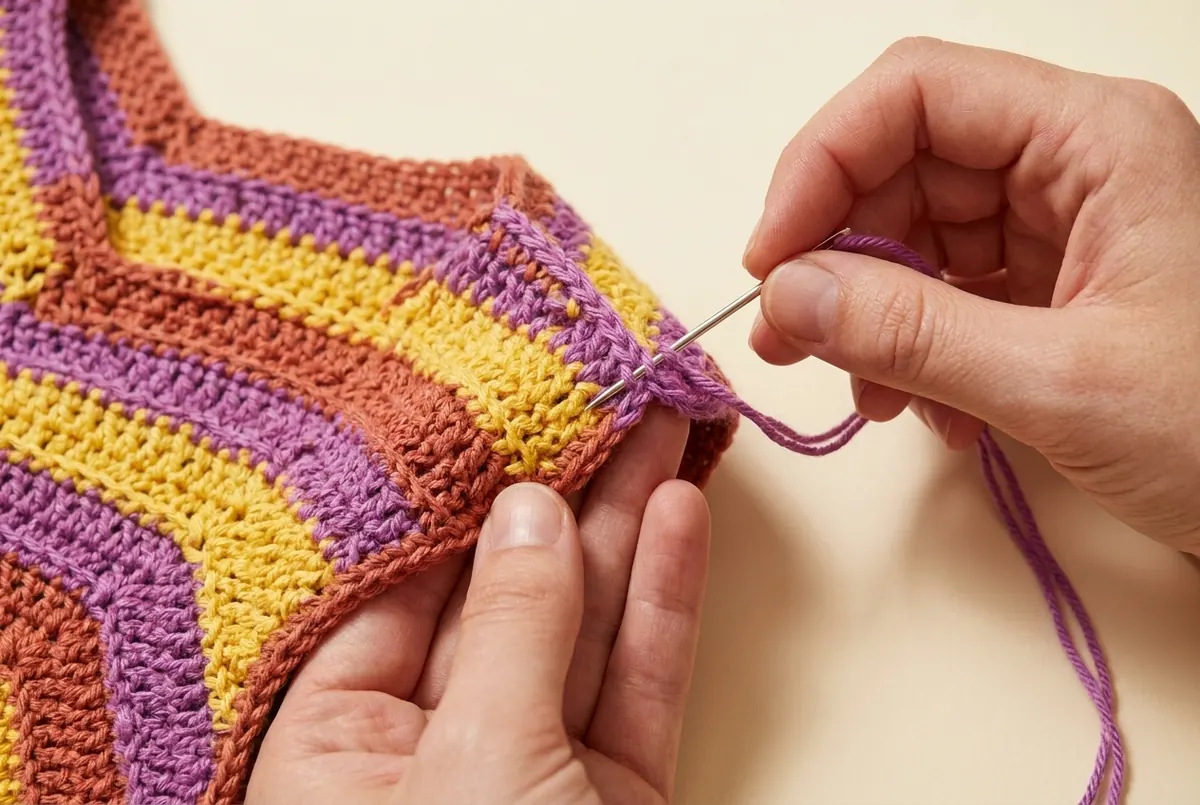
Place the panels with right sides facing. Match the stripe boundaries, wave peaks, neck edges, and outer shoulder edges. Using the tapestry needle and a matching color, whip stitch each shoulder through the top loops of corresponding stitches. Do not pull the yarn tight enough to gather the crochet.
For each side seam, begin at the lower edge and sew upward to the armhole marker at Row 40. Pass the needle through the end stitch or turning-chain area of one row on each panel. Stop every few inches, smooth the seam, and verify that yellow meets yellow, terracotta meets terracotta, and purple meets purple.
A Clean Crochet Cotton Tank Top Pattern Seaming Rhythm
- Use a yarn length no longer than your arm span to reduce fraying.
- Make two small passes at each color boundary so stripes cannot drift.
- Leave the armhole open from Row 41 to the shoulder seam.
- Try the tank on before weaving in seam tails; adjust the side opening if you prefer more room.
- Secure the yarn by weaving back through at least 2 inches of same-color stitches, not with a bulky knot.
Step 4: Crochet the Neckline and Armhole Edging
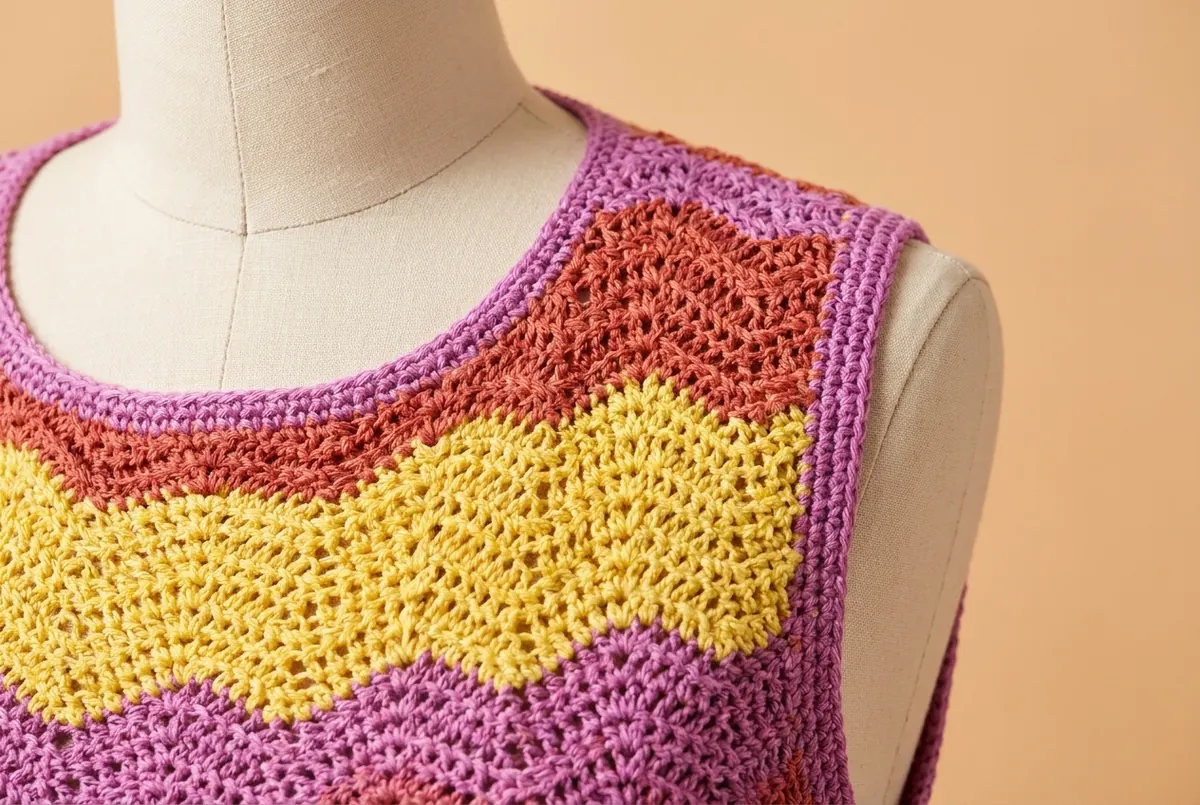
Turn the tank right side out. Switch to the 3 mm hook and Purple. Join yarn at the left shoulder seam for the neckline. Ch 1, then work Round 1 in single crochet, placing one sc in each top stitch and approximately two sc for every three row ends along the front slopes. At each lower front-neck corner, work sc2tog so the curve lies flat. Slip stitch to the first sc.
For Round 2, ch 1 and sc in every stitch around. If the first round waves, decrease two to four stitches evenly on the second round. If it pulls, add one extra sc at each curved transition. Fasten off only after the neckline sits flat on the body.
Work both armholes in the same way. Join at the underarm seam, crochet one sc per top stitch and about two sc per three row ends, then add a second round. Count the first armhole stitches and match that count on the second. This small habit makes the crochet cotton tank top pattern look balanced and professional.
Final Crochet Cotton Tank Top Pattern Blocking
Soak the finished tank in cool water with a small amount of wool wash or gentle detergent. Press out water without twisting, roll the tank in a towel, then lay it flat. Pin the side seams straight, open the lace gently, shape each hem point, and match both armholes. Let the garment dry completely before removing pins.
Fit, Color, and Length Variations
One advantage of this crochet cotton tank top pattern is that the repeat is easy to personalize. Keep all changes symmetrical on the front and back, and record your final row count before starting the second panel.
Make the Crochet Cotton Tank Top Pattern Longer or Cropped
Each eight-row stripe adds about 2⅔ inches (6.7 cm) at gauge. For a crop top, remove one or two full stripes before Row 40 and establish the armhole at your preferred length. For a tunic, add full 8-row stripes before the armhole. Buy at least one extra ball of every color used in added stripes—yarn chicken is much less funny when the final shoulder is on your hook.
Use a Calmer Crochet Cotton Tank Top Pattern Palette
The wave stitch also works beautifully in cream, sand, and terracotta, or in three values of one color. For fewer ends, use a self-striping cotton and work continuously. If you choose a busy variegated yarn, pair it with one solid border color so the neckline remains crisp.
Adjust the Crochet Cotton Tank Top Pattern Ease
Each 14-stitch repeat measures about 3⅛ inches (7.8 cm) at gauge per panel, adding roughly 6¼ inches to the total bust. That is a large jump, so smaller fit changes are best made through gauge: a slightly smaller hook creates a closer fit, while a slightly larger hook adds ease. Never change hooks without making and washing another swatch.
Style the finished tank
Wear the tank over linen trousers, denim, or a simple cotton skirt. If you enjoy colorful wearables, save our crochet baby jacket pattern guide. For smaller weekend projects, try the crochet frog crossbody bag pattern or practice color planning with the multi-coloured granny square tutorial.
Crochet Cotton Tank Top Pattern Troubleshooting
The panel grows wider or narrower
Recount every repeat: each one must begin with a dc2tog, contain two doubled stitches at the peak, and end with another dc2tog. The repeat consumes and produces 14 stitches. Marking every repeat prevents a missing increase from hiding inside the texture.
The hem curls or the valleys bunch
A tight foundation is the usual cause. Foundation double crochet is the easiest fix, but you can also make the starting chain with a hook 0.5 mm larger. Blocking helps a mild curl; it cannot rescue a foundation several inches shorter than the body.
The neckline ripples
Too many edging stitches were placed along the row ends. Remove the edging and try two single crochets for every three row ends. If a neckline still flares after Round 1, work a few evenly spaced sc2tog decreases in Round 2.
The side seams look stepped
Chevron rows naturally create small edge variations. Align each stripe first, seam one row end to one row end, and avoid pulling hard. The final blocking smooths the remaining steps. If needed, add a vertical surface-slip-stitch line inside the seam for stability.
My finished tank is too long after washing
Cotton can grow under its own weight. Rewash, reshape to the schematic length, and dry flat. For your next crochet cotton tank top pattern, hang the gauge swatch overnight before measuring row gauge and remove a stripe if the fabric relaxes significantly.
Frequently Asked Questions
Open each question for a clear answer about yarn, fit, construction, and care.
Can a beginner make this crochet cotton tank top pattern?
Yes, if you can chain, double crochet, increase, decrease, and sew a simple seam. Make a full chevron swatch first. The garment is repetitive, but the stitch count needs attention at peaks, valleys, and neckline edges.
Which yarn is best for a summer crochet tank?
A smooth DK cotton or cotton-bamboo blend gives clear stitches and breathable drape. Avoid fuzzy yarn because it hides the lace, and test heavy mercerized cotton carefully because it may lengthen after washing. Check the Craft Yarn Council yarn-weight system when substituting.
Can I work the tank in one color?
Absolutely. A solid color highlights the shadow lines of the chevron and eliminates most ends. Keep the row markers, because stripe boundaries will no longer help you track the armhole and neckline shaping rows.
How much ease should I choose?
Aim for 2–5 inches of positive ease for a relaxed cotton tank. Compare the finished bust to your body and a favorite garment. The Craft Yarn Council’s body-sizing standards can help, but your preferred fit matters most.
How should I wash the finished crochet cotton tank?
Follow the yarn label. In most cases, hand wash in cool water, press moisture out in a towel, and dry flat. Avoid hanging a wet cotton garment because its weight can stretch the shoulders and length.
Instant Digital PDF · Pattern Only
Ready to crochet the complete tank?
Download the organized PDF edition with the four-size chart, row-by-row shaping, color plan, finishing notes, and web-optimized tutorial images. This is a digital pattern; no physical item is shipped.
Final Checklist
- Both panels match in width and total row count.
- Front and back shoulder stitch counts are identical.
- Stripe boundaries align at both side seams.
- Neckline and armholes lie flat without puckering.
- All ends are woven into matching-color areas.
- The tank is washed, blocked, and completely dry.
- Finished measurements match your chosen size and preferred ease.
You now have a colorful crochet cotton tank top pattern that is practical enough for a summer WIP and polished enough to become a favorite handmade layer. Save your hook size, washed gauge, and any length changes with the project notes—you’ll thank yourself when you make the second colorway.
Editorial disclosure: tutorial photographs were AI-generated from the user-supplied garment reference and are included as visual aids. Written instructions and measured gauge control the project. Brand names, where mentioned, belong to their respective owners.




