

MY CROCHET UNIVERSE · FREE CROCHET PATTERN
Crochet Baby Jacket Pattern: Complete 5-Size Step-by-Step Guide
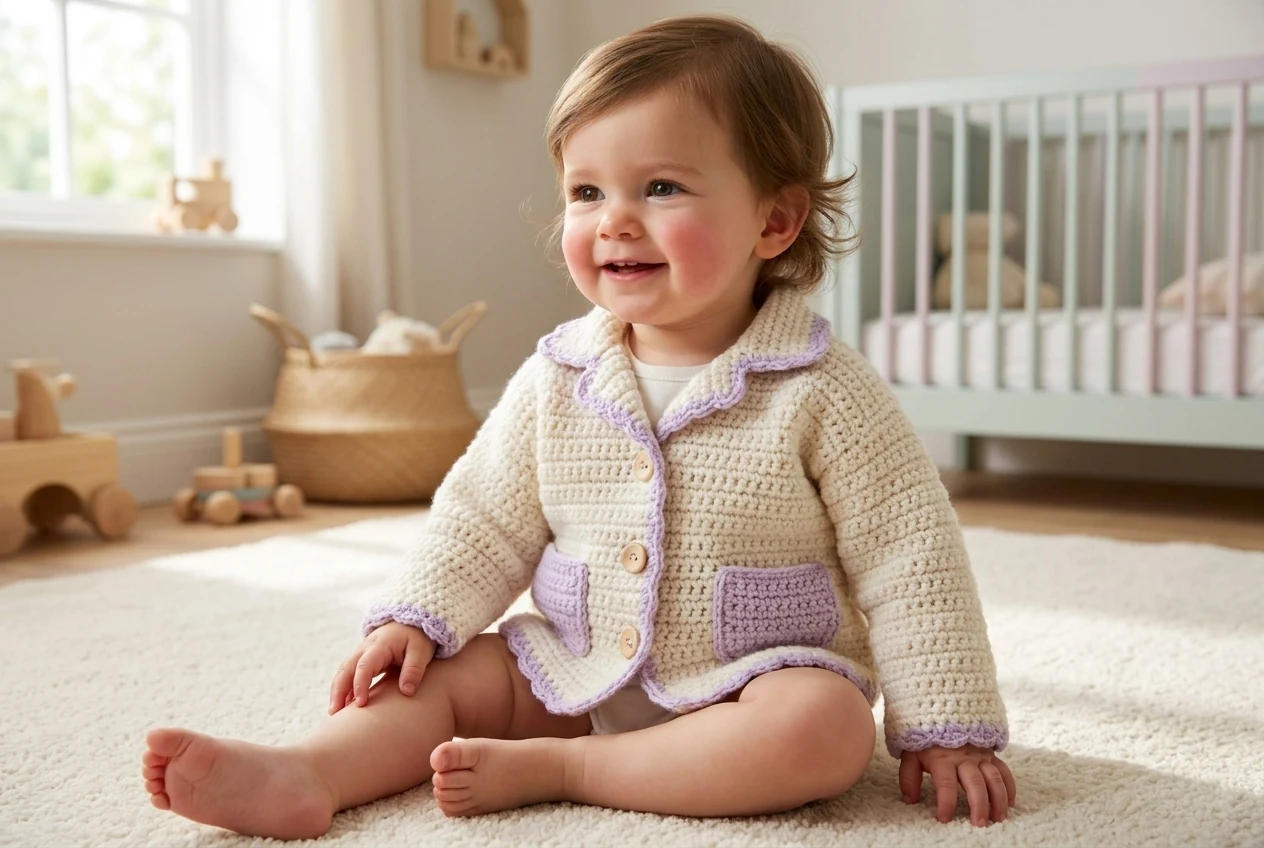
This crochet baby jacket pattern makes a soft gender-neutral cardigan with long sleeves, integrated lapels, two patch pockets, three buttons, and a delicate contrast edging. The supplied pattern covers five sizes from 0–3 months to 3–4 years and uses half treble crochet for a warm fabric with gentle drape.
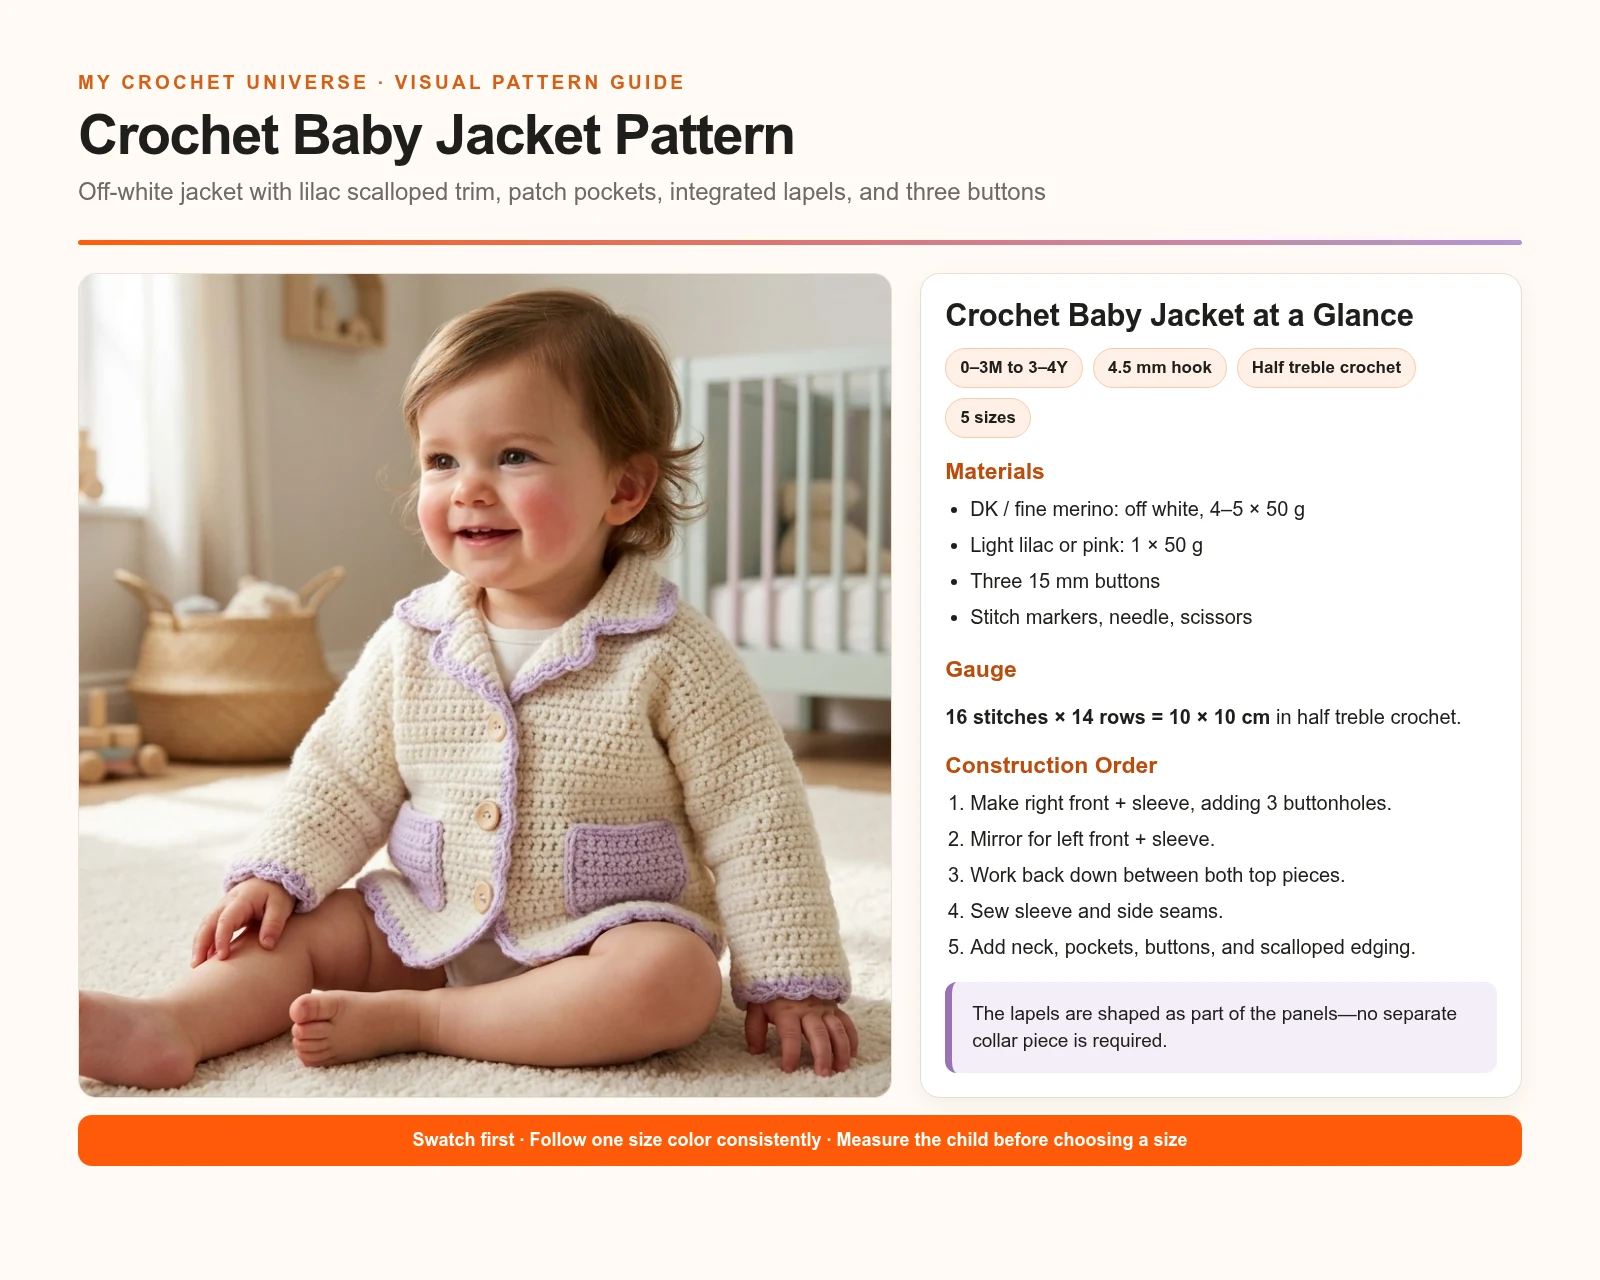
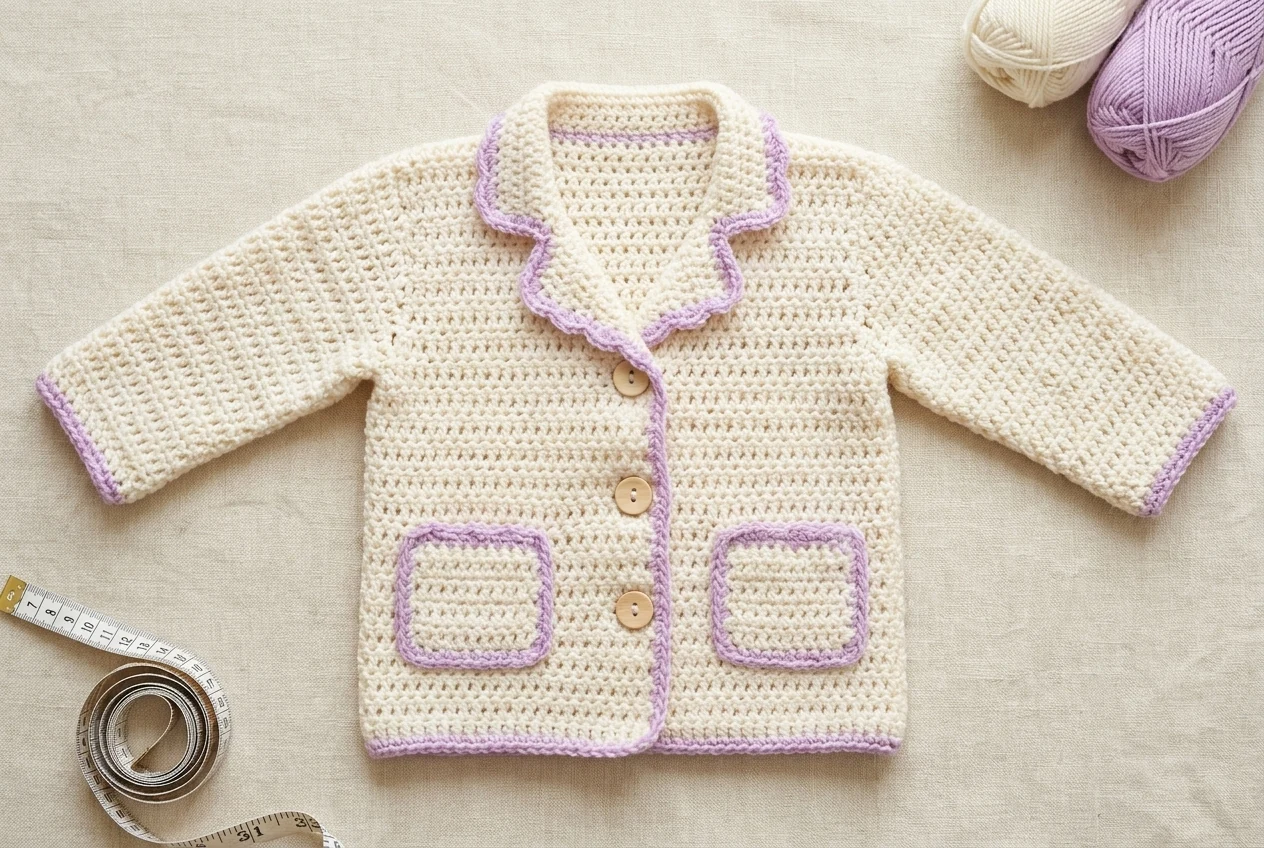
The construction is unusual but efficient. You crochet the right front and its sleeve first, mirror the section for the left front and sleeve, then work the back down between those two pieces. The crochet baby jacket pattern finishes with side and sleeve seams, a short neck edging, two pockets, three buttonholes, three buttons, and a scalloped border.
Table of Contents
- Project overview
- Before you begin
- Sizes and measurements
- Materials
- Gauge
- Abbreviations
- Written pattern
- Step-by-step tutorial
- Fit and safety
- Troubleshooting
- FAQ
Project Overview
| Detail | Pattern information |
|---|---|
| Project | Off-white crochet baby jacket with lilac or light-pink trim |
| Skill level | Confident beginner / intermediate |
| Sizes | 0–3M, 6–9M, 12–18M, 2–3Y, 3–4Y |
| Main yarn | Fine merino / DK, 50 g = approximately 105 m |
| Hook | 4.5 mm crochet hook |
| Main stitch | Half treble crochet in UK terminology |
| Construction | Two front-and-sleeve pieces, then back worked between them |
| Closure | Three 15 mm buttons and three buttonholes |
| Finishing | Two patch pockets, neck edging, and contrast scalloped border |
The front pieces grow sideways into the sleeves through armhole increases and chains. The back connects the two upper sections, then narrows at the armholes and continues to the hem. This approach gives the crochet baby jacket pattern an integrated collar effect without making a separate collar.
Before You Begin
Read the complete crochet baby jacket pattern and circle one size before starting. Every parenthesis contains values for the five sizes in this order: 0–3M (6–9M, 12–18M, 2–3Y, 3–4Y). Copy your chosen number into a separate project note so you do not accidentally move into another size column.
- Make and wash a gauge swatch before measuring it.
- Mark the first and last stitch of shaped rows.
- Place the armhole markers exactly where instructed; the back length depends on them.
- Work the first two buttonholes before the first armhole increase.
- Keep the right and left front row counts equal.
- Count turning chains consistently; the source states that slip stitches are not counted as stitches.
- Measure the fronts while they lie flat without stretching.
- Pin pockets and buttons before sewing.
Sizes and Finished Measurements
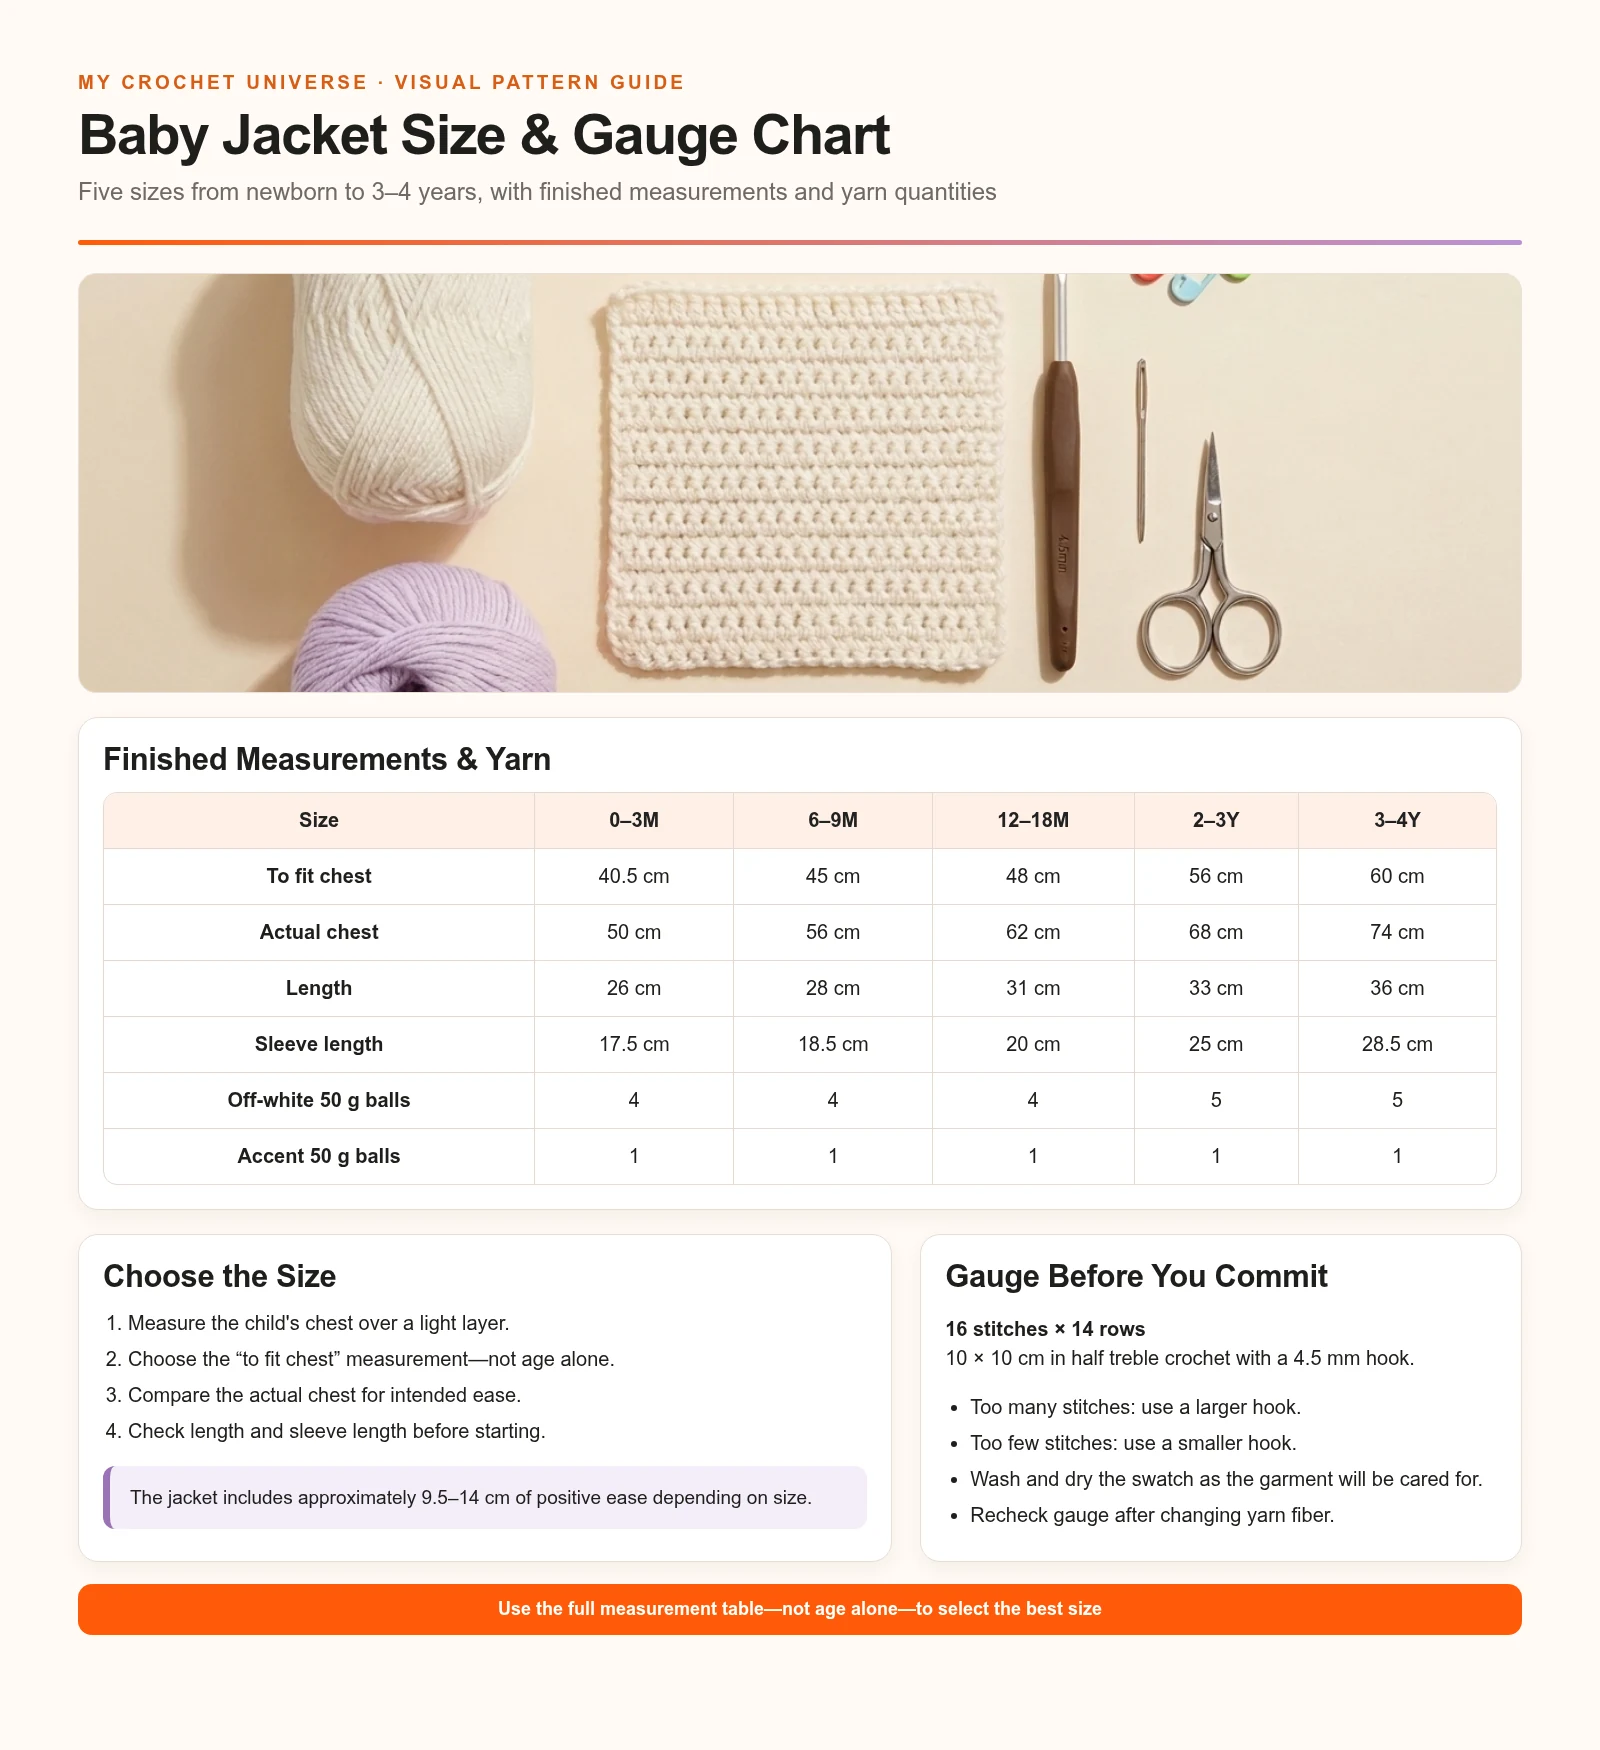
Choose a size by chest measurement rather than age alone. The jacket includes positive ease, so compare both the “to fit chest” and actual garment chest values. Length is measured from the shoulder area to the hem, and sleeve length follows the finished sleeve.
| Measurement | 0–3M | 6–9M | 12–18M | 2–3Y | 3–4Y |
|---|---|---|---|---|---|
| To fit chest | 40.5 cm / 16 in | 45 cm / 18 in | 48 cm / 19 in | 56 cm / 22 in | 60 cm / 23½ in |
| Actual chest | 50 cm / 19¾ in | 56 cm / 22 in | 62 cm / 24½ in | 68 cm / 26¾ in | 74 cm / 29 in |
| Length | 26 cm / 10¼ in | 28 cm / 11 in | 31 cm / 12¼ in | 33 cm / 13 in | 36 cm / 14¼ in |
| Sleeve length | 17.5 cm / 7 in | 18.5 cm / 7¼ in | 20 cm / 8 in | 25 cm / 10 in | 28.5 cm / 11¼ in |
The actual chest is approximately 9.5–14 cm larger than the body measurement, depending on size. Measure the child over the clothing normally worn underneath. If the chest falls between sizes, consider sleeve and body length before choosing.
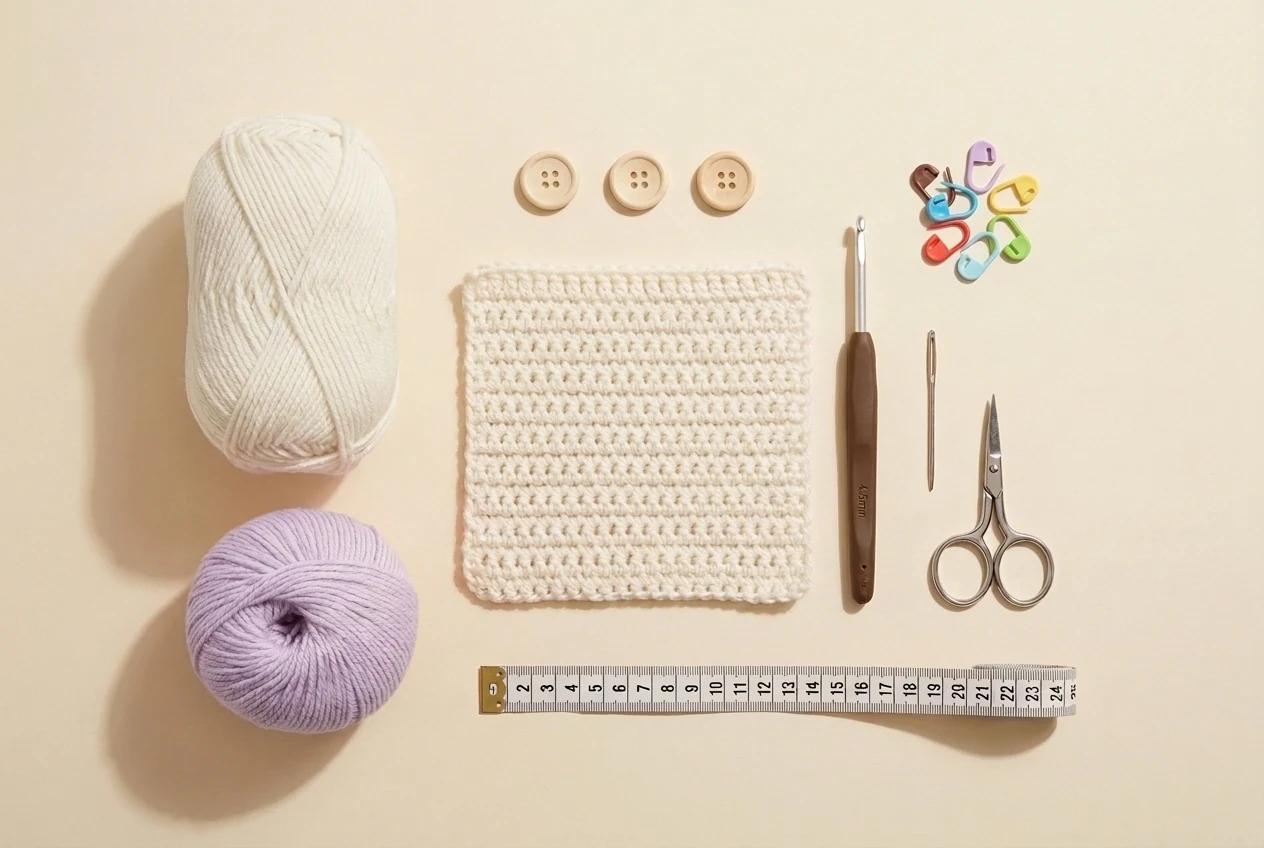
Materials and Tools
The original crochet baby jacket pattern uses a smooth fine merino yarn. A washable DK or light-worsted substitute can work, but the stated gauge matters more than the label category.
| Material | Specification |
|---|---|
| Off-white yarn | Fine merino, 50 g / 105 m: 4 (4, 4, 5, 5) balls |
| Light pink or lilac yarn | Same or compatible weight: 1 ball for every size |
| Crochet hook | 4.5 mm, or size required to obtain gauge |
| Buttons | Three 15 mm buttons |
| Stitch markers | Several, including two armhole markers |
| Tapestry needle | For seams, pockets, buttons, and ends |
| Scissors and tape measure | For finishing and size checks |
Keep the main and contrast yarns similar in care requirements. If substituting, compare the yarn with the Craft Yarn Council yarn-weight system and wash a sample exactly as the finished jacket will be washed.
Gauge
16 stitches and 14 rows = 10 × 10 cm over half treble crochet using a 4.5 mm hook, or the hook needed to obtain the correct tension.
Gauge controls chest, sleeve, neck, and pocket proportions in the crochet baby jacket pattern. If your swatch has more than 16 stitches across 10 cm, use a larger hook. If it has fewer stitches, use a smaller hook. Row gauge also matters because the instructions tell you to work to measured lengths before shaping.
Wash and dry the swatch before making a final decision. Merino can relax, bloom, or grow. Record both the unwashed and washed measurements so the finished jacket does not become unexpectedly wide or short.
Crochet Abbreviations
The source uses UK stitch names. The half treble crochet in this pattern is equivalent to a US half double crochet.
| Abbreviation | Meaning |
|---|---|
| ch | Chain |
| dc | Double crochet in UK terms / single crochet in US terms |
| htr | Half treble crochet in UK terms / half double crochet in US terms |
| htr6tog | Half treble six stitches together |
| patt | Pattern |
| pm | Place marker |
| rep | Repeat |
| RS | Right side |
| ss | Slip stitch |
| st / sts | Stitch / stitches |
| WS | Wrong side |
| yrh | Yarn round hook / yarn over |
For htr6tog, yarn over, insert the hook in the next stitch, yarn over and pull up a loop; repeat that action across six stitches, then yarn over and pull through all loops on the hook. Review standard terminology with the Craft Yarn Council crochet abbreviations if needed.
How the Jacket Is Constructed
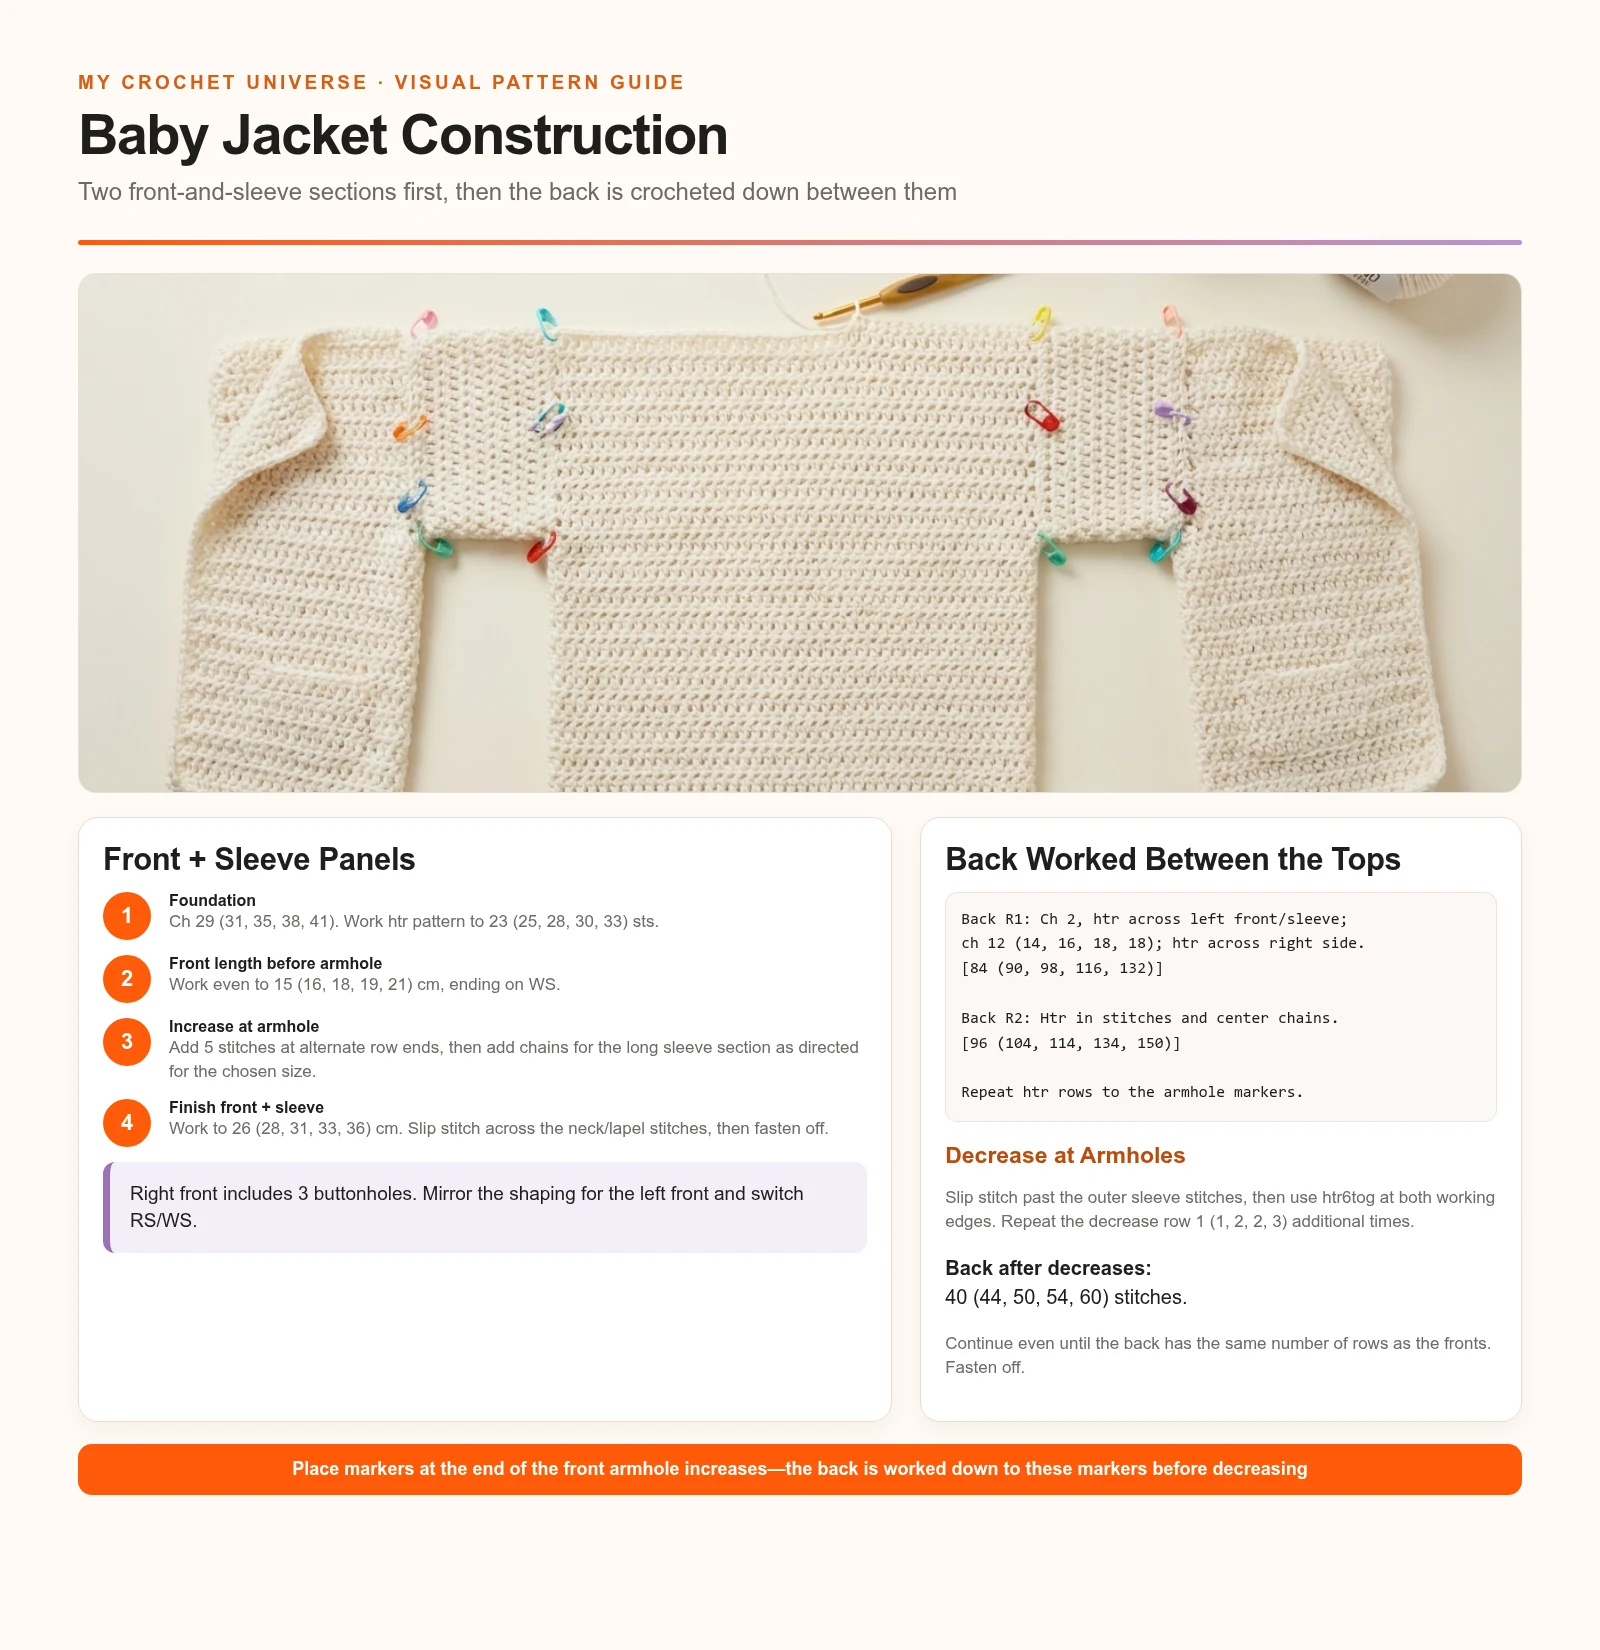
The crochet baby jacket pattern begins with two mirrored front sections. Each front is crocheted from the lower front toward the top. The fabric expands sharply to create the underarm and sleeve, then narrows at the neck or lapel edge. The back is not made separately and sewn across the shoulders; it is worked directly between the two front-and-sleeve pieces.
The source instructs you to leave the yarn attached to the left front. That working loop begins the back row across the left piece, across a center chain for the back neck or upper-back span, and across the right piece. The back grows downward, then decreases at both armholes to return to body width.
Crochet Baby Jacket Pattern Written Instructions
Follow only the number for your chosen size. The five values always represent 0–3M (6–9M, 12–18M, 2–3Y, 3–4Y).
Buttonholes — right front only
Work three buttonholes on the right front. Make the first when the front measures 8 (9, 10, 11, 11) cm, the second at 12 (13, 15, 16, 17) cm, and the third at 16 (17, 20, 21, 23) cm.
- Buttonhole row — WS: Work in pattern to the final 2 stitches, ch 1, skip 1 stitch, htr in the final stitch, turn.
- Next row — RS: Ch 2, htr in the chain space, then continue in pattern to the end.
The first two buttonholes are completed before armhole shaping. Remember to work the third at the stated height while continuing the upper front and sleeve section.
Right Front and Sleeve — off white
- Foundation: Ch 29 (31, 35, 38, 41).
- Row 1: Htr in the third chain from the hook, htr in the next 3 chains; repeat (skip 1 chain, htr in the next 4 chains) 4 (4, 5, 6, 6) times; skip 1 chain, then htr in the final 2 (4, 3, 1, 4) chains. Turn. [23 (25, 28, 30, 33) sts]
- Row 2: Ch 2, which counts as the first htr throughout; htr in each stitch across. Turn.
Repeat Row 2 until the front measures 15 (16, 18, 19, 21) cm, ending on a WS row. Confirm that the first two buttonholes have been worked at the required heights.
Increase at Armholes
Continue to remember the final buttonhole position.
- Increase Row 1 — RS: Ch 2, htr in each stitch to the final stitch, work 6 htr in the final stitch. Turn. [28 (30, 33, 35, 38) sts]
- Increase Row 2 — WS: Ch 2, work 5 htr in the stitch at the base of ch 2, then htr in each stitch across. Turn. [33 (35, 38, 40, 43) sts]
Repeat Increase Rows 1–2 another 0 (0, 0, 0, 1) time. The 3–4Y size now has 53 stitches; the smaller sizes retain their listed totals.
Sleeve Extension — sizes 0–3M, 6–9M, and 3–4Y only
- Next row — RS: Ch 2, htr in each stitch to the final stitch, work 6 htr in the final stitch, then add the stated sleeve chains for the chosen size. Turn. [38 (40, –, –, 58) sts before working into the added chain section]
- Next row — WS: Htr in the second chain from the hook, work htr across the added chains, then htr in every existing stitch. Turn. [51 (55, –, –, 78) sts]
Place a marker in the end of the last row. This marker identifies where the back later begins its armhole decrease.
Sleeve Extension — sizes 12–18M and 2–3Y only
- Next row — RS: Ch 2, htr in each stitch to the final stitch, work 6 htr in the final stitch, then add the sleeve chains stated in the source. Turn. [– (–, 43, 45, –) sts before working into the added chains]
- Next row — WS: Htr in the second chain from the hook; the skipped chain counts as a stitch. Htr across the added chains and in each remaining stitch. Turn. [– (–, 60, 70, –) sts]
Place a marker in the end of the last row.
Finish the Right Front and Sleeve — all sizes
- Next row — RS: Ch 2, htr in each stitch across. Turn. [51 (55, 60, 70, 78) sts]
- Repeat the last row until the front measures 26 (28, 31, 33, 36) cm, ending on a WS row.
- Neck/lapel row — WS: Slip stitch in the first 10 (11, 12, 13, 13) stitches, ch 2, then htr in each stitch to the end. [42 (45, 49, 58, 66) sts]
Fasten off.
Left Front and Sleeve — make one mirrored piece
Work as for the right front and sleeve, omitting all buttonhole rows. Switch RS and WS so the shaping mirrors the first piece. Do not fasten off at the end of the left front and sleeve; the attached yarn begins the back.
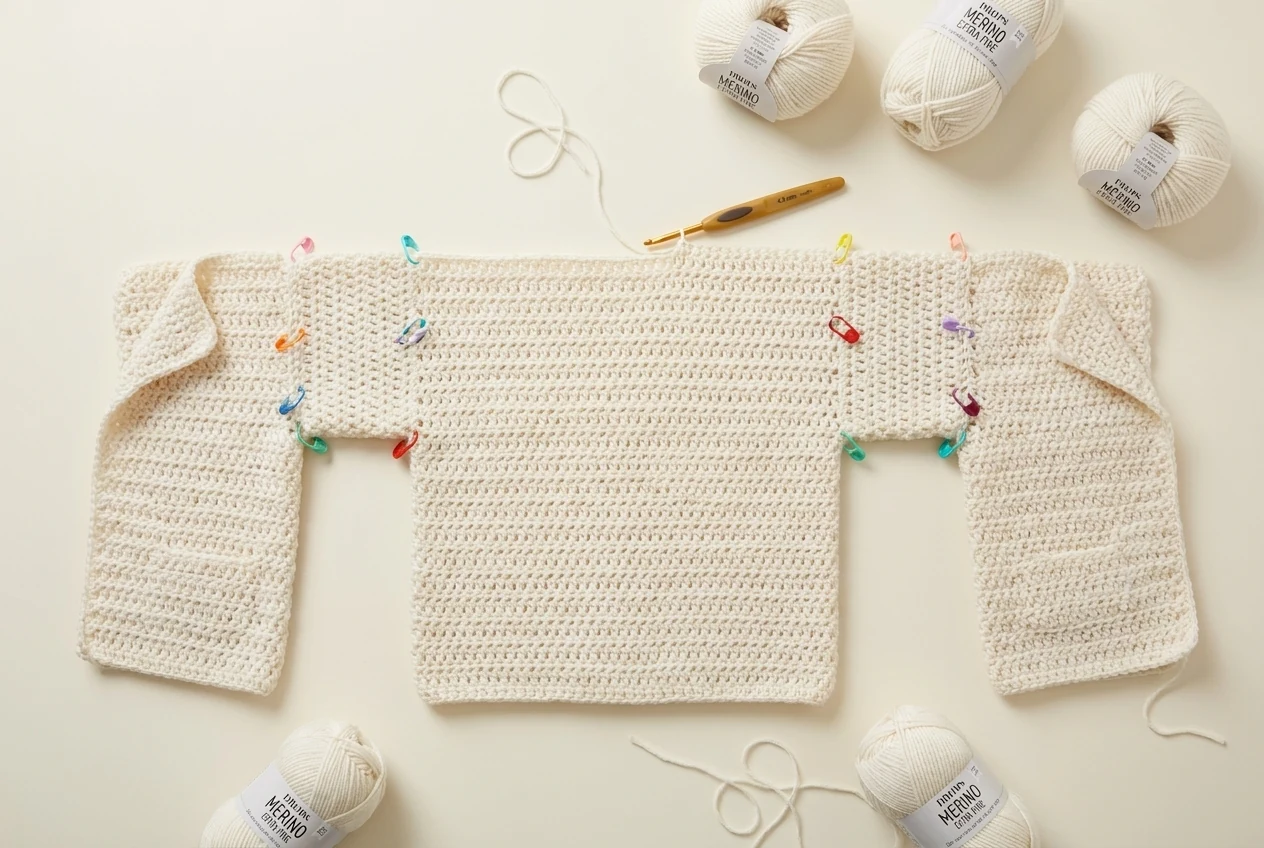
Back and Sleeves
- Back Row 1: Ch 2, htr in each stitch across the left front and sleeve, ch 12 (14, 16, 18, 18), then htr in each stitch across the right front and sleeve. Turn. [84 (90, 98, 116, 132) sts]
- Back Row 2: Ch 2, htr in each stitch and each center chain across. Turn. [96 (104, 114, 134, 150) sts]
- Back Row 3: Ch 2, htr in each stitch across. Turn.
Repeat Back Row 3 until the back has the same number of rows worked down to the marker placed at the end of the front armhole increase section.
Decrease at Armholes
- Decrease Row 1: Slip stitch in the first 13 (15, 12, 20, 20) stitches; ch 1, which does not count as a stitch; work htr6tog, then continue across, leaving the final 13 (15, 12, 20, 20) stitches unworked. Turn. [60 (64, 80, 84, 100) sts]
- Decrease Row 2: Ch 1, htr6tog, work htr in each stitch to the final 6 stitches, htr6tog. Turn. [50 (54, 70, 74, 90) sts]
- Repeat Decrease Row 2 another 1 (1, 2, 2, 3) time. [40 (44, 50, 54, 60) sts]
- Next row: Ch 2, htr in each stitch across. Turn.
Repeat the last row until the back has the same number of rows as the fronts. Fasten off.
Neck Edging — off white
Join off-white yarn in the first slip stitch on the final row of the right front and sleeve.
- Neck Row 1: Ch 2, work 33 (37, 41, 45, 45) htr evenly around the neck to the end of the left front. Turn. [34 (38, 42, 46, 46) sts]
- Neck Row 2: Ch 2, htr in each stitch across.
Fasten off. The lapel shape comes from the front, back, and neck sections; no separate collar piece is required.
Pockets — off white, make two
- Foundation: Ch 5 (6, 7, 8, 9).
- Pocket Row 1: Htr in the third chain from the hook, then htr in the next 2 (3, 4, 5, 6) chains. Turn. [4 (5, 6, 7, 8) sts]
- Pocket Row 2: Ch 2, htr in the stitch at the base of ch 2, htr in each stitch to the final stitch, work 2 htr in the final stitch. Turn. [6 (7, 8, 9, 10) sts]
- Pocket Rows 3–4: Repeat Row 2. [10 (11, 12, 13, 14) sts after Row 4]
- Pocket Row 5: Ch 2, htr in each stitch across. Turn.
Repeat Pocket Row 5 until each pocket measures 5 (5, 6, 7, 7) cm. Fasten off.
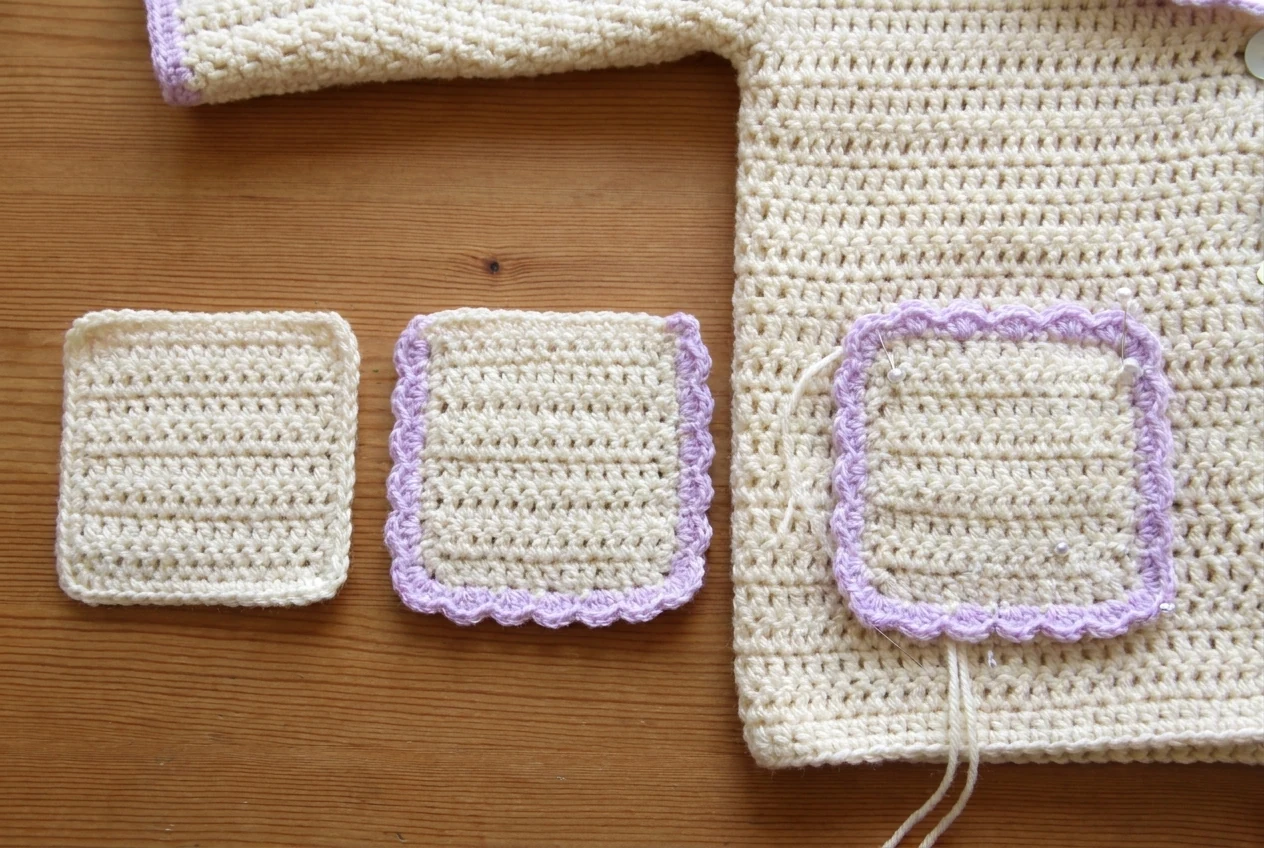
Pocket Edging — contrast color
Join light pink or lilac yarn in the top-right corner.
- Round 1: Ch 1, dc in the corner; repeat (ch 3, tr in the last chain from the hook, skip 2 stitches or row ends, dc in the next stitch) around. Slip stitch to the beginning dc.
Fasten off. Repeat on the second pocket and check that both borders contain a similar number of scallops.
Make Up
- Sew the side and sleeve seams closed with the garment turned to the wrong side.
- Turn right side out and smooth the seams.
- Pin and sew one pocket to each front.
- Sew three buttons to the left front directly opposite the buttonholes.
- Check that the fronts overlap evenly when buttoned.
Main Contrast Edging
Join light pink or lilac yarn at the center back hem.
- Round 1: Ch 1, dc; repeat (ch 3, tr in the last chain from the hook, skip 2 stitches or row ends, dc in the next stitch) around the entire hem, front opening, and neck. Slip stitch to the beginning dc.
Fasten off and weave in every end. Work matching edging around each cuff if needed to reproduce the photographed finish.
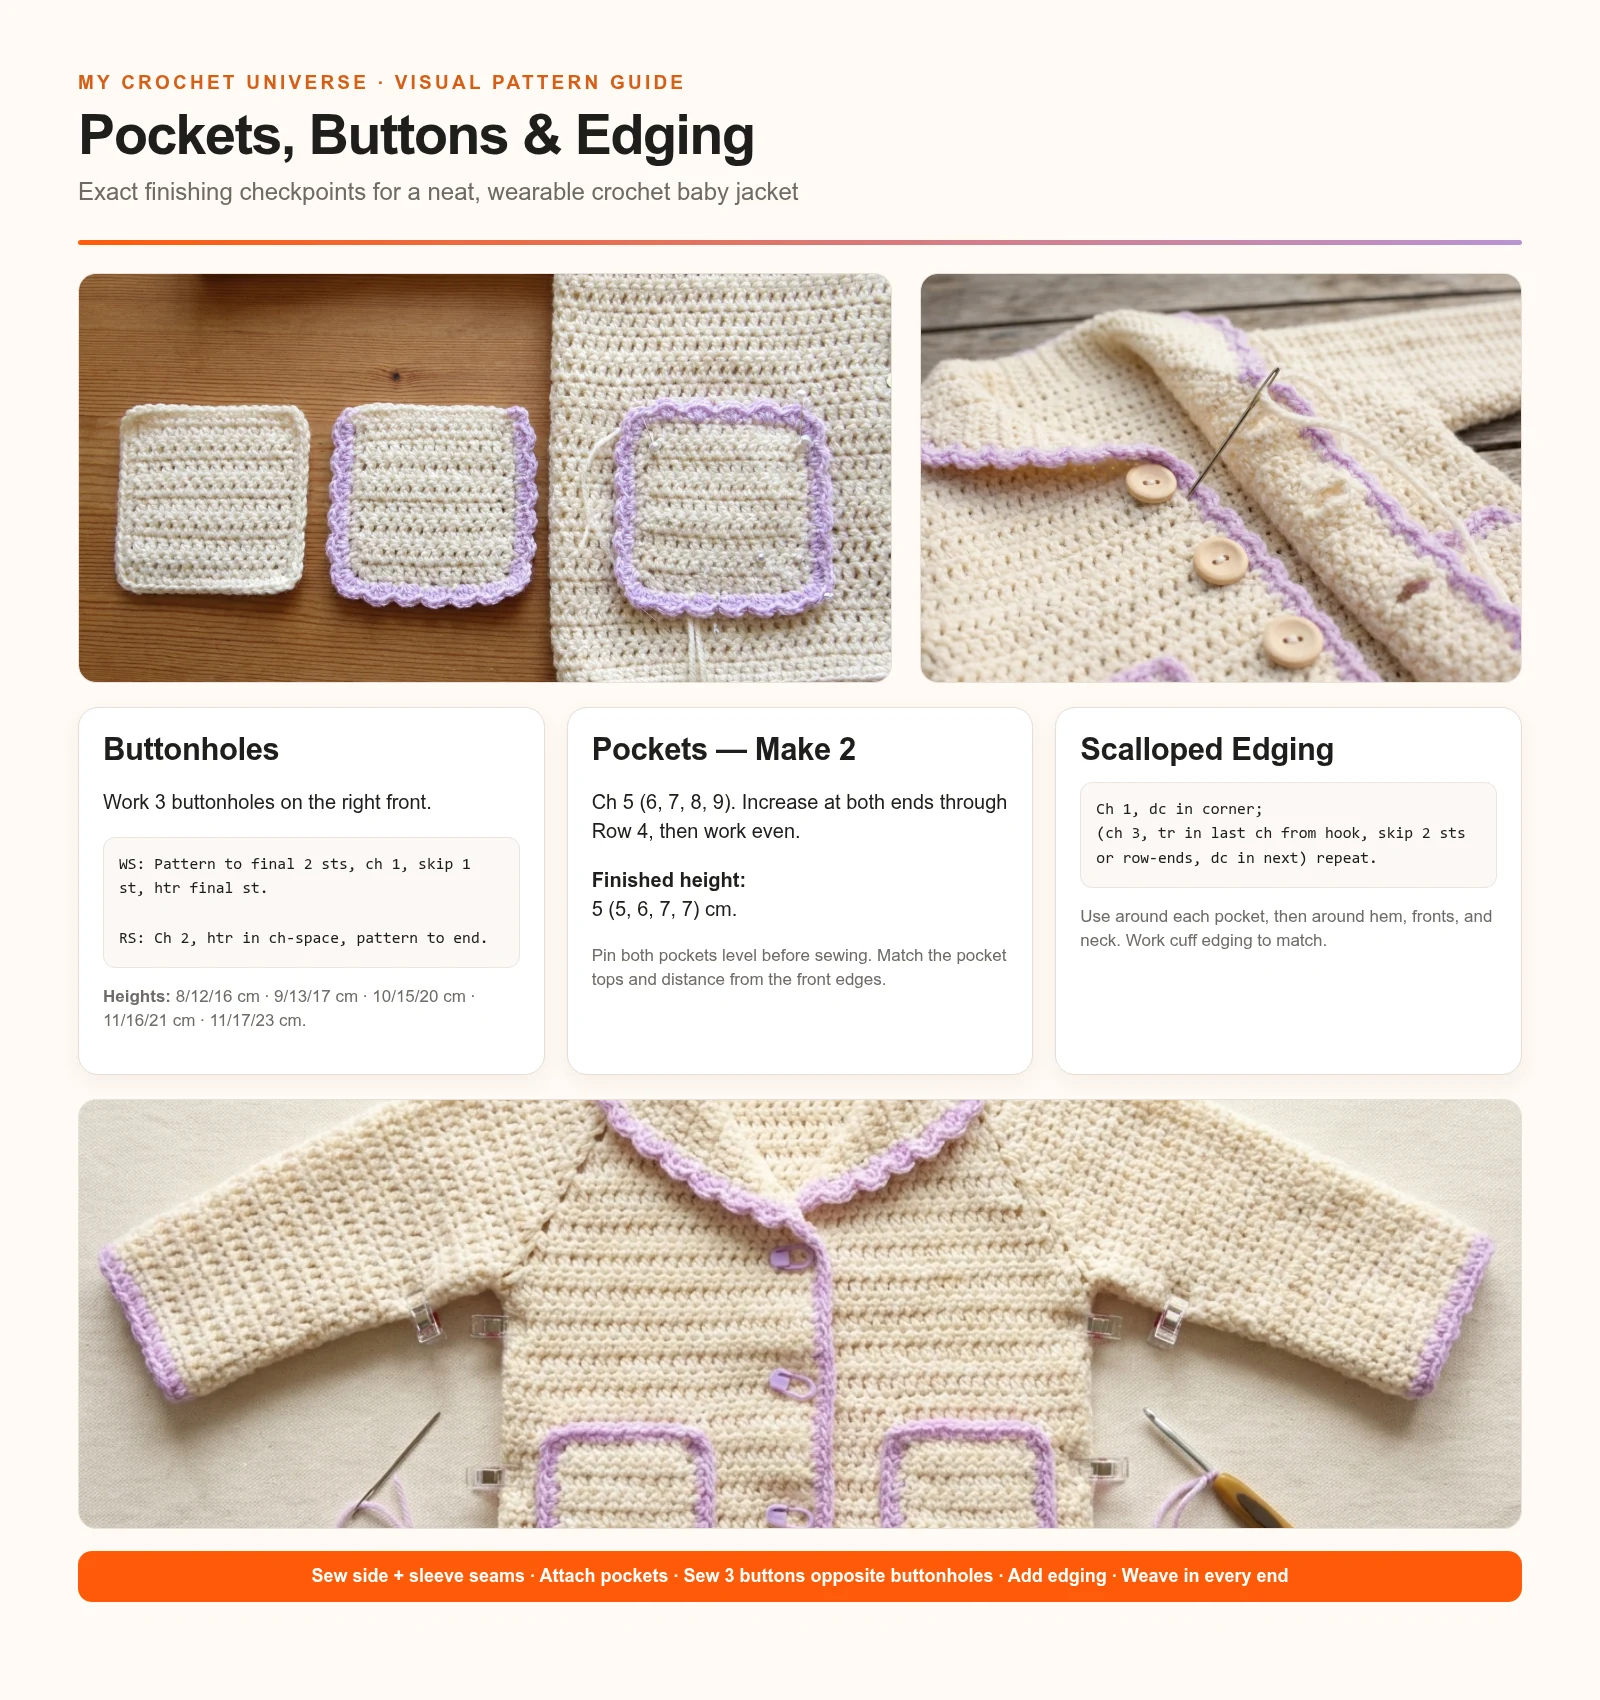
Crochet Baby Jacket Pattern Step-by-Step Tutorial
The written rows contain the exact counts. These six checkpoints help you manage the crochet baby jacket pattern without losing the construction sequence.
Step 1 — Swatch, measure, and select one size
Make a generous half-treble swatch, wash it, let it dry flat, and measure the center. Measure the child’s chest, body length, and sleeve length. Compare those numbers with the full table and record one size’s figures.
Do not combine the width from one size with the sleeve counts from another unless you are comfortable recalculating shaping. The center-back chains and armhole decreases depend on the selected front stitch totals.
Step 2 — Crochet the right front and its sleeve
Begin at the lower front and work even rows to the first armhole point. Add the first and second buttonholes at their measured heights. Make the armhole increases, add the appropriate sleeve extension, place the marker, and continue to the full front length.
Work the third buttonhole on time. Finish by slip stitching over the neck or lapel stitches, then fasten off. Label the piece “right” before setting it aside.
Step 3 — Mirror the left front and connect the back
Crochet the left front without buttonholes, switching RS and WS so the shaping mirrors the right side. Keep the yarn attached. Lay both pieces with the right sides oriented consistently before beginning the first back row.
Work across the left piece, crochet the center chain, and work across the right piece. Count the complete back row before turning. The next row works into both stitches and new chains, creating one connected upper jacket.
Step 4 — Shape the back and sew the main seams
Continue the back to the armhole markers. Slip stitch past the outer sleeve stitches, then use htr6tog at both working edges to return to body width. Work even until the back matches the fronts.
Fold the jacket with right sides together. Pin the sleeve and side seams from cuffs to hem. Sew with a flexible mattress or whip stitch, distributing the seam evenly so one side does not pucker.
Step 5 — Add neck edging, pockets, and buttons
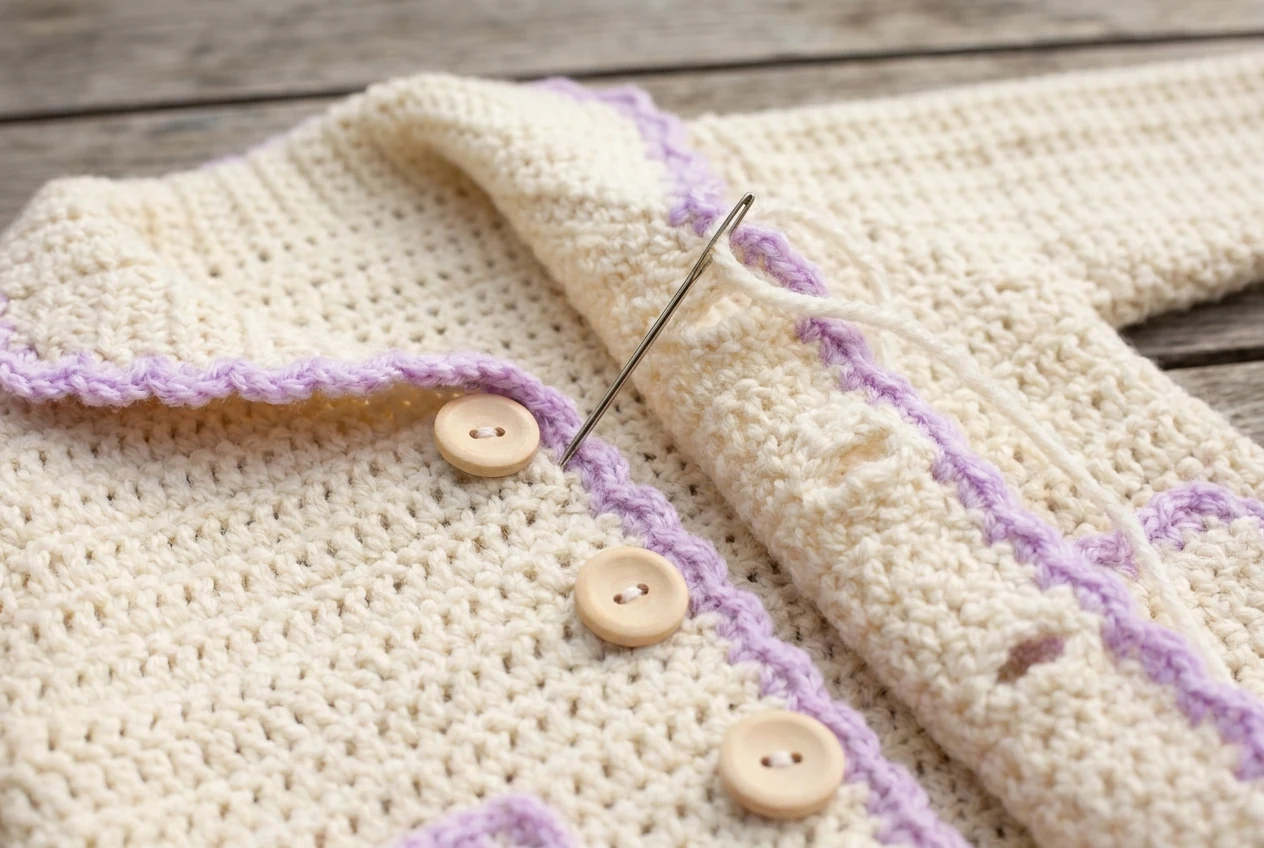
Work the two-row off-white neck edging. Crochet two identical pockets, add the contrast scallops, then pin them level on the fronts. Try the jacket flat and buttoned before sewing permanently.
Use strong thread or doubled yarn to sew each 15 mm button. Pass through the crochet fabric several times and finish on the wrong side. The buttons must align with the holes without pulling the front edge sideways.
Step 6 — Crochet the final border and inspect the jacket
Join the contrast yarn at the center back hem and work the scalloped repeat around the hem, both fronts, and neck. Match the cuffs to the same finish. Weave in all ends through several stitches, reverse direction, and trim only after a gentle tug test.
Wash or lightly block according to the yarn label. Lay the crochet baby jacket pattern flat, shape the lapels, square the pockets, and confirm that the sleeves are equal.
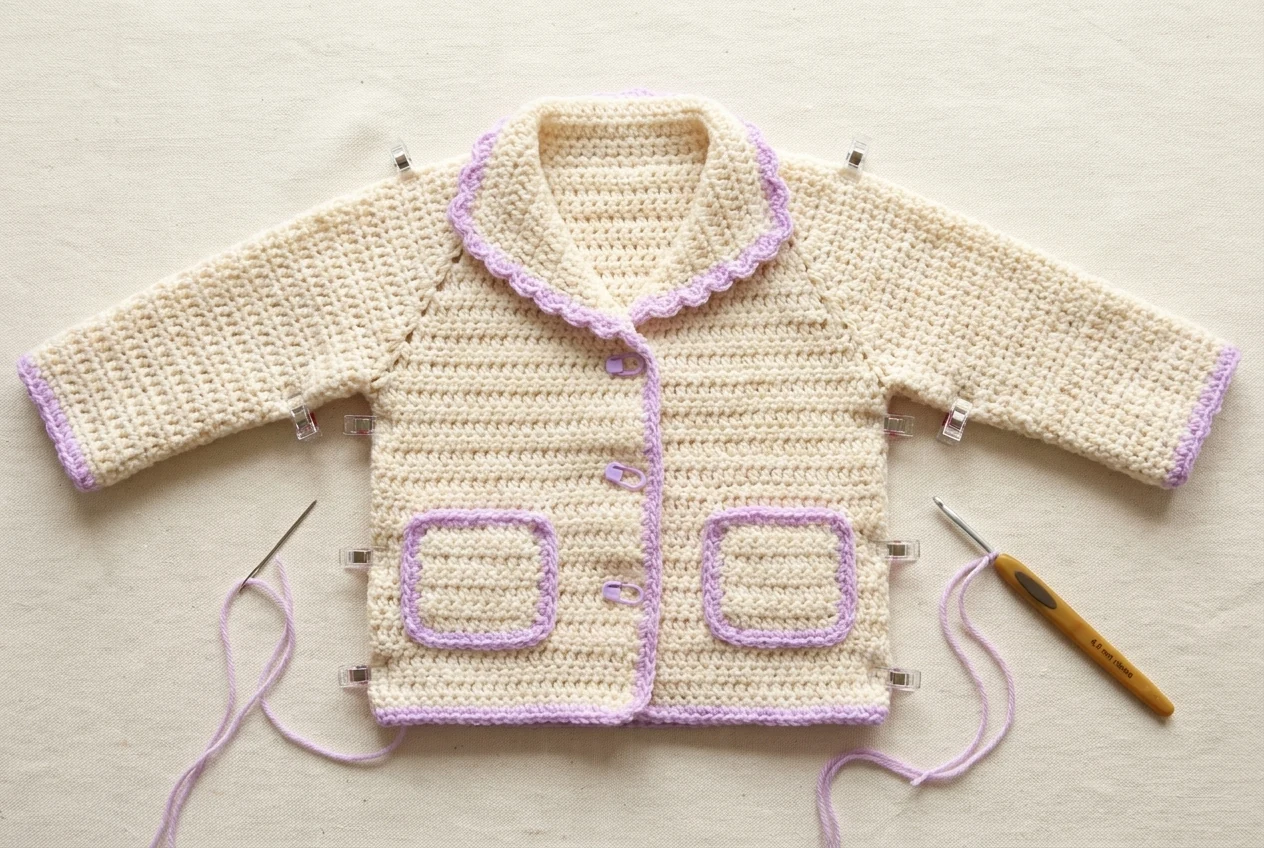
Why This Jacket Construction Works
The crochet baby jacket pattern reduces bulky shoulder seams by connecting the back directly to the front-and-sleeve sections. The crochet baby jacket pattern also uses measured front lengths, so row-gauge variations can be checked before the sleeve shaping begins.
Integrated lapels give the crochet baby jacket pattern a finished collar effect without another loose component. The two shaped pockets make the crochet baby jacket pattern practical while repeating the same half-treble fabric as the body. Contrast scallops help the crochet baby jacket pattern look polished and make the edges easier to see while finishing.
Because each front is made separately, the crochet baby jacket pattern lets you place buttonholes while the fabric is flat. Finally, five measurement sets allow the crochet baby jacket pattern to scale from newborn through preschool sizing while preserving the same construction logic.
Project Planning Notes
Print or copy the five values for your chosen crochet baby jacket pattern before crocheting the foundation chain. A row counter makes the crochet baby jacket pattern easier to mirror because both fronts must contain the same number of even rows before and after the armhole shaping.
Photograph the first completed front beside a ruler; that picture becomes a useful reference while making the second side of the crochet baby jacket pattern. Keep the armhole markers attached until the back decreases are complete, since those markers control an important transition in the crochet baby jacket pattern.
Before sewing, arrange every section of the crochet baby jacket pattern on a flat surface and compare sleeve length, front length, and lapel depth. Record the washed finished measurements of the crochet baby jacket pattern so you can choose or adjust a size confidently when making another jacket.
Fit, Finishing, and Button Safety
Check the neck, chest, cuffs, and sleeve length before gifting the jacket. The fabric should allow comfortable movement over a light layer without pulling across the buttons. Merino can relax after washing, so compare the finished garment with the washed swatch rather than the unwashed measurements.
Buttons are a potential choking hazard. Sew each button through a stable section of fabric using strong thread, secure the thread on the inside, and tug-test every button before use. Inspect the buttons before every wear and stop using the jacket if one becomes loose. A handmade buttoned garment is not sleepwear and should be used with age-appropriate supervision.
Avoid long loose yarn tails, beads, cords, or decorative pieces. Follow the care instructions for the chosen yarn and reshape the crochet baby jacket pattern flat after washing.
Troubleshooting
The jacket is wider or narrower than the size table
Recheck the washed gauge. Stitch gauge determines width across the fronts and back. Count the foundation row and confirm that every turning chain is handled consistently. Do not compensate by stretching the fabric during measurement.
One front is longer than the other
Count rows rather than relying only on centimeters. Confirm that both fronts ended on the required WS row and that the left side mirrors the right. Undo the longer section before joining the back; a difference becomes more visible after seaming.
The sleeve extension count does not match
Return to the last armhole increase and verify the correct size column. The five sizes use different repeat counts and sleeve-chain instructions. Place the marker only after the row reaches the stated final total.
The back pulls across the upper shoulders
Confirm the center chain count in Back Row 1 and make sure Back Row 2 includes every chain. Tight chains shorten the upper back, so crochet the center chains loosely or use a slightly larger hook for that chain only.
The htr6tog decrease is too tight
Draw each loop to the normal stitch height and keep the working yarn relaxed. If needed, use a hook one size larger for the decrease loops, then return to the main hook. Do not omit one of the six insertion points.
The buttonholes stretch
The hole should be large enough for a 15 mm button without forcing it. Reinforce the surrounding stitches discreetly with matching yarn if the fabric is loose. Avoid oversized or heavy buttons that drag the front edge.
The pockets look uneven
Count the final pocket rows, block both pieces to the same dimensions, and pin them while the jacket is buttoned and lying flat. Measure each pocket from the hem and front opening before sewing.
The scalloped border ruffles
You may be placing the repeat too closely along row ends. Skip the stated two stitches or row ends consistently, and distribute the dc anchor stitches evenly around corners. If the edge still waves, use a smaller hook for the contrast round.
FAQ
Open a question for a concise answer about skill level, terminology, yarn, sizing, finishing, and buttons.
Final Checklist
- Washed gauge measures 16 stitches × 14 rows over 10 cm.
- One size column was followed consistently.
- Right front contains three buttonholes at the stated heights.
- Left front mirrors the right without buttonholes.
- Armhole markers are correctly placed and both sleeves match.
- Back stitch totals match before and after decreases.
- Neck edging lies flat without tightening the opening.
- Two pockets are equal, level, and firmly sewn.
- Three 15 mm buttons align with the holes and pass a tug test.
- Contrast edging is evenly spaced around hem, fronts, neck, pockets, and cuffs.
- Seams are flexible, ends are woven in, and care instructions are recorded.
The finished crochet baby jacket pattern is a practical handmade layer with five useful sizes and a distinctive construction. Save your gauge, chosen size numbers, and finished measurements with the project photos so the next version is even easier.




