

6 Design Details Behind the Daisy Garden Baby Set Shell Stitch Skirt
A shell stitch baby skirt crochet pattern is more than a repeating motif; it is a study in spacing, increase placement, and edge finishing. In the Daisy Garden Baby Set, graduated shells build a gentle A-line shape, while eyelets, a two-color hem, tassels, and floral motifs connect the skirt to the button-front top.
This guide uses the supplied pink-and-white sample as a concrete case study. The phrase shell stitch baby skirt crochet describes the article’s planning focus; it is not a certification or promise. Always verify fit, yarn behavior, and finishing choices for the specific recipient.
In this article
Detail 1: The Eyelet Waistband Round
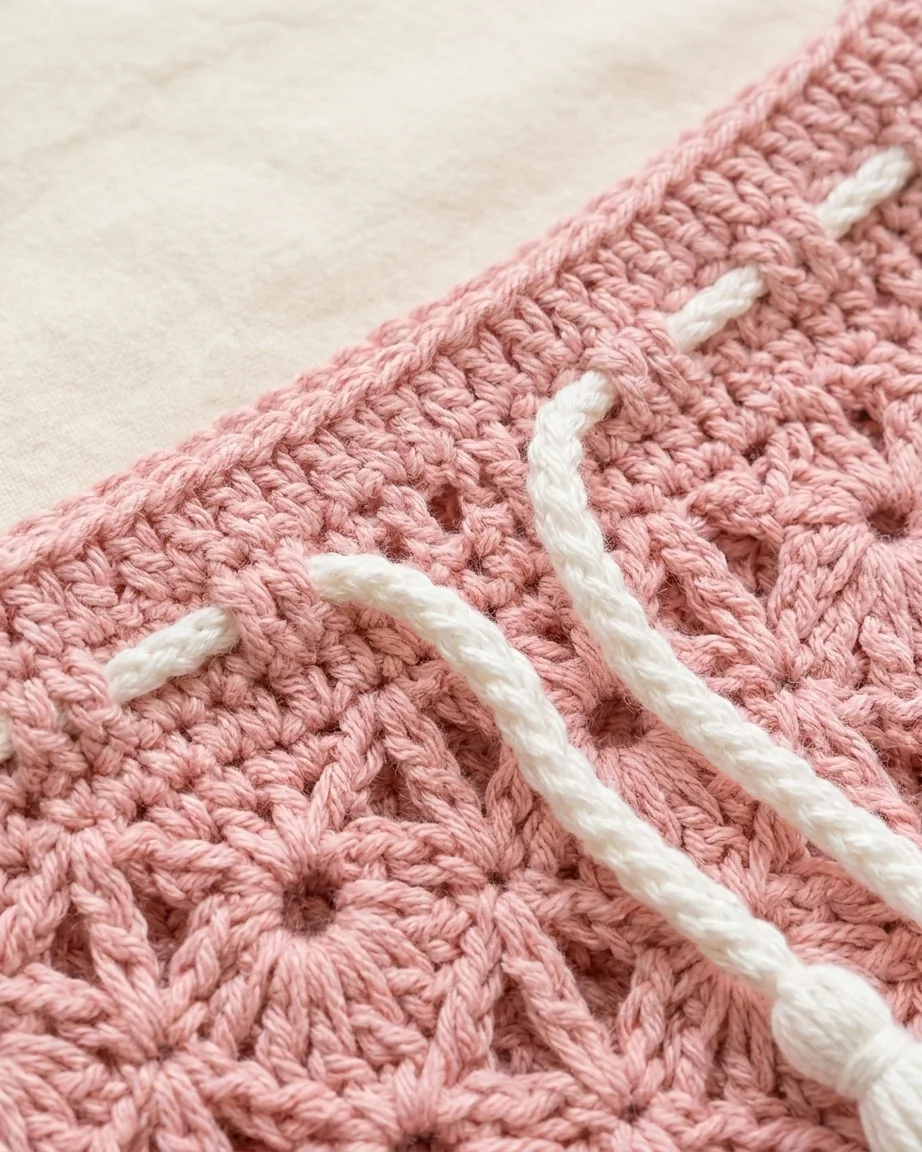
The skirt foundation has 78 (84, 90) chains. After a full double-crochet round, Round 2 repeats chain two, skip two, and double crochet in the next stitch, creating 26 (28, 30) spaces. Round 3 restores the stitch count by working in both stitches and spaces.
This eyelet round creates a built-in path for the white crocheted cord without sewing a separate casing. The openings should remain even and large enough for threading, but the cord still requires close adult supervision and removal for sleep.
Work slowly enough to inspect construction detail in good light. Count at the end of each repeat, compare both sides before continuing, and place a removable marker wherever a shaping decision must be mirrored. This small pause is faster than undoing several rows later. Keep notes for the size you selected, including hook changes, blocked gauge, yarn use, and any intentional color substitutions.
The photographs in this article are independently generated instructional references rather than cropped pages from the PDF. Use them to understand the stage and orientation, but let the official written pattern control exact stitch placement. Handmade tension varies, so your fabric may look slightly different while still matching the required blocked measurements.
shell stitch baby skirt crochet planning note
Photograph or note your choices for construction detail before changing the project. Keep the original pattern counts separate from personal edits, and make only one controlled change at a time. That record makes matching, gifting, and future remakes much easier.
Detail 2: Graduated Shell Increases
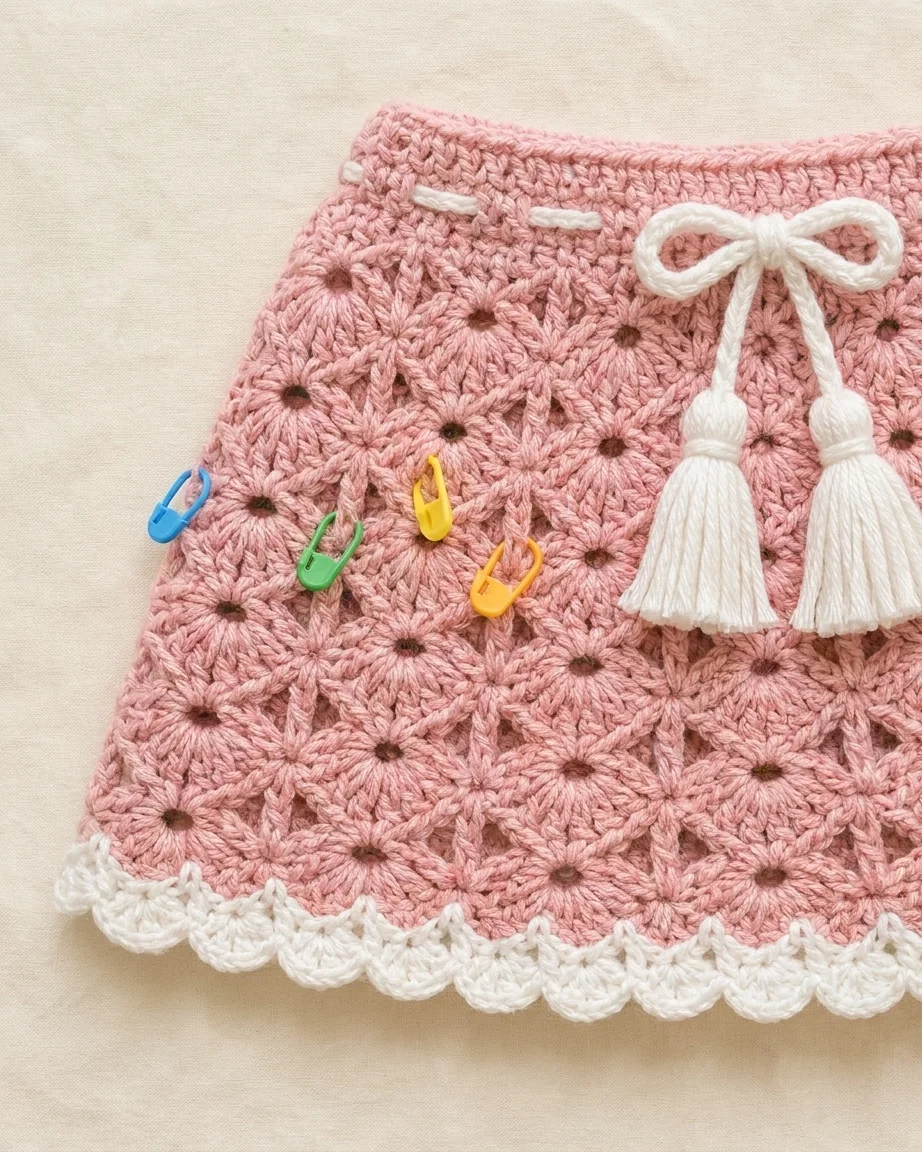
Round 4 establishes 13 (14, 15) shells. Round 6 adds four shells for 17 (18, 19); Round 9 adds four for 21 (22, 23); and Round 12 adds four for 25 (26, 27). Even rounds between increases give the new width time to settle into the fabric.
The result is a graduated A-line flare rather than one abrupt expansion. Maintain the pattern’s shell definition—five double crochets in one stitch or space—and check the center double crochet where the next single crochet is placed.
Work slowly enough to inspect construction detail in good light. Count at the end of each repeat, compare both sides before continuing, and place a removable marker wherever a shaping decision must be mirrored. This small pause is faster than undoing several rows later. Keep notes for the size you selected, including hook changes, blocked gauge, yarn use, and any intentional color substitutions.
The photographs in this article are independently generated instructional references rather than cropped pages from the PDF. Use them to understand the stage and orientation, but let the official written pattern control exact stitch placement. Handmade tension varies, so your fabric may look slightly different while still matching the required blocked measurements.
shell stitch baby skirt crochet planning note
Photograph or note your choices for construction detail before changing the project. Keep the original pattern counts separate from personal edits, and make only one controlled change at a time. That record makes matching, gifting, and future remakes much easier.
Detail 3: Balanced Marker Placement
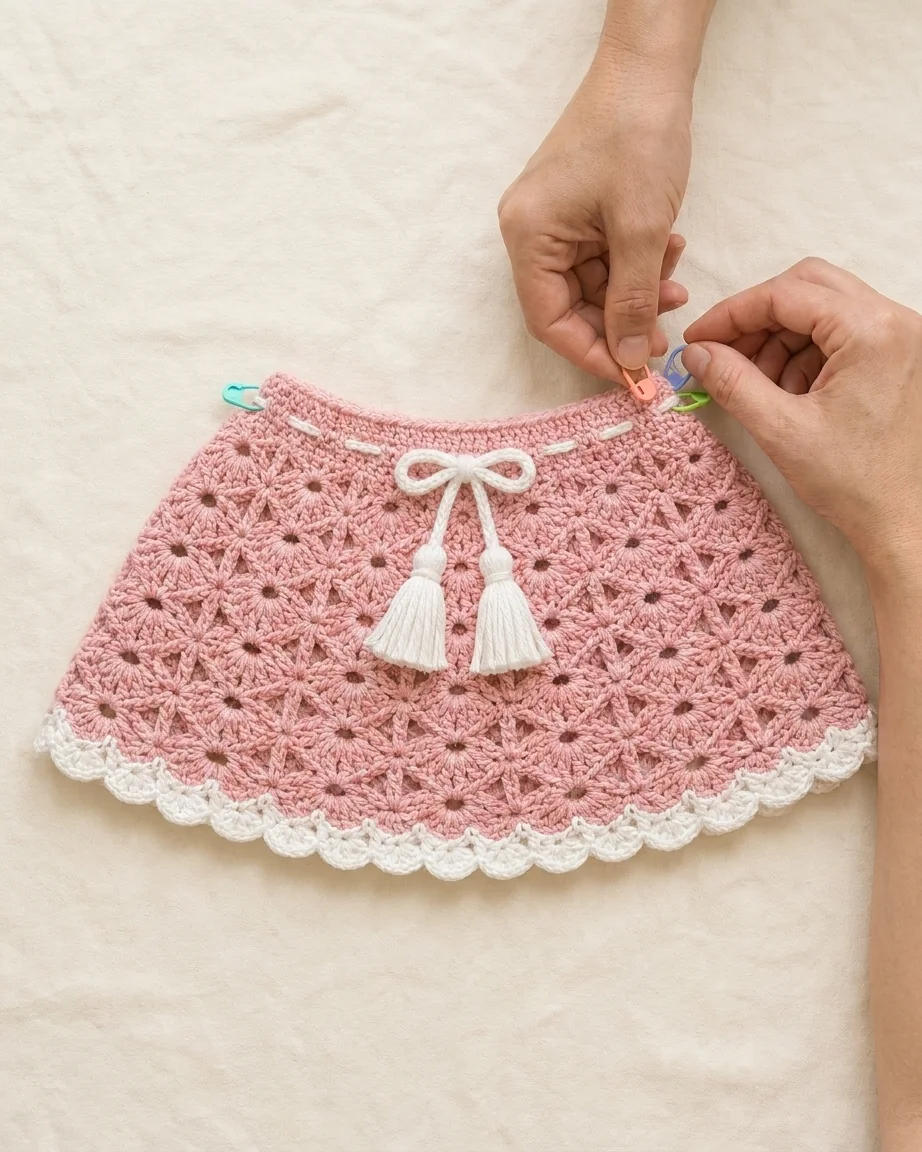
Four markers distribute each increase round around the circumference. The PDF instructs the maker to move all four evenly before each increase round, preventing increases from stacking in permanent vertical columns.
Count shells between markers, not just stitches. If one quadrant differs, stop before the increase round and redistribute the markers. This simple discipline supports symmetry and makes any error easier to locate.
Work slowly enough to inspect construction detail in good light. Count at the end of each repeat, compare both sides before continuing, and place a removable marker wherever a shaping decision must be mirrored. This small pause is faster than undoing several rows later. Keep notes for the size you selected, including hook changes, blocked gauge, yarn use, and any intentional color substitutions.
The photographs in this article are independently generated instructional references rather than cropped pages from the PDF. Use them to understand the stage and orientation, but let the official written pattern control exact stitch placement. Handmade tension varies, so your fabric may look slightly different while still matching the required blocked measurements.
shell stitch baby skirt crochet planning note
Photograph or note your choices for construction detail before changing the project. Keep the original pattern counts separate from personal edits, and make only one controlled change at a time. That record makes matching, gifting, and future remakes much easier.
Detail 4: The Anchor-and-Scallop Hem
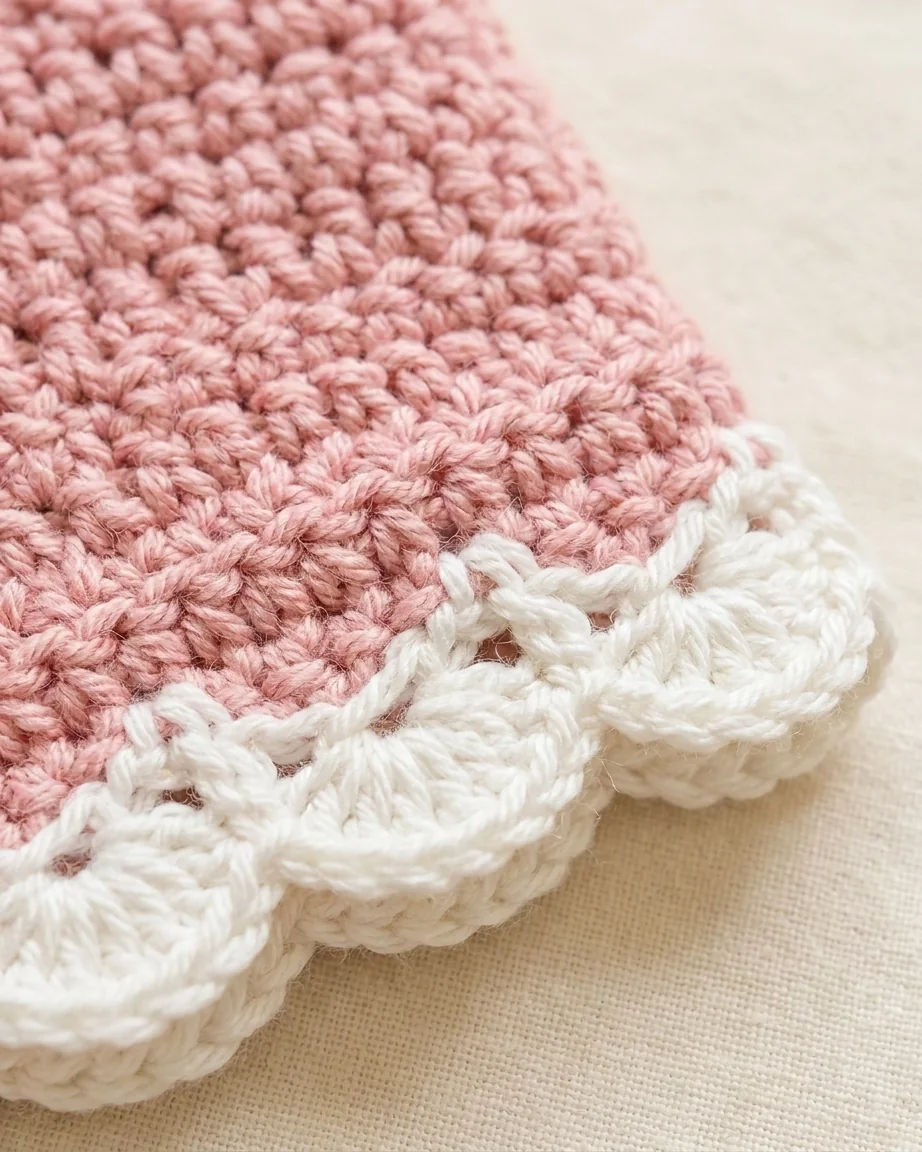
At the desired length, the pink anchor round works single crochet evenly across the shell tops, approximately 150 (156, 162) stitches. That line stabilizes an undulating edge before the contrast color is introduced.
White Round 1 is single crochet in every anchor stitch. White Round 2 repeats skip two, shell in the next stitch, skip two, single crochet in the next. The optional third round adds a small chain-three point. Pin scallops open while blocking so the border reads cleanly.
Work slowly enough to inspect construction detail in good light. Count at the end of each repeat, compare both sides before continuing, and place a removable marker wherever a shaping decision must be mirrored. This small pause is faster than undoing several rows later. Keep notes for the size you selected, including hook changes, blocked gauge, yarn use, and any intentional color substitutions.
The photographs in this article are independently generated instructional references rather than cropped pages from the PDF. Use them to understand the stage and orientation, but let the official written pattern control exact stitch placement. Handmade tension varies, so your fabric may look slightly different while still matching the required blocked measurements.
shell stitch baby skirt crochet planning note
Photograph or note your choices for construction detail before changing the project. Keep the original pattern counts separate from personal edits, and make only one controlled change at a time. That record makes matching, gifting, and future remakes much easier.
Detail 5: Tassel Proportion
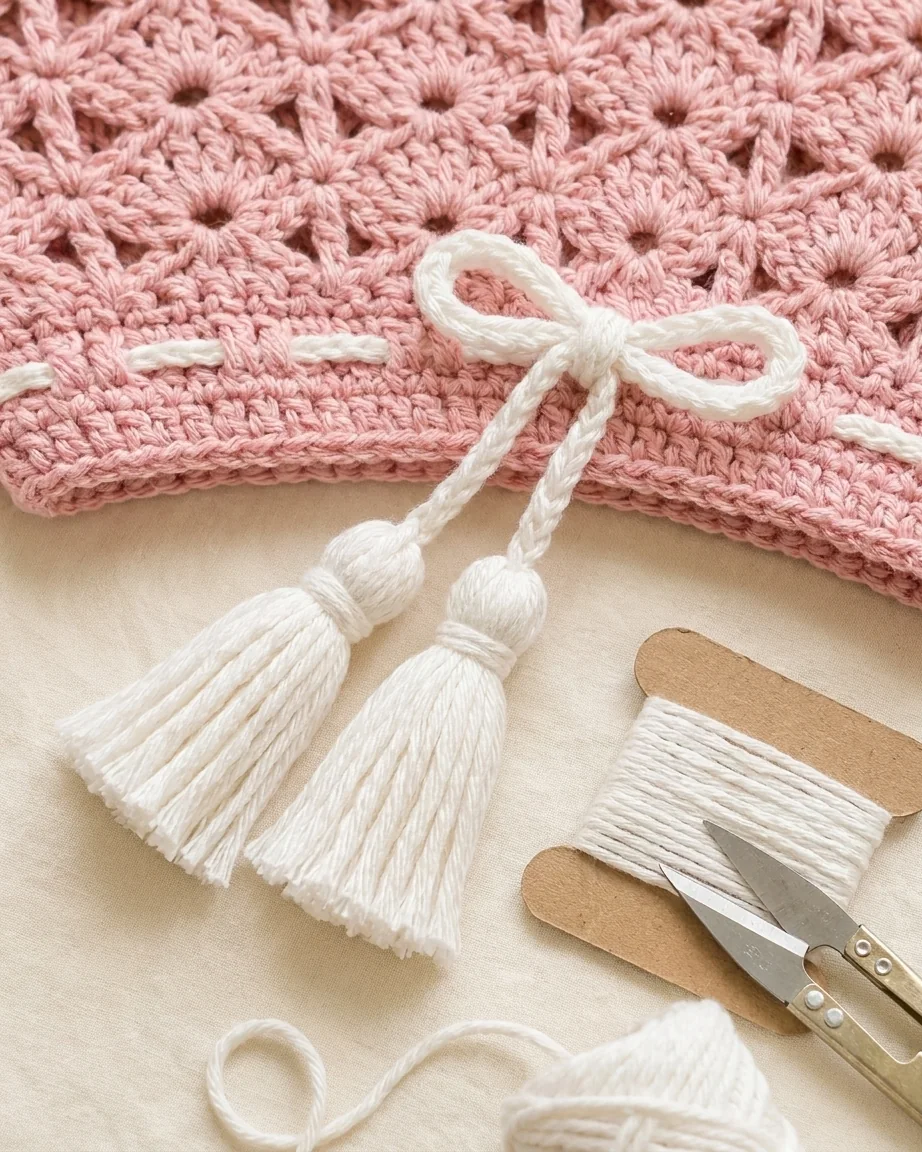
The pattern uses an 8 cm card as the winding form and about 20 wraps per tassel. After tying and cutting, bind 1 cm below the top and trim the finished tassel to 5 cm. Matching the pair matters more than chasing an exact loose-yarn appearance.
Attach each tassel securely to the cord and pull-test it. Keep cord ends short, supervise closely, and remove the drawstring for sleep. Decorative proportion never overrides the safety note.
Work slowly enough to inspect construction detail in good light. Count at the end of each repeat, compare both sides before continuing, and place a removable marker wherever a shaping decision must be mirrored. This small pause is faster than undoing several rows later. Keep notes for the size you selected, including hook changes, blocked gauge, yarn use, and any intentional color substitutions.
The photographs in this article are independently generated instructional references rather than cropped pages from the PDF. Use them to understand the stage and orientation, but let the official written pattern control exact stitch placement. Handmade tension varies, so your fabric may look slightly different while still matching the required blocked measurements.
shell stitch baby skirt crochet planning note
Photograph or note your choices for construction detail before changing the project. Keep the original pattern counts separate from personal edits, and make only one controlled change at a time. That record makes matching, gifting, and future remakes much easier.
Detail 6: Daisy Placement as Focal Points
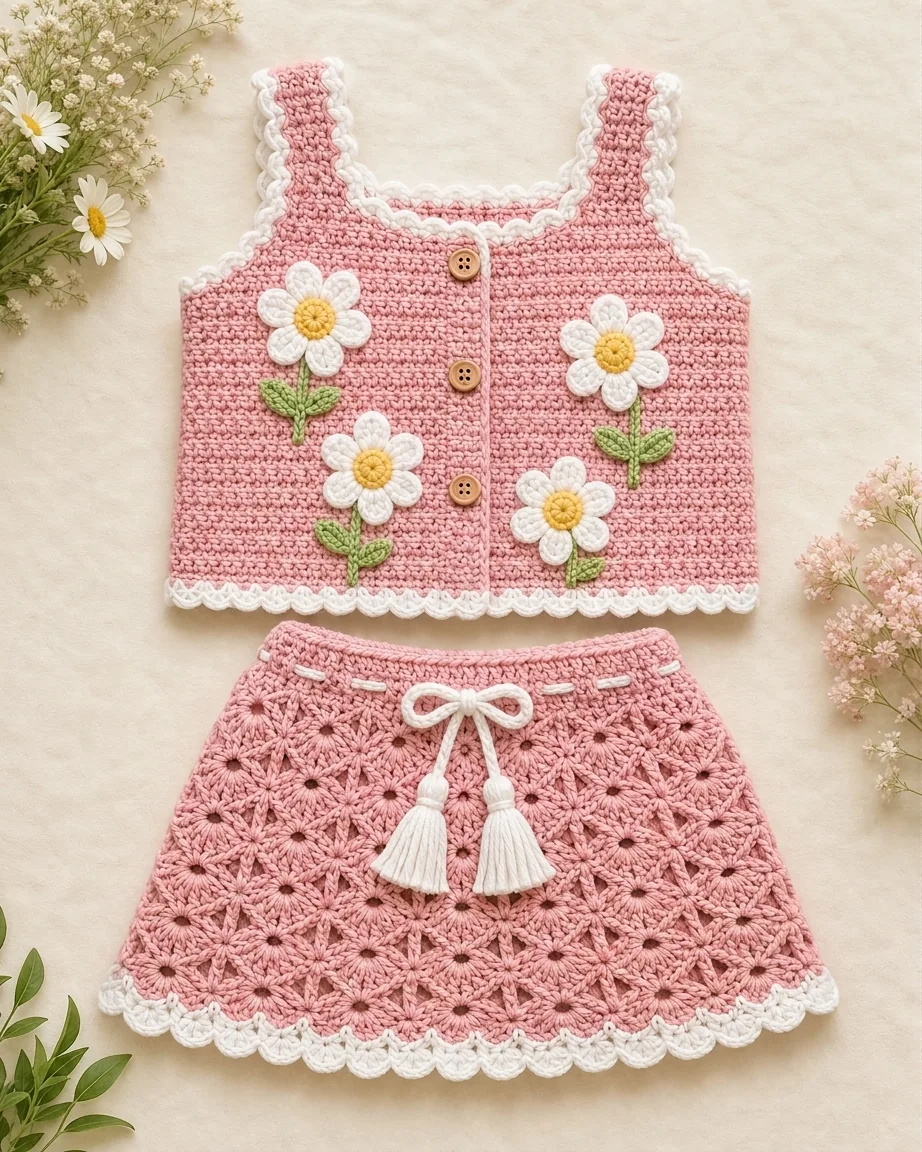
Two daisies on each front create a staggered vertical rhythm. Their white petals echo the scalloped edging, yellow centers provide a small accent, and green stems break up the broad pink panels.
Placed above the skirt, the vertical motifs balance the skirt’s repeated horizontal rounds and widening shell field. This visual relationship is also useful when exploring color choices that highlight shell texture. Secure every appliqué edge and inspect it with the same care as a button.
Work slowly enough to inspect construction detail in good light. Count at the end of each repeat, compare both sides before continuing, and place a removable marker wherever a shaping decision must be mirrored. This small pause is faster than undoing several rows later. Keep notes for the size you selected, including hook changes, blocked gauge, yarn use, and any intentional color substitutions.
The photographs in this article are independently generated instructional references rather than cropped pages from the PDF. Use them to understand the stage and orientation, but let the official written pattern control exact stitch placement. Handmade tension varies, so your fabric may look slightly different while still matching the required blocked measurements.
shell stitch baby skirt crochet planning note
Photograph or note your choices for construction detail before changing the project. Keep the original pattern counts separate from personal edits, and make only one controlled change at a time. That record makes matching, gifting, and future remakes much easier.
Practical Planning Notes
Understanding the construction helps the maker identify errors early: eyelets establish the cord path, markers control flare, the anchor round organizes the hem, and blocking opens the scallops. Pair that knowledge with sizing and safety considerations for the skirt before the set is used or gifted.
Work slowly enough to inspect the final plan in good light. Count at the end of each repeat, compare both sides before continuing, and place a removable marker wherever a shaping decision must be mirrored. This small pause is faster than undoing several rows later. Keep notes for the size you selected, including hook changes, blocked gauge, yarn use, and any intentional color substitutions.
The photographs in this article are independently generated instructional references rather than cropped pages from the PDF. Use them to understand the stage and orientation, but let the official written pattern control exact stitch placement. Handmade tension varies, so your fabric may look slightly different while still matching the required blocked measurements.
Frequently Asked Questions
Can I lengthen the skirt?
Continue even shell rounds only after verifying circumference and yarn supply. Remember that extra length changes yarn use and finished proportion.
What happens if I skip increase rounds?
The skirt will have fewer shells and less flare. It may also change fit, drape, and hem repeat alignment.
Why use an anchor round?
It creates a more stable line across the shell tops before the white border is worked and gives the scallops a controlled foundation.
Final Checklist
- ✓ Confirm the recipient and selected size.
- ✓ Swatch, block, and record the result.
- ✓ Secure and inspect every removable-looking detail.
- ✓ Keep pattern instructions and personal notes together.
Ready to crochet the Daisy Garden set?
Use this article as your planning companion, then follow the complete illustrated pattern for the row-by-row instructions and size-specific counts.




