

8 Key Stages to Master the Daisy Garden Baby Set Crochet Pattern
The Daisy Garden Baby Set crochet pattern looks delicate, but its real strength is the construction sequence. Before you pick up your 4.0 mm hook, it helps to see the whole journey from foundation chain to finished tassel. This eight-stage walkthrough follows the supplied premium PDF so you know what to expect at every row, decrease, scallop edge, and finishing checkpoint.
The set is sized for 12–18 months, 24 months, and 2T–3T, but age labels are only a starting point. Choose from finished measurements and make a blocked swatch. If you are making the project as a gift, review these thoughtful occasions to gift the pattern and confirm measurements with the recipient before beginning. The walkthrough accompanies, rather than replaces, the official PDF.
Ready to crochet the Daisy Garden set?
Use this article as your planning companion, then follow the complete illustrated pattern for the row-by-row instructions and size-specific counts.
In this article
- Stage 1: Make and Block Your Gauge Swatch
- Stage 2: Crochet the Back Panel
- Stage 3: Shape the Mirrored Front Panels
- Stage 4: Join Shoulders and Side Seams
- Stage 5: Add Scallop Edging and Button Bands
- Stage 6: Create and Attach Daisy Appliqués
- Stage 7: Work the Waistband and Shell-Stitch Skirt
- Stage 8: Finish with Hem Border, Cord, and Blocking
Stage 1: Make and Block Your Gauge Swatch
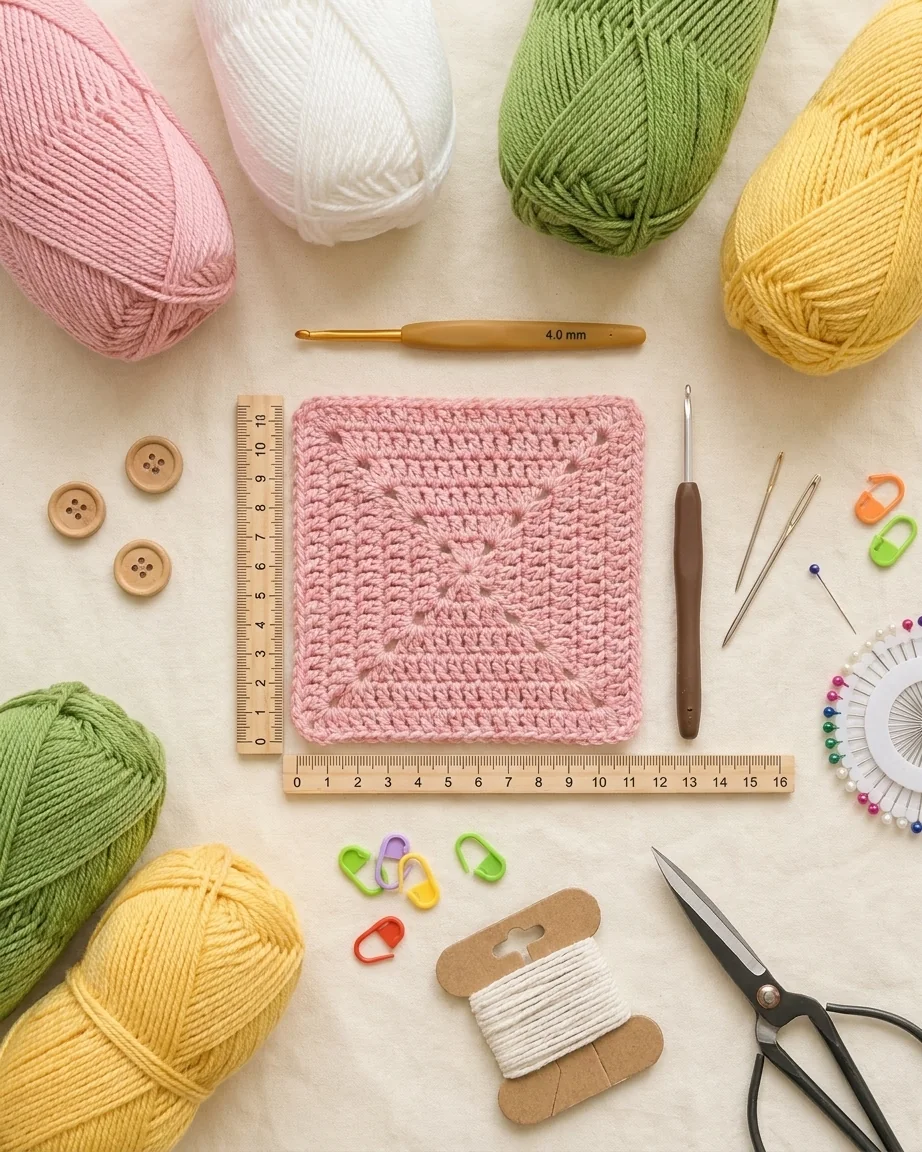
The PDF specifies CYC #3 DK/light-worsted yarn and a 4.0 mm / US G-6 hook, or the hook needed to obtain gauge. Plan 3 (3, 4) × 50 g pink, 1 (1, 2) × 50 g white, plus small green and yellow amounts. Gather three 15 mm wooden buttons, markers, tapestry needle, pins, scissors, and an 8 cm tassel card.
Crochet a representative double-crochet swatch, wash or steam it according to the yarn label, shape it without overstretching, and let it dry completely. The blocked target is 18 dc and 10 rows per 10 cm / 4 in. Also sample the shell fabric physically because the pattern specifically asks the maker to confirm shell gauge. A swatch that is too small needs a larger hook; one that is too large needs a smaller hook.
Daisy Garden Baby Set crochet pattern checkpoint
Compare this stage with the official PDF before continuing, record the active size, and verify the count after blocking or shaping.
Work slowly enough to inspect stage 1: make and block your gauge swatch in good light. Count at the end of each repeat, compare both sides before continuing, and place a removable marker wherever a shaping decision must be mirrored. This small pause is faster than undoing several rows later. Keep notes for the size you selected, including hook changes, blocked gauge, yarn use, and any intentional color substitutions.
The photographs in this article are independently generated instructional references rather than cropped pages from the PDF. Use them to understand the stage and orientation, but let the official written pattern control exact stitch placement. Handmade tension varies, so your fabric may look slightly different while still matching the required blocked measurements.
Stage 2: Crochet the Back Panel
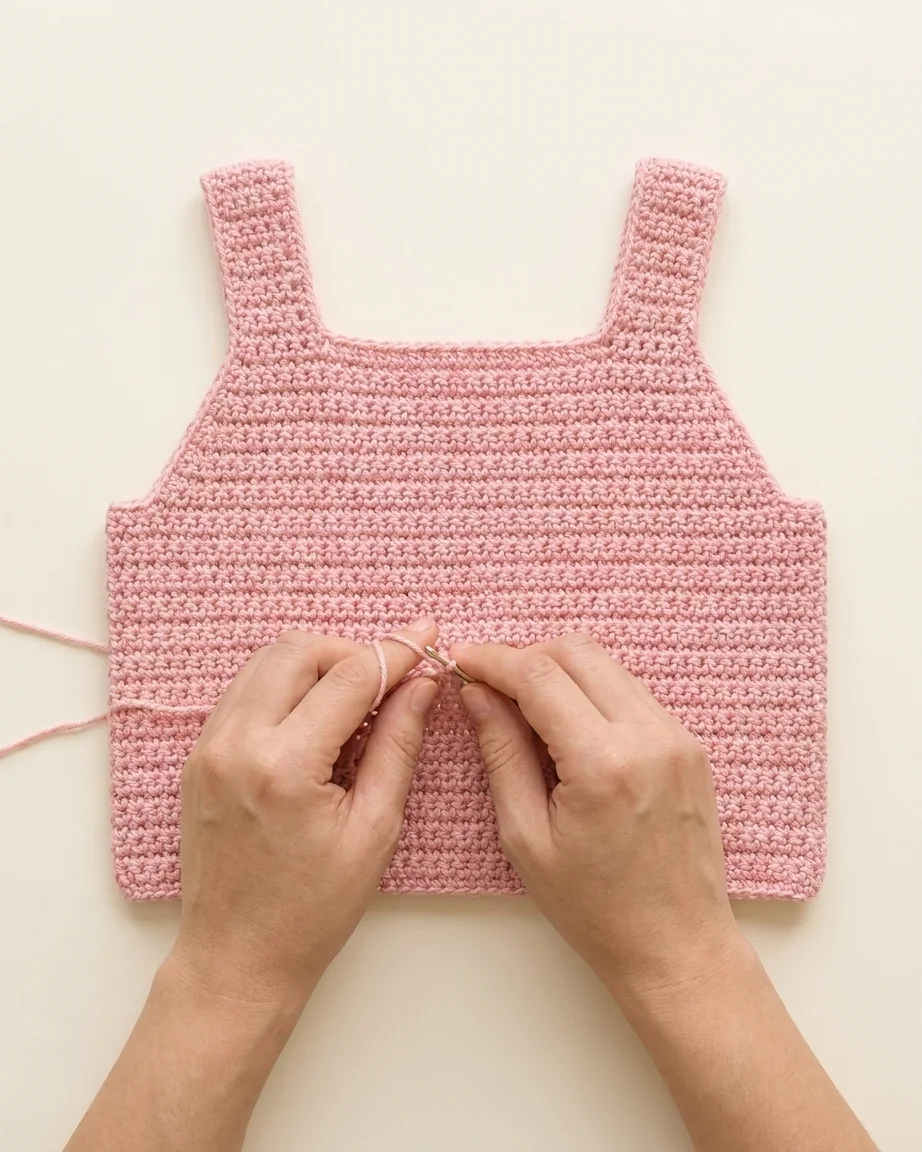
The back is worked flat from the bottom up. Chain 48 (52, 56). Work the first double crochet in the fourth chain from the hook and continue across for 46 (50, 54) stitches. Work evenly through Row 16, checking width against your blocked gauge rather than relying on the unblocked fabric.
On Rows 17–19, work dc2tog at both ends of every row. The count becomes 40 (44, 48). Continue evenly to Row 24 (26, 28), then use the seven stitches at each top corner for straps, working 9 (10, 11) strap rows. Label the right side and do not trim structural tails until the join is secure.
Daisy Garden Baby Set crochet pattern checkpoint
Compare this stage with the official PDF before continuing, record the active size, and verify the count after blocking or shaping.
Work slowly enough to inspect stage 2: crochet the back panel in good light. Count at the end of each repeat, compare both sides before continuing, and place a removable marker wherever a shaping decision must be mirrored. This small pause is faster than undoing several rows later. Keep notes for the size you selected, including hook changes, blocked gauge, yarn use, and any intentional color substitutions.
The photographs in this article are independently generated instructional references rather than cropped pages from the PDF. Use them to understand the stage and orientation, but let the official written pattern control exact stitch placement. Handmade tension varies, so your fabric may look slightly different while still matching the required blocked measurements.
Stage 3: Shape the Mirrored Front Panels
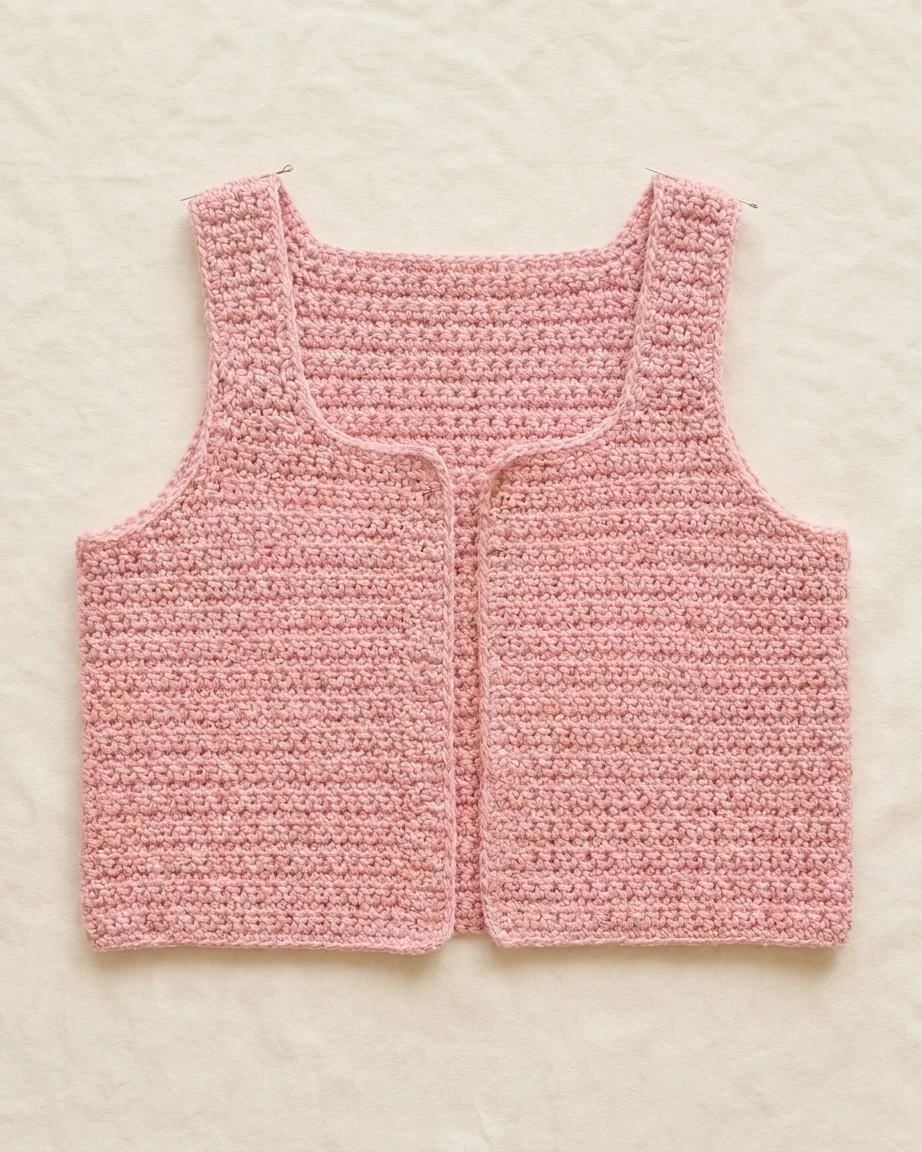
Make two fronts as mirror images. Chain 26 (27, 29), work from the fourth chain, and finish Row 1 with 24 (25, 27) stitches. Work evenly through Row 16. Across Rows 17–19, decrease only at the outer armhole edge to reach 21 (22, 24) stitches.
Across Rows 20–22, place the decreases at the center-front edge, not the armhole edge, reaching 18 (19, 21) stitches. Continue to Row 24 (26, 28), then work the outer seven stitches as the strap for 9 (10, 11) rows. Lay both fronts over the back: hems, underarms, neckline curves, and strap lengths should align before assembly.
Daisy Garden Baby Set crochet pattern checkpoint
Compare this stage with the official PDF before continuing, record the active size, and verify the count after blocking or shaping.
Work slowly enough to inspect stage 3: shape the mirrored front panels in good light. Count at the end of each repeat, compare both sides before continuing, and place a removable marker wherever a shaping decision must be mirrored. This small pause is faster than undoing several rows later. Keep notes for the size you selected, including hook changes, blocked gauge, yarn use, and any intentional color substitutions.
The photographs in this article are independently generated instructional references rather than cropped pages from the PDF. Use them to understand the stage and orientation, but let the official written pattern control exact stitch placement. Handmade tension varies, so your fabric may look slightly different while still matching the required blocked measurements.
Stage 4: Join Shoulders and Side Seams
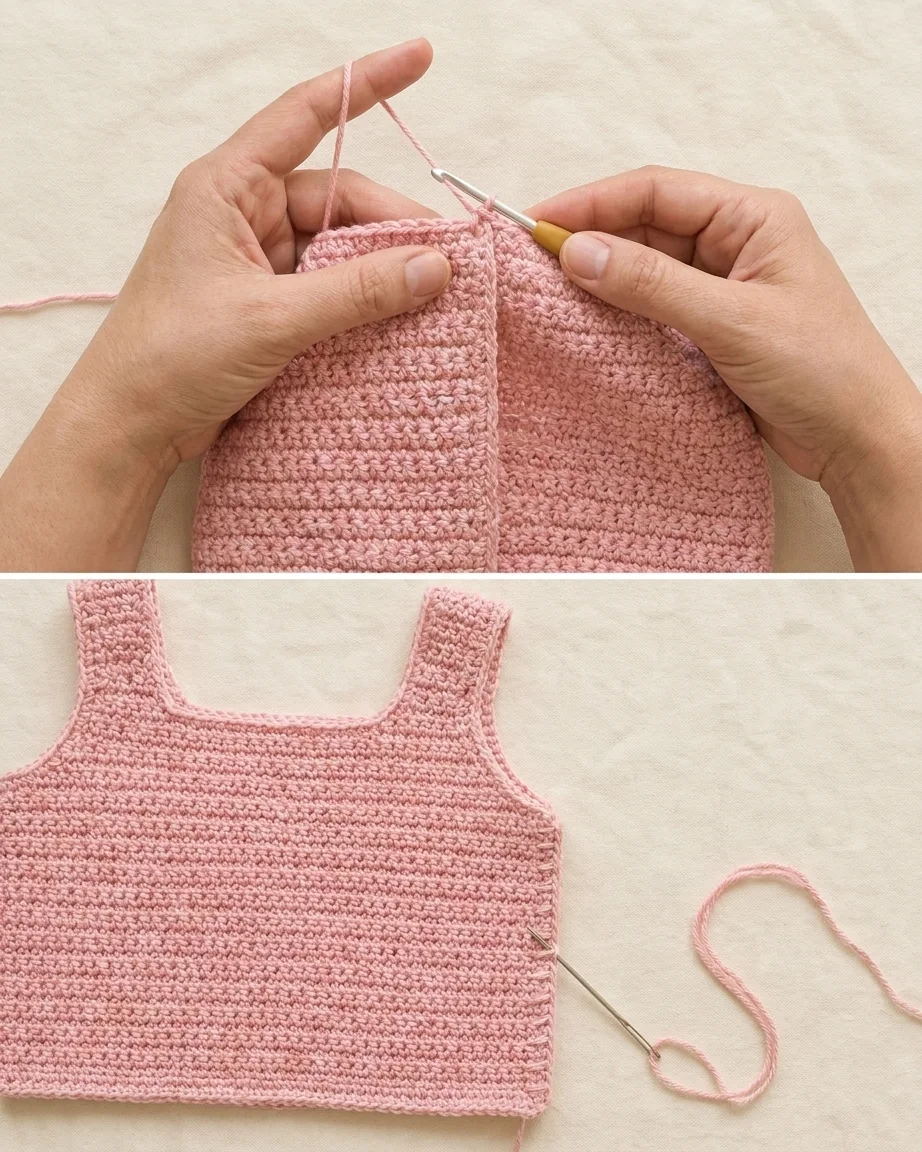
Place matching strap tops right sides together and slip stitch them. A flat, controlled join is preferable to a bulky ridge because white edging will later frame both strap sides. Next, whipstitch each side from the hem to the start of the shaped armhole rows.
Leave the shaped armhole rows open. Turn the top right side out, smooth the seams with your fingers, and compare the two armholes. Secure structural yarn tails into dense fabric, changing direction so the ends resist movement. Do not use appliqué tails as structural seam yarn.
Daisy Garden Baby Set crochet pattern checkpoint
Compare this stage with the official PDF before continuing, record the active size, and verify the count after blocking or shaping.
Work slowly enough to inspect stage 4: join shoulders and side seams in good light. Count at the end of each repeat, compare both sides before continuing, and place a removable marker wherever a shaping decision must be mirrored. This small pause is faster than undoing several rows later. Keep notes for the size you selected, including hook changes, blocked gauge, yarn use, and any intentional color substitutions.
The photographs in this article are independently generated instructional references rather than cropped pages from the PDF. Use them to understand the stage and orientation, but let the official written pattern control exact stitch placement. Handmade tension varies, so your fabric may look slightly different while still matching the required blocked measurements.
Stage 5: Add Scallop Edging and Button Bands
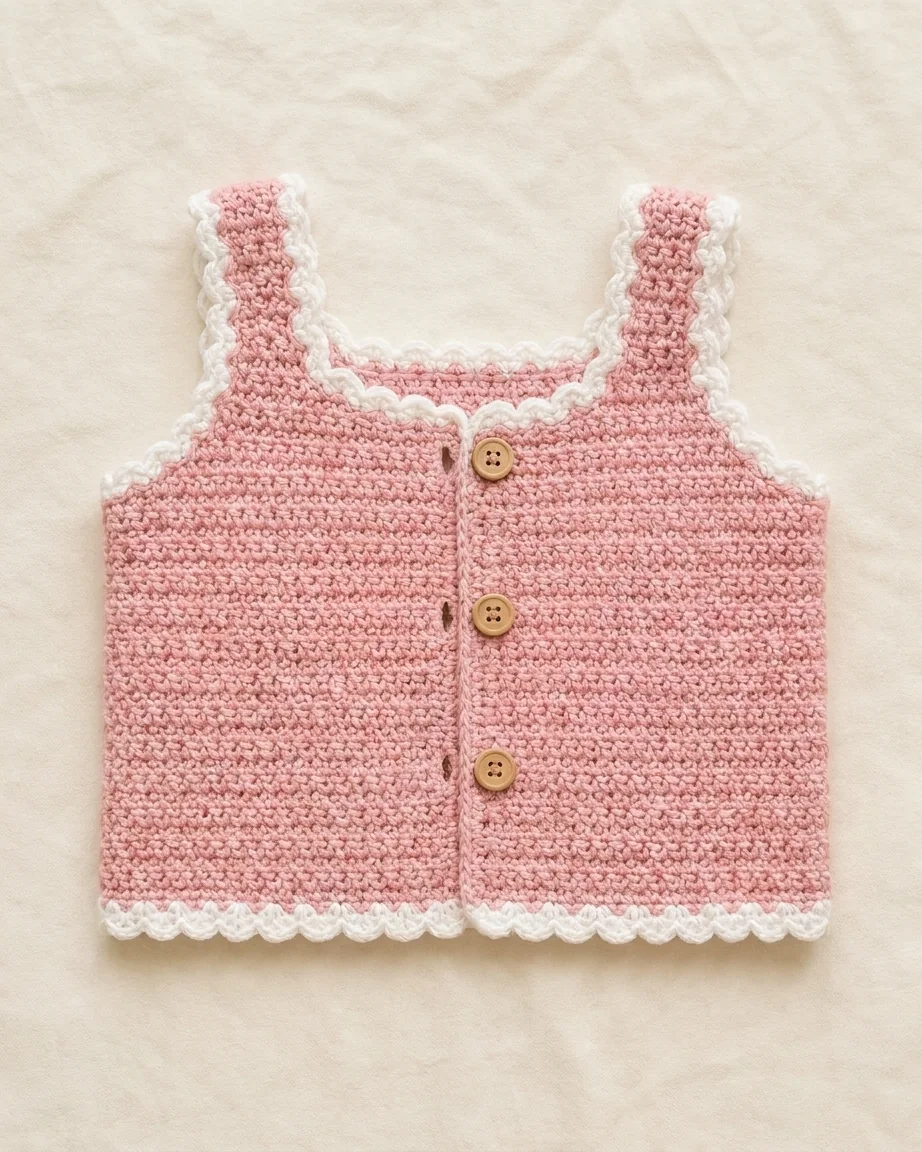
Work white scallops around both armholes, then around the back neck, front necklines, and both sides of the straps. The pattern defines a scallop as a shell, skip two, single crochet in the next stitch, repeated evenly. At the hem, first establish one single-crochet round, then add the scallop round.
For the center fronts, work three rows of single crochet on the left band. On the right band, form three evenly spaced chain-two buttonholes during Row 2; in Row 3, work two single crochets in each buttonhole space. Overlap the buttonhole band over the button band, block the top, and only then sew the three wooden buttons opposite the holes. Adjust spacing or hook size if edging pulls or ripples.
Daisy Garden Baby Set crochet pattern checkpoint
Compare this stage with the official PDF before continuing, record the active size, and verify the count after blocking or shaping.
Work slowly enough to inspect stage 5: add scallop edging and button bands in good light. Count at the end of each repeat, compare both sides before continuing, and place a removable marker wherever a shaping decision must be mirrored. This small pause is faster than undoing several rows later. Keep notes for the size you selected, including hook changes, blocked gauge, yarn use, and any intentional color substitutions.
The photographs in this article are independently generated instructional references rather than cropped pages from the PDF. Use them to understand the stage and orientation, but let the official written pattern control exact stitch placement. Handmade tension varies, so your fabric may look slightly different while still matching the required blocked measurements.
Stage 6: Create and Attach Daisy Appliqués
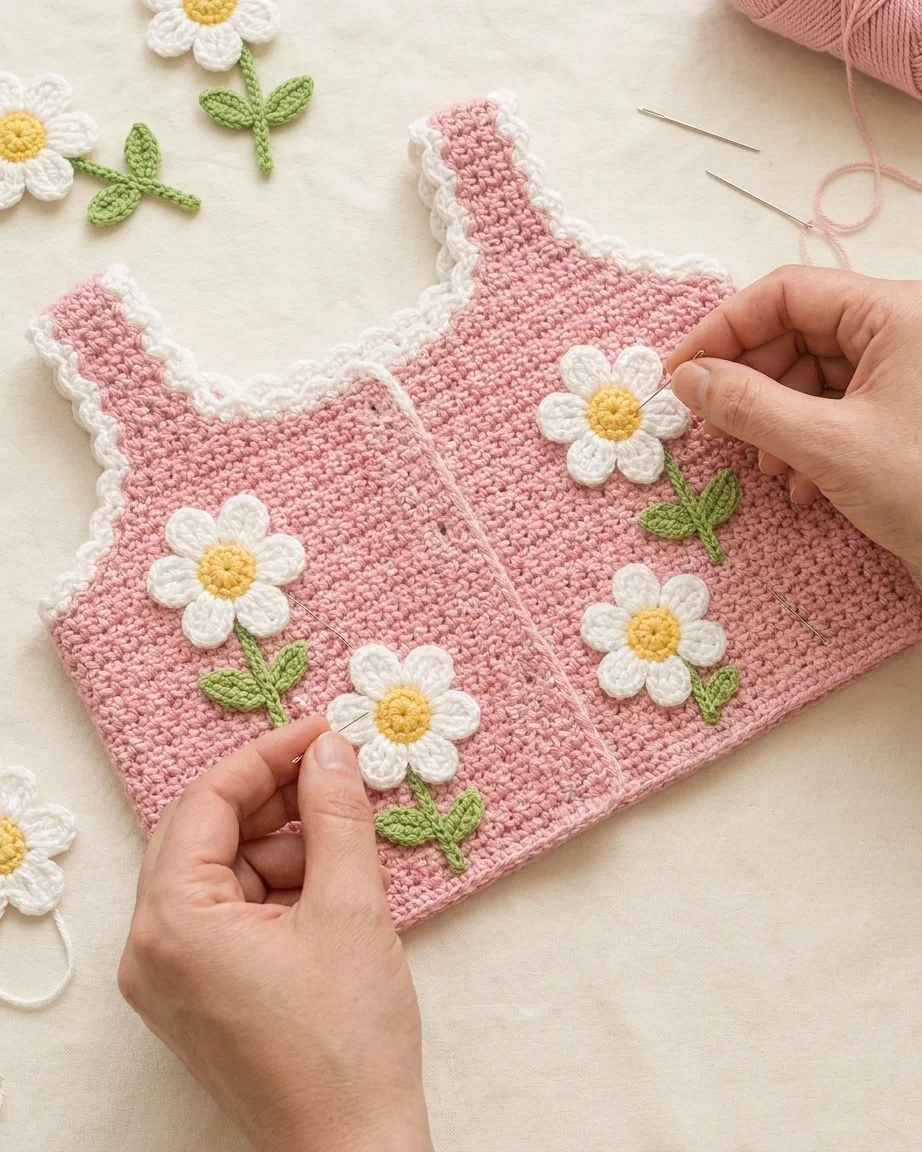
Make four white flowers. Begin with a magic ring and repeat (sc, hdc, dc, hdc, sc, sl st) six times in the ring, producing six petals. For each yellow center, make a magic ring, work six single crochets, and slip stitch to join. Sew the yellow center securely over the petal unit.
For every green stem, chain eight. Form a leaf from a chain of five, working slip stitch, half double crochet, double crochet, and half double crochet along the chain. Pin two flowers per front in a staggered layout. Sew every petal edge, center, stem, and leaf edge; then pull-test each attachment before wear.
Daisy Garden Baby Set crochet pattern checkpoint
Compare this stage with the official PDF before continuing, record the active size, and verify the count after blocking or shaping.
Work slowly enough to inspect stage 6: create and attach daisy appliqués in good light. Count at the end of each repeat, compare both sides before continuing, and place a removable marker wherever a shaping decision must be mirrored. This small pause is faster than undoing several rows later. Keep notes for the size you selected, including hook changes, blocked gauge, yarn use, and any intentional color substitutions.
The photographs in this article are independently generated instructional references rather than cropped pages from the PDF. Use them to understand the stage and orientation, but let the official written pattern control exact stitch placement. Handmade tension varies, so your fabric may look slightly different while still matching the required blocked measurements.
Stage 7: Work the Waistband and Shell-Stitch Skirt
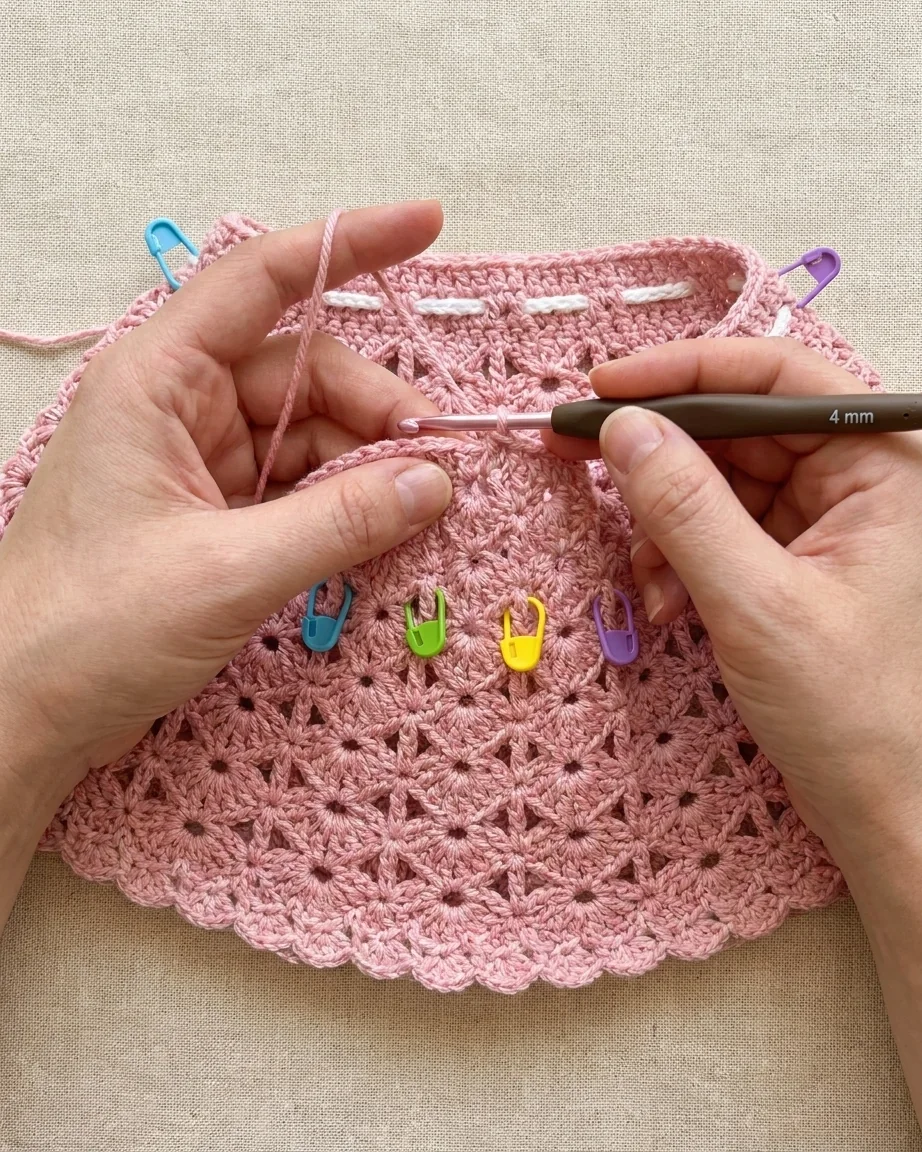
The skirt is worked top-down in joined rounds. Chain 78 (84, 90), check that the chain is not twisted, and join. Round 1 is double crochet throughout. Round 2 creates 26 (28, 30) eyelet spaces with chain two, skip two, double crochet in the next stitch. Round 3 restores 78 (84, 90) stitches by working into the stitches and spaces.
Round 4 establishes 13 (14, 15) shells. Alternate shells and single crochets as specified. In Round 6, add four shells at evenly spaced markers to reach 17 (18, 19). Work Rounds 7–8 evenly, add four shells in Round 9 to reach 21 (22, 23), work Rounds 10–11 evenly, then add four in Round 12 for 25 (26, 27). Move all four markers evenly before each increase round and continue until the shell section measures 19 (21, 23) cm from the waistband.
Daisy Garden Baby Set crochet pattern checkpoint
Compare this stage with the official PDF before continuing, record the active size, and verify the count after blocking or shaping.
Work slowly enough to inspect stage 7: work the waistband and shell-stitch skirt in good light. Count at the end of each repeat, compare both sides before continuing, and place a removable marker wherever a shaping decision must be mirrored. This small pause is faster than undoing several rows later. Keep notes for the size you selected, including hook changes, blocked gauge, yarn use, and any intentional color substitutions.
The photographs in this article are independently generated instructional references rather than cropped pages from the PDF. Use them to understand the stage and orientation, but let the official written pattern control exact stitch placement. Handmade tension varies, so your fabric may look slightly different while still matching the required blocked measurements.
Stage 8: Finish with Hem Border, Cord, and Blocking
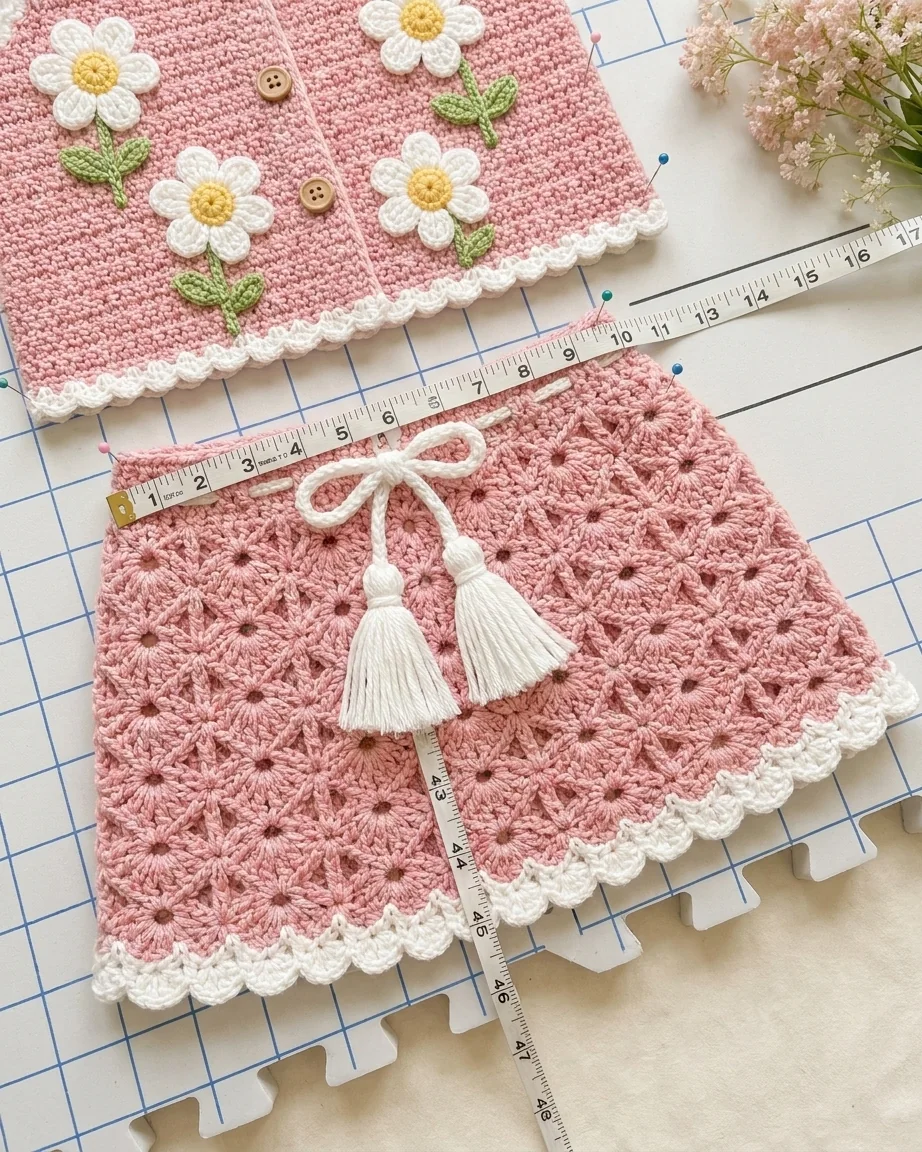
Work a pink single-crochet anchor round across the shell tops, approximately 150 (156, 162) stitches. In white, work one round of single crochet, then the shell-and-single-crochet scallop repeat. The optional third round adds small chain-three points. Join neatly and pin scallops open during blocking.
For the cord, chain about 150, then single crochet back from the second chain. Wind white yarn about 20 times around the 8 cm card, tie the top, cut the opposite loops, bind 1 cm below the top, and trim each finished tassel to 5 cm. Attach one to each cord end and thread the cord through the eyelets. Shape top and skirt separately, dry completely, measure, and pull-test buttons, flowers, leaves, and tassels. Drawstrings require close adult supervision and must be removed for sleep.
Daisy Garden Baby Set crochet pattern checkpoint
Compare this stage with the official PDF before continuing, record the active size, and verify the count after blocking or shaping.
Work slowly enough to inspect stage 8: finish with hem border, cord, and blocking in good light. Count at the end of each repeat, compare both sides before continuing, and place a removable marker wherever a shaping decision must be mirrored. This small pause is faster than undoing several rows later. Keep notes for the size you selected, including hook changes, blocked gauge, yarn use, and any intentional color substitutions.
The photographs in this article are independently generated instructional references rather than cropped pages from the PDF. Use them to understand the stage and orientation, but let the official written pattern control exact stitch placement. Handmade tension varies, so your fabric may look slightly different while still matching the required blocked measurements.
Pattern-testing note
The supplied PDF states that designer confirmation and physical testing are still required. Verify every count, gauge, shell repeat, and finished measurement on real samples in all three sizes. Do not advertise the pattern as fully tested until that work is complete.
Frequently Asked Questions
Can I omit the drawstring?
Yes. Omitting the cord removes the drawstring feature; ensure the relaxed waistband measurement suits the wearer and do not improvise an unsafe substitute.
What if my shell gauge is off?
Make a physical shell swatch. Change hook size and re-block before starting the skirt, because shell width affects repeat count, flare, and finished circumference.
How do I mirror the fronts correctly?
Mark the center-front and outer armhole edges. Put decreases at the armhole edge first, then at the center-front edge, and lay each panel over the back before joining.
Final Checklist
- ✓ Blocked dc gauge is 18 stitches × 10 rows per 10 cm / 4 in.
- ✓ Fronts mirror each other and align with the back.
- ✓ Four daisies, three buttons, two tassels, and all leaves are firmly attached.
- ✓ Finished measurements match the selected size.
- ✓ Drawstring is shortened, supervised, and removed for sleep.
Ready to crochet the Daisy Garden set?
Use this article as your planning companion, then follow the complete illustrated pattern for the row-by-row instructions and size-specific counts.




