

My Crochet Universe · Winter Amigurumi
Free Crochet Snowman Pattern: Complete Amigurumi Tutorial
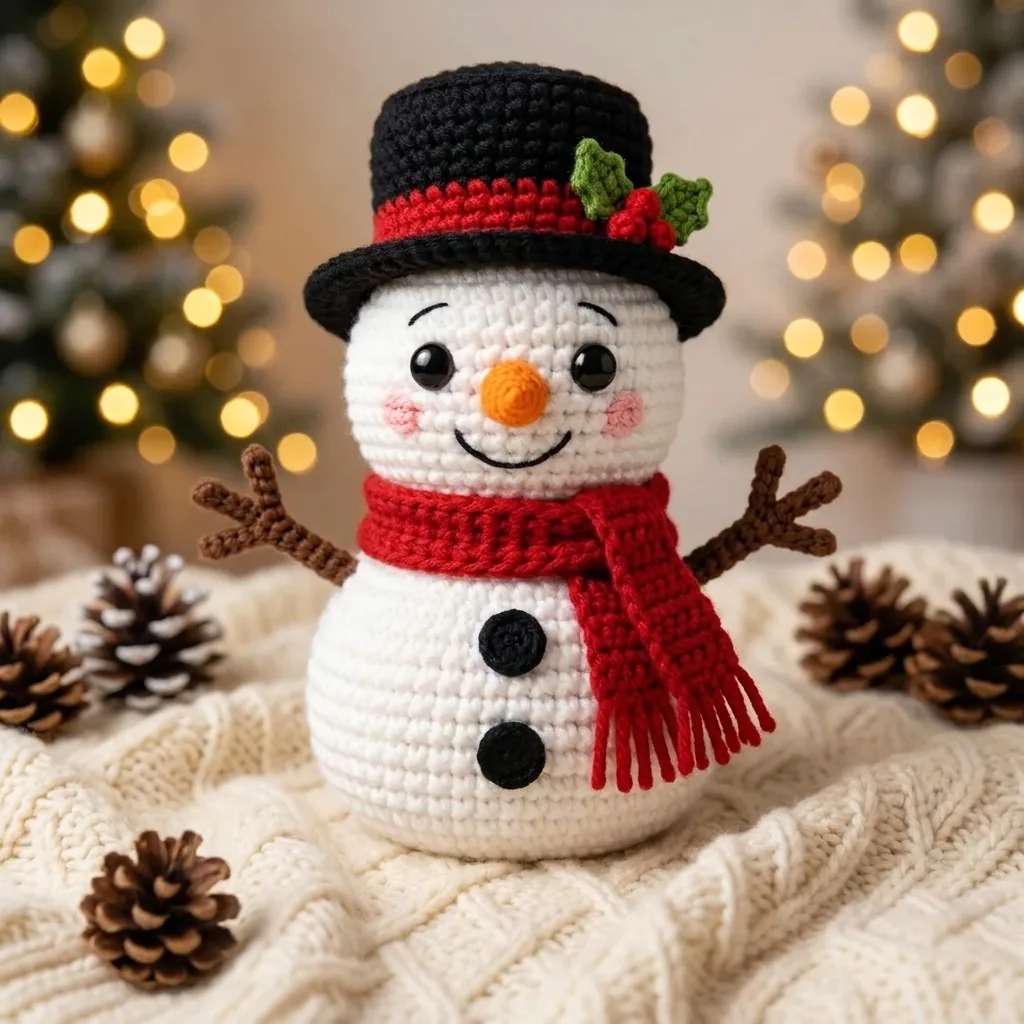
Bring a cheerful handmade friend into your winter décor with this complete crochet snowman pattern. The finished snowman has a white head and body, black top hat, red scarf, orange nose, brown branch arms, two black buttons, and a green holly leaf with red berries.
Every stitch count and assembly instruction below comes from the supplied reference image. If you enjoy character projects, explore the Amigurumi category or browse more free crochet patterns.
Materials, Notes, Finished Size, and Gauge
The crochet snowman pattern uses the listed gauge as a size guide rather than a strict requirement.
Prepare all supplies before beginning the crochet snowman pattern.
Materials from the source
- Worsted-weight yarn: white for body, black for hat, red for scarf, orange for nose, brown for arms, green for holly leaf, and red for berries
- 2.5–3.0 mm crochet hook
- 10 mm safety eyes
- Black embroidery thread
- Fiberfill stuffing, yarn needle, stitch marker, and scissors
The finished seated snowman measures approximately 23 cm (9 in). Using a 2.5 mm hook, the stated gauge is 18 sc × 18 rows = 10 × 10 cm (4 × 4 in). Gauge is not critical, but it affects final size.
Work in continuous rounds unless stated, mark the beginning of each round, stuff firmly as you go, and read the full pattern before starting.
US abbreviations
mr magic ring · ch chain · sc single crochet · inc increase · dec invisible decrease · hdc half double crochet · dc double crochet · sl st slip stitch · BLO back loop only · FO fasten off.
Crochet the Snowman Head and Body
The crochet snowman pattern builds both white shapes with increases, straight rounds, firm stuffing, and matching decreases.
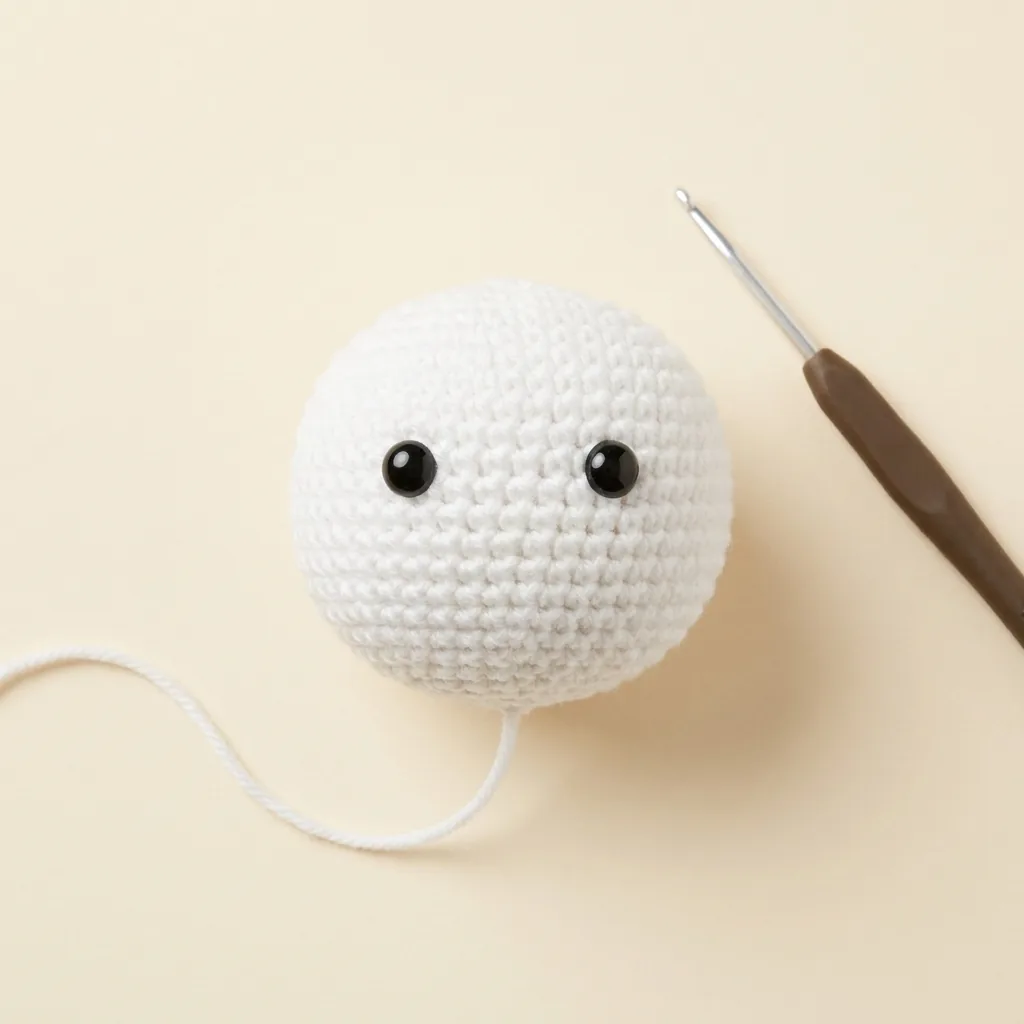
Head — white
- R1: 6 sc in mr (6)
- R2: inc ×6 (12)
- R3: (sc, inc) ×6 (18)
- R4: (2 sc, inc) ×6 (24)
- R5: (3 sc, inc) ×6 (30)
- R6–R10: sc around (30)
- R11: (3 sc, dec) ×6 (24)
- R12: (2 sc, dec) ×6 (18)
- R13: (sc, dec) ×6 (12)
- R14: dec ×6 (6)
- FO and close the hole.
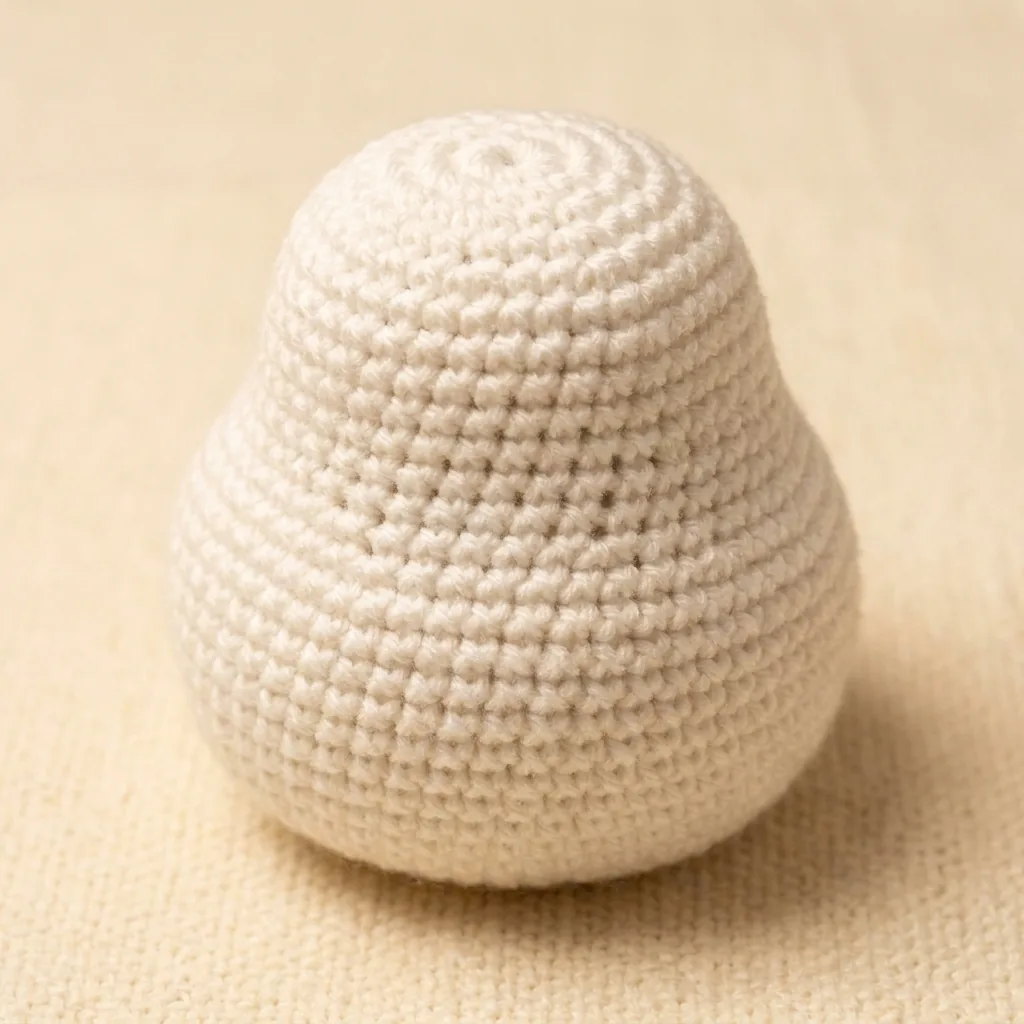
Body — white
- R1: 6 sc in mr (6)
- R2: inc ×6 (12)
- R3: (sc, inc) ×6 (18)
- R4: (2 sc, inc) ×6 (24)
- R5: (3 sc, inc) ×6 (30)
- R6: (4 sc, inc) ×6 (36)
- R7–R12: sc around (36)
- R13: (4 sc, dec) ×6 (30)
- R14: (3 sc, dec) ×6 (24)
- R15: (2 sc, dec) ×6 (18)
- R16: (sc, dec) ×6 (12)
- R17: dec ×6 (6)
- FO and close the hole.
Make the Hat, Scarf, and Branch Arms
The crochet snowman pattern includes complete instructions for all three winter accessories and the paired branch arms.
These accessories give the crochet snowman pattern its classic winter character.
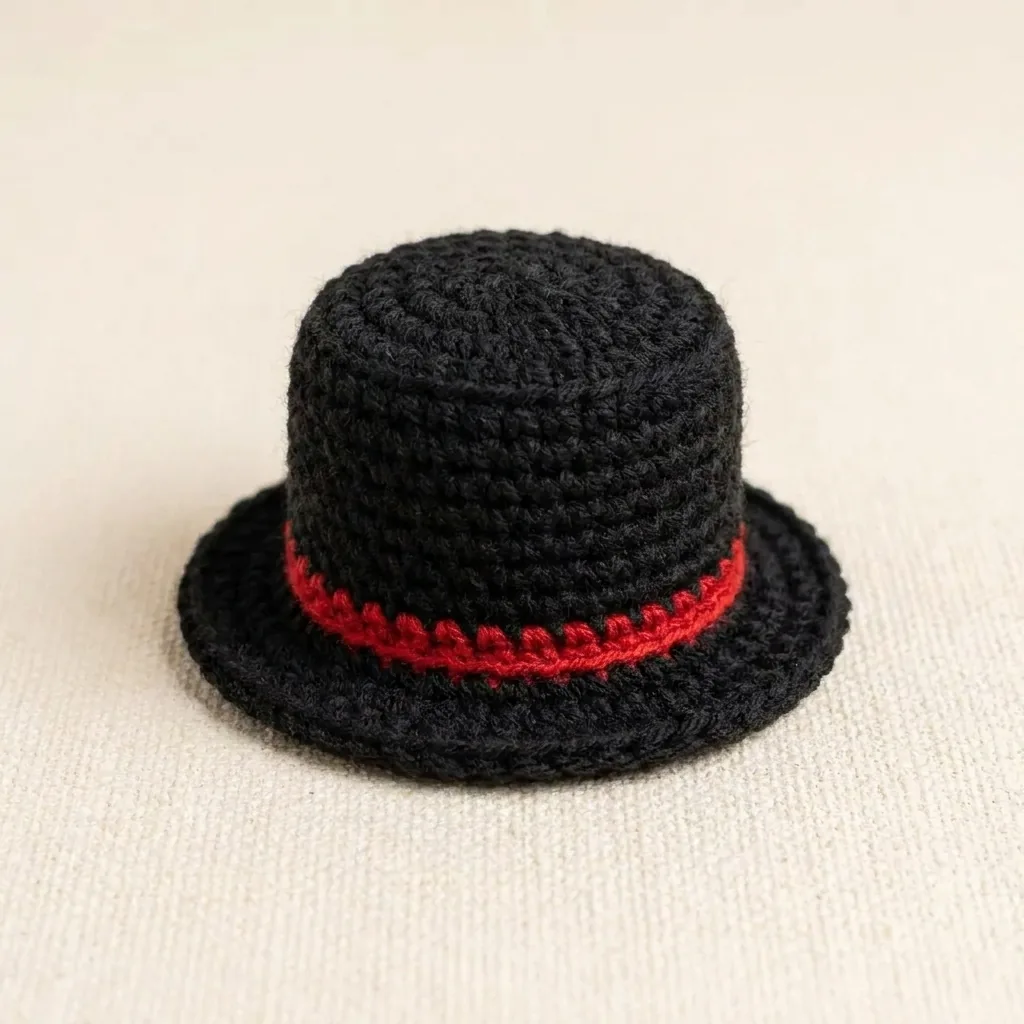
Top hat — black
- R1: 6 sc in mr (6)
- R2: inc ×6 (12)
- R3: (sc, inc) ×6 (18)
- R4: (2 sc, inc) ×6 (24)
- R5: (3 sc, inc) ×6 (30)
- R6–R8: sc around (30)
- Change to BLO.
- R9–R12: sc around (30)
- R13: (3 sc, dec) ×6 (24)
- Brim R14: 2 dc in each stitch around (48)
- R15: sl st around (48)
- FO and weave in all ends.
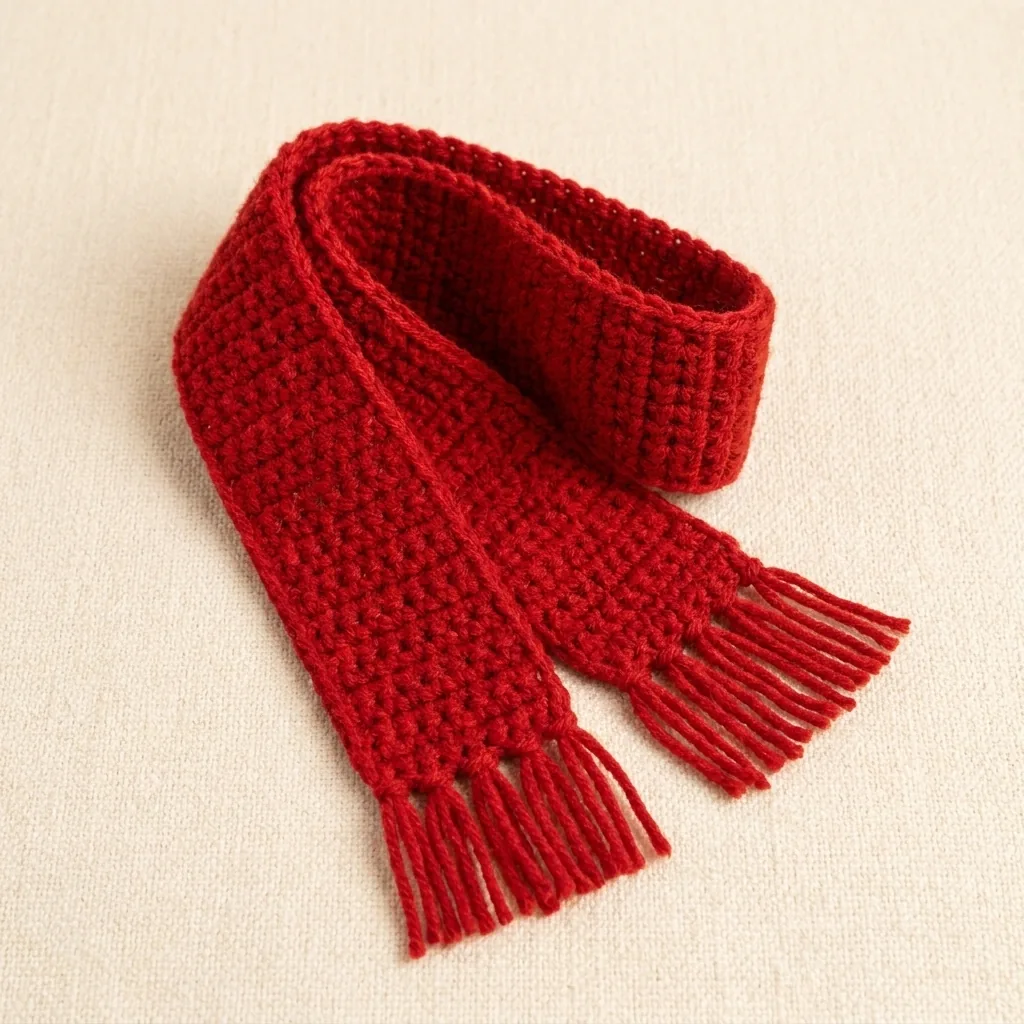
Scarf — red
- Ch 7.
- Rows 1–90: hdc in the second chain from the hook and each chain across (6).
- FO and weave in the ends.
- Add fringe if desired.
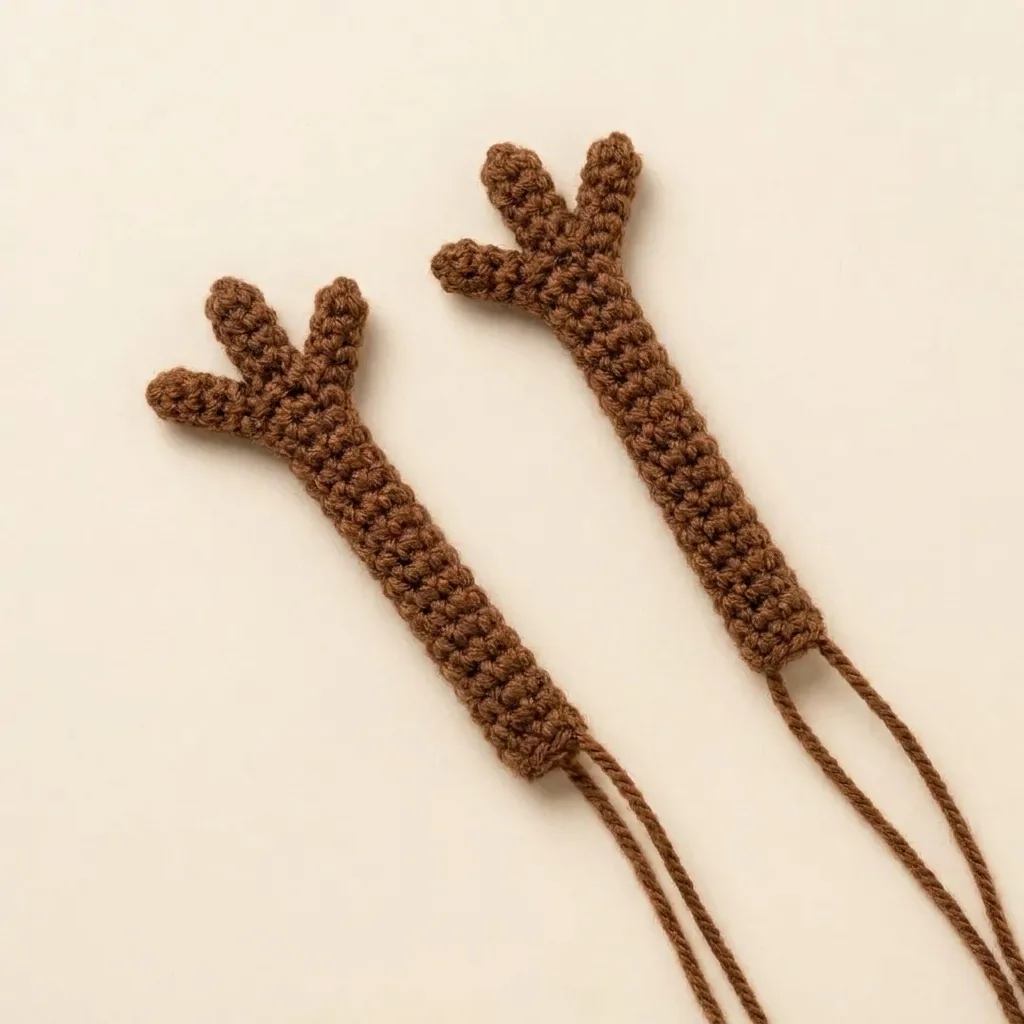
Arms — make 2 in brown
- R1: 6 sc in mr (6)
- R2–R10: sc around (6)
- R11: fold in half and sc 3 stitches through both layers to close.
- At the top, split into 3 branches.
- Branch: ch 4, sl st in second chain from hook, sl st, sl st into arm.
- Repeat for the other 2 branches.
Crochet the Nose, Holly Leaf, and Berries
Small finishing pieces in the crochet snowman pattern use orange, green, and red yarn exactly as listed in the source.
Carrot nose — orange
- R1: 4 sc in mr (4)
- R2: inc ×4 (8)
- R3: (sc, inc) ×4 (12)
- R4–R6: sc around (12)
- R7: (sc, dec) ×4 (8)
- R8: dec ×4 (4)
- FO, leave a long tail for sewing.
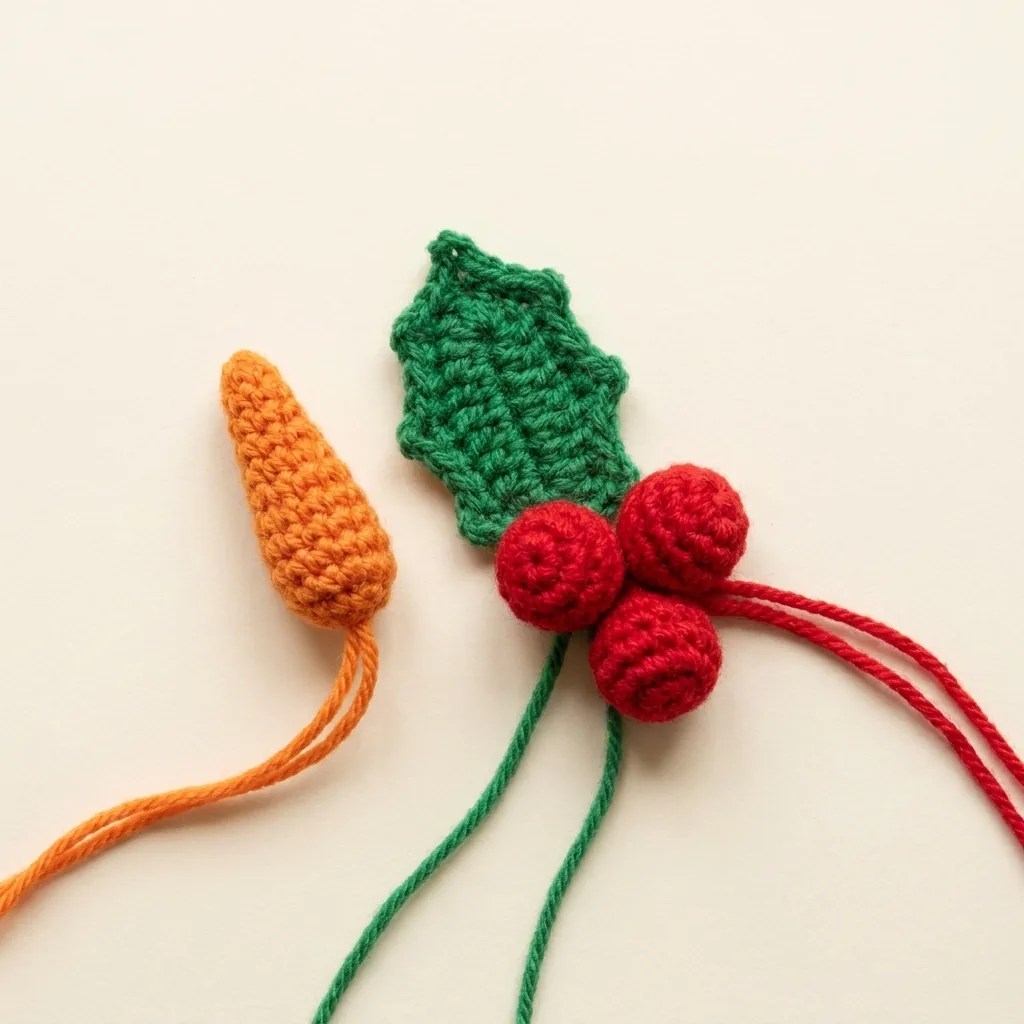
Holly leaf and berries
- Holly leaf: ch 7.
- Row 1: sc, hdc, dc, hdc, sc, sl st.
- FO, leave a long tail for sewing.
- Berries — make 3 in red.
- Berry R1: 6 sc in mr (6)
- Berry R2: sc around (6)
- FO, leaving a long tail for sewing.
Assemble the Crochet Snowman Step by Step
Follow the crochet snowman pattern assembly sequence from the safety eyes through the final holly decoration.
Step 1: Attach the safety eyes
Attach the safety eyes between rounds 7 and 8.
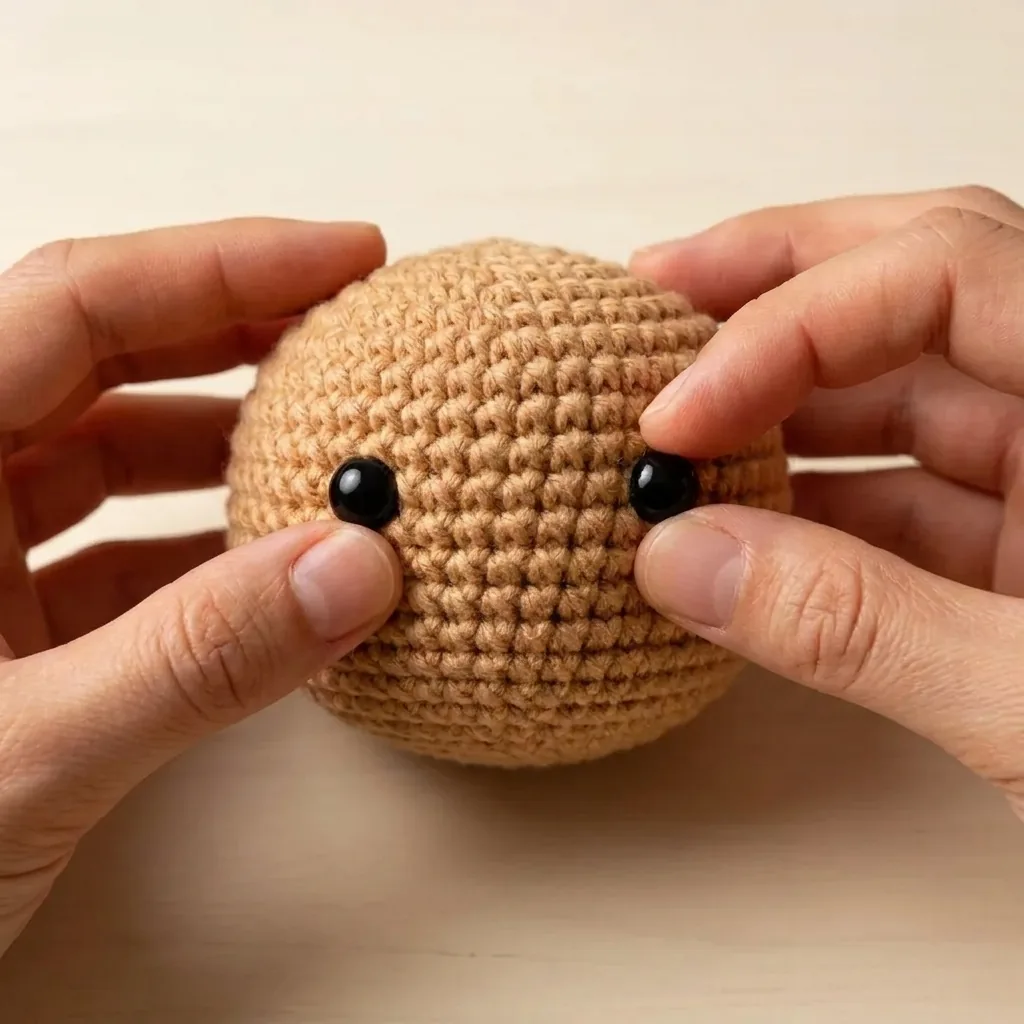
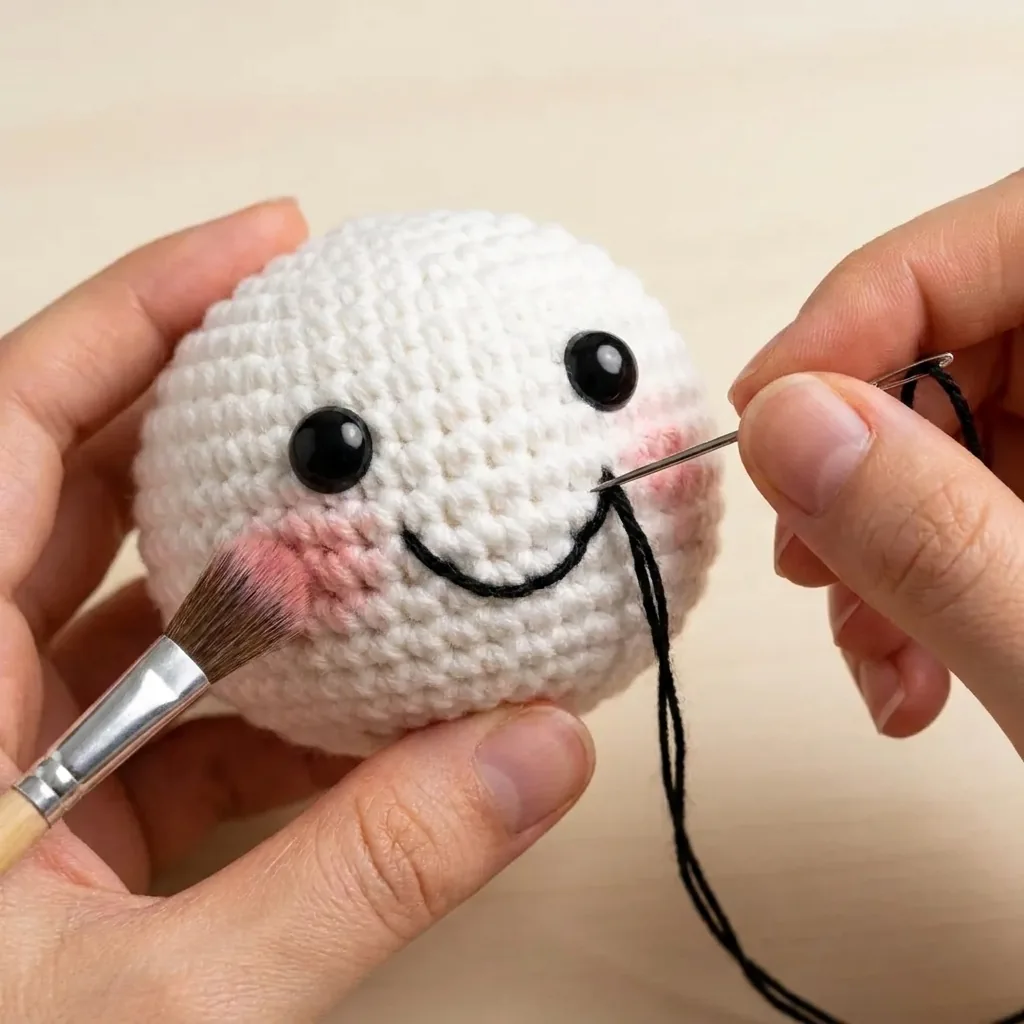
Step 2: Embroider the smile and add blush
Embroider the smile with black thread and add blush to the cheeks.
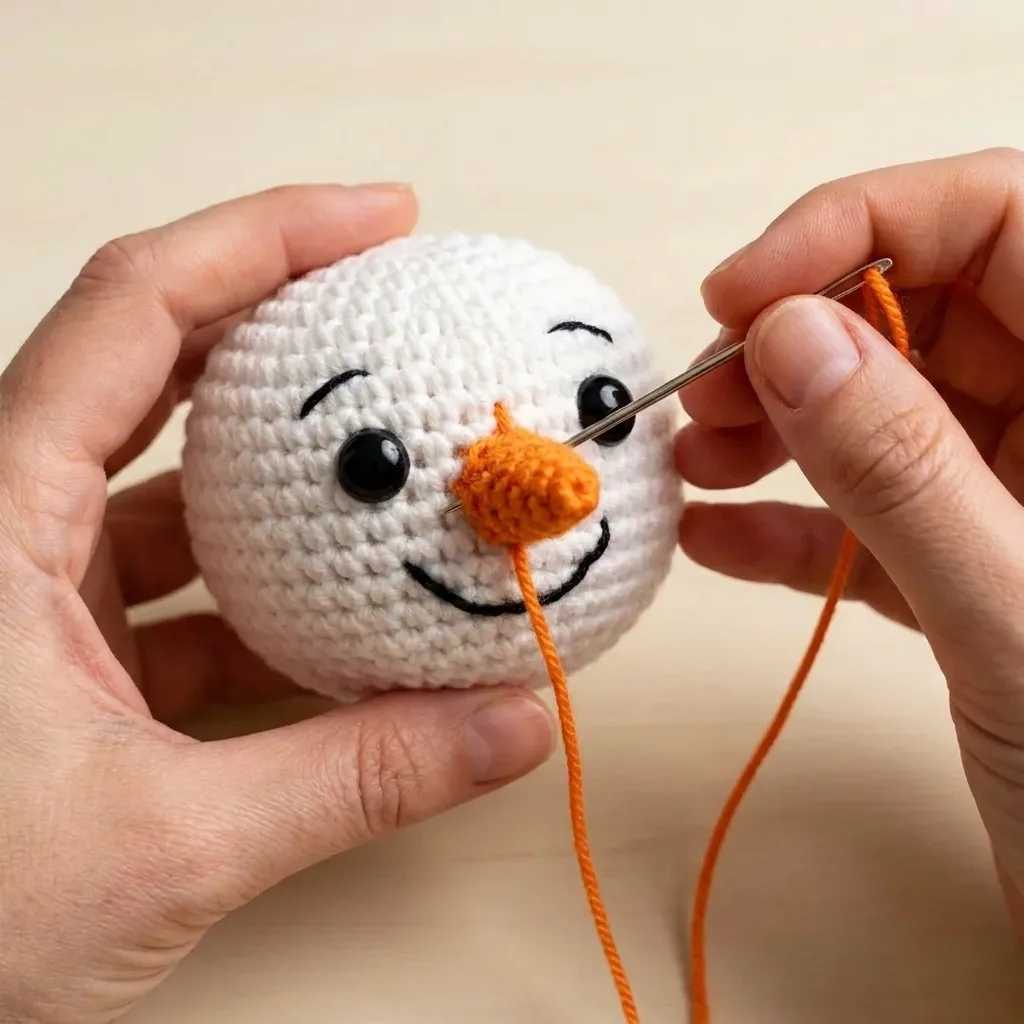
Step 3: Sew on the nose
Sew the orange nose in the center of the face.
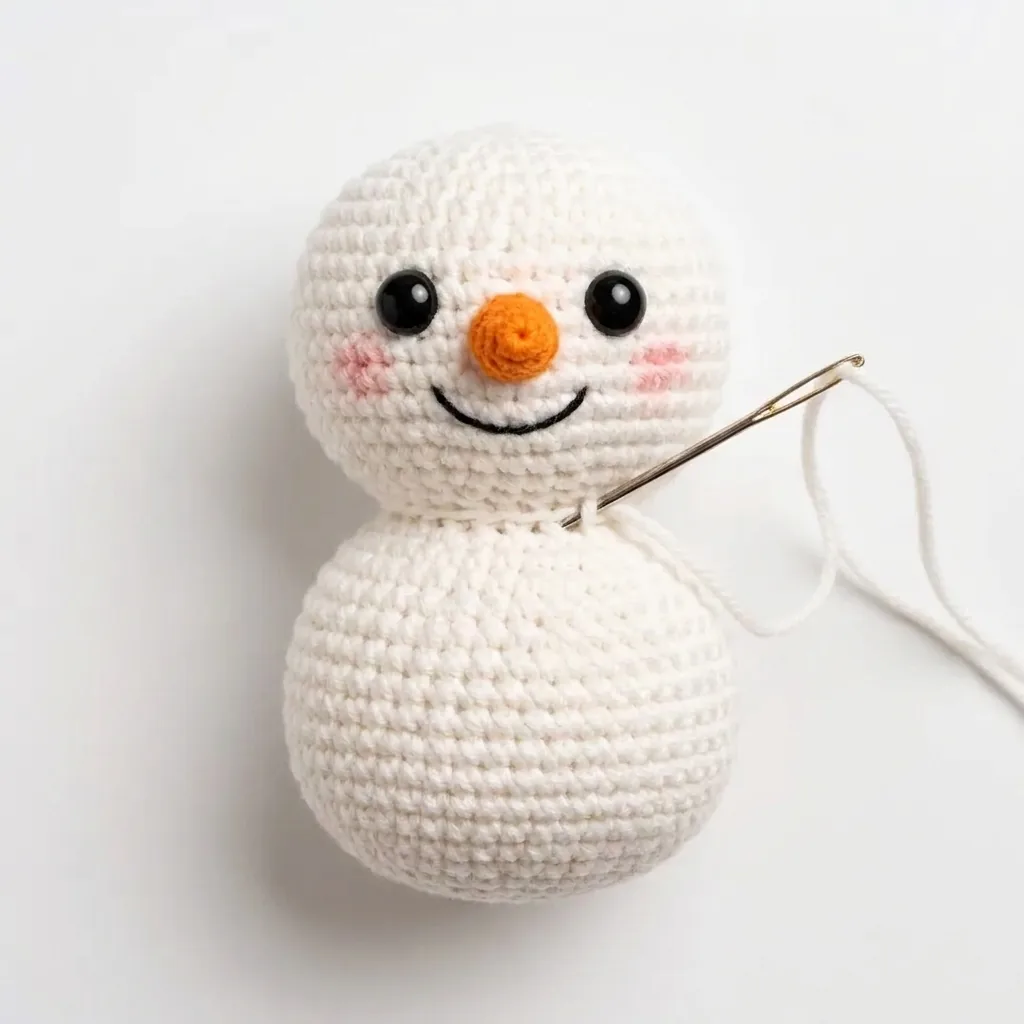
Step 4: Join the head and body
Place the head on top of the body and sew securely.
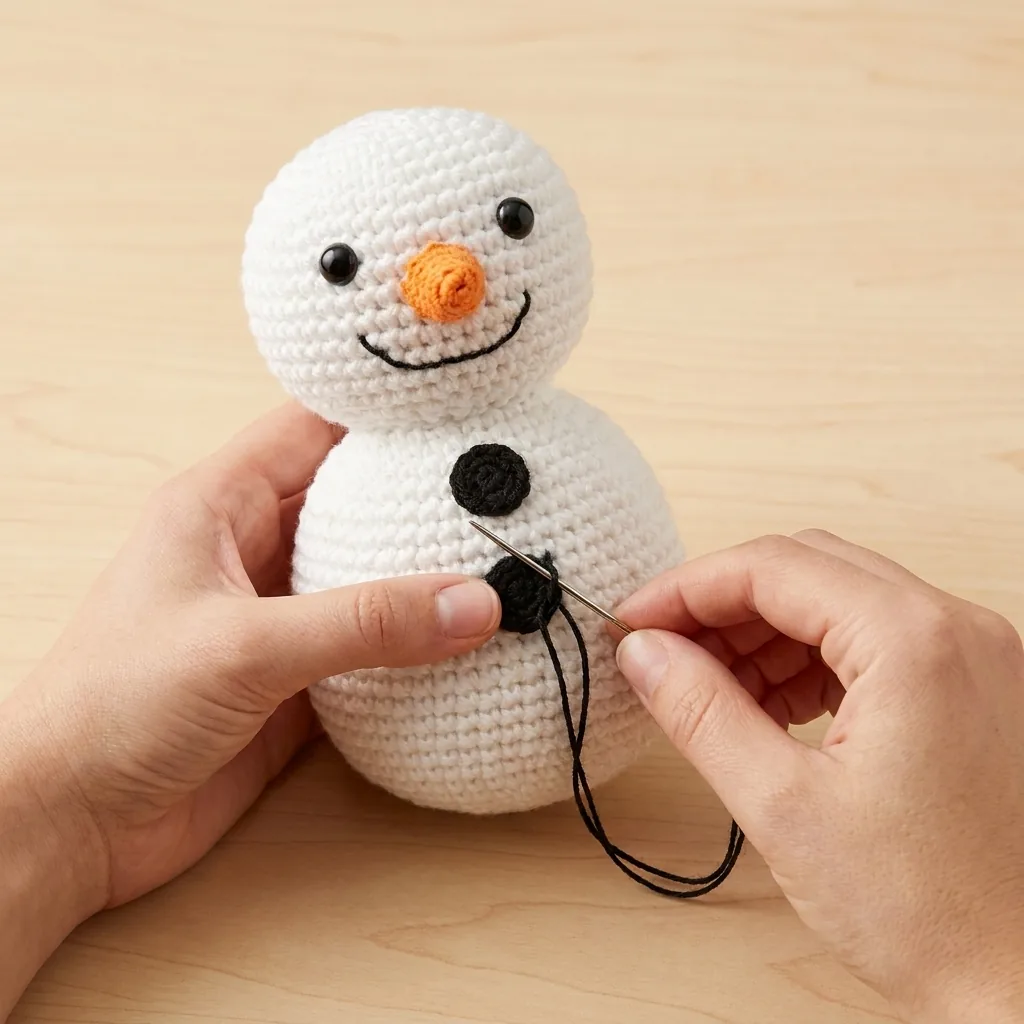
Step 5: Add the buttons
Sew the buttons onto the front of the body.
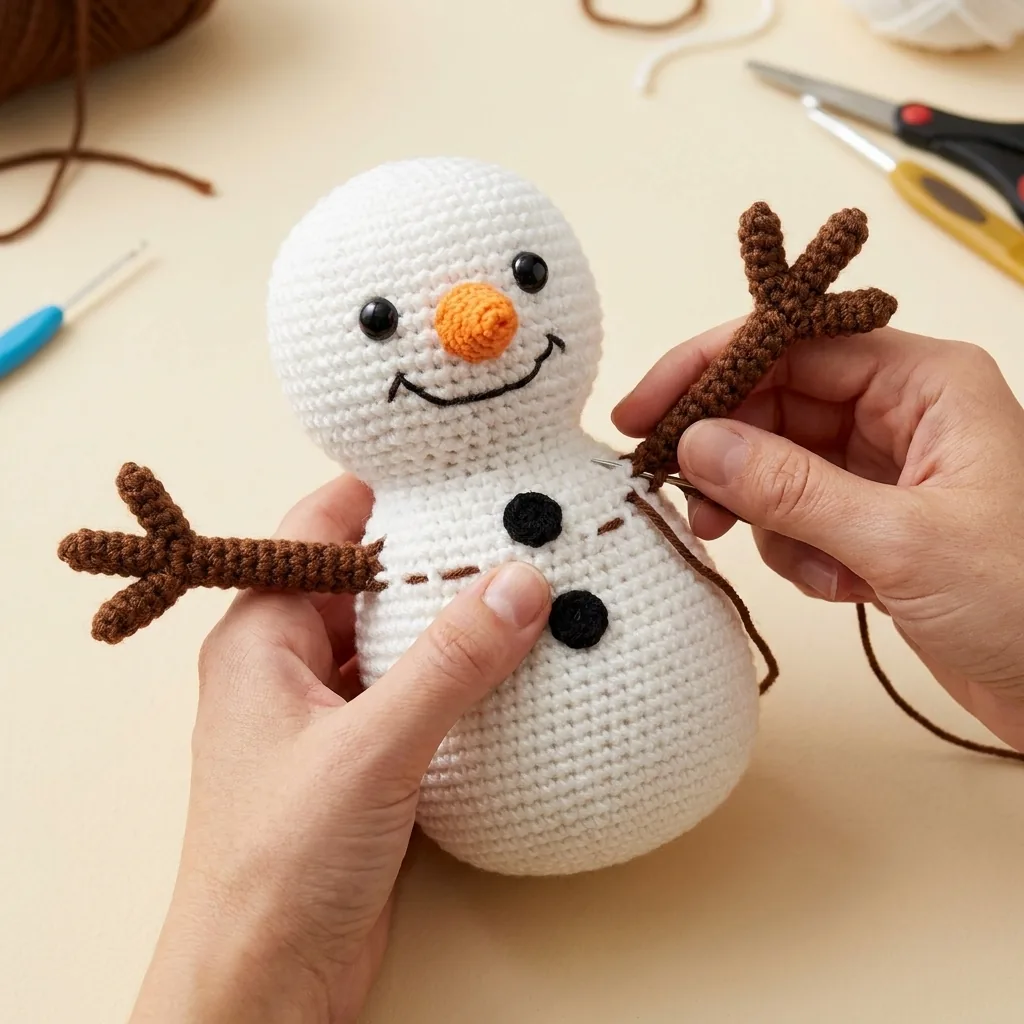
Step 6: Insert and sew the arms
Insert the branch arms into the sides and sew them securely.
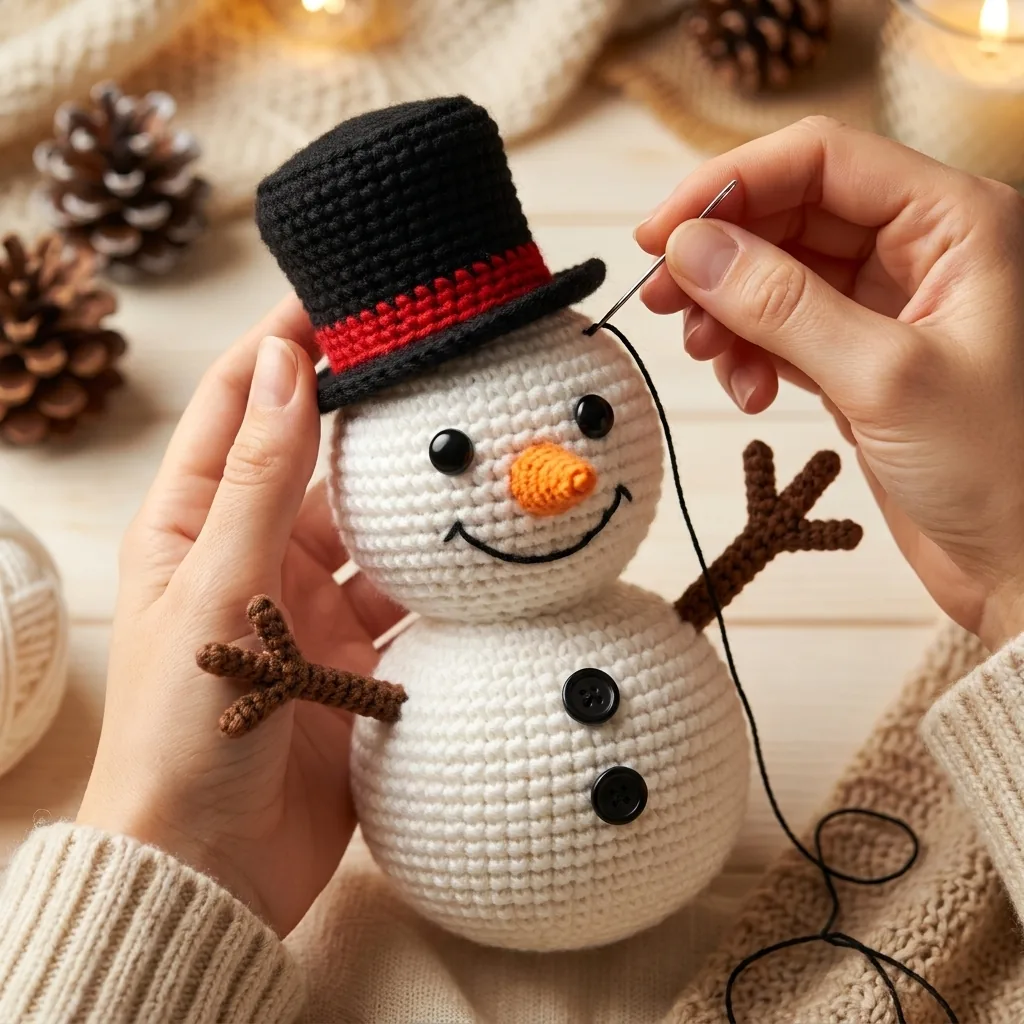
Step 7: Place the hat
Place the black top hat on the head and secure it.
Step 8: Wrap the scarf
Wrap the red scarf around the neck.
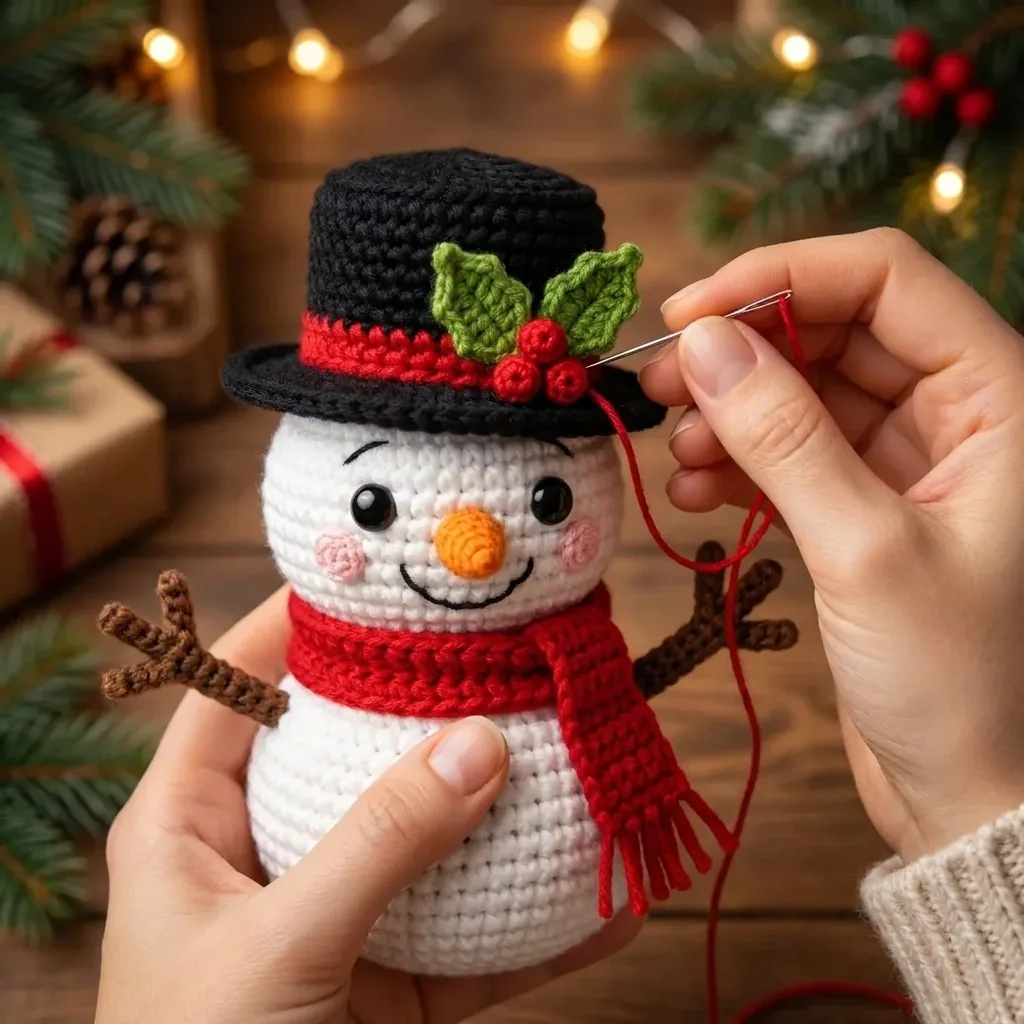
Step 9: Attach holly and berries
Sew the green holly leaf and three red berries onto the hat.
Step 10: Your snowman is ready.
Tips, Color Ideas, and Care
The crochet snowman pattern supports all five color ideas without changing the supplied stitch counts.
Use stitch markers to keep rounds even, stuff firmly for a round shape, tighten stitches to avoid gaps, and add a little weight in the bottom for extra stability.
The supplied color ideas are Classic, Blue Winter, Green & Red, Pastel, and Rustic. Change the hat and scarf colors while keeping the same crochet snowman pattern.
Care instructions
- Hand wash in cold water.
- Do not bleach.
- Dry flat.
- Do not tumble dry.
Your Handmade Snowman Is Ready
This completes every component and assembly stage in the supplied crochet snowman pattern.
Explore more amigurumi projects, discover additional free patterns, or visit the complete store.




