

MY CROCHET UNIVERSE · AUTUMN CROCHET TUTORIAL
Pumpkin Ghost Car Hanger Crochet Pattern Tutorial
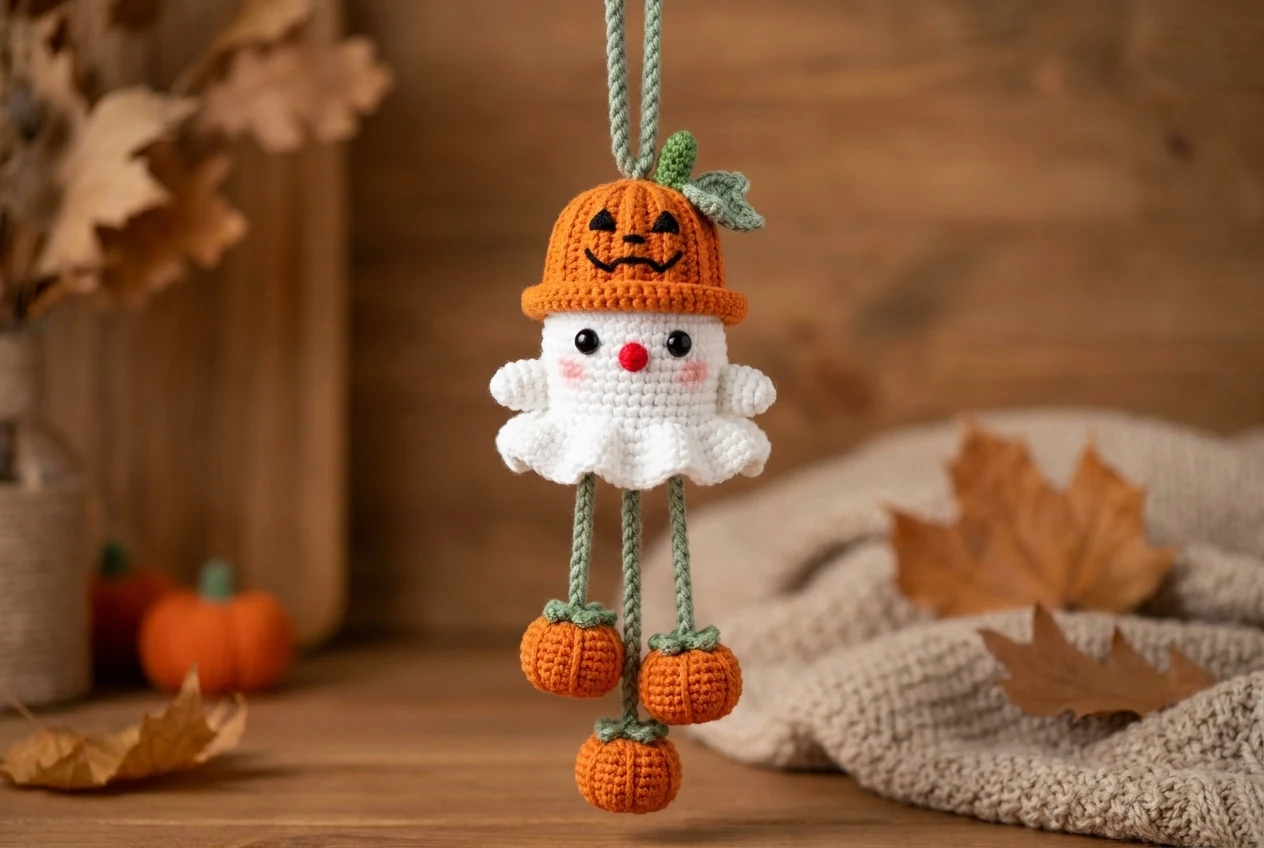
A cheerful white ghost under a ribbed jack-o’-lantern hat with three tiny pumpkins below. The pumpkin ghost car hanger crochet pattern turns the supplied pattern notes into a clean, maker-friendly tutorial while preserving stitch counts, cord lengths, and component order.
This pumpkin ghost car hanger crochet pattern keeps every small component in a practical build order, so you can pause after any section without losing your place. Before you begin the pumpkin ghost car hanger crochet pattern, read the full round once and mark every color change.
Table of Contents
Project at a Glance
Adventurous beginner to intermediate
About 8 × 8 cm before cords
Joined rounds, flat motifs, chain cords
The finished pumpkin ghost car hanger crochet pattern should swing freely without feeling heavy or overstuffed.
What you will make
- Shared white ghost body and hands
- Orange ribbed pumpkin hat with embroidered face
- Two small pumpkins and one mini pumpkin
- Green pumpkin leaves and tops
- 115-chain long cord and 65-chain short cord
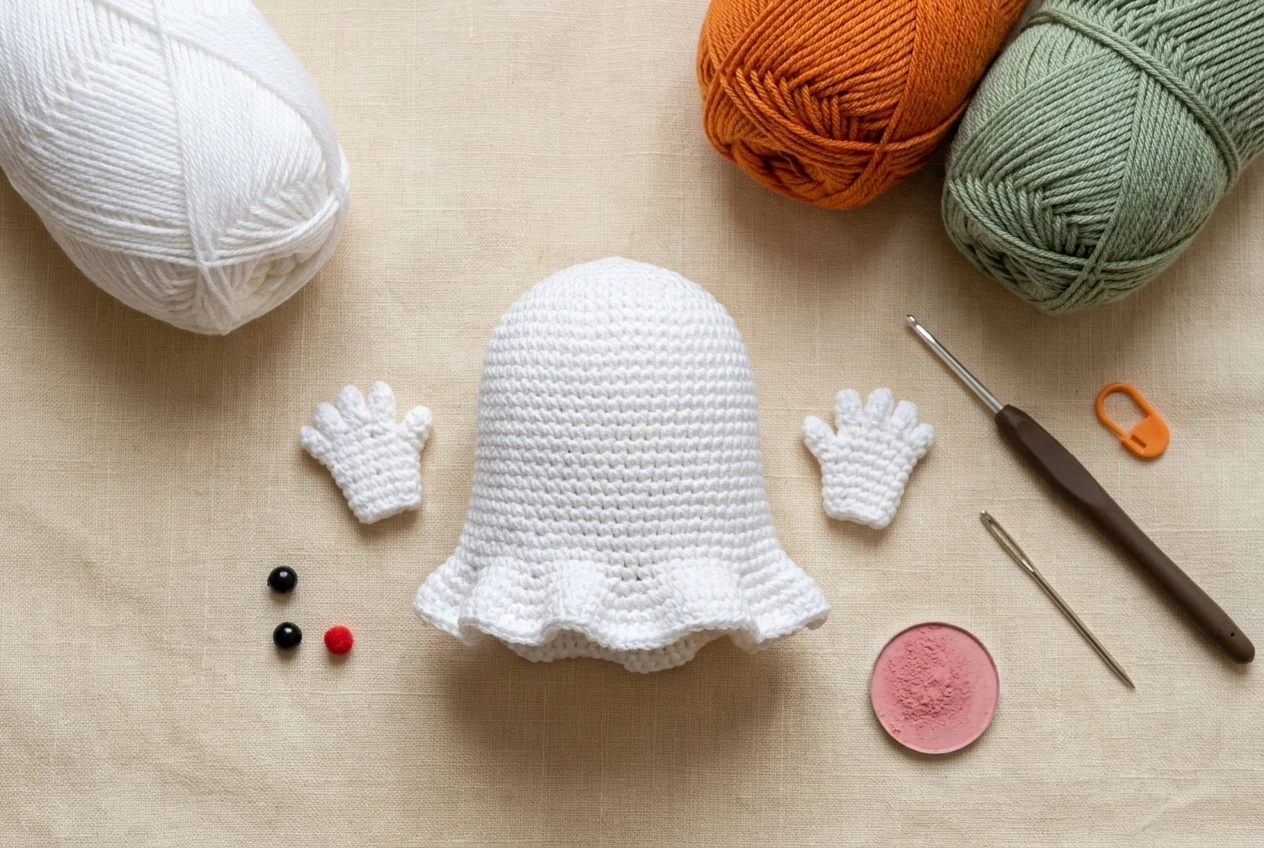
Materials and Abbreviations
- 4- or 5-ply milk cotton or similar sport/DK cotton blend in white, pumpkin orange, sage green, black, and blush
- 2.0–3.0 mm crochet hook
- 4 mm safety eyes or embroidery thread
- Fiberfill, stitch marker, tapestry needle, scissors, and optional blush
| Abbreviation | Meaning |
|---|---|
| MR | magic ring |
| ch | chain |
| sl st | slip stitch |
| sc | single crochet |
| hdc | half double crochet |
| dc | double crochet |
| tr | treble crochet |
| inc / dec | increase / decrease |
| BLO | back loop only |
US crochet terminology is used. Compare unfamiliar terms with the Craft Yarn Council crochet abbreviations and match your yarn to the standard yarn-weight system.
For the neatest pumpkin ghost car hanger crochet pattern, keep the cords firm, the joins secure, and the decorative pieces balanced. Use the pumpkin ghost car hanger crochet pattern as a checklist: body first, themed details second, cords third, and final assembly last.
Complete Written Instructions
Body (joined rounds; ch 1 at the start does not count as a stitch; slip stitch to the first sc to join)
R1: 6 sc in a magic ring (6)
R2: inc around (12)
R3: [1 sc, inc] × 6 (18)
R4: [1 sc, inc, 1 sc] × 6 (24)
R5–R9: 24 sc (24)
R10: [3 sc, inc] × 6 (30)
R11: [2 sc, inc, 2 sc] × 6 (36)
R12: [5 sc, inc] × 6 (42)
R13: [1 sc, 1 hdc, 1 dc, 1 hdc, 1 sc, 1 sl st] × 7

Hands (make 2)
R1: 5 sc in a magic ring (5)
R2: [1 sc, inc] × 2, 1 sc (7)
R3: 7 sc (7)
Sew the hands to body rounds 7–8. Add the eyes around round 6, embroider the small nose, and brush on blush if desired.

Use the lily-hat base:
Lily hat
R1: 8 sc in a magic ring (8)
R2: 8 inc (16)
R3: [1 sc, inc] × 8 (24)
R4–R5: 24 sc (24)
R6: 4 sc, 1 hdc, 1 dc, 2 tr, 1 dc, 1 hdc, 4 sc, 1 hdc, 1 dc, 2 tr, 1 dc, 1 hdc, 4 sc


Pumpkin hat: use the lily-hat base above, then embroider triangular eyes, a nose, and a stitched jack-o'-lantern smile.

Small pumpkins (make 2)
R1: ch 10. Starting in the second chain, 1 sl st, 7 sc, 1 sl st.
R2–R12: work BLO only: ch 1, turn, 1 sl st, 7 sc, 1 sl st.
Join R1 to R12, gather and secure the bottom, stuff lightly, then close the top.

Mini pumpkin (make 1)
R1: ch 9. Starting in the second chain, 1 sl st, 6 sc, 1 sl st.
R2–R9: work BLO only: ch 1, turn, 1 sl st, 6 sc, 1 sl st.
Join the first and last rows, stuff lightly, and close.

Pumpkin leaf
R1: Make a ring. Form three leaf lobes with ch-5 branches, working combinations of sl st, sc, hdc, and dc back toward the ring; tighten the ring.
R2: Edge the leaf with sc and small ch-3 picots to create pointed tips.

Pumpkin top
R1: 4 sc in a magic ring (4)
R2: 4 inc (8)

Cords: long cord 115 ch; short cord 65 ch.
Step-by-Step Construction Order
1. Crochet the body
Keep the right side facing outward and add only a small amount of fiberfill. Mark the first stitch, count after every increase round, and test the face placement before fastening the eye backs. For decorative use around children, embroidered eyes are safer than plastic parts.
A careful gauge check makes the pumpkin ghost car hanger crochet pattern easier to assemble and helps every paired piece match.
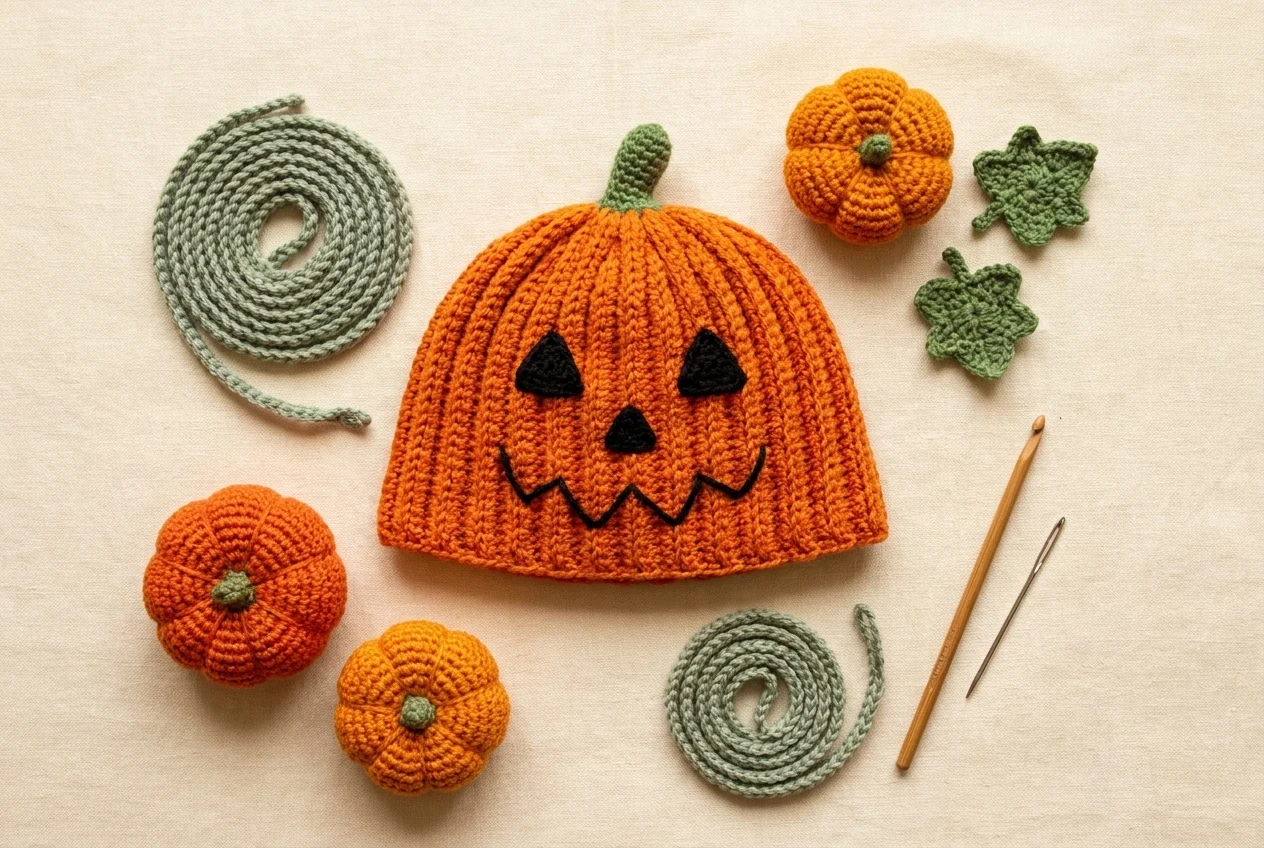
2. Make the hat or themed topper
Work the color changes in the listed order. Pin the center front, center back, and both sides before sewing so the topper does not creep off-center. Hide the final tail inside the topper.
3. Crochet the hanging charms
Make matching motifs in batches and keep the first beside the second as a size guide. Stuff round charms lightly, leave stars and leaves flat, and weave in all tails before attaching the pieces to the cords.
When the pumpkin ghost car hanger crochet pattern is complete, tug-test each sewn joint before hanging it in a vehicle.
4. Build and balance the cords
Chain the exact lengths, let them relax, and thread the long cord through the top. Attach the charms at staggered heights so they do not collide. Hang the project with temporary knots, adjust the spacing, and only then sew the joins permanently.
5. Finish the face and final assembly
Add embroidery with short controlled stitches, use blush sparingly, and steam only from a distance. Tug-test every sewn connection. Weave each tail through several stitches and trim it inside the work.
Photograph the pumpkin ghost car hanger crochet pattern flat before hanging it; the image makes it easier to spot twisted cords or uneven spacing. The pumpkin ghost car hanger crochet pattern works best with smooth yarn that shows small stitches clearly.
Safety and Durability Checks
- Tug every cord and sewn motif firmly before use.
- Keep the hanger short enough that it does not obstruct the driver’s view.
- Do not place it near controls, vents, mirrors, or airbags.
- Keep detachable parts away from children and pets.
- Repair the hanger if a cord frays or a safety eye loosens.
If you batch-make gifts, repeat one component of the pumpkin ghost car hanger crochet pattern at a time instead of finishing one hanger from start to finish.
Troubleshooting
Recount the increase round and verify the final decorative repeat.
Use four-point pinning before sewing.
Let the chain relax, steam from a distance, and assemble while suspended.
Use the same hook and count each stitch instead of comparing by eye.
The pumpkin ghost car hanger crochet pattern is small enough for scraps but detailed enough to feel like a complete amigurumi project.
Frequently Asked Questions
Is this project beginner friendly?
Yes, if you know a magic ring, single crochet, increases, and decreases. The small parts make it an adventurous-beginner project.
Can I use acrylic yarn?
Yes, but smooth cotton or a cotton blend usually gives crisper tiny motifs and firmer cords.
How large is the finished ghost?
The source lists approximately 8 × 8 cm for the main body. The full length depends on the cords and charm spacing.
Can I sell finished hangers?
Generally yes when your pattern license allows it, but do not redistribute the pattern instructions or source images.
How do I prevent stretching?
Use firm tension, a smaller hook, cotton-rich yarn, and reinforced top attachment points.
Keep this pumpkin ghost car hanger crochet pattern nearby during assembly so the order of the dangling pieces remains clear.




