

Crochet Teardrop Bag Pattern: From 2 Skeins to Done
A four-stage roadmap from flat base to the finished integrated handle
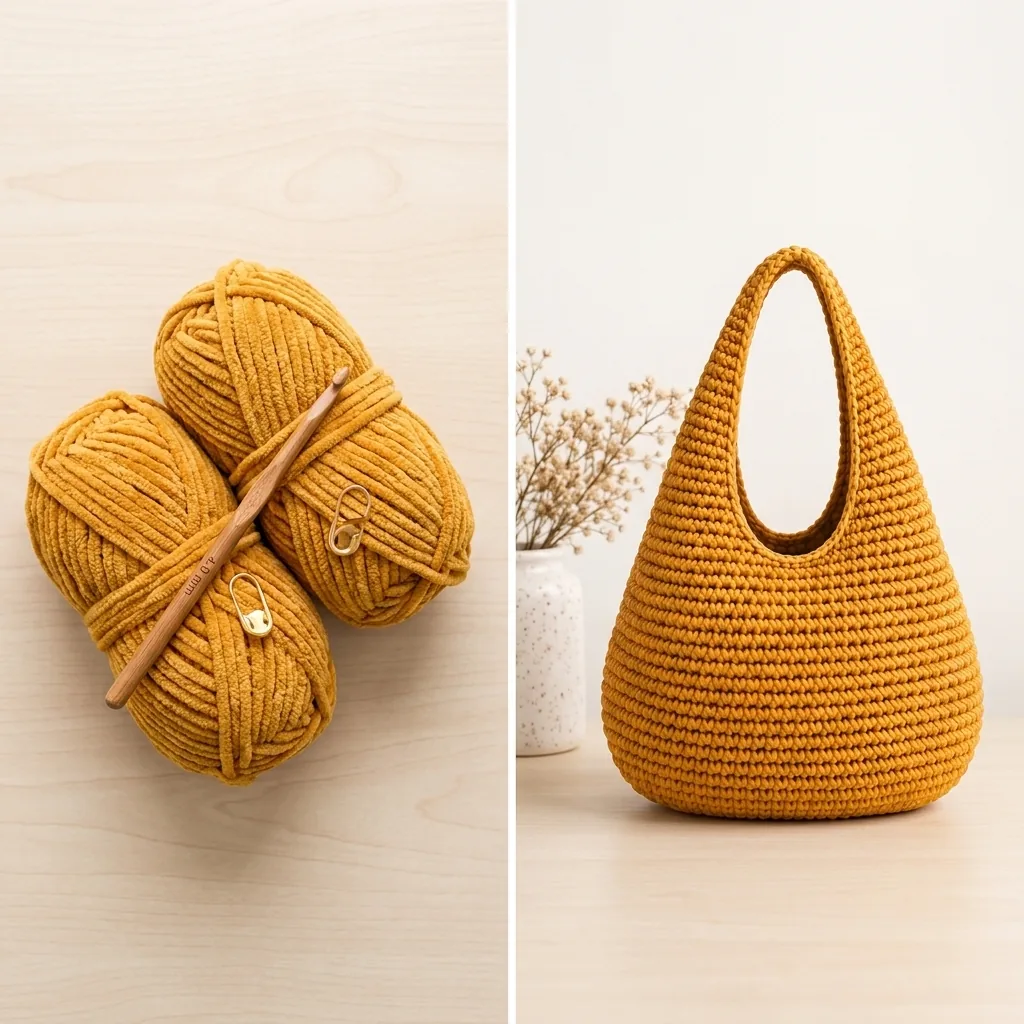
Mustard chenille and a 4.0 mm hook become a structured teardrop shoulder bag.
This crochet teardrop bag pattern turns plush chenille into a rounded shoulder bag with an integrated handle and a clean, minimalist silhouette. The product includes three sizes, step-by-step instructions, detailed rounds and stitch counts, and tips for a sturdy seamless finish.
The verified product reference specifies plush chenille yarn, a 4.0 mm hook, and an approximate 25–30 cm range. Use the PDF for the exact requirements of the small, medium, or oversized version. This article explains the project flow, the purpose of each stage, common checkpoints, and finishing decisions without replacing the pattern instructions.
Why This Crochet Teardrop Bag Pattern Works for Beginners
Keep the crochet teardrop bag pattern open for the exact counts, size checkpoints, and decrease placement in this stage. Materials You’ll Need
From Skein to Teardrop: The 4 Stages
Keep the crochet teardrop bag pattern open for the exact counts, size checkpoints, and decrease placement in this stage. The “Ugly Middle Phase” — What to Expect
Finishing Touches That Make It Look Designer
Keep the crochet teardrop bag pattern open for the exact counts, size checkpoints, and decrease placement in this stage.
Choosing Between the Three Included Sizes
Keep the crochet teardrop bag pattern open for the exact counts, size checkpoints, and decrease placement in this stage.
The small, medium, and oversized options let the same crochet teardrop bag pattern serve different purposes. Small works well for essentials and evening styling. Medium is the most adaptable daily size. Oversized makes a relaxed statement and offers more capacity, but every larger bag should be used within the limits of its yarn, handle, and construction.
The product reference lists an approximate 25–30 cm range. Use the PDF’s exact finished measurements for each version, because personal gauge and yarn substitution can change the result. Decide on the size before buying yarn, and do not assume that the two-skein estimate applies equally to every size, color lot, or substitute fiber.
Substituting Yarn Without Losing the Shape
Plush chenille creates the soft, rounded appearance shown in the reference. A substitute should be compared by weight, thickness, stretch, and stitch definition—not only by the label category. Crochet a measured swatch with the 4.0 mm hook specified for this product, then compare it with the PDF. If the fabric stretches excessively under a small test load, it may not be suitable for the handle or body.
Keep the same yarn type throughout one bag unless the pattern specifically approves a change. Different fibers can produce uneven tension and a visible shift in texture. Buy enough of one dye lot for the selected size whenever possible.
Troubleshooting the Four Construction Stages
Keep the crochet teardrop bag pattern open for the exact counts, size checkpoints, and decrease placement in this stage.
If the base curls, pause and recount before continuing. Check the distribution of increases and compare the diameter with the pattern checkpoint. If the BLO walls lean or ripple, confirm that you are consistently entering the correct loop and not adding stitches at the round join.
During the taper, a temporary awkward shape is normal, but the decreases should remain balanced. Use markers to divide the round into sections and compare both sides. At the handle stage, pin or hold the join in position before sewing. The opening should appear centered, and the two sides of the handle should meet at the same height.
Finishing, Care, and Everyday Use
Keep the crochet teardrop bag pattern open for the exact counts, size checkpoints, and decrease placement in this stage.
Weave chenille ends with the method in the PDF because plush fibers can hide short tails that later work loose. Shape the ridges gently by hand; do not press them with direct high heat. If adding an optional base insert or lining, fit it from the finished interior measurements and avoid making it so tight that it changes the outer silhouette.
Empty the bag after use, store it supported on a shelf, and follow the yarn manufacturer’s cleaning directions. A handmade shoulder bag lasts longer when heavy items are distributed evenly and the handle is not left carrying weight during storage.
FAQ
Conclusion
Why This Crochet Teardrop Bag Pattern Works for Beginners
Keep the crochet teardrop bag pattern open for the exact counts, size checkpoints, and decrease placement in this stage. Three reasons.
First, the stitches. The entire bag body is single crochet. That’s it. No post stitches, no colorwork, no complicated shaping math. If you can work a single crochet, you can make this bag.
Second, the shaping does the design work. The teardrop silhouette comes from two simple moves — working the walls in back loops only (BLO), then tapering with decrease rounds near the top. The BLO ridges create that beautiful ribbed texture, and the taper pulls the shape in toward the handle. Fancy look, simple mechanics.
Third, the materials are forgiving. Chenille yarn is the most flattering yarn I’ve ever worked with — it plumps up, fills in, and quietly hides the uneven tension we all have on a Tuesday night. (Fair warning: it does shed a bit of fluff at first. That’s normal and it settles.)
Materials You’ll Need
That’s the whole list. No hardware, no lining required (though I’ll share structure tricks below), no special tools. The finished bag measures roughly 25–30 cm across depending on which of the three sizes you make.
From Skein to Teardrop: The 4 Stages
Keep the crochet teardrop bag pattern open for the exact counts, size checkpoints, and decrease placement in this stage. Here’s the road map. Each stage gets its own moment in the PDF with exact stitch counts for small, medium and oversized.
Stage 1: The Base
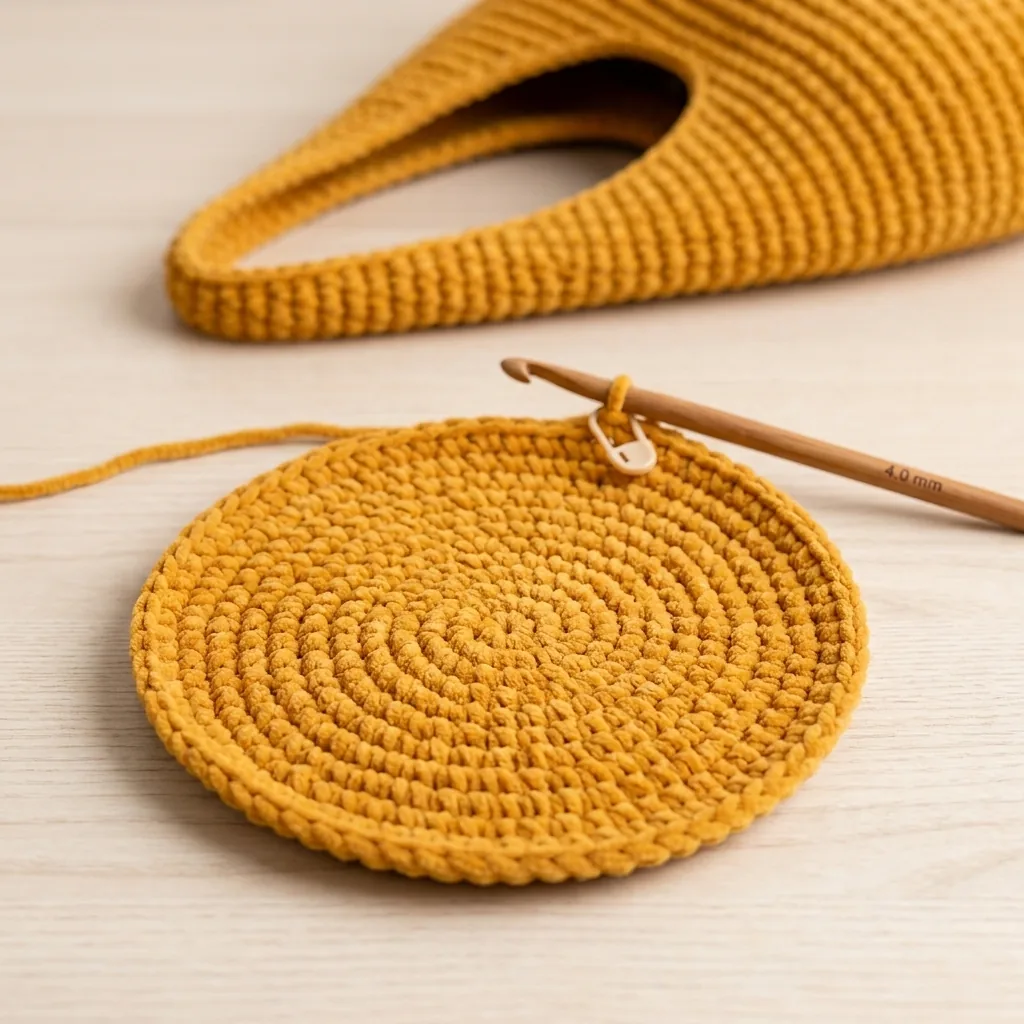
A flat, evenly counted base supports the full bag.
The bag starts as a flat circle worked in the round: a magic ring of 6 stitches, increased steadily until the circle reaches its full width (around 36 stitches for the medium size).
The golden rule here: count every round. A flat circle is pure math, and one missed increase in round 4 becomes a wavy taco by round 8. Mark your first stitch and count like your bag depends on it — because it does.
Stage 2: The Walls in BLO
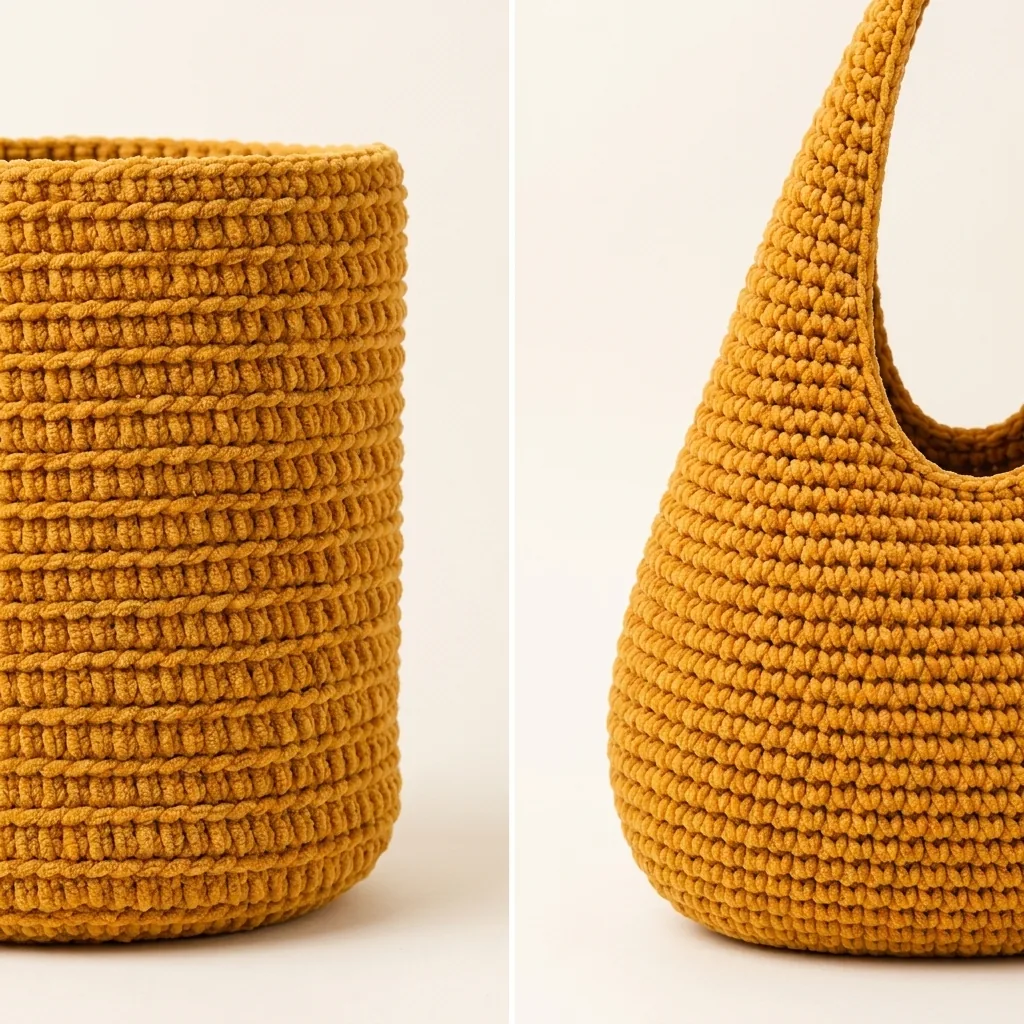
Back-loop texture builds the walls before the upper taper.
Once the base is done, you stop increasing and work the walls in single crochet — through the back loops only.
This is the stage where the texture appears. Working BLO leaves the front loops unworked, and they form those soft horizontal ridges that give the bag its ribbed, almost knitted look. The walls climb round after round (about 11 rounds on the medium), and the cylinder slowly becomes a basket.
Stage 3: The Taper
Here’s the magic trick. Decrease rounds near the top pull the walls inward, curving the silhouette from “basket” into “teardrop.” A handful of evenly spaced decreases over 3–4 rounds does it — the shape narrows gently, like the bag is gathering itself toward the handle.
This is also where most people panic (more on that below).
Stage 4: The Handle and Join
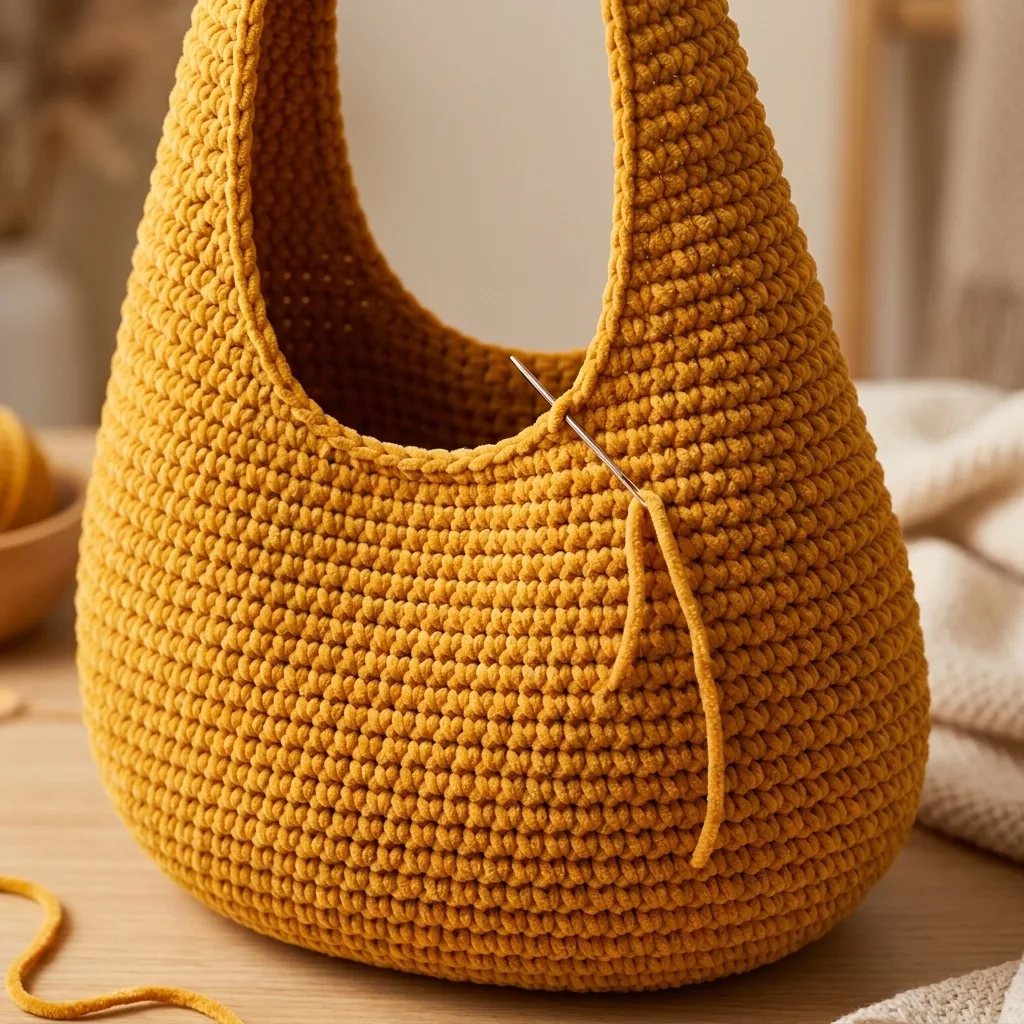
A symmetrical secure join completes the integrated handle.
The handle is a chain of about 40 stitches, then rows of tight single crochet worked back and forth until it’s firm. Honestly, make it one or two rows firmer than feels necessary — handles relax with use. Join it to the opposite side with a slip stitch seam, weave in the ends, and it’s done.
The project is presented as a weekend-friendly make, but completion time depends on size, pace, and experience.
The “Ugly Middle Phase” — What to Expect
Every crocheted 3D object has one, and this bag is no exception. Let me walk you through the emotional arc so you don’t bail at hour two:
The teardrop shape only resolves when the handle is attached and the bag is stuffed with something. The taper that looks strange mid-process is exactly what creates that smooth curve at the end. Push through the ugly phase — it’s the toll you pay for the before/after moment.
And what a before/after it is. Two plain skeins on one side; a structured, boutique-looking bag on the other. That transformation photo is honestly my favorite thing about this whole project.
Finishing Touches That Make It Look Designer
Keep the crochet teardrop bag pattern open for the exact counts, size checkpoints, and decrease placement in this stage. The difference between “homemade” and “handmade-looks-expensive” is about twenty minutes of finishing:
Keep tension firm on the handle. A tight, dense handle is the single biggest luxury signal on this bag. Weave ends in deeply. Chenille grips itself well, so a 4–5 inch woven tail disappears forever. Loose ends are the fastest way to look amateur. Add a base insert (optional). A circle of plastic canvas wrapped in fabric drops into the bottom and makes the bag stand at attention. Two minutes, huge payoff. Steam or finger-block the ridges. Gentle shaping after finishing evens out the BLO texture beautifully. Don’t crush chenille with a hot iron — steam from a distance or just smooth by hand. Do these four things and people will ask which brand it is. Let them. Then enjoy saying “oh this? I made it.”
Choosing Between the Three Included Sizes
Keep the crochet teardrop bag pattern open for the exact counts, size checkpoints, and decrease placement in this stage.
The small, medium, and oversized options let the same crochet teardrop bag pattern serve different purposes. Small works well for essentials and evening styling. Medium is the most adaptable daily size. Oversized makes a relaxed statement and offers more capacity, but every larger bag should be used within the limits of its yarn, handle, and construction.
The product reference lists an approximate 25–30 cm range. Use the PDF’s exact finished measurements for each version, because personal gauge and yarn substitution can change the result. Decide on the size before buying yarn, and do not assume that the two-skein estimate applies equally to every size, color lot, or substitute fiber.
Substituting Yarn Without Losing the Shape
Plush chenille creates the soft, rounded appearance shown in the reference. A substitute should be compared by weight, thickness, stretch, and stitch definition—not only by the label category. Crochet a measured swatch with the 4.0 mm hook specified for this product, then compare it with the PDF. If the fabric stretches excessively under a small test load, it may not be suitable for the handle or body.
Keep the same yarn type throughout one bag unless the pattern specifically approves a change. Different fibers can produce uneven tension and a visible shift in texture. Buy enough of one dye lot for the selected size whenever possible.
Troubleshooting the Four Construction Stages
Keep the crochet teardrop bag pattern open for the exact counts, size checkpoints, and decrease placement in this stage.
If the base curls, pause and recount before continuing. Check the distribution of increases and compare the diameter with the pattern checkpoint. If the BLO walls lean or ripple, confirm that you are consistently entering the correct loop and not adding stitches at the round join.
During the taper, a temporary awkward shape is normal, but the decreases should remain balanced. Use markers to divide the round into sections and compare both sides. At the handle stage, pin or hold the join in position before sewing. The opening should appear centered, and the two sides of the handle should meet at the same height.
Finishing, Care, and Everyday Use
Keep the crochet teardrop bag pattern open for the exact counts, size checkpoints, and decrease placement in this stage.
Weave chenille ends with the method in the PDF because plush fibers can hide short tails that later work loose. Shape the ridges gently by hand; do not press them with direct high heat. If adding an optional base insert or lining, fit it from the finished interior measurements and avoid making it so tight that it changes the outer silhouette.
Empty the bag after use, store it supported on a shelf, and follow the yarn manufacturer’s cleaning directions. A handmade shoulder bag lasts longer when heavy items are distributed evenly and the handle is not left carrying weight during storage.
FAQ
Q1. Is this crochet teardrop bag pattern good for beginners?A: Yes — it’s built entirely from single crochet, and the shaping is just evenly spaced increases and decreases. If you’ve made a hat or a basket before, you already have every skill this needs.
Q2. How long does the teardrop bag take to make?A: Time varies by size and maker. Plan the work in stages and pause if firm bag tension causes hand fatigue.
Q3. Can I substitute t-shirt yarn for chenille?A: Absolutely. T-shirt yarn gives a slightly crisper, more structured result and shows stitches more clearly. Chenille gives the soft, velvety boutique look. Both hold the teardrop shape well.
Q4. Why is my bag curling during the base rounds?A: That’s a stitch count slip or tension that’s too tight on increases. Count every round and keep your increases evenly spaced — and if it’s already curled, my crochet bag mistakes post covers how to fix it.
Q5. Does the bag need a lining?A: It’s optional. The dense single crochet fabric holds small items fine, but a lining stops stretch over time and gives a clean interior. A lining is optional unless the pattern specifies one, but it can reduce stretching and protect the interior.
Conclusion
A crochet teardrop bag pattern is one of those rare projects that looks far harder than it is — single crochet, four stages, two skeins, one weekend. The secret isn’t skill; it’s counting your rounds, trusting the ugly middle phase, and finishing with care.
Ready to make yours? The full PDF with all three sizes and step-by-step photos is in [YOUR SHOP LINK]. And if you make it, come back and tell me what color you chose — I’m already tempted to make a sage one next.
More from My Crochet Universe
Browse crochet patterns, explore amigurumi projects, or discover another project in the free crochet patterns library.
Make the Teardrop Bag
The pattern includes three sizes, step-by-step instructions, detailed rounds and stitch counts, plus guidance for a sturdy seamless finish.




