

My Crochet Universe · Complete Tutorial
Crochet Coffee Cup Keychain Pattern: Easy Step-by-Step Tutorial
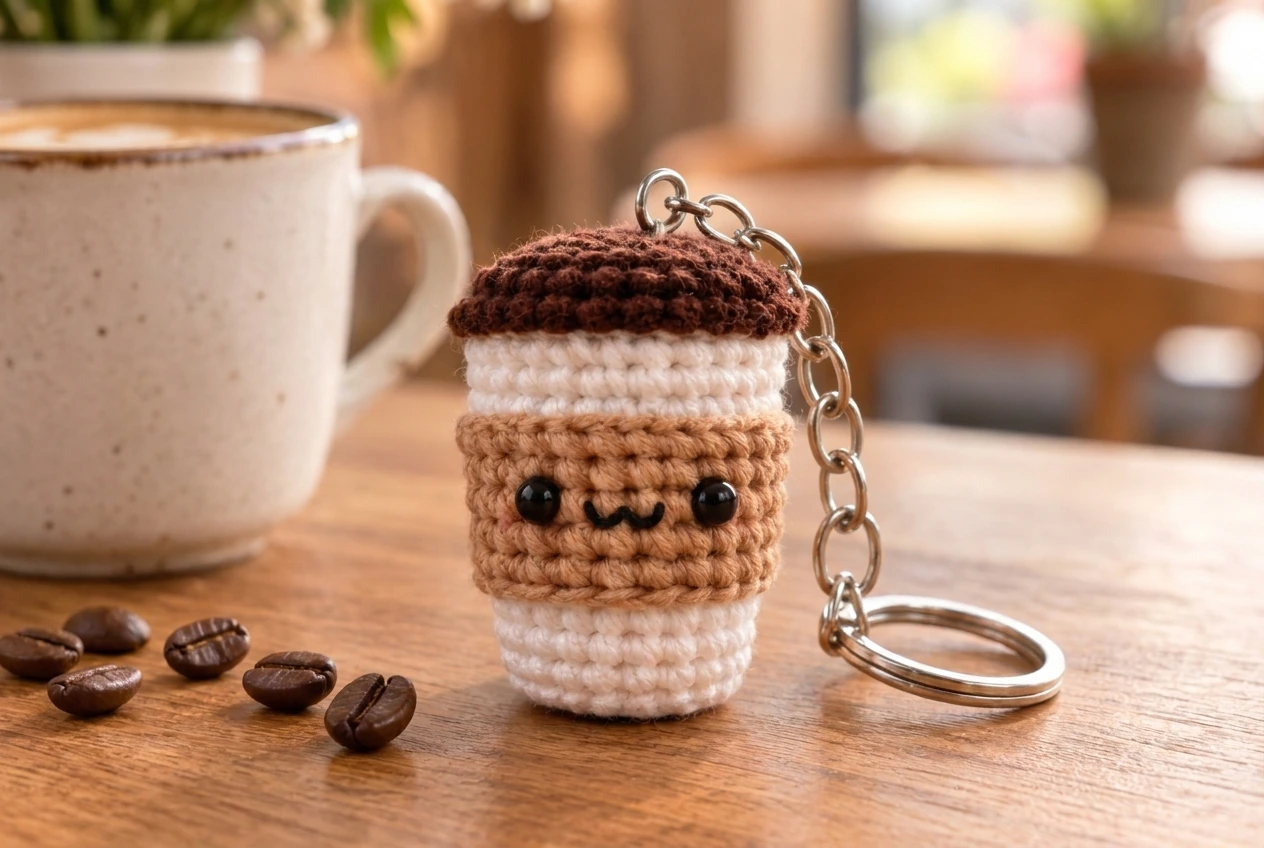
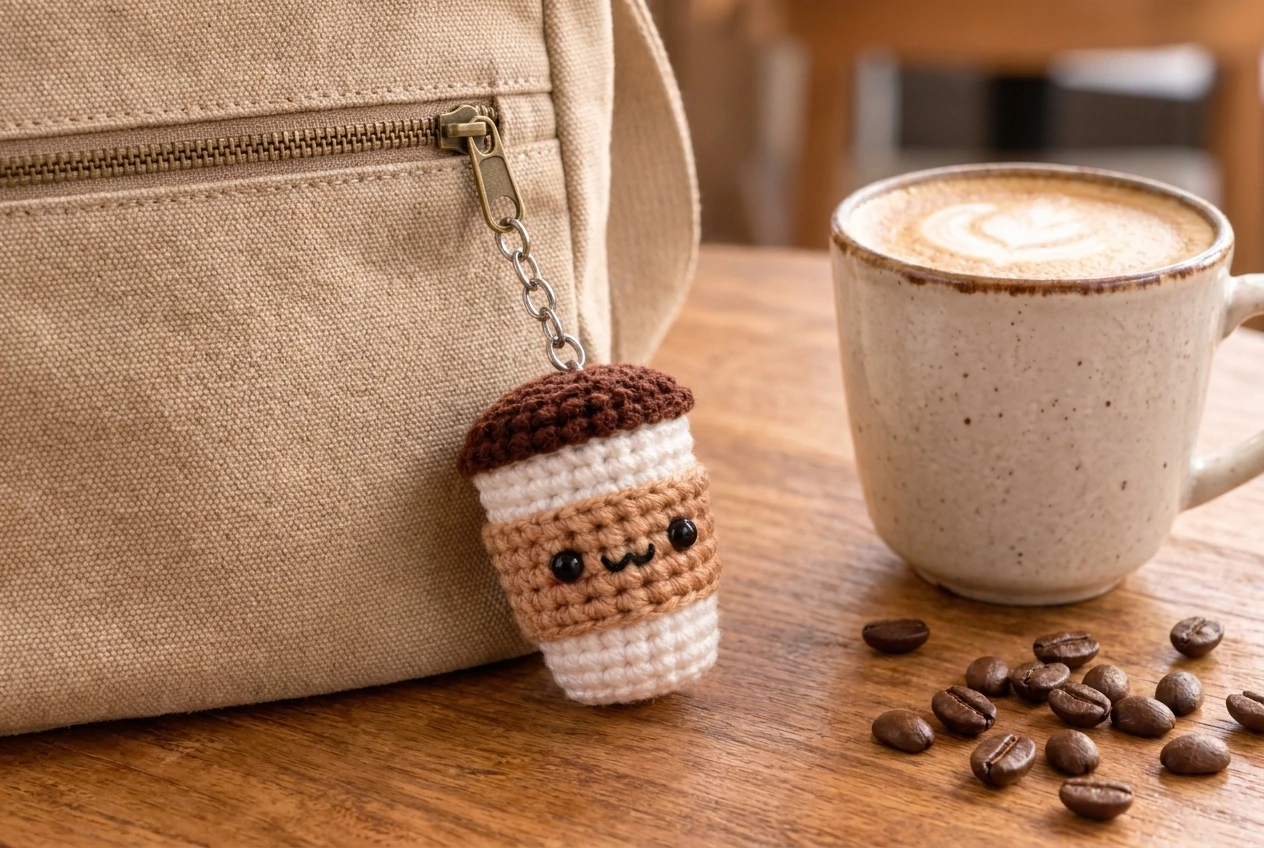
This crochet coffee cup keychain pattern turns small amounts of white, tan, and dark brown yarn into a cozy miniature takeaway cup. The design is worked continuously from the flat white base through a textured tan sleeve and white upper section, then closed with a softly domed coffee-colored lid.
The source PDF supplies a clear 17-round structure, an example gauge, finished dimensions, facial placement, and assembly guidance. This article translates that technical information into a detailed web tutorial and pairs it with entirely new landscape progress images. The PDF pages are not used as article images.
The finished charm is approximately 5 cm tall by 4 cm wide. It is designed as a decorative accessory for keys, project bags, backpacks, or gift packaging. The crochet coffee cup keychain pattern is beginner friendly if you can work single crochet, increases, invisible decreases, color changes, and continuous rounds.
Crochet coffee cup keychain pattern overview
The entire cup is one stuffed cylinder. This compact construction keeps the crochet coffee cup keychain pattern easy to carry and straightforward to assemble. Rounds 1–6 form a white base, Rounds 7–10 create the tan sleeve in back loops only, Rounds 11–13 return to white for the upper cup, and Rounds 14–17 use dark brown yarn to make the domed lid. The face sits on the sleeve, and a reinforced ring at the lid supports the chain.
| Section | Rounds | Color / technique |
|---|---|---|
| Base | 1–6 | White, standard sc |
| Sleeve | 7–10 | Tan, BLO sc |
| Upper cup | 11–13 | White, both loops |
| Lid | 14–17 | Brown, decreases |
Use a stitch marker in the first stitch of every round. Continuous rounds do not end with a slip stitch, so the marker prevents the beginning from drifting. Accurate tracking also keeps the color joins of the crochet coffee cup keychain pattern aligned at the back. Count after every increase or decrease round; the shape of this crochet coffee cup keychain pattern depends on maintaining 18 stitches through the straight sections.
Materials and stitch abbreviations
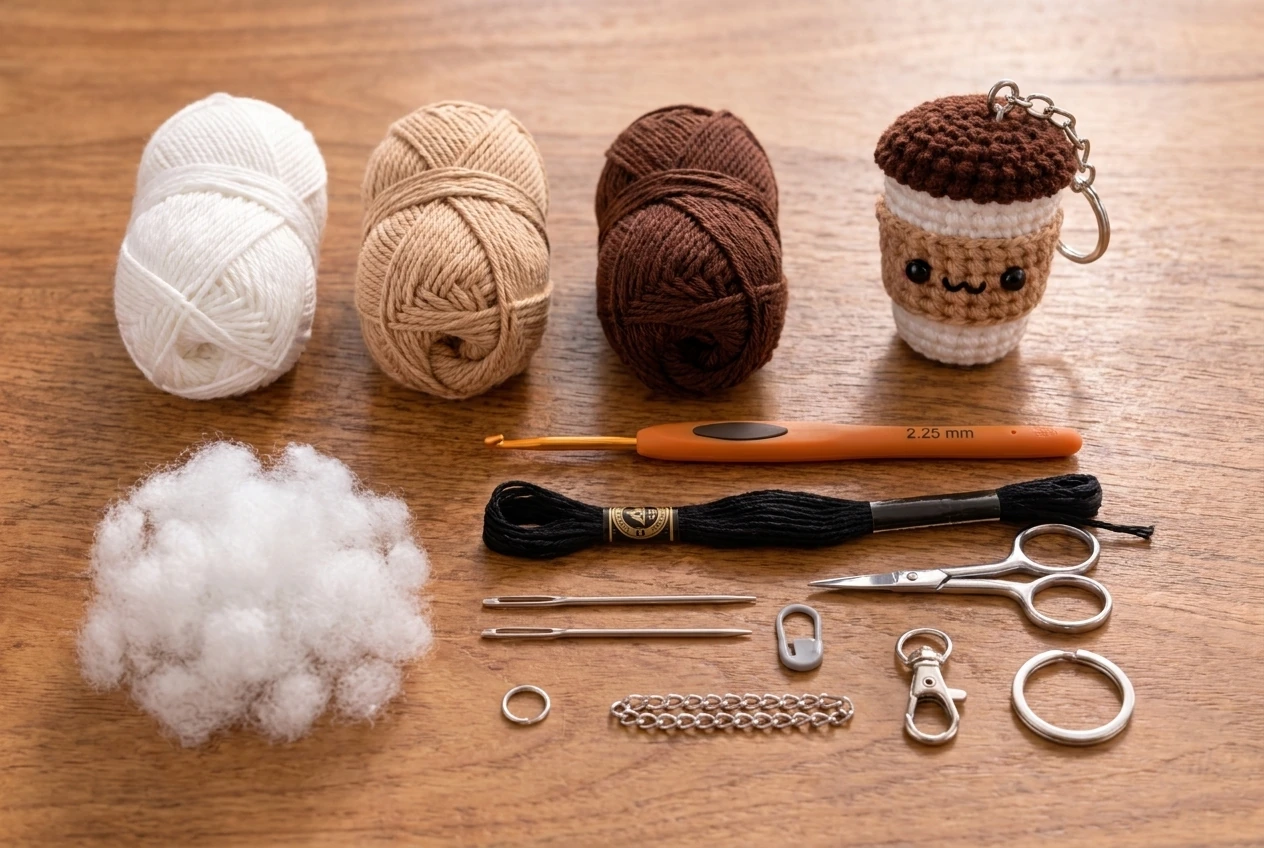
- Small amounts of white, tan or beige, and dark brown worsted-weight cotton yarn
- US B/1 or 2.25 mm crochet hook
- Black embroidery floss for the eyes and mouth
- Polyester fiberfill
- Yarn needle, small scissors, and locking stitch marker
- Silver or gold jump ring, short chain, swivel clasp, or split keyring
- Optional 4–5 mm safety eyes for adult decorative charms only
Abbreviations: MR means magic ring; sc means single crochet; inc means two single crochets in one stitch; dec means an invisible single-crochet decrease; BLO means back loop only; st means stitch; rnd means round.
Smooth cotton gives the clearest miniature stitches and resists fuzzing on frequently handled keychains. It also helps the small details in the crochet coffee cup keychain pattern remain visible. Use one yarn weight across all three colors. If your yarn is thicker, the crochet coffee cup keychain pattern will grow larger; select a hook that produces firm fabric without making your hands uncomfortable.
Gauge, size, and preparation
The PDF gives an example gauge of 6 single crochets by 6 rows in a 2.5 cm square. Gauge is not critical in the same way it would be for a fitted garment, but it controls the final size and firmness. The target is dense fabric that contains the stuffing and holds a clean cup silhouette. A firm swatch makes the crochet coffee cup keychain pattern more durable without making it rigid.
Make a small single-crochet swatch if the 5 cm size matters. If your stitches are too tight and the swatch is small, try a slightly larger hook. If they are loose and the gaps expose stuffing, use a smaller hook. Always test the actual yarn chosen for the crochet coffee cup keychain pattern.
Before starting
- Leave color-change tails long enough to secure inside.
- Use invisible decreases for a smooth lid.
- Do not overstuff; the cup should remain cylindrical.
- Choose embroidered eyes if the charm may be accessible to a child.
- Test the finished hardware with several firm tugs.
Step 1: Crochet the white cup base
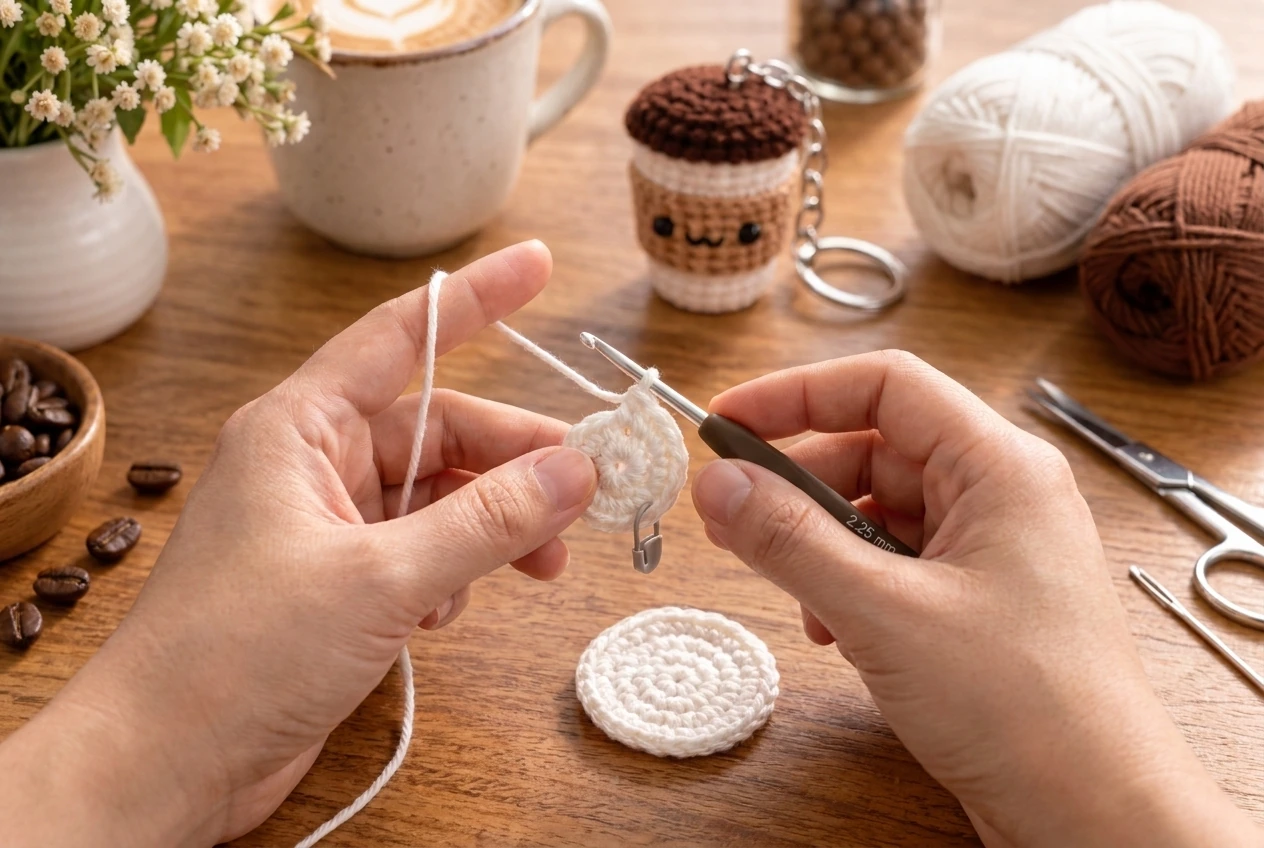
With white yarn, make a magic ring. Work in continuous rounds and place a marker in the first stitch. Pull the center closed after Round 1, but do not bury the tail until the base is established; the tail can reinforce the center later.
| Round | Instructions | Total |
|---|---|---|
| 1 | 6 sc in MR | 6 |
| 2 | inc in each stitch around | 12 |
| 3 | (sc in next st, inc in next st) × 6 | 18 |
| 4–6 | sc in every stitch for 3 rounds | 18 each |
After Round 3, the base should be a small flat circle. A balanced circle gives the crochet coffee cup keychain pattern a stable bottom and prevents leaning. Rounds 4–6 stop the increases, so the fabric begins curving upward into a shallow cup. Keep the round transition at the back. The white lower section in the crochet coffee cup keychain pattern should feel firm but still accept a yarn needle.
On the final stitch of Round 6, begin the last yarn-over with white, then complete it with tan. This creates a clean color change. Knot the two tails loosely inside or weave them in opposite directions so the transition cannot open during stuffing.
Step 2: Crochet the tan ribbed sleeve
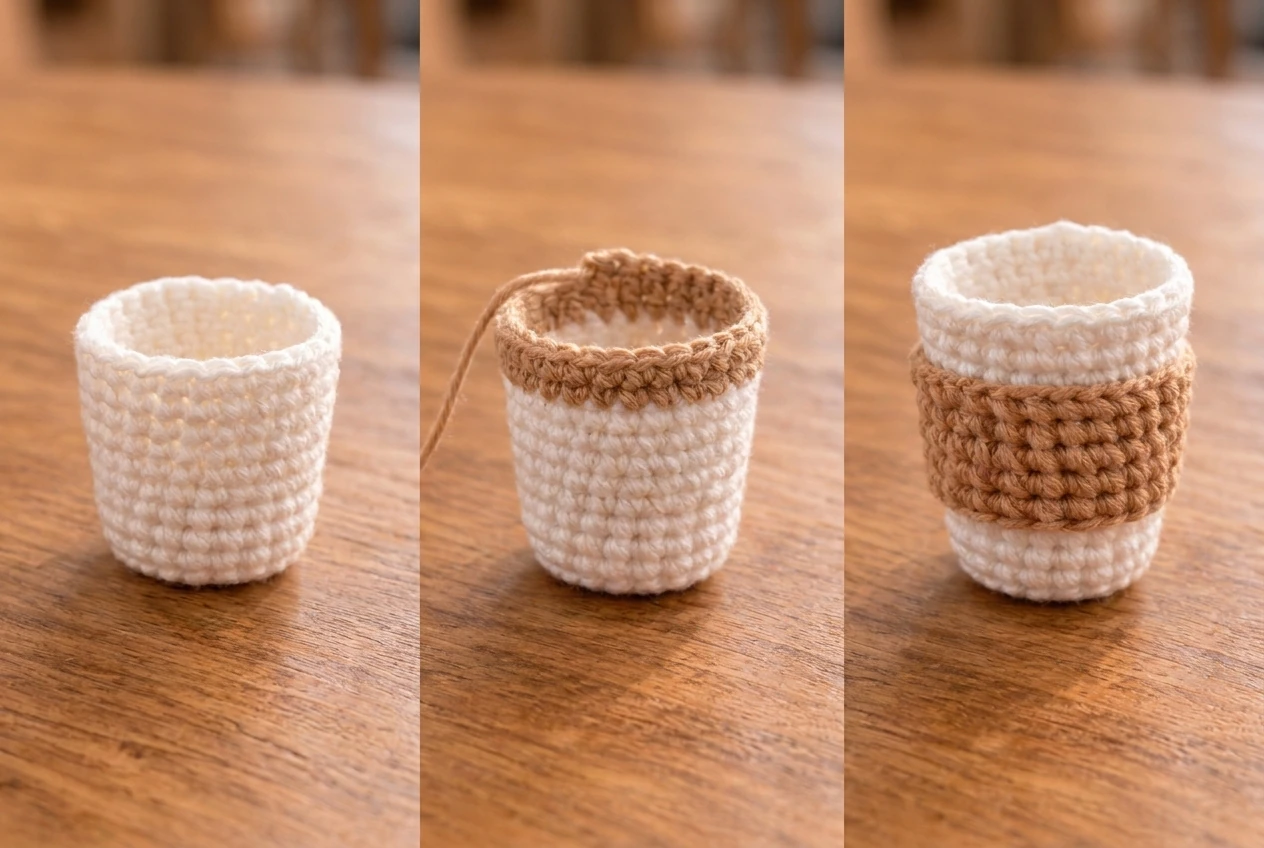
Rounds 7–10 are worked in tan through the back loop only. Insert the hook under the loop farthest from you, leaving the front loop visible. These exposed loops form horizontal ridges that resemble the texture of a takeaway-cup sleeve. That ribbing is the signature texture of the crochet coffee cup keychain pattern.
| Round | Instructions | Total |
|---|---|---|
| 7–10 | sc BLO in every stitch for 4 rounds | 18 each |
Keep tension consistent when working BLO. If the first tan round is much tighter than the white base, the cylinder will pinch. If it is too loose, the sleeve will flare. The crochet coffee cup keychain pattern needs a straight, even sleeve because it becomes the focal area for the face.
At the last stitch of Round 10, change back to white using the same final-yarn-over method. Before continuing, count 18 stitches and identify the front center. You can mark the intended eye positions with two short contrasting yarn tails.
Step 3: Work the white upper cup
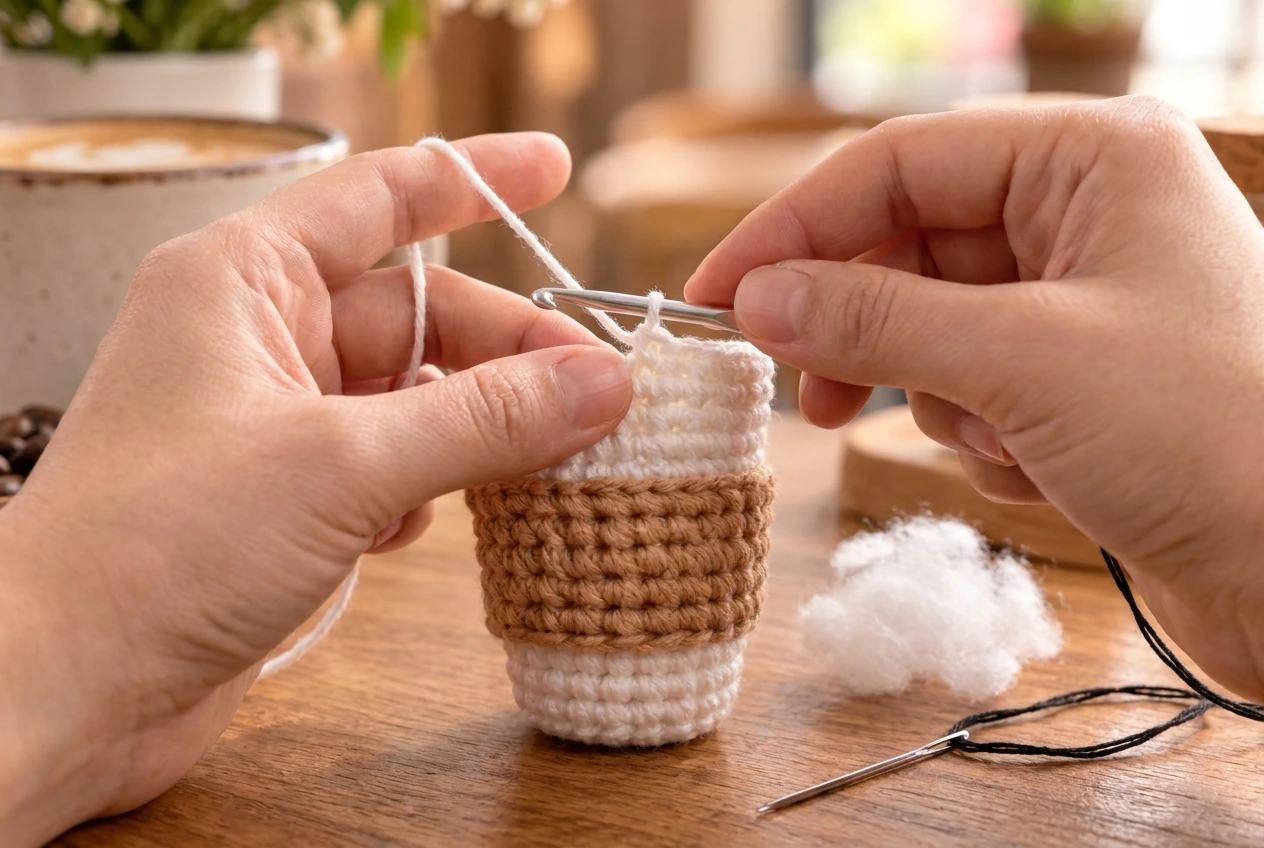
For Rounds 11–13, crochet through both loops. The fabric should rise directly above the tan sleeve without increasing or decreasing. These three rounds create the white band visible beneath the brown lid. Their even height preserves the familiar takeaway-cup proportions of the crochet coffee cup keychain pattern.
| Round | Instructions | Total |
|---|---|---|
| 11–13 | sc in every stitch through both loops | 18 each |
The crochet coffee cup keychain pattern remains open after Round 13, making this the best time to add facial details and begin stuffing. If you are using safety eyes on an adult-only decorative charm, insert them before closing. For a softer and more child-conscious version, embroider the eyes with black floss.
Step 4: Add the face and begin stuffing
Center the face on the tan sleeve. Place eyes approximately 4–5 stitches apart, positioned around the middle of the sleeve. Check the spacing from the front and side before fastening anything. A slightly wider eye placement creates a friendly expression and leaves room for the curved mouth.
For embroidered eyes, make several short vertical or satin stitches over one crochet stitch, then secure the thread inside. Add a tiny curved W-shaped smile between the eyes. Avoid long thread spans on the interior. The face on this crochet coffee cup keychain pattern should remain compact and centered.
Begin adding fiberfill in small pinches. Gradual filling helps the crochet coffee cup keychain pattern stay cylindrical instead of becoming lumpy. Fill the base first, then use the blunt end of the hook or a stuffing tool to push material into the lower corners. Continue until the cylinder holds its shape, but leave the upper edge flexible enough for the decrease rounds.
Safety note
This keychain contains small hardware and is not a toy. Use embroidered facial details whenever a child could access it. Inspect the jump ring and stitching regularly and remove the charm from use if any component loosens.
Step 5: Shape and close the dark brown lid
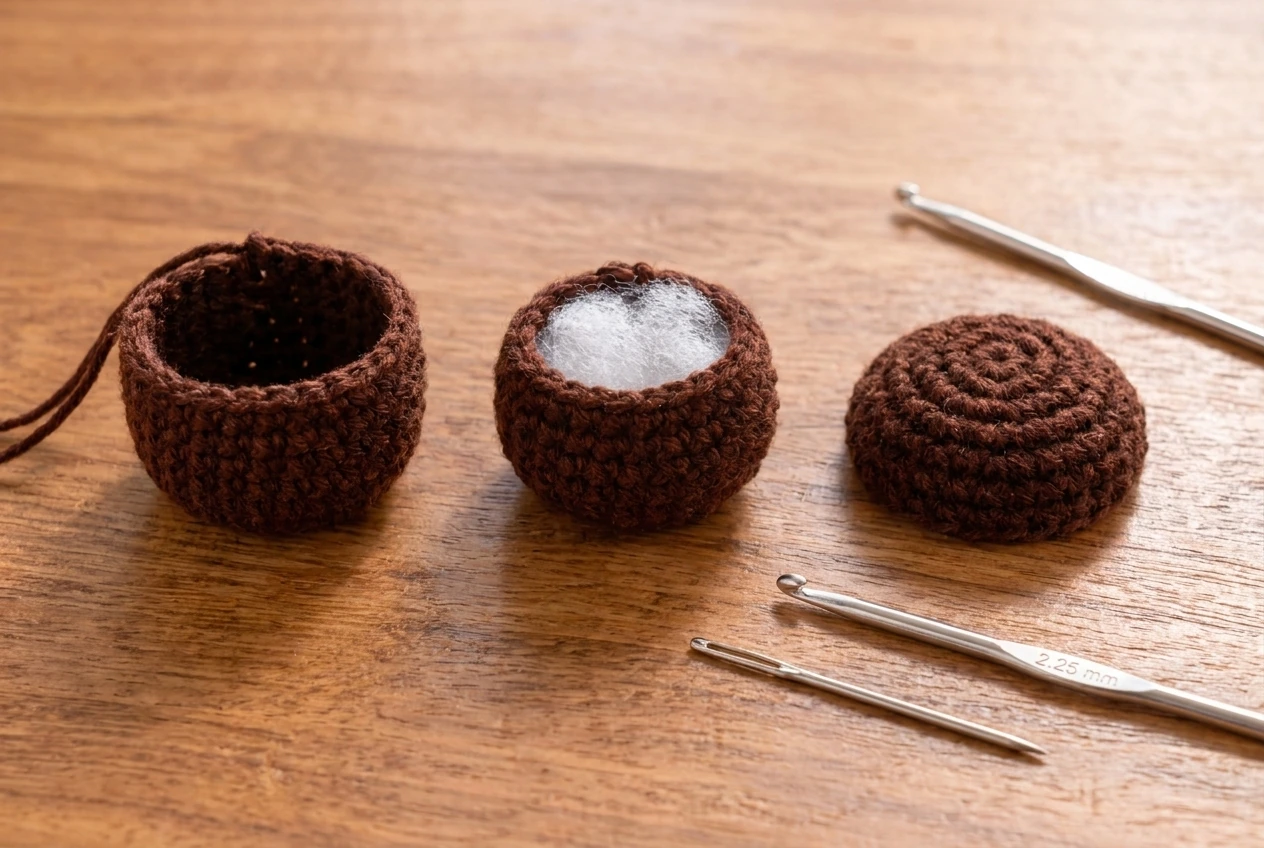
Change to dark brown on the last stitch of Round 13. Round 14 is worked even to establish the lid color. This uninterrupted round creates a clean border around the top of the crochet coffee cup keychain pattern. The following decrease rounds create the rounded foam-top shape shown in the pattern.
| Round | Instructions | Total |
|---|---|---|
| 14 | sc in every stitch | 18 |
| 15 | (sc in next st, dec) × 6 | 12 |
| 16 | dec × 6 | 6 |
| 17 | dec × 3 | 3 |
Pause before the final decreases and add the last small amount of stuffing. Shape the top gently rather than packing it hard. The brown lid in the crochet coffee cup keychain pattern should dome softly and extend slightly beyond the white upper cup.
Fasten off with a tail of about 15 cm. Thread it onto a yarn needle, pass through the remaining front loops, pull the opening closed, and secure the tail inside. Do not cut the tail flush; weave it through the stuffed body in two directions.
Step 6: Embroider details and attach hardware
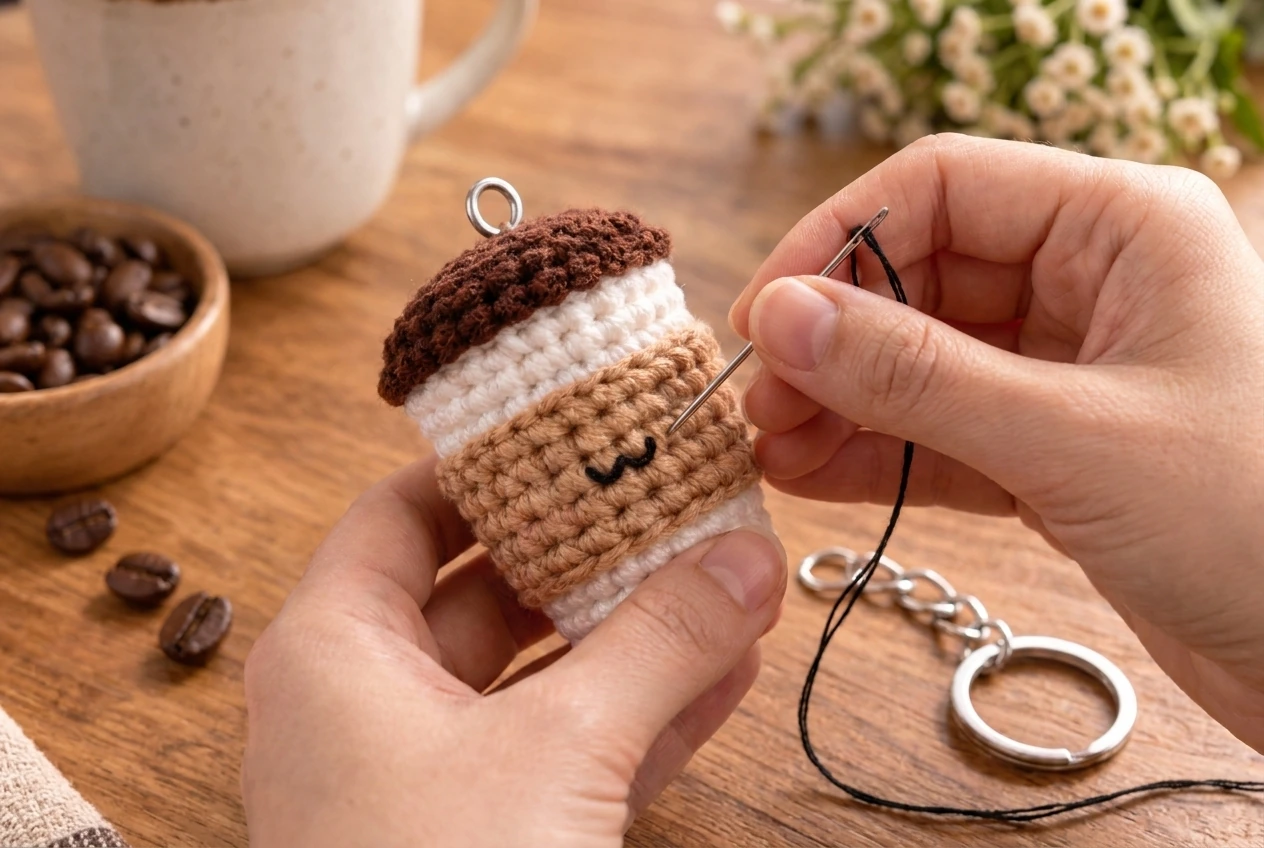
If the mouth was not added earlier, embroider it now with a sharp yarn needle and black floss. Hide the knot by entering through the back of the sleeve, or bury it through the stuffed body. Add optional blush with one short pink stitch beneath each eye.
Choose the strongest top-center stitches on the brown lid. Reinforcement protects the crochet coffee cup keychain pattern from stretching where the metal finding bears weight. Pass a jump ring through one or two full crochet stitches, not only a loose surface strand. Close the ring completely with two jewelry pliers. Attach a short chain, swivel clasp, or split ring according to how the charm will be used.
The hardware is the highest-stress point in the crochet coffee cup keychain pattern. Tug the chain firmly in several directions and watch the surrounding yarn. If the stitches distort, remove the ring and reinforce the area with matching brown yarn before reattaching it.
For extra durability, sew a small closed metal ring into the lid while finishing Round 14, then crochet around its base. The exact method depends on the finding. Avoid open rings that separate easily, sharp edges, or heavy chains that pull the miniature out of shape.
Coffee cup keychain variations
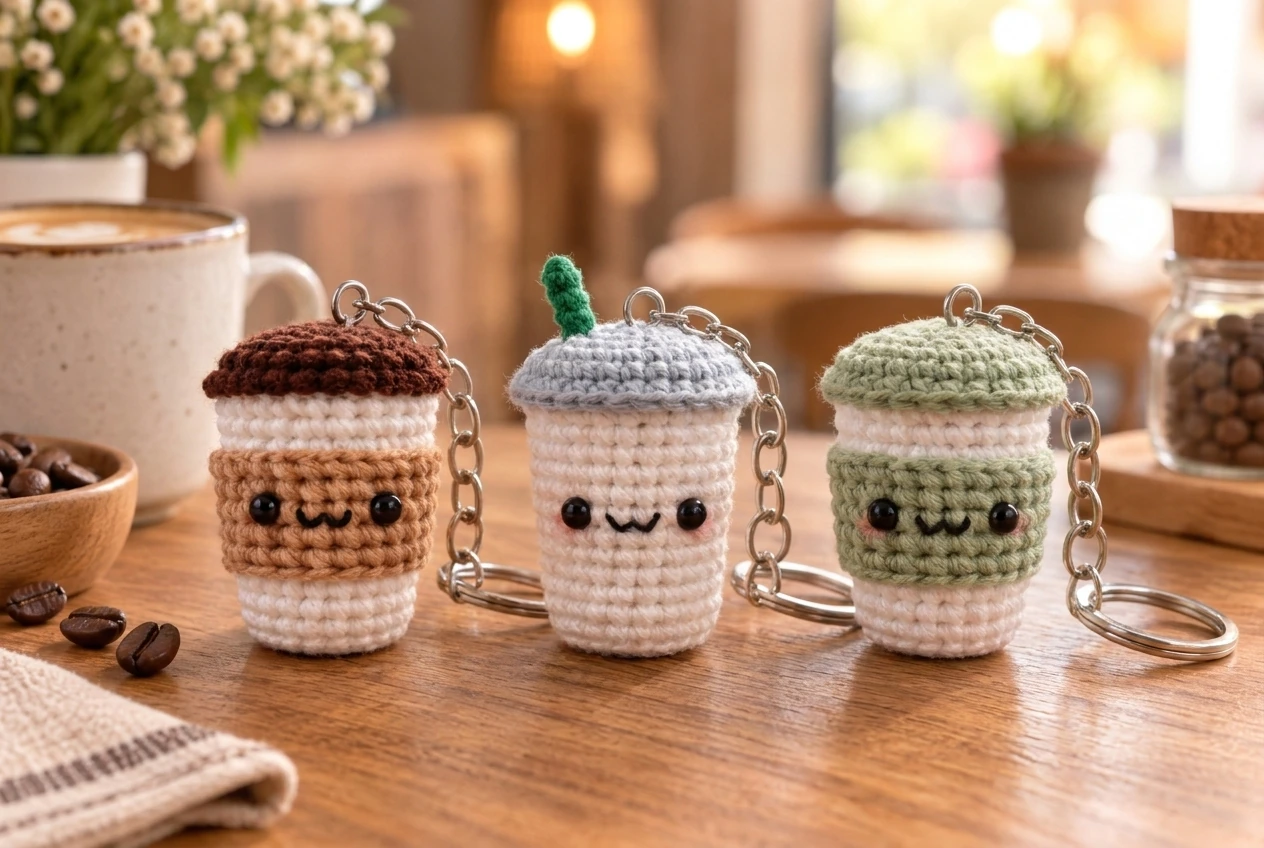
Iced coffee
Use a pale blue-gray lid and add a tiny green crochet straw through a reinforced point at the top. Keep the straw short so it does not snag. A lighter tan or all-white body gives the variation a cool, refreshing look.
Matcha
Replace the tan sleeve and brown lid with soft sage green. Add one darker embroidered leaf or keep the face simple. This version works beautifully with cream hardware and botanical bag accessories.
Hot cocoa
Retain the brown lid and sew two or three tiny white bobbles on top as marshmallows. Attach every bobble through multiple stitches. The original crochet coffee cup keychain pattern stays unchanged beneath these decorative additions.
For a larger ornament, use bulkier yarn and a larger hook while keeping the round sequence. For a smaller charm, use fingering-weight cotton and a fine hook. Any size change should preserve dense fabric and appropriately scaled hardware.
Finishing, care, and troubleshooting
The cup leans
Check whether one section has fewer than 18 stitches or whether the stuffing is uneven. Massage the fiberfill, then reshape the cylinder. A severe lean usually begins with a missed stitch in the straight rounds.
The sleeve flares
Your tan BLO tension may be looser than the white section. Use a smaller hook for the sleeve or consciously tighten each stitch. Keep the color-change stitches the same height as their neighbors.
Stuffing shows through
Use a slightly smaller hook, tighten the single crochet, or replace lumpy stuffing with small teased pieces. Do not solve large gaps only by adding more stuffing, because overfilling stretches them further.
The lid looks flat
Add a little more filling before Round 16 and shape the dome with your fingers. Confirm that all decrease rounds were completed. The closing tail should pull the center together without crushing the top.
The hardware pulls the lid
Move the ring through stronger stitches, reinforce the area with matching yarn, and choose a lighter chain. The finished crochet coffee cup keychain pattern should hang vertically without opening the lid stitches.
Spot clean the charm with a damp cloth. Avoid soaking or machine washing, which can stress the metal hardware and alter the stuffing. Dry flat, reshape the lid, and polish the clasp only with a product appropriate for its finish.
Frequently asked questions
Is this coffee cup keychain suitable for beginners?
Yes. It uses single crochet, increases, invisible decreases, back-loop stitches, simple color changes, stuffing, embroidery, and basic assembly.
Can I embroider the eyes instead of using safety eyes?
Yes, and embroidery is recommended whenever a child might access the charm. Safety eyes and keychain findings are small parts.
Why is the sleeve worked in back loops only?
Leaving the front loops exposed creates horizontal ridges that resemble the texture of a cardboard coffee sleeve.
How large is the finished charm?
Using the suggested yarn, hook, and tension, the reference size is approximately 5 cm tall by 4 cm wide, excluding the chain.
Can I sell finished coffee cup keychains?
Check the original pattern’s license and your local product-labeling obligations. Credit the designer when required and disclose that the item contains small parts.
This crochet coffee cup keychain pattern succeeds through careful counting, firm fabric, controlled stuffing, and reinforced hardware. Work from 6 to 18 stitches, maintain the 18-stitch cylinder through the white and ribbed tan sections, decrease the brown lid neatly, and test every attachment before use.




