

7 Steps to Crochet a Cat-Face Bow Bag
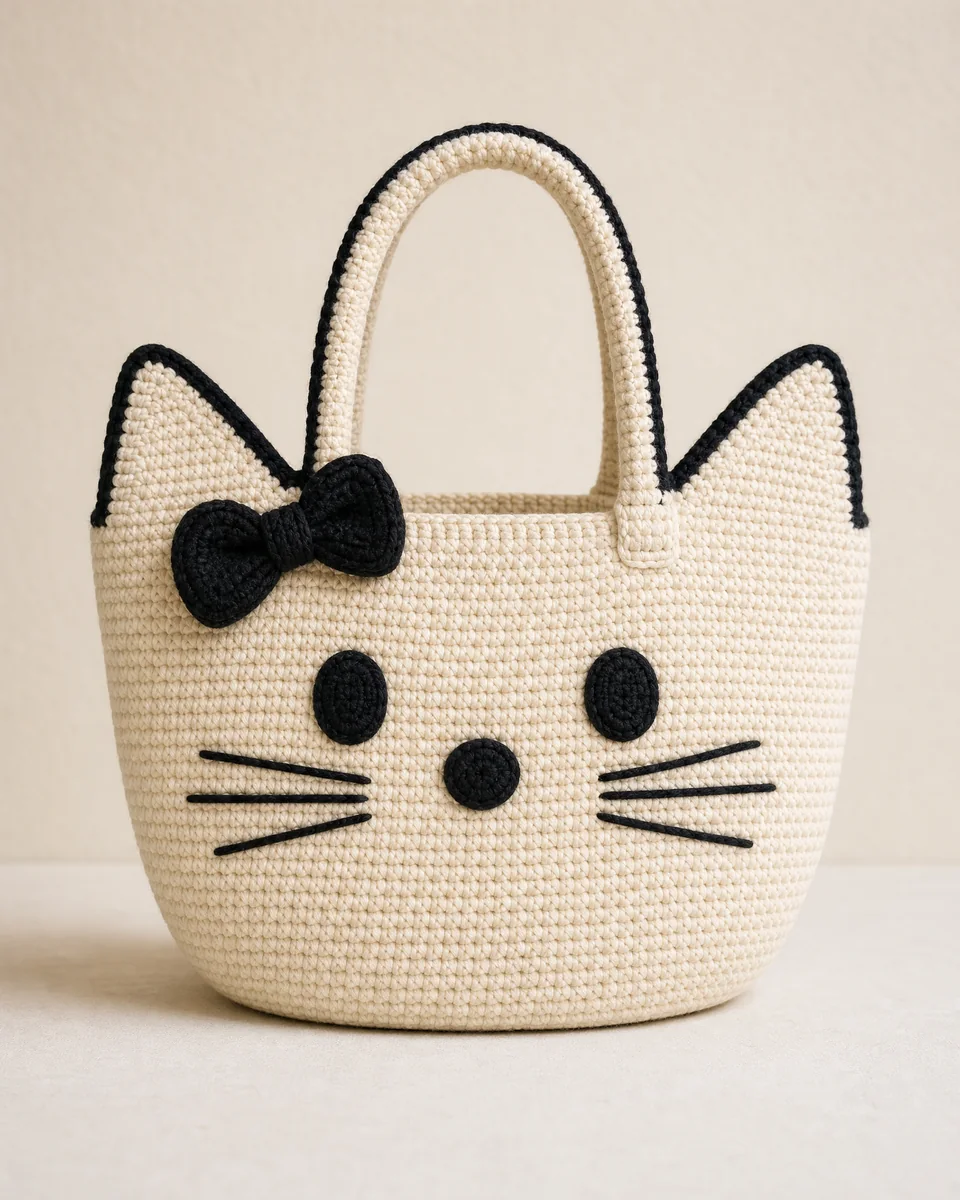
There is something satisfying about carrying a bag you made yourself, especially when it has ears, whiskers and a dimensional bow. This crochet cat face bow bag tutorial follows the supplied premium PDF and turns its construction sequence into seven clear stages, from tools and oval base to the structured body, cat details, handles and final checks.
In this article
Love this cream-and-black cat-face bow bag?
The supplied pattern PDF contains designer-confirmation placeholders. Exact foundation chains, round counts, component stitch counts, yarn use and final measurements must be checked against a complete physical sample before a pattern is published or sold. The instructions below preserve the verified construction sequence without inventing missing numbers.
1. Gather Materials and Tools
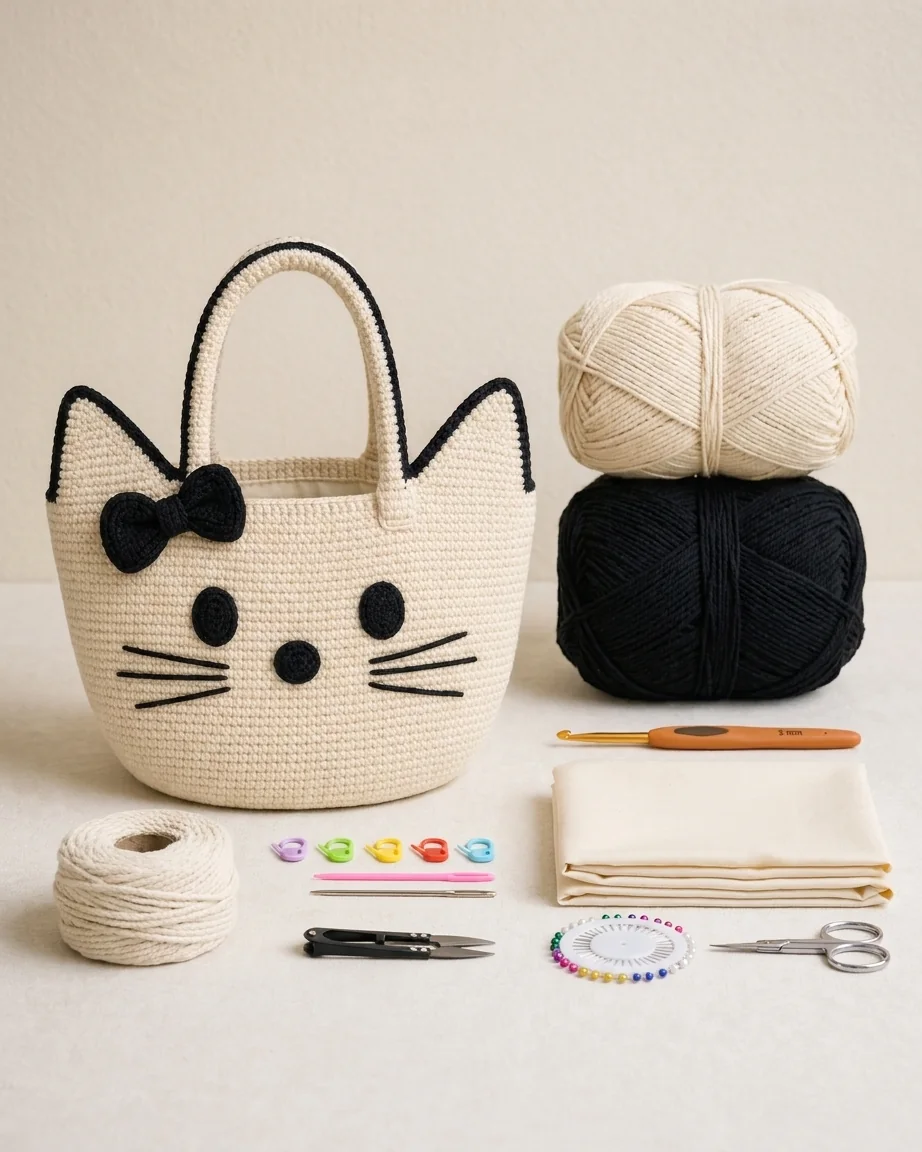
The PDF lists approximately 340 m / 370 yd of cream worsted cotton and 85 m / 90 yd of black worsted cotton, together with a 5 mm H-8 hook. Gather stitch markers, pins, a tapestry needle and scissors. Optional finishing supplies include cotton filler cord, lining fabric and a magnetic snap.
Make a gauge swatch before beginning. The stated gauge is 15 single crochet stitches by 16 rows over 10 cm / 4 in. Ch, sc, inc, sc2tog, sl st, rnd, RS/WS and st/sts are the abbreviations used. Ch 1 does not count as a stitch, and the first stitch of each spiral round should be marked.
2. Crochet the Bag Base
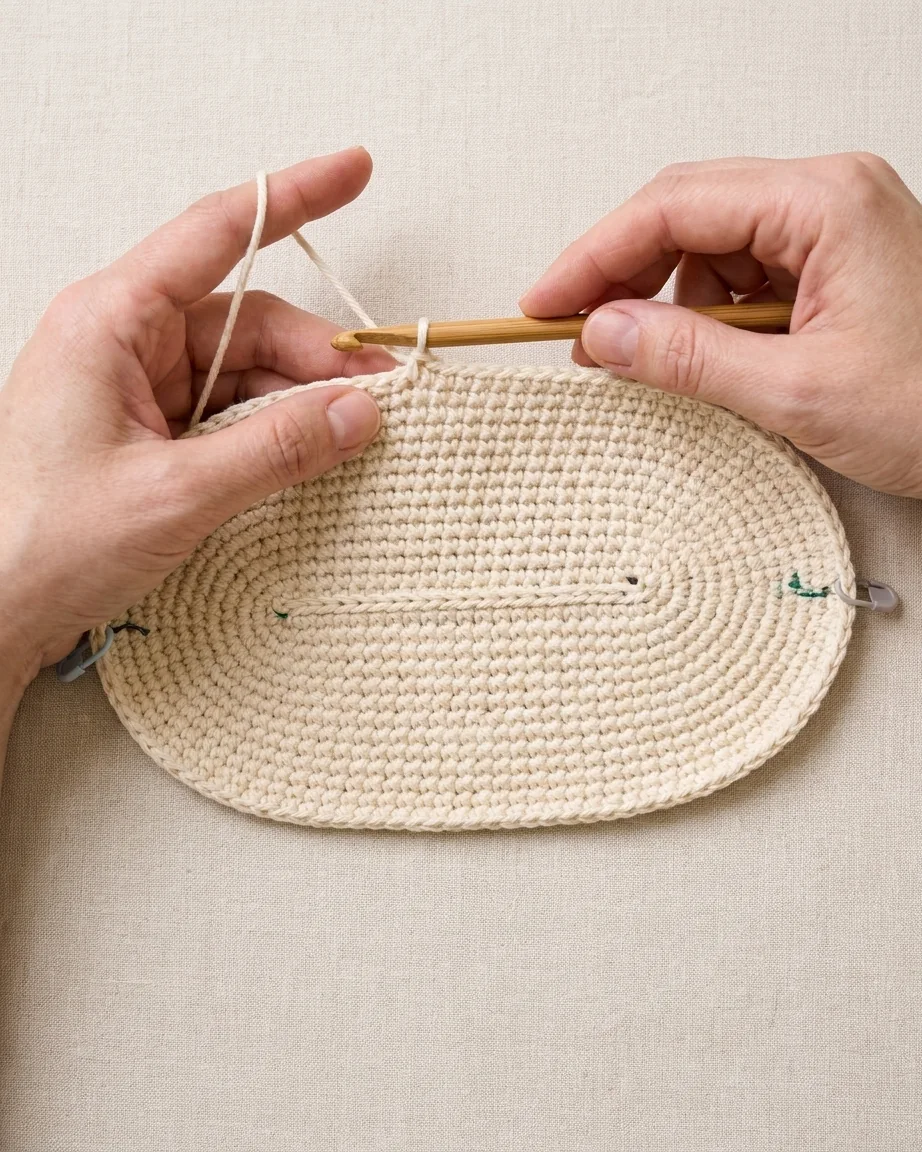
Begin the crochet cat face bow bag with a foundation chain chosen from a tested sample. Work single crochet down one side, multiple stitches in the end chain to turn, then crochet back along the opposite side. Increase at the second rounded end and place balanced markers around both curves.
Continue the oval with symmetrical shaping points until it reaches the tested width and depth. The guide targets a body around 28 cm wide but does not supply a publishable starting-chain or base-round count. Lay the work flat frequently: cupping requires more increases; ruffling means the increases are too frequent or too close.
3. Build the Bag Body
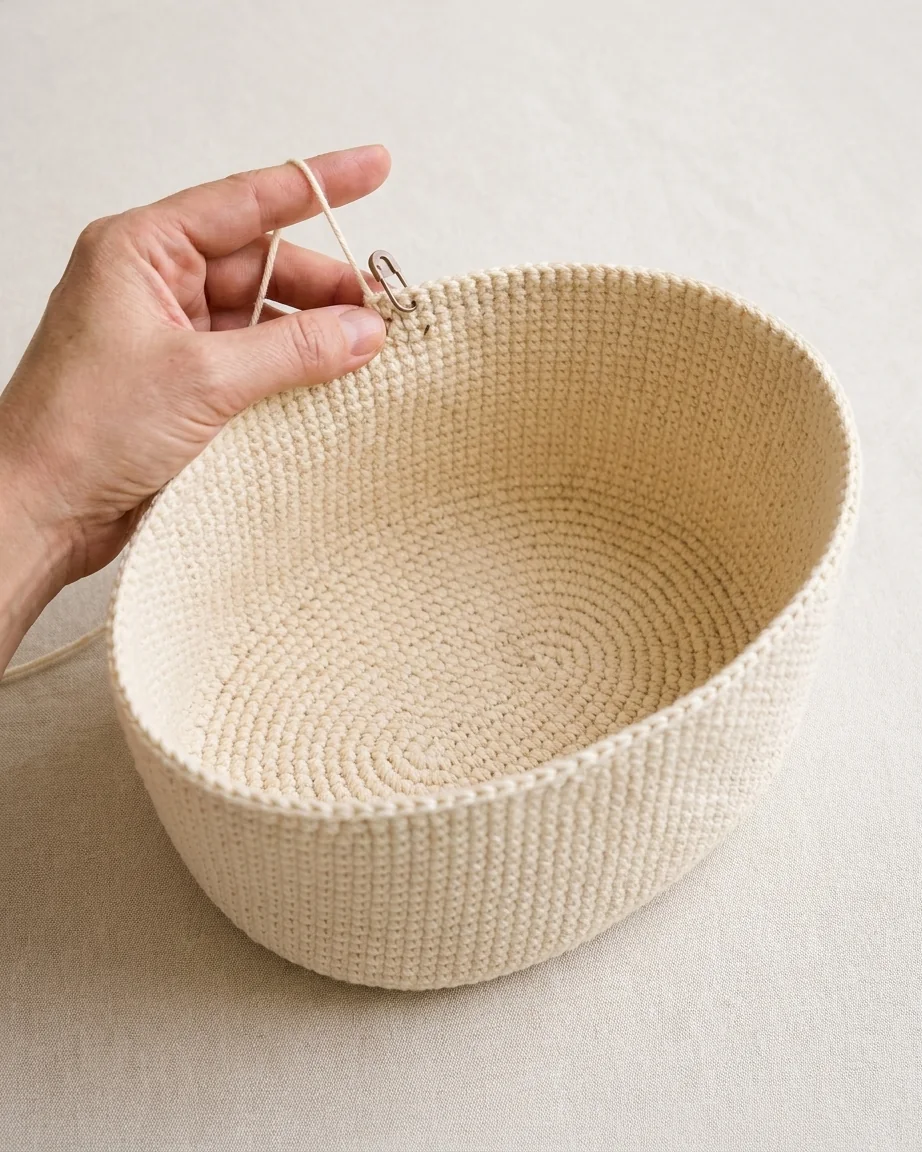
Move directly from the oval into continuous spiral rounds. Work one single crochet in every stitch, maintaining the final base count and moving the marker after each round. Dense, even fabric helps the cream walls rise vertically without visible gaps.
Continue until the body measures about 23 cm from the base, with the tote standing upright while measured. Record the actual round count from the physical sample. If the walls are too soft, test firmer cotton, a slightly smaller hook or interfacing rather than promising identical structure from every yarn.
4. Shape and Attach the Cat Ears
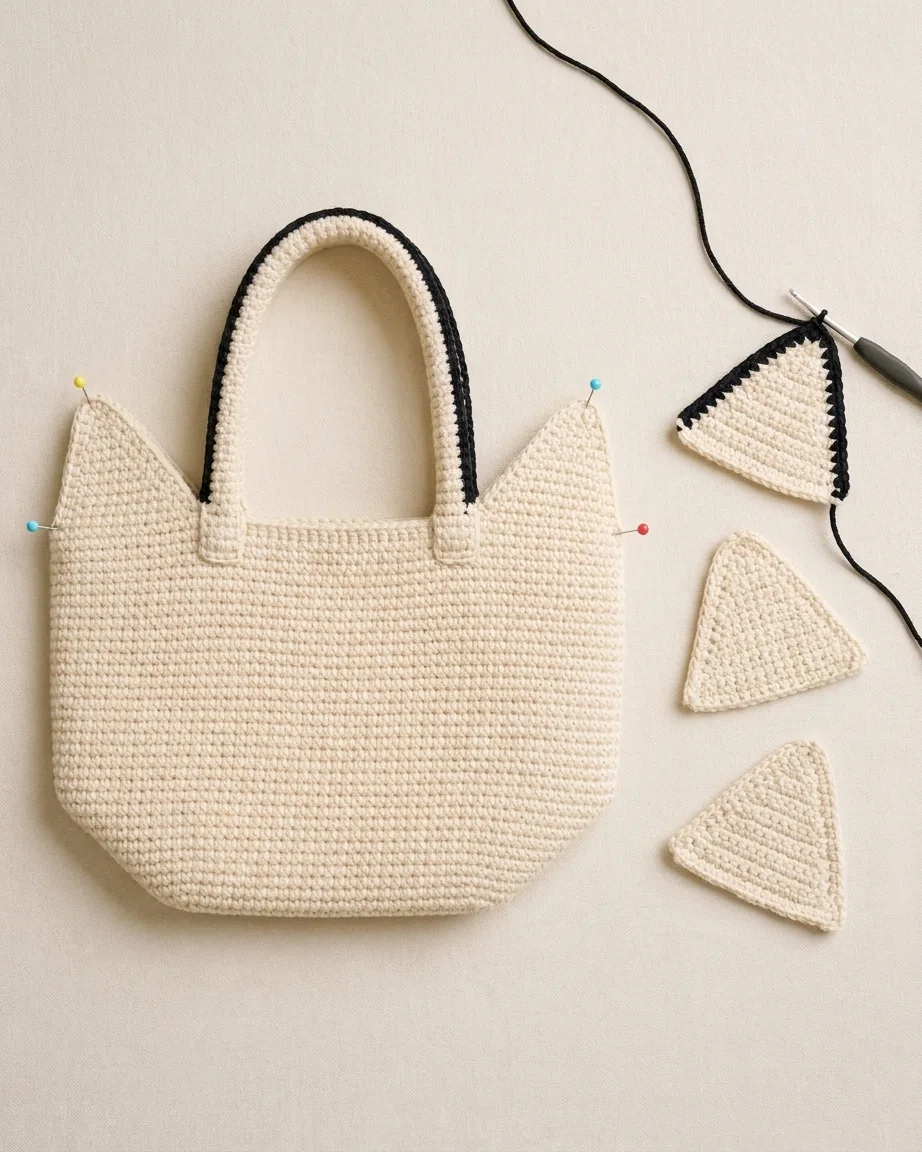
Flatten and center the front. Mark matching ear-base sections at both upper corners on the front and back. Join cream yarn and work each triangle in rows, using sc2tog at both ends on later rows until one stitch remains. Compare all pieces before edging.
Join black yarn at a lower outer edge and crochet a neat outline along the slopes and point, leaving the attachment edge cream. Aim for approximately 7 cm / 2¾ in height on the tested sample. Matching slope, point and border tension is essential because unequal ears can shift the entire expression.
5. Create and Attach the Facial Features
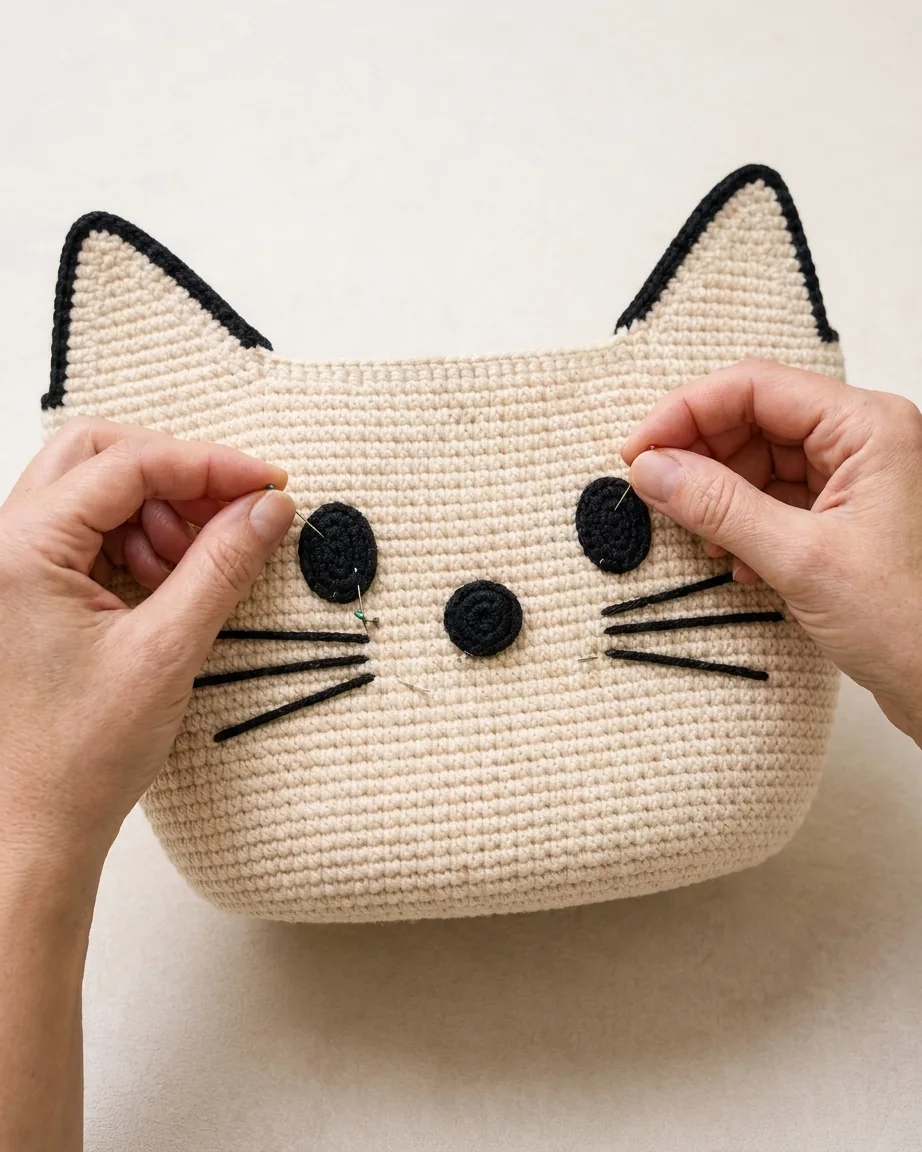
Make two compact black oval eyes around 3 × 4 cm and one black oval nose around 2 cm wide, leaving sewing tails. Pin them first, positioning the eyes roughly 5 cm apart and around 7 cm below the top. Center the nose below and between them.
Sew the appliqués without pulling the cream wall out of shape. Add three straight black whiskers to each cheek: upper line slightly rising, middle almost level and lower line falling. Secure every strand on the wrong side. Exact component counts remain sample-confirmation details.
6. Crochet and Attach the Bow
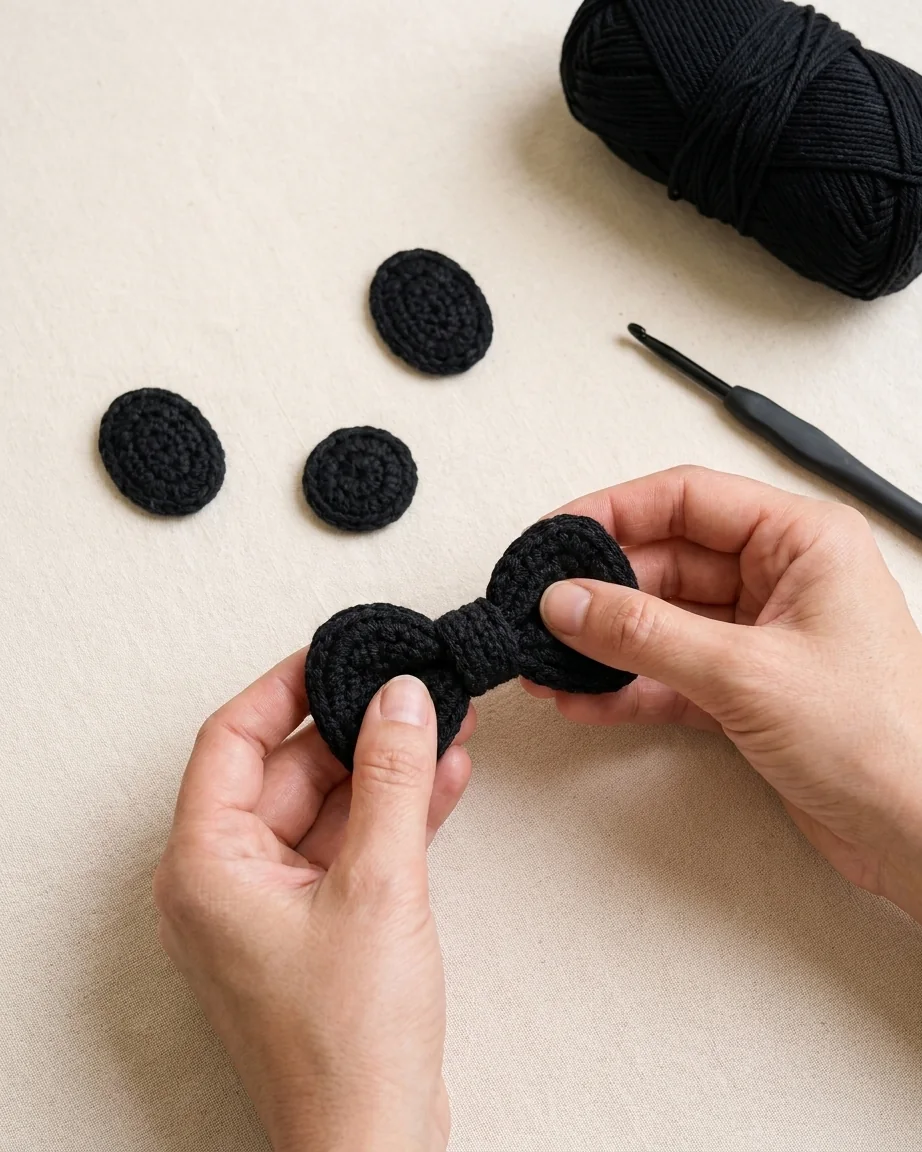
Crochet two rounded black bow loops, shape them evenly and join their centers. Wrap the join with a narrow black band to create the dimensional middle. The PDF targets a finished width around 9 cm / 3½ in.
Block lightly if needed and sew the bow at the base of the left front ear. Keep it clear of the eye and handle attachment. Because the pattern source does not provide final tested bow counts, record the real loop, band and finishing numbers before publication.
7. Add the Handles and Finish
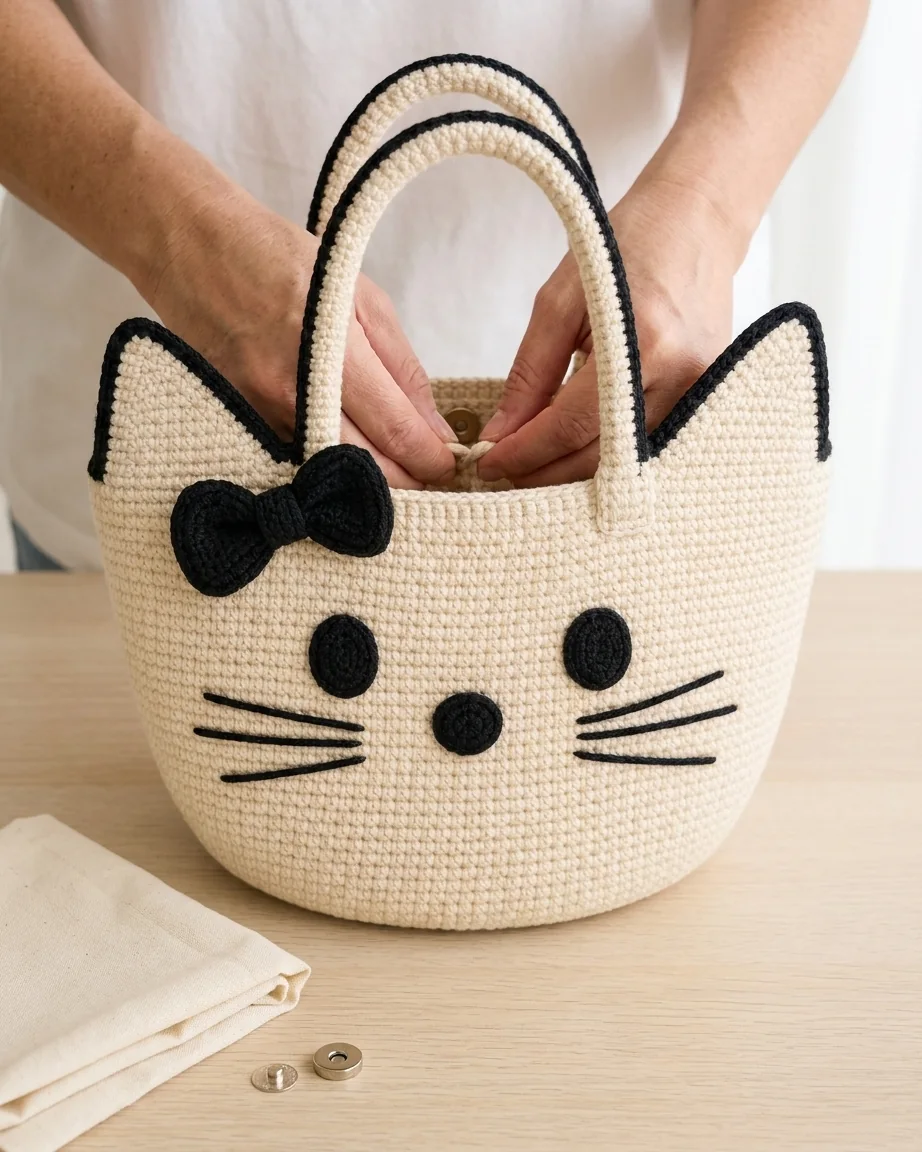
Make two matching firm cream tube handles approximately 45 cm long, optionally working over cotton filler cord. Keep their circumference constant, add black trim along the outer edge and compare both loops flat before installation.
Mark four attachment points between and slightly inside the ears, target about 9 cm spacing and reinforce through several wall rows. Aim for roughly 14 cm handle drop after testing. Finish with optional lining, reinforced magnetic snap and light steam blocking. Gradually load-test the sample, but never publish an unverified carrying capacity.
Final Verification Checklist
- Confirm foundation-chain and base-increase counts.
- Record final body stitches and rounds.
- Test and document ears, eyes, nose, bow and handle counts.
- Measure actual yarn use and finished dimensions.
- Test handle attachments and optional closure.
- Use generic original cat-face branding and verified care notes.
Frequently Asked Questions
What skill level is this pattern?
It is best approached by a confident beginner or intermediate maker comfortable with continuous rounds, shaping, appliqués and reinforced assembly. Verify the final marketplace level after sample testing.
Can I add a lining?
Yes. Trace the tested body, add seam allowance and hand-sew the lining below the top edge. Install and reinforce a magnetic snap before the lining goes into the bag.
How can I make the base sturdier?
Verify gauge and increase spacing first. A firmer cotton, smaller hook or suitable interfacing can be tested, but the finished sample should determine the final recommendation.
Explore the Complete Cat-Face Bow Bag Series
- 7 Occasions When a Cat Bow Bag Becomes the Perfect Handmade Cat Lover Gift
- 3 Cottagecore Outfits That Pair Beautifully With a Cat-Face Bow Bag
- 4 Questions to Ask Before Buying a Crochet Cat-Face Bow Bag
- 6 Handmade Crochet Bow Bag Details You Can See in This Cat-Face Design
Love this cream-and-black cat-face bow bag?




