

10-Step Crochet Bunny Keychain Pattern: Make This Sweet Rust-and-Cream Duo
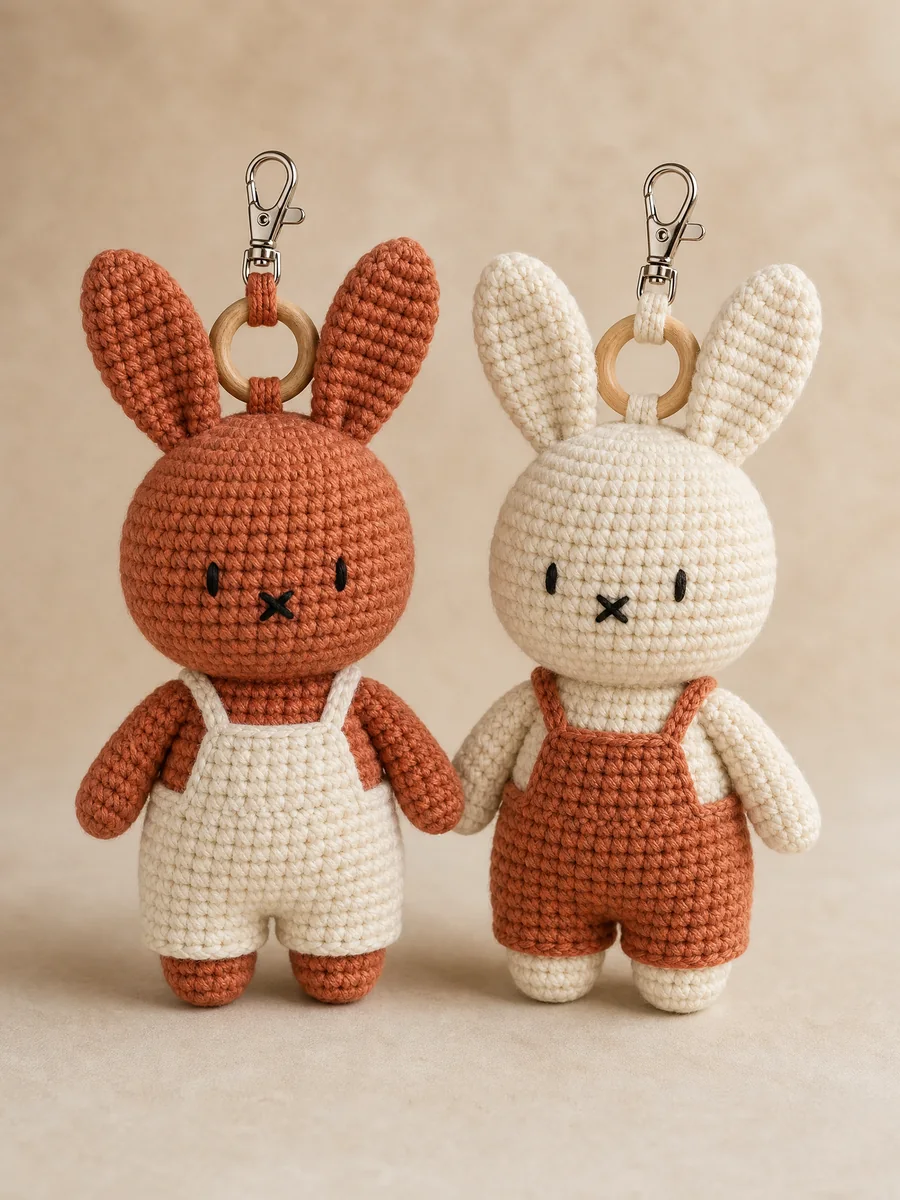
This crochet bunny keychain pattern follows the construction sequence in the supplied PDF: a separate spherical head, tall ears, compact body, slim limbs, miniature overalls, embroidered face, wooden ring and swivel clasp. The first bunny is worked in rust with cream clothing, then repeated with the colors reversed to create the coordinated pair.
The project is presented for a confident beginner familiar with a magic ring, single crochet, increases, invisible decreases and continuous spiral rounds. Use a stitch marker at the first stitch and move it after every round. Because the document identifies the instructions as a provisional photo-based reconstruction, make and measure a complete physical sample, correct the master pattern and verify every count before commercial release.
In this step-by-step guide
Ready to explore the finished rust-and-cream bunny duo?
Materials and Pattern Essentials
Suggested materials: DK or light-worsted cotton in rust and cream; a 2.5–3.5 mm crochet hook with 3 mm as the starting recommendation; polyester fiberfill; black embroidery floss; stitch marker; tapestry and embroidery needles; scissors; one small wooden ring and one swivel clasp per bunny.
Abbreviations: MR = magic ring, sc = single crochet, inc = two single crochet in one stitch, dec = invisible single-crochet decrease, rnd = round, st/sts = stitch/stitches, and FO = fasten off. Work the amigurumi sections in continuous spirals without joining or turning unless a step says otherwise.
Choose a hook small enough that stuffing does not show between stitches. Keep the tension firm but workable, count after every increase and decrease round, and add stuffing in small pieces. Consistency and finished proportions matter more than an unverified gauge number, so record your own hook, yarn, head diameter and finished height during the test make.
1. Crochet the Round Bunny Head
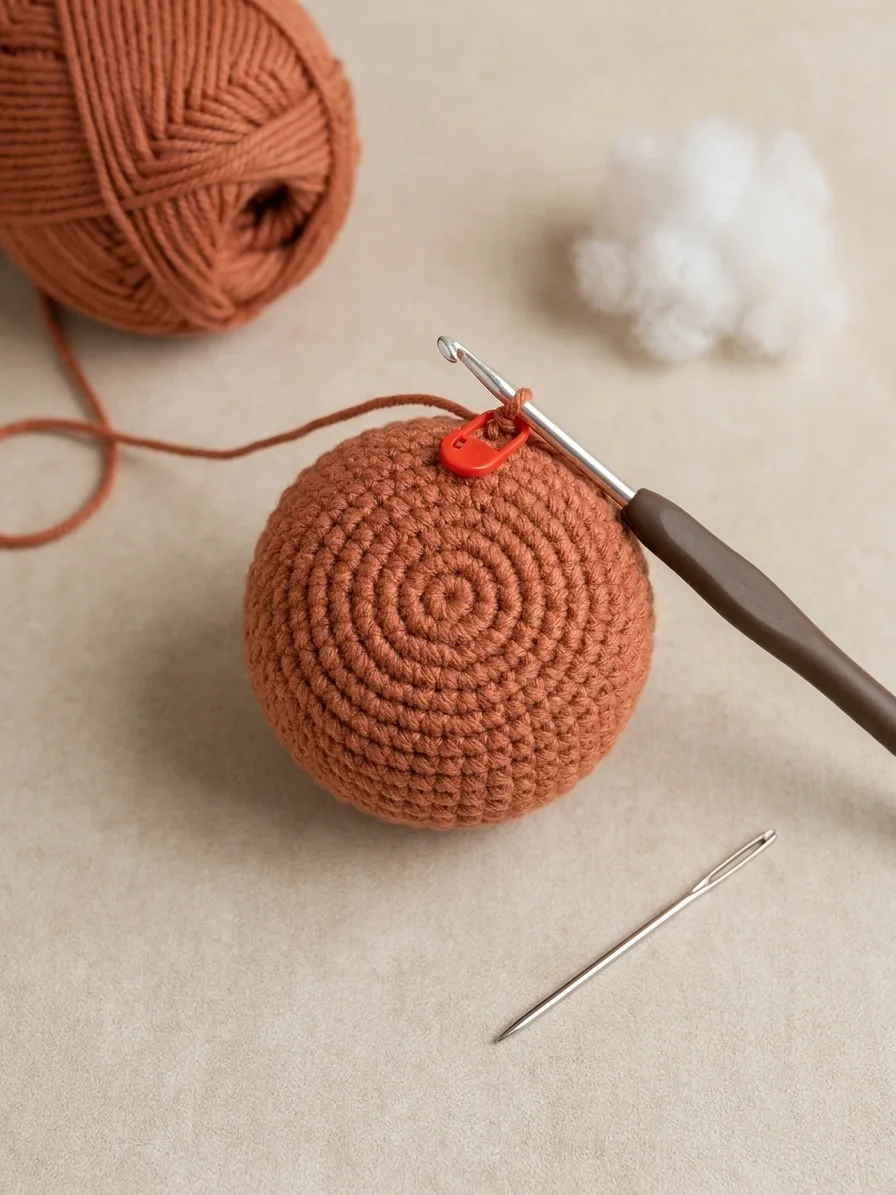
Rounds 1–5: Rnd 1: 6 sc in MR (6). Rnd 2: inc in every st (12). Rnd 3: [1 sc, inc] × 6 (18). Rnd 4: [2 sc, inc] × 6 (24). Rnd 5: [3 sc, inc] × 6 (30).
Rounds 6–13: Work Rnds 6–9 with 30 sc. Rnd 10: [3 sc, dec] × 6 (24). Rnd 11: [2 sc, dec] × 6 (18) and begin stuffing. Rnd 12: [1 sc, dec] × 6 (12). Rnd 13: dec × 6 (6). Finish stuffing, fasten off and cinch the opening closed.
The head should form a firm, even sphere with no visible gaps or dents. Massage small pieces of stuffing toward the cheeks before closing, but do not pack so tightly that the stitches stretch.
2. Make Two Tall Bunny Ears
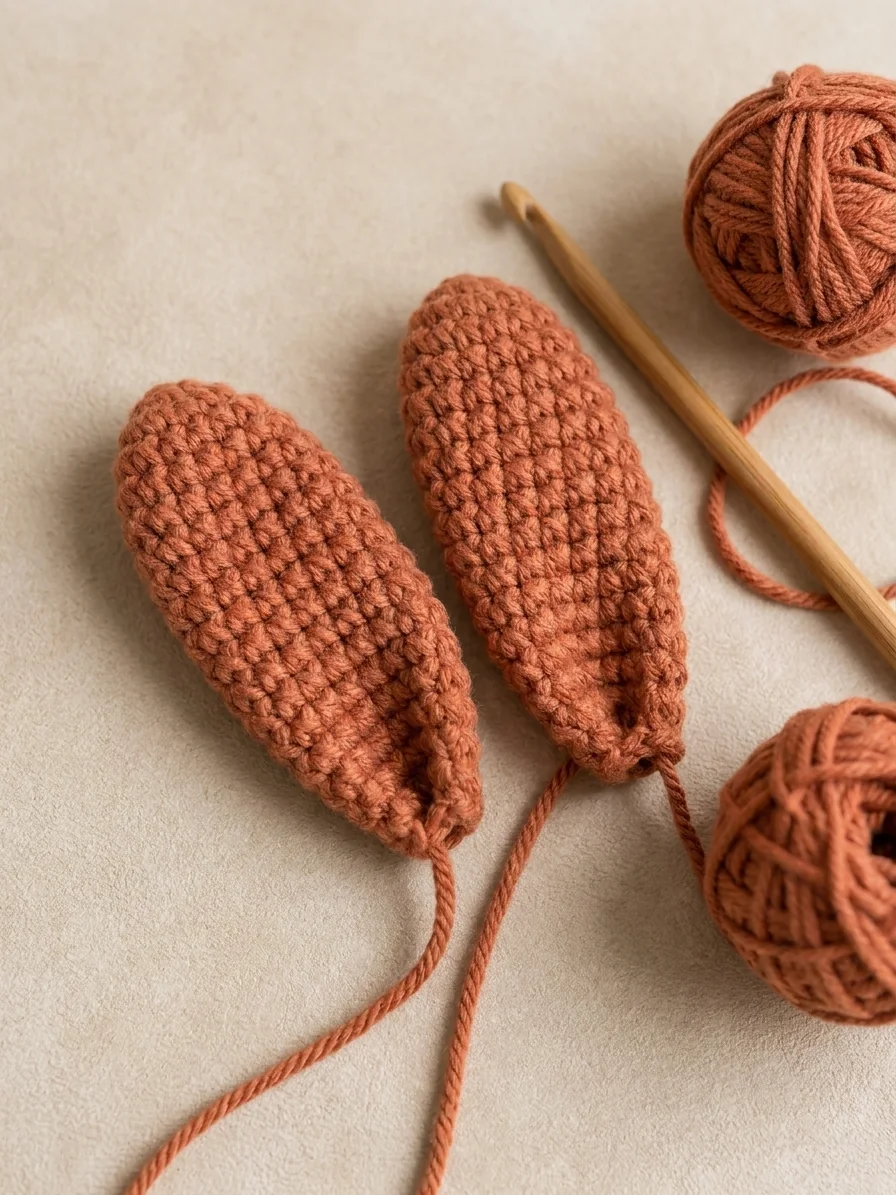
Ear — make two: Rnd 1: 6 sc in MR (6). Rnd 2: inc in every st (12). Work Rnds 3–9 with 12 sc. For a longer tested proportion, the PDF permits one or two additional straight rounds. Fasten off with a long sewing tail.
Do not stuff the ears. Flatten each tube evenly, pinch the base lightly and keep the top rounded. Compare the first ear with the head before making the second, then check both together so they read as tall narrow oval leaves rather than short round shapes.
3. Crochet the Compact Body
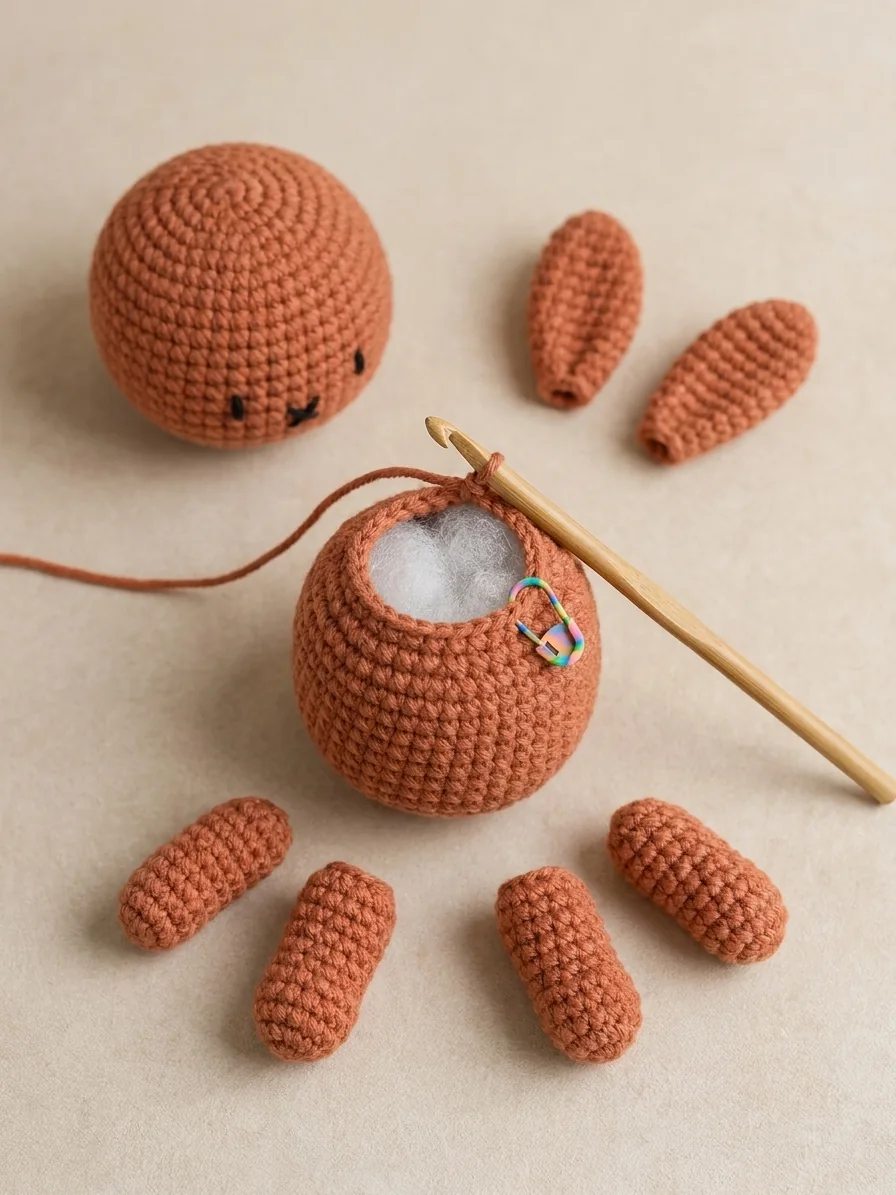
Body: Rnd 1: 6 sc in MR. Rnd 2: inc around (12). Rnd 3: [1 sc, inc] × 6 (18). Work Rnds 4–9 with 18 sc. Rnd 10: [1 sc, dec] × 6 (12), then stuff. Rnd 11: dec × 6 (6). Fasten off and leave a long tail for assembly.
Shape a compact torso that is firm enough to support the large head without becoming overfilled. Keep the final opening neat and position the decrease area where it can be hidden against the head during assembly.
4. Make Two Slim Arms
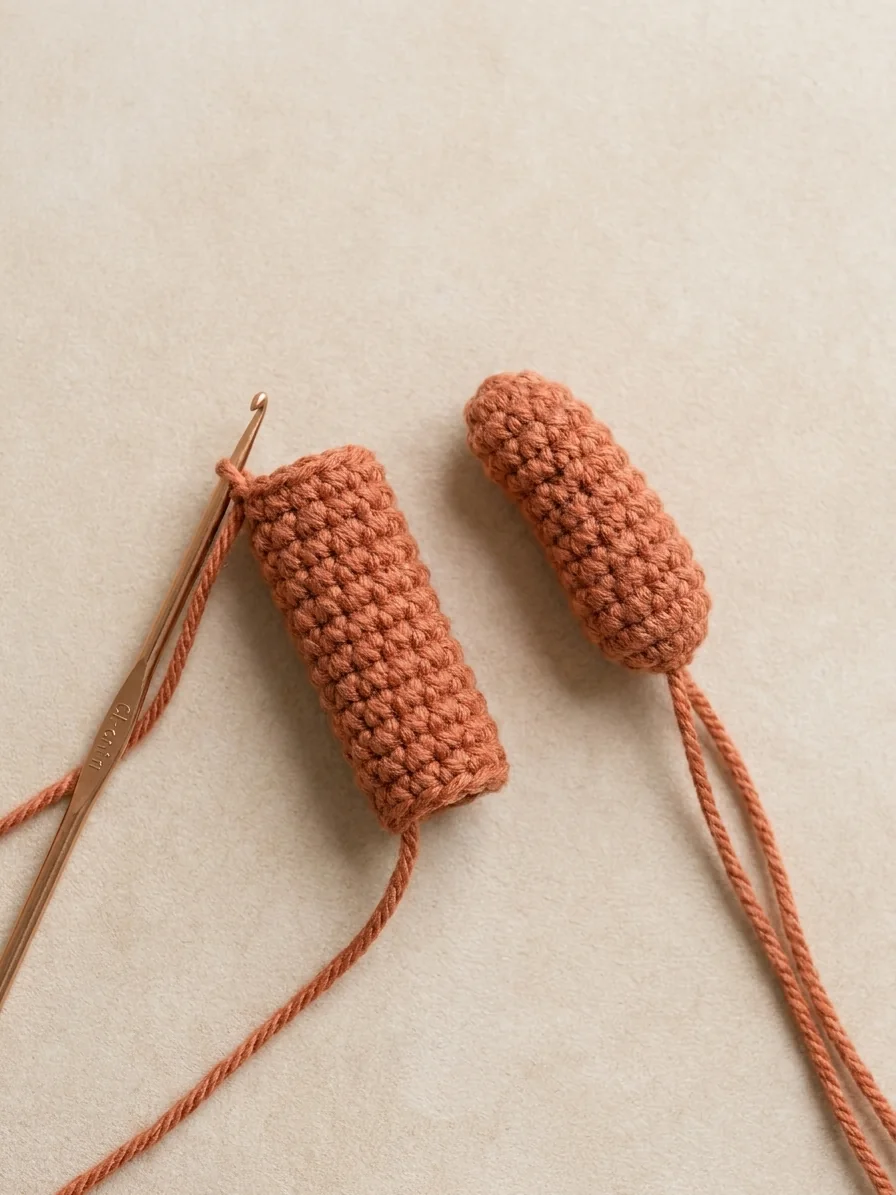
Arms — make two: Rnd 1: 5 sc in MR. Work Rnds 2–7 with 5 sc. Stuff only the lower half or leave the narrow tubes unstuffed, flatten the openings and fasten off with long sewing tails.
The arms should remain slimmer and more flexible than the body. Make both with the same tension and count, then place them against the upper torso to confirm equal length before sewing.
5. Make Two Lightly Stuffed Legs
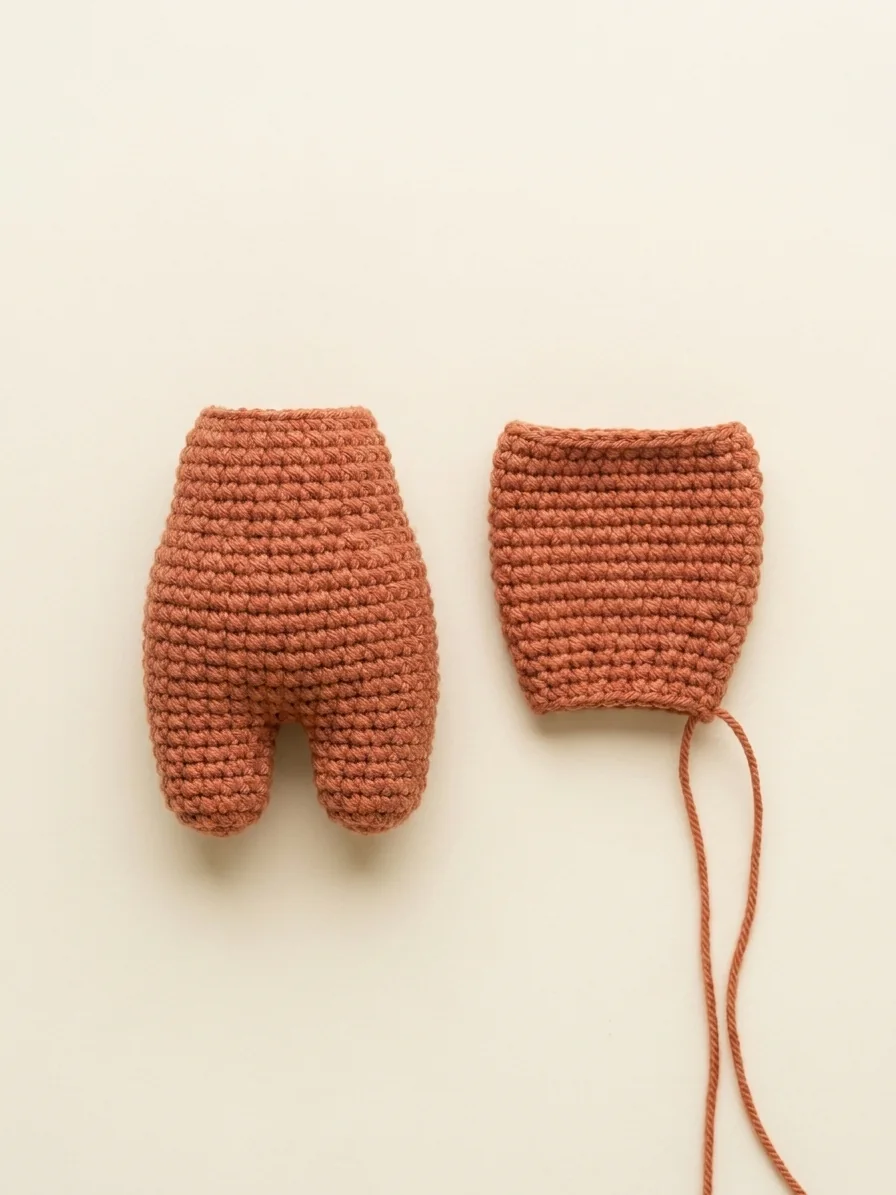
Legs — make two: Rnd 1: 6 sc in MR. Work Rnds 2–7 with 6 sc. Stuff lightly, flatten the opening and fasten off with a long tail.
The legs are slightly wider than the arms and need enough shape to show below the overalls. Keep the filling light so the openings can be sewn flat and aligned evenly at the body base.
6. Crochet the Miniature Overalls
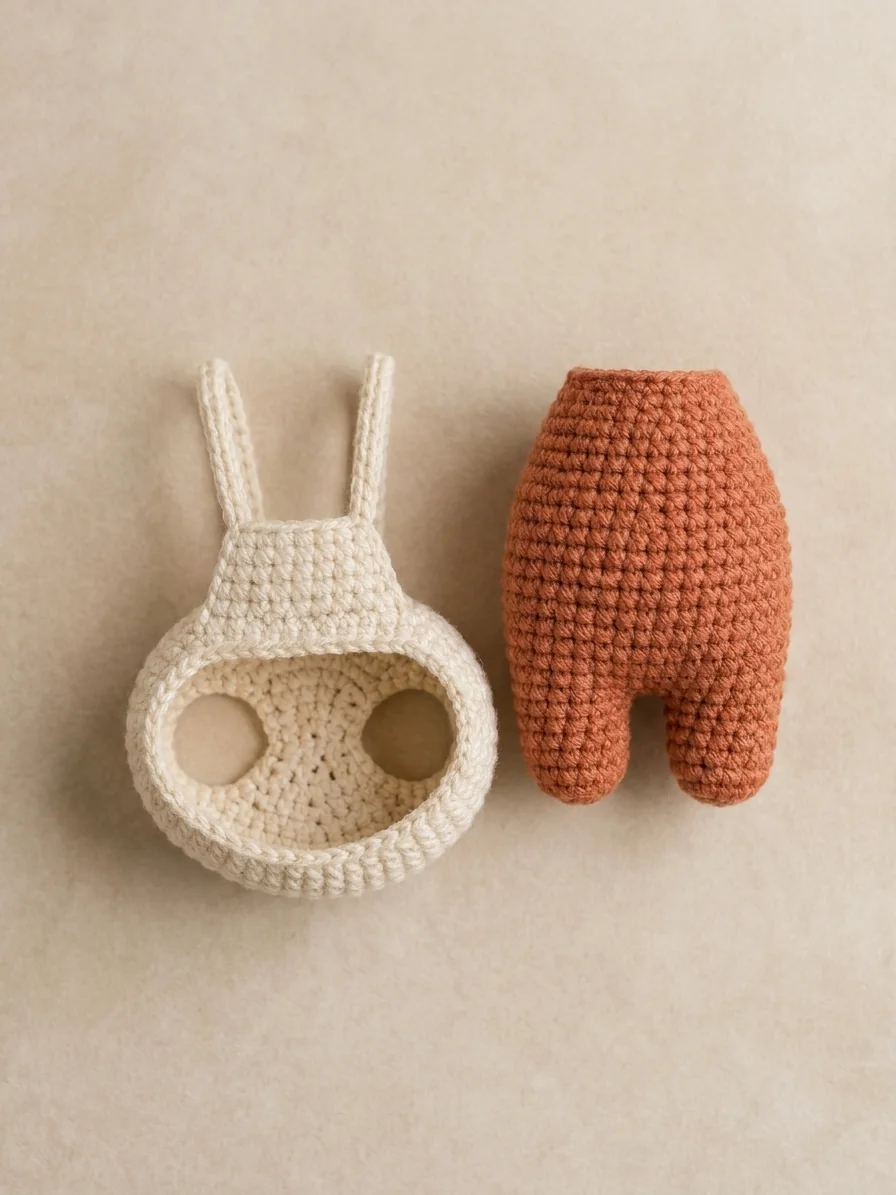
Shorts tube: Chain 22 loosely and join without twisting. Work six rounds of single crochet around (22). Try the tube on the tested body and adjust the starting chain by two stitches if needed. Flatten the lower edge, then join three center-front stitches to three center-back stitches to form two leg openings.
Bib and straps: Join the contrast color at the front center. Work eight single crochets across for Row 1, then Rows 2–5 with ch 1, turn and 8 sc. From each upper corner, chain approximately 14–18 for a strap. Cross the straps or place them straight and sew securely to the back waist.
The overalls construction is an engineered reconstruction and must be adjusted against the completed test body. The shorts should have slight ease and must not compress or distort the torso.
7. Assemble the Bunny Securely
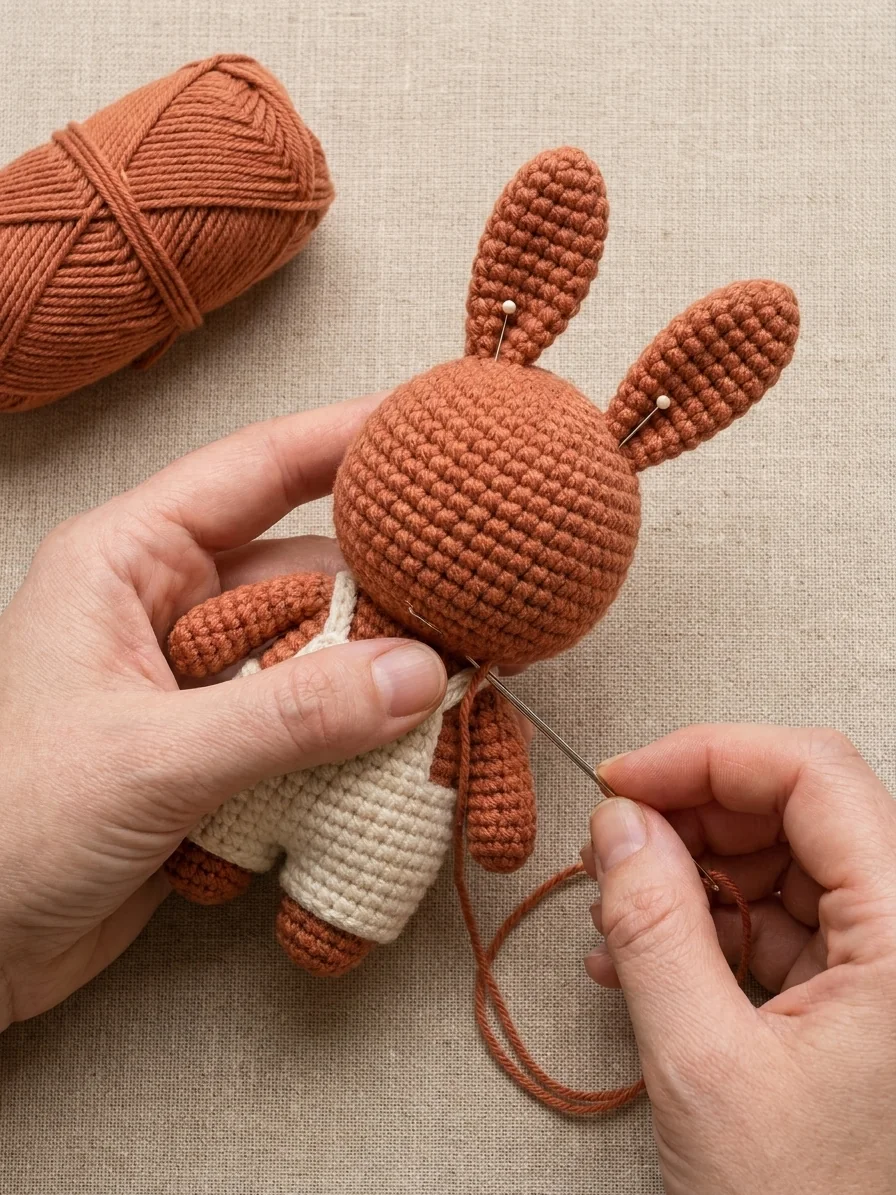
Pin every component before committing to stitches. Sew the head firmly to the top of the body with a very slight forward tilt. Attach the ears at the crown with a small gap and outward angle, add the arms high on the sides angled down, and attach the legs evenly at the base. Dress the bunny and secure the overall straps.
Use matching yarn and small joining stitches that pass through complete crochet stitches rather than surface fibers. Pull firmly without puckering, bury tails deeply and rotate the figure while sewing. From the front, the head, bib and leg gap should share a vertical center line while ears and arms appear balanced.
8. Embroider the Minimalist Face
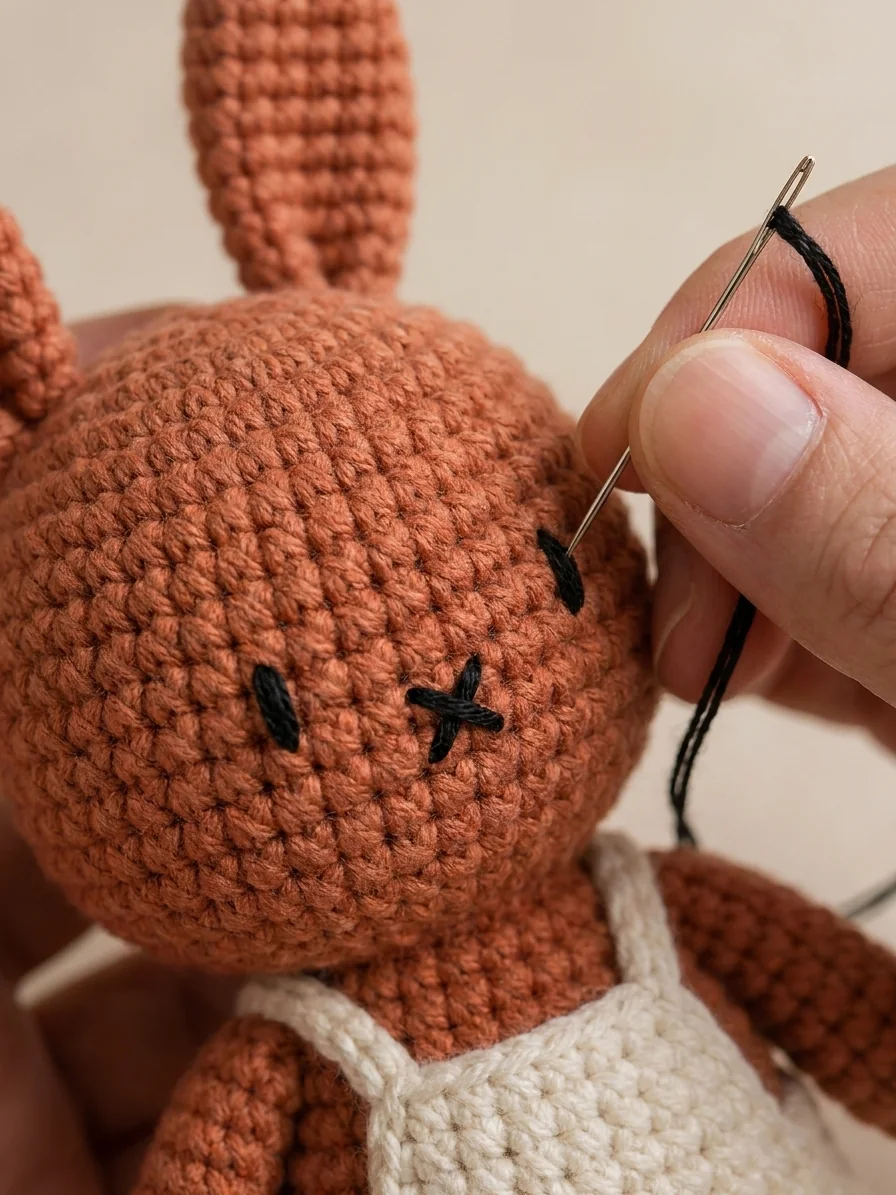
Thread a sharp needle with black embroidery floss. Place the eyes near the horizontal midpoint of the head and at equal distances from the vertical center. Build each eye from two or three short vertical stitches, keeping the tension gentle enough that the face does not dent.
Below and between the eyes, make one small diagonal stitch and cross it with a second to form the compact X-shaped nose-mouth. Secure and bury all thread ends inside. Embroidery avoids visible plastic eye components, but it does not make the finished keychain a children’s toy.
9. Attach the Ring and Swivel Clasp
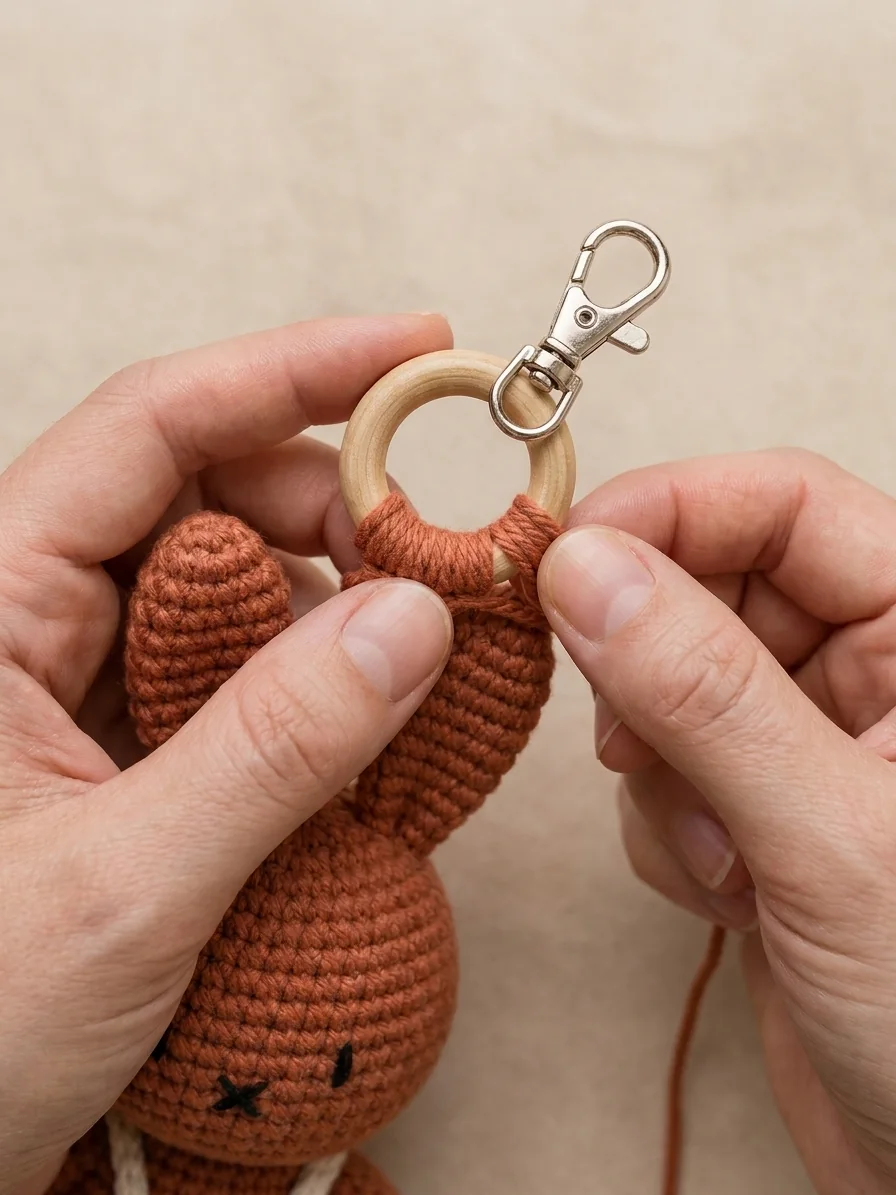
Create a reinforced yarn or cord loop and anchor it through several upper-back head or body stitches. Pass the loop through the wooden ring, wrap the ring neck neatly with matching yarn, and hide every end. Connect the swivel clasp to the ring and confirm that its gate closes completely.
Pull-test the ring, wrap, loop, sewn joins and anchor point on the physical sample. Replace any sharp, tarnished or damaged component. Inspect the keychain regularly and discontinue use if yarn or hardware loosens.
10. Create the Matching Color-Swapped Pair
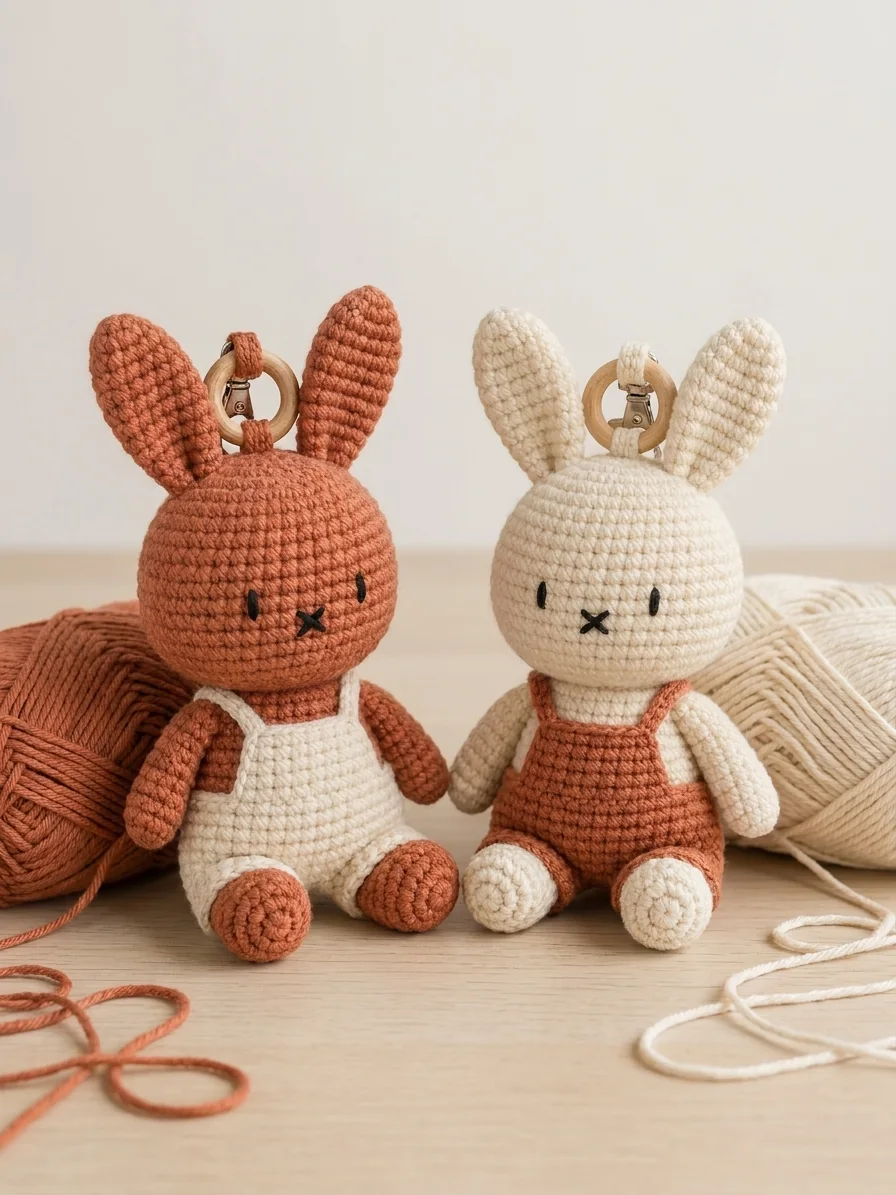
Repeat the same construction with the main and contrast colors reversed. Colorway A uses rust for the head, ears, body, arms and legs with cream shorts, bib and straps. Colorway B uses cream for the bunny pieces and rust for the outfit. Match the hanging wrap to the bunny or its contrast color consistently.
For a true coordinated pair, keep the yarn line, hook, tension, stuffing amount, round counts, facial spacing, ring size and clasp finish consistent. The instructions can also produce one standalone keychain, but the final dimensions and yarn usage must come from a completed tested sample rather than an estimate.
Finishing and Quality Control
Weave in and trim all ends, shape the stuffing with fingertips and check that both clasps open and close smoothly. If the selected yarn is cotton, steam only very lightly and avoid saturated heat around stuffing, wood and metal. Any cleaning method must follow the verified yarn and hardware guidance; protect metal and wood from prolonged soaking and dry the accessory completely before use.
Correct a lumpy head by adding stuffing in smaller pieces. Lengthen short, wide ears with additional straight rounds in the tested version. Reposition a face that sits too high, shorten and anchor loose straps, and redo an uneven ring wrap under controlled tension. Compare the pair from clasp to feet for symmetrical ears, facial placement, matched proportions, secure limbs, smooth overalls and hidden yarn tails.
Test Before Publishing or Selling
The PDF explicitly identifies this pattern as a provisional reconstruction from a finished-product photograph. Make the head and one ear first, compare their proportions, then record yarn, hook, gauge, head diameter and height. Complete one bunny, test the overalls fit, pull-test every join and hardware anchor, repeat the construction in the swapped colorway and revise the master copy before release.
Do not describe the pattern as tested until physical samples and verification support that claim. Before publication, confirm the counts and repeats, arrange an independent proofread or technical edit, use original finished-product photography and include version and support details. Review the marketplace’s current AI-disclosure requirements as applicable.
Safety Notes
This is a decorative keychain or bag charm, not a baby toy. Small hardware, wood components, yarn and fibers may create choking or entanglement hazards. Keep the finished accessory away from children under three, inspect the clasp and wooden ring regularly, and stop using it if any yarn connection or hardware component becomes loose.
Frequently Asked Questions
What skill level is this bunny keychain pattern?
The PDF positions it for a confident beginner who can work continuous spiral rounds, count increases and decreases, sew amigurumi pieces and embroider simple facial details.
Why should I make a test bunny first?
No verified source gauge or finished dimensions are provided, and the overalls are an engineered reconstruction. A physical sample lets you confirm proportions, fit, yarn use, measurements, joins and hardware anchoring before release.
Can I make only one colorway?
Yes. Either rust with cream overalls or cream with rust overalls can be made as a standalone decorative keychain. Record the tested dimensions and materials for the final listing.
Explore the Complete Bunny Keychain Series
- 7 Gift Moments for a Crochet Bunny Keychain Duo
- 5 Rust-and-Cream Ways to Style a Crochet Bunny Bag Charm
- 4 Things to Compare Before Choosing a Crochet Bag Charm
- 8 Handmade Details to Notice in a Crochet Bunny Keychain Duo
Ready to explore the finished rust-and-cream bunny duo?




