

CROCHET / AMIGURUMI / MATCHING TEDDY BEARS
THE PRACTICAL PATTERN GUIDE
Crochet Bear Couple Pattern: A Sweet Amigurumi Pair
This crochet bear couple pattern creates two round-headed teddy bears with white muzzles, pink cheeks, and coordinated striped outfits. One sample wears blue shorts and a blue-and-white shirt; the other has a pink skirt and a small bow. The instructions below translate the supplied Chinese pattern into clear English using US crochet terms.
US TERMS · 2 MM SOURCE HOOK · MATCHING HEADS · INTEGRATED OUTFITS
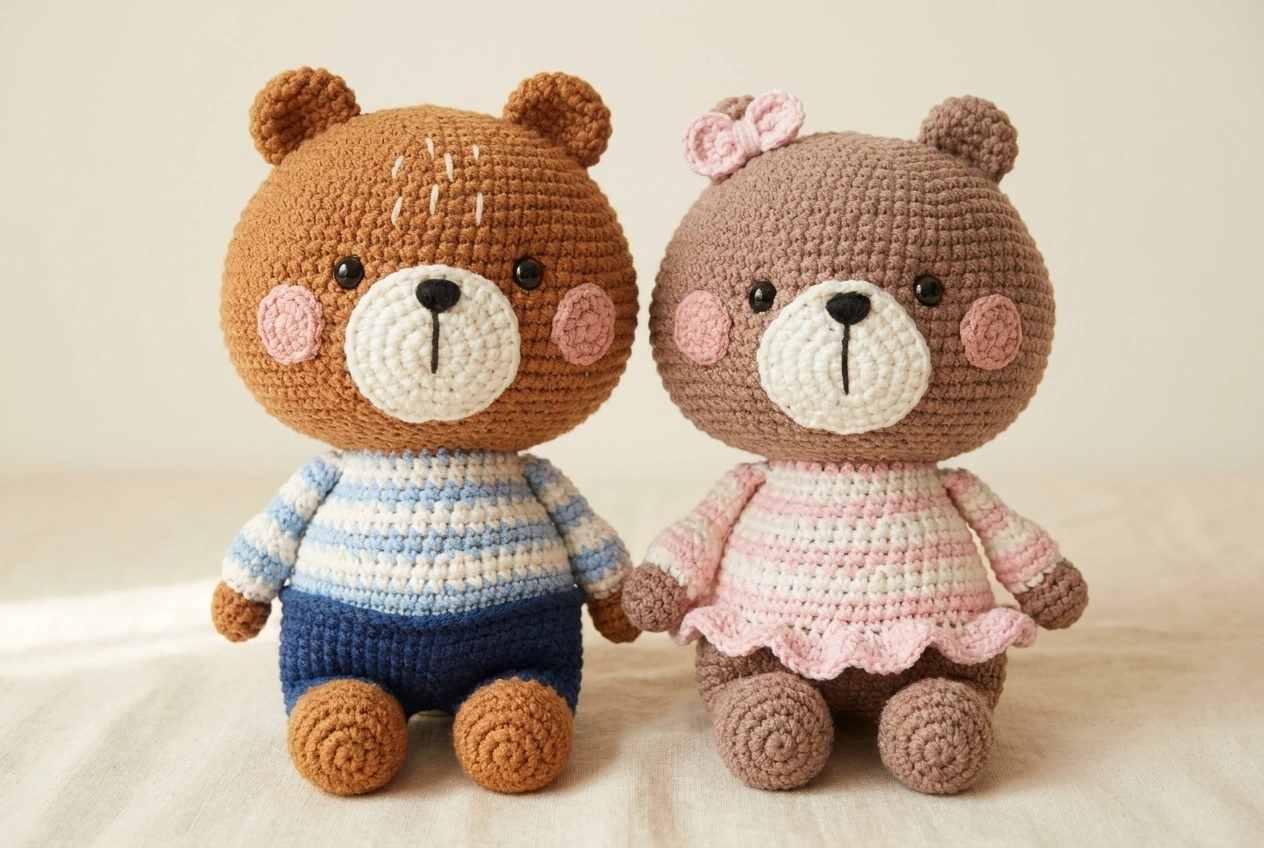
Make the shared pieces first. Give each bear its own character.
Both bears in the crochet bear couple pattern use the same head, ear, cheek, and muzzle shapes. The clothing colors and skirt make the pair look different without requiring two unrelated designs. Work one complete bear at a time, or make matching pieces in small batches if that is easier to organize.
The source photographs credit @conngauuhandmade, and the supplied sheets credit a Chinese translator. This is an English translation with added reading and assembly notes, not a claim of original pattern authorship or an independently tested redesign. Check permission and attribution before republishing the source design commercially.
01 / THE PATTERN
Crochet Bear Couple Pattern Materials and US Terms
| Item | What the supplied source says |
|---|---|
| Hook | 2 mm |
| Eyes | 9 mm eyes |
| Nose | 10 mm nose |
| Bear colors | Brown for the heads and limbs; samples show cinnamon and taupe |
| Other colors | White for muzzles and shirt stripes; pink for cheeks and bow; blue/pink clothing accents; navy for the shorts sample |
| Not supplied | Yarn brand, fiber, weight, quantities, gauge, finished toy height, or eye spacing |
| Useful extra tools | Stuffing, yarn needle, scissors, stitch marker, and pins — practical assembly supplies |
Choose a yarn that makes a firm, close fabric with your hook so stuffing does not show through. Because the crochet bear couple pattern provides no yarn specification, a particular yarn weight or finished size cannot be guaranteed. The 2 mm hook is a source recommendation, not a promise that every yarn will produce the same bear.
| English term | Source symbol / meaning |
|---|---|
| MR | Magic ring |
| sc | X — single crochet |
| inc | V — 2 sc in one stitch |
| dec | A — decrease 2 stitches to 1 |
| hdc | T — half double crochet |
| ch / sl st | Chain / slip stitch |
| BLO / FLO | Back loop only / front loop only |
| 3-sc increase | W — 3 stitches in one stitch; listed in the source key but not needed in these rounds |
Read a bracketed repeat such as [3 sc, inc] × 6 as a sequence worked six times. The crochet bear couple pattern is formatted in rounds; the source does not explicitly say whether to join every round. Continuous rounds are a common amigurumi working convention, so use a first-stitch marker if you choose that method and keep it consistent.
An invisible sc decrease is a practical option when the fabric permits it, but the source only names a decrease. If you need a refresher on tight stitches and markers before starting the crochet bear couple pattern, explore our crochet guides for beginners.
02 / THE PATTERN
Crochet Bear Couple Pattern Head and Facial Pieces
1
Shape the large round head
Make one head per bear in its chosen brown shade. Keep the lower opening for joining to the body.
The crochet bear couple pattern head begins with eight stitches and uses several different increase rhythms to create its broad shape. Don’t replace the early eight-repeat rounds with a standard six-repeat sphere. Follow the counts below, especially the slower three-increase rounds near the widest section.
| Round | US instructions | Count |
|---|---|---|
| 1 | 8 sc in MR. | 8 |
| 2 | Inc in each stitch. | 16 |
| 3 | [1 sc, inc] × 8. | 24 |
| 4 | [2 sc, inc] × 8. | 32 |
| 5 | [7 sc, inc] × 4. | 36 |
| 6 | [5 sc, inc] × 6. | 42 |
| 7 | [6 sc, inc] × 6. | 48 |
| 8 | [7 sc, inc] × 6. | 54 |
| 9 | [8 sc, inc] × 6. | 60 |
| 10 | [9 sc, inc] × 6. | 66 |
| 11–12 | Sc in every stitch. | 66 |
| 13 | [21 sc, inc] × 3. | 69 |
| 14 | Sc in every stitch. | 69 |
| 15 | [22 sc, inc] × 3. | 72 |
| 16–20 | Sc in every stitch. | 72 |
| 21 | [23 sc, inc] × 3. | 75 |
| 22 | Sc in every stitch. | 75 |
| 23 | [23 sc, dec] × 3. | 72 |
| 24 | [10 sc, dec] × 6. | 66 |
| 25 | [9 sc, dec] × 6. | 60 |
| 26 | [8 sc, dec] × 6. | 54 |
| 27 | [7 sc, dec] × 6. | 48 |
| 28 | [6 sc, dec] × 6. | 42 |
| 29 | BLO: [5 sc, dec] × 6. | 36 |
| 30 | [4 sc, dec] × 6. | 30 |
| 31 | Sc in every stitch. | 30 |
Fasten off, leaving a long sewing tail. The source places the eyes between Rounds 16 and 17 but gives no spacing. Before securing them, position the muzzle and cheeks temporarily so the expression is balanced. Add stuffing gradually before the opening becomes difficult to access. These placement and stuffing checks help the crochet bear couple pattern stay tidy.
Ears — make two per bear
| Round | Instructions | Count |
|---|---|---|
| 1 | 7 sc in MR, using the bear color. | 7 |
| 2 | Inc in each stitch. | 14 |
| 3–5 | Sc in every stitch. | 14 |
Fasten off with a long sewing tail. The source positions the ears between head Rounds 4 and 8. Pin both ears before sewing; the crochet bear couple pattern looks more balanced when their bases follow the same curve. The source does not specify ear stuffing, so do not treat a particular filling amount as mandatory.
Pink cheeks — make two per bear
| Round | Instructions | Count |
|---|---|---|
| 1 | 7 sc in MR with pink. | 7 |
| 2 | Inc in each stitch. | 14 |
Fasten off with a long sewing tail for attaching each cheek. These are small flat circles, not additional head increases. In the crochet bear couple pattern, place them after the muzzle and eyes have been arranged so the cheeks don’t crowd the face. Exact cheek coordinates are not supplied.
White muzzle — make one per bear
| Round | Instructions | Count |
|---|---|---|
| 1 | 7 sc in MR with white. | 7 |
| 2 | Inc in each stitch. | 14 |
| 3 | [1 sc, inc] × 7. | 21 |
| 4 | [2 sc, inc] × 7. | 28 |
| 5 | Sc in every stitch. | 28 |
Fasten off with a long sewing tail and attach the nose as directed by the source. The sample shows a short black line descending from the nose; embroider that line to match the photograph if desired. The crochet bear couple pattern gives no separate embroidered-mouth stitch formula or exact muzzle placement, so use pins and check the face before sewing.
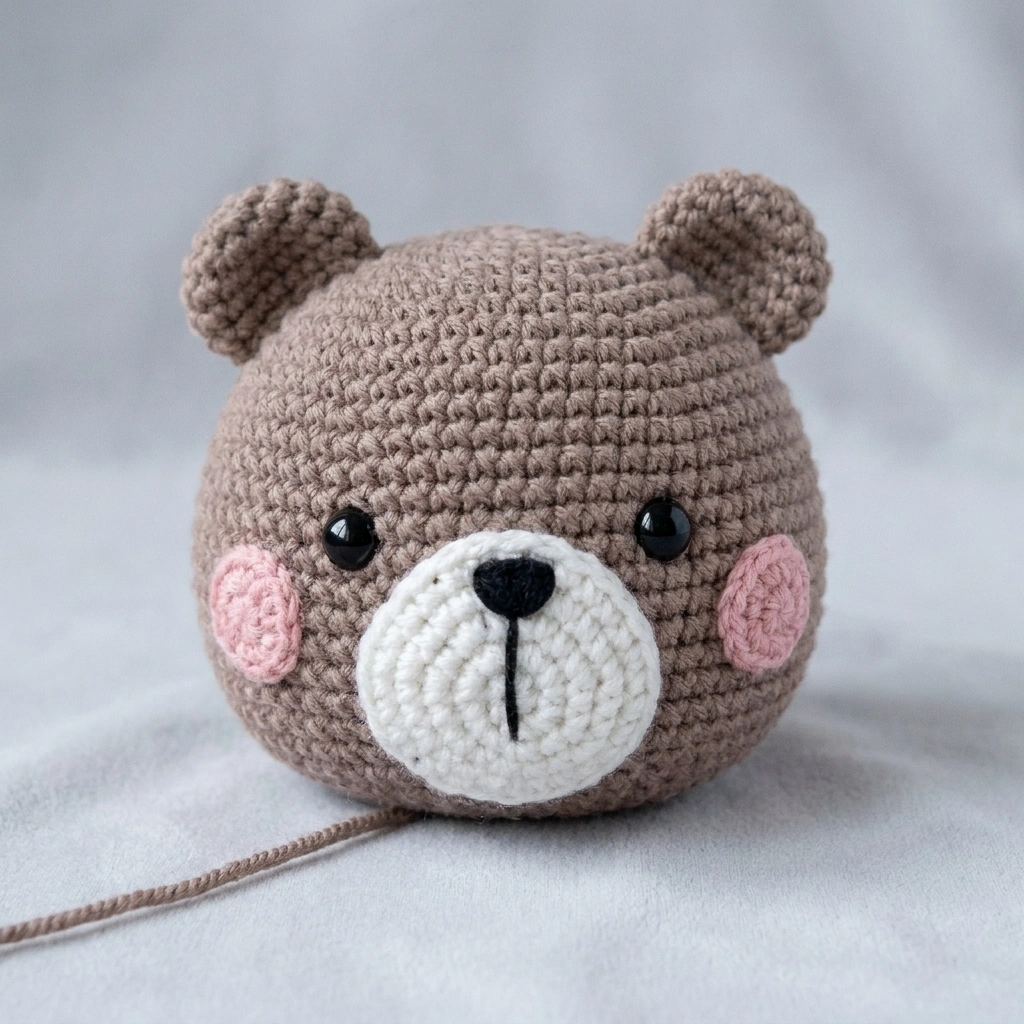
03 / THE PATTERN
Crochet Bear Couple Pattern Arms and Sleeves
2
Make the hands and striped sleeves
Make two arms per bear. Brown forms the hand, then the sleeve grows from front loops.
The source uses colored text to assign sleeve colors: black entries mean white yarn, and red entries mean blue or pink. The crochet bear couple pattern table below translates that convention into a color column so you don’t need to read the original colored lettering. “Accent” means the clothing color you chose for that bear.
| Round | Color | Instructions | Count |
|---|---|---|---|
| 1 | Bear color | 6 sc in MR. | 6 |
| 2 | Bear color | Inc in each stitch. | 12 |
| 3–4 | Bear color | Sc in every stitch. | 12 |
| 5 | Bear color | [1 sc, dec] × 4. | 8 |
| 6 | White | FLO: inc in each stitch. | 16 |
| 7–8 | Accent | Sc in every stitch. | 16 |
| 9 | White | Sc in every stitch. | 16 |
| 10 | Accent | Dec 8 times. | 8 |
| 11–12 | White | Sc in every stitch. | 8 |
| 13–14 | White as printed | Sc in every stitch. | 8 |
| 15–16 | White as printed | Sc in every stitch. | 8 |
| Close | Current yarn | Fold the opening flat and work 4 sc through both layers. | 4 joining stitches |
The final three two-round groups are all printed in black on the supplied arm sheet, so this crochet bear couple pattern translation keeps them white. If you prefer more regular stripes, changing those colors is a styling adaptation rather than a literal translation. The original photos are not enough to confirm an omitted color change.
As a practical finishing choice, lightly stuff the hand while keeping the upper arm soft enough to flatten. The four closure stitches will be used when joining each arm into the body later. Keep both arms the same length before continuing with the crochet bear couple pattern legs.
04 / THE PATTERN
Crochet Bear Couple Pattern Legs and Joined Body
3
Work both legs
Make the first leg and fasten off; keep the second attached for the three-chain bridge.
The crochet bear couple pattern feet begin with eight sc and widen to 24 before decreasing at the middle of the round. For the dress bear, keep the legs in its bear color. For the shorts bear, the source changes to the trouser color from Round 12 through Round 20 of the combined leg/body sequence.
| Round | Instructions | Count |
|---|---|---|
| 1 | 8 sc in MR. | 8 |
| 2 | Inc in each stitch. | 16 |
| 3 | [1 sc, inc] × 8. | 24 |
| 4–7 | Sc in every stitch. | 24 |
| 8 | 8 sc, dec 4 times, 8 sc. | 20 |
| 9 | 8 sc, dec twice, 8 sc. | 18 |
| 10–11 | Sc in every stitch. | 18 |
| 12–13 | Sc in every stitch; use trouser color for the shorts bear. | 18 |
Fasten off the first leg, leaving the second leg attached. Ch 3 and connect to the first leg. For Round 14, work 18 sc around the first leg, 3 sc along the chain bridge, 18 sc around the second leg, and 3 sc along the other side of the bridge. The crochet bear couple pattern now has 42 body stitches.
Body shaping and shirt stripes
The crochet bear couple pattern continues directly upward from the joined legs. Rounds 15–20 enlarge and stabilize the lower body. In the source, shirt colors alternate in the later rounds using black text for white and red text for an accent. The body note names blue or red; pink is the dress sample’s photo-based accent choice.
| Round | Color | Instructions | Count |
|---|---|---|---|
| 14 | Bear / trouser color | 18 sc, 3 sc on chain, 18 sc, 3 sc on opposite side of chain. | 42 |
| 15 | Bear / trouser color | [6 sc, inc] × 6. | 48 |
| 16 | Bear / trouser color | [7 sc, inc] × 6. | 54 |
| 17–20 | Bear / trouser color | Sc in every stitch. | 54 |
| 21 | Accent | Sc in every stitch. | 54 |
| 22 | White | BLO: [7 sc, dec] × 6. | 48 |
| 23 | White | Sc in every stitch. | 48 |
| 24 | Accent | [6 sc, dec] × 6. | 42 |
| 25 | Accent | Sc in every stitch. | 42 |
| 26 | White | [5 sc, dec] × 6. | 36 |
| 27 | White | Sc in every stitch. | 36 |
| 28–29 | Accent | Sc in every stitch. | 36 |
| 30 | White | [4 sc, dec] × 6. | 30 |
| 31 | White | Sc in every stitch. | 30 |
| 32 | Accent | Sc in every stitch. | 30 |
| 33 | Accent | 7 sc, 4 sc through arm and body together, 11 sc, 4 sc through other arm and body together, 4 sc. | 30 |
| 34 | White | Sc in every stitch. Fasten off and hide the end. | 30 |
Use a marker to keep the bridge stitches separate from the leg stitches. After Round 16, the crochet bear couple pattern should have 54 stitches; after Round 22, it should have 48. Those two checkpoints help you spot a missed bridge stitch or an unintended increase before the shirt narrows.
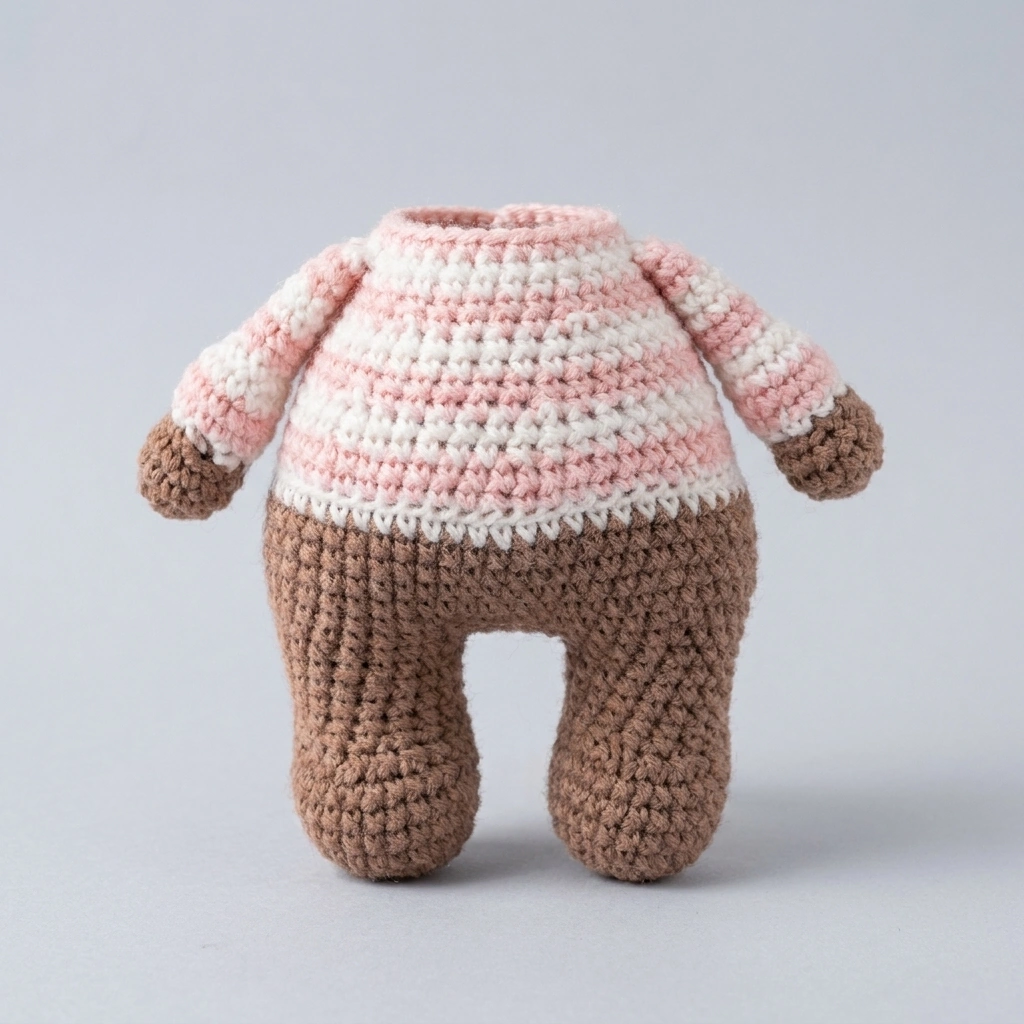
05 / THE PATTERN
Crochet Bear Couple Pattern Skirt and Bow
4
Add the dress skirt
Turn the toy with its legs pointing upward and locate the waist attachment positions.
The source places the skirt at the remaining stitches around Body Round 22, with the legs facing upward while working. The crochet bear couple pattern skirt begins by doubling 48 attachment positions to 96 stitches, then adds two plain rounds. It does not provide a separate scallop-stitch edging round.
| Skirt round | Instructions | Count |
|---|---|---|
| 1 | Inc at each of the 48 source-designated waist attachment positions. | 96 |
| 2–3 | Sc in every stitch. Fasten off and hide the yarn end. | 96 |
If you are making the shorts version of the crochet bear couple pattern, omit the skirt. If you are making the dress version, keep the toy lightly supported while working around the waist so the stuffing does not distort the opening. Resolve the attachment count before committing to the increase round.
Pink bow — make one if desired
| Bow round | Instructions | Count |
|---|---|---|
| 1 | Ch 4. Starting in the second chain from the hook: inc, 1 sc, 4 sc in the last chain. Continue along the other side of the chain: 1 sc, inc. | 10 |
| 2 | Inc twice, 1 sc, inc 4 times, 1 sc, inc twice. | 18 |
| 3 | 1 sc, inc, 5 sc, inc, 2 sc, inc, 5 sc, inc, 1 sc. | 22 |
The source says to arrange the bow’s shape after Round 3. Pinching its center and wrapping a sewing tail around it is a practical way to create the photographed bow silhouette, but that wrapping step is an added finishing suggestion. Attach it beside an ear once the rest of the crochet bear couple pattern face is positioned.
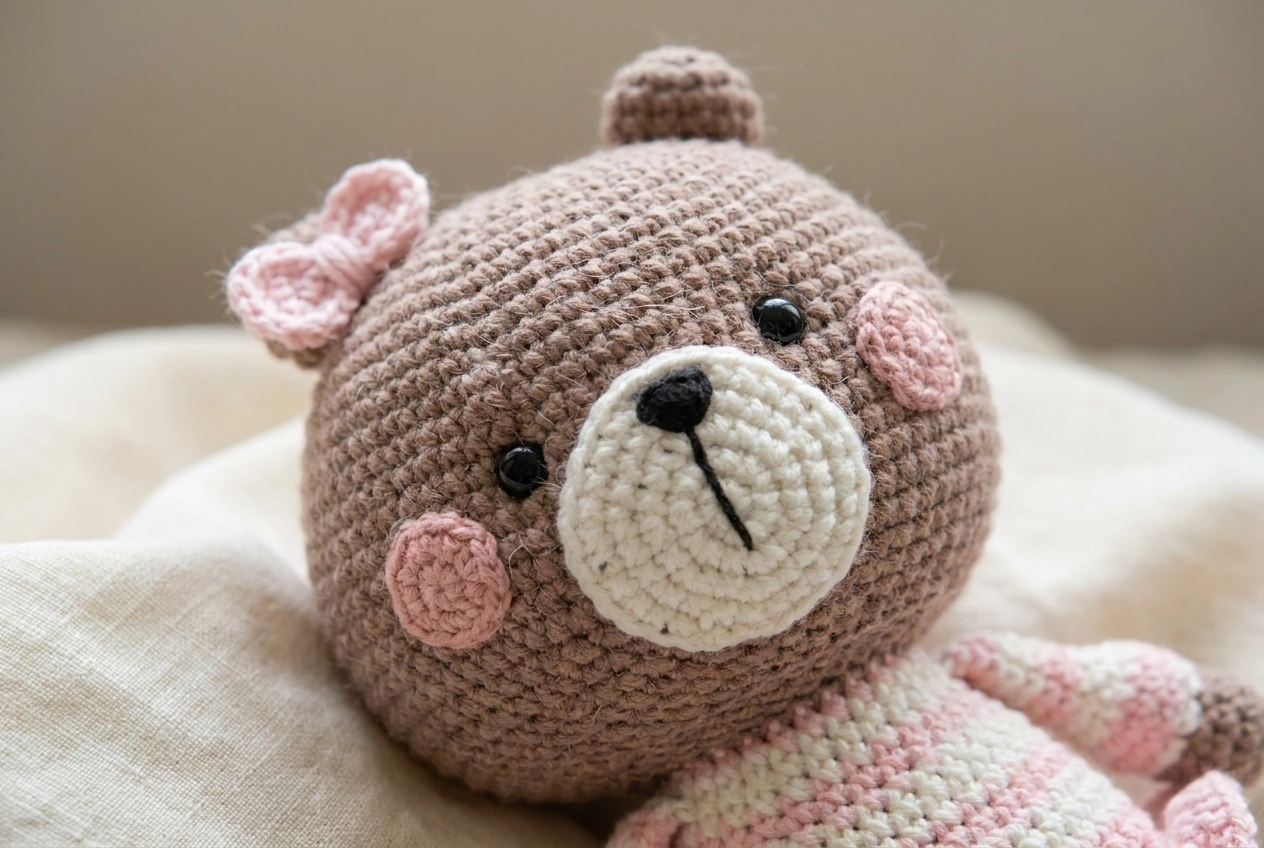
06 / THE PATTERN
Assemble the Crochet Bear Couple Pattern
A calm order for putting the pieces together
Begin with the face: secure the eyes and nose as appropriate, pin the muzzle, then check both cheeks. Sew the ears within the source’s Round 4–8 placement range. The crochet bear couple pattern does not give exact cheek spacing, muzzle coordinates, or an assembly stitch diagram, so these are practical placement checks rather than translated measurements.
Stuff the body gradually, paying attention to the leg bridge so there is no empty hollow between the feet. Join the 30-stitch head opening to the 30-stitch body opening securely. Matching those counts gives the crochet bear couple pattern a useful sewing reference, but pin the head first so it faces forward rather than following an accidental round-start offset.
The sample’s forehead dashes are optional embroidery visible in the photograph; there is no separate stitch-count instruction for them. Add them only after the head has been positioned. Finish the bow, weave in all tails, and check that the cheeks and ears are attached firmly.
Troubleshooting the shape
If the head feels lumpy, adjust the stuffing before tightening the sewing seam. If the feet twist, check where the four and two decreases sit on the leg rounds. If an arm points backward, inspect the Round 33 joining orientation. For this crochet bear couple pattern, correcting the alignment before fastening off is easier than resewing a stuffed toy afterward.
If changing yarn or hook size, make one head and muzzle as a fit test before completing both bears. Different yarns can alter the balance between the large head and narrow neck. The crochet bear couple pattern contains no finished-size chart, so don’t promise a specific height based on a yarn substitution.
For another handmade character after the crochet bear couple pattern, browse our amigurumi crochet patterns. If you want a break from stuffing and sewing, try the crochet plaid scarf pattern as a contrasting accessory project.
07 / THE PATTERN
Crochet Bear Couple Pattern FAQ
Is this crochet bear couple pattern written in English?
Yes. The supplied Chinese symbols and instructions are translated into English US crochet terms. The color columns replace the original black/red text convention. Source uncertainties remain clearly identified rather than guessed.
Are the two bears made with different head patterns?
No. Both use the same 31-round head instructions, ears, cheeks, and muzzle. The crochet bear couple pattern changes their appearance through the bear shade, clothing colors, skirt, bow, and optional forehead embroidery.
How tall will the finished bears be?
The source gives no finished height, yarn weight, or gauge. The crochet bear couple pattern only supplies a 2 mm hook, 9 mm eyes, and a 10 mm nose as recommendations. Your actual size depends on yarn, tension, and stuffing.
Should the skirt have 96 or 108 stitches?
The written skirt says 48 increases for 96 stitches, but the preceding BLO shaping raises an attachment-loop ambiguity. This crochet bear couple pattern translation keeps 96 as the source target and flags the missing selection instructions. Verify the waist setup before crocheting the skirt.
Can I use the AI photos as assembly diagrams?
No. They are decorative illustrations inspired by the source sample, not exact construction photographs or a crochet-tested result. Use the round tables and assembly notes for the crochet bear couple pattern; enhanced images may reconstruct details.
Keep the matching pieces together. Enjoy the small details.
The crochet bear couple pattern is easier to manage when you separate shared shapes from outfit choices. Label your colors, count the large head rounds carefully, and pin the face before committing to the expression. With the source limitations checked and the sewing done patiently, the pair becomes a coordinated handmade project rather than two separate puzzles.
Reference guides: crochet abbreviations and yarn-weight standards from the Craft Yarn Council. This article uses US stitch terminology.




