

MY CROCHET UNIVERSE · FREE CROCHET BAG TUTORIAL
Crochet Oval Shoulder Bag Pattern: 8-Step Guide
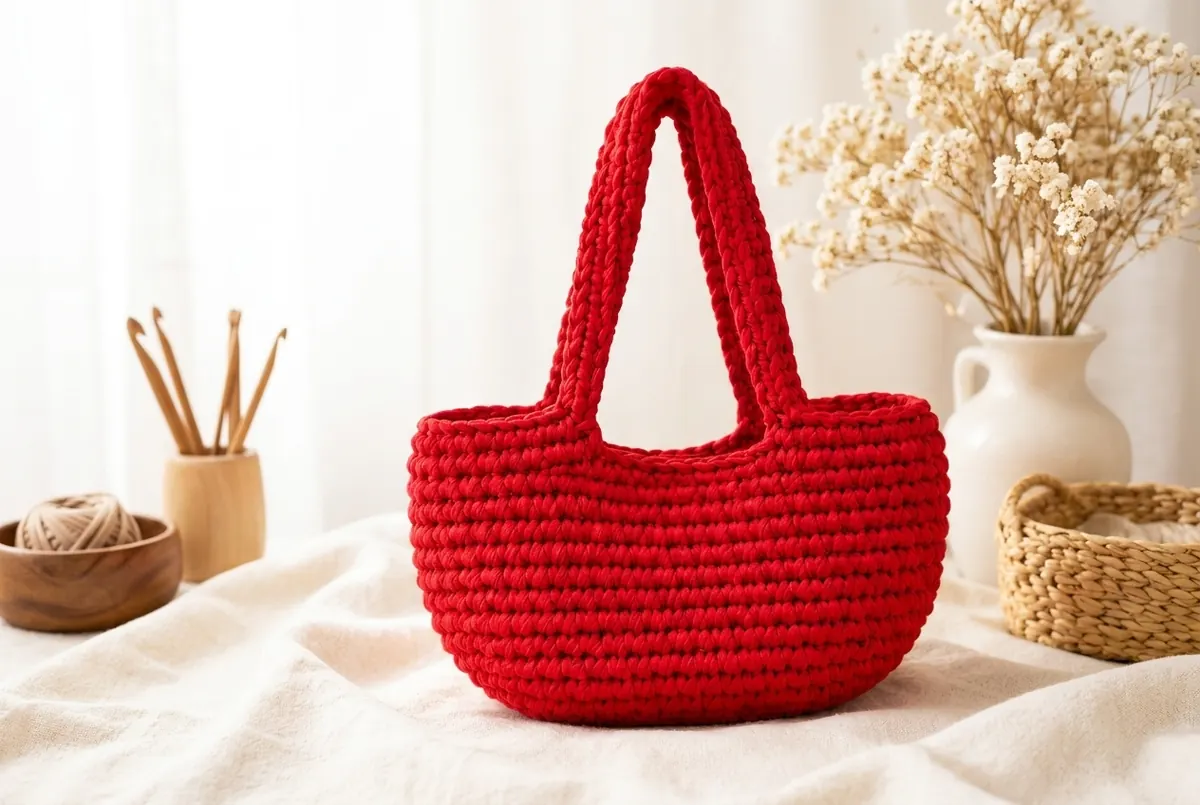
This crochet oval shoulder bag pattern turns one skein of chunky T-shirt yarn into a practical, structured bag with no separate panels to sew. The project starts with a long foundation chain, grows into a balanced oval base, then rises in continuous single-crochet rounds before the handles are built directly into the rim.
The construction is satisfyingly simple, but the small details matter: the curved ends must receive matching increases, the first stitch of every round needs a marker, and the handle anchor points must be counted rather than guessed. This professional guide organizes the original photo-book method into eight clear stages with stitch totals, checkpoints, customization advice, troubleshooting, and a printable-pattern CTA.
Crochet Oval Shoulder Bag Pattern: Before You Begin
This guide is a rewritten educational adaptation of the user-provided “Oval Bag Crochet Pattern” tutorial attributed to Made by Bee Bags. The step sequence has been reorganized and clarified; generated photographs are visual aids. Make a small yarn-and-hook test because T-shirt yarn varies dramatically in thickness and stretch.
Crochet Oval Shoulder Bag Pattern Overview
The crochet oval shoulder bag pattern is worked in one continuous piece from the center of the base upward. The first three rounds establish the oval. Three additional increase rounds widen it to 56 stitches, and eight even rounds create the walls. Four markers divide the rim into two handle spaces and two side sections.
| Feature | Approximate result | How to adjust |
|---|---|---|
| Bag width | 28–32 cm / 11–12½ in | Change foundation chain |
| Body height | 17–20 cm / 6¾–8 in | Add or remove even rounds |
| Handle chain | 38 chains per handle | Add or subtract chains equally |
| Top stitch count | 56 stitches | Keep marker spacing symmetrical |
Crochet Oval Shoulder Bag Pattern Gauge
Because T-shirt yarn can be narrow, wide, soft, or firm, measure the base rather than relying on a universal gauge. After the oval reaches 56 stitches, it should lie flat and feel sturdy. If it cups, loosen your tension or use a larger hook. If it ripples, tighten your tension or use a smaller hook.
Materials for the Crochet Oval Shoulder Bag Pattern
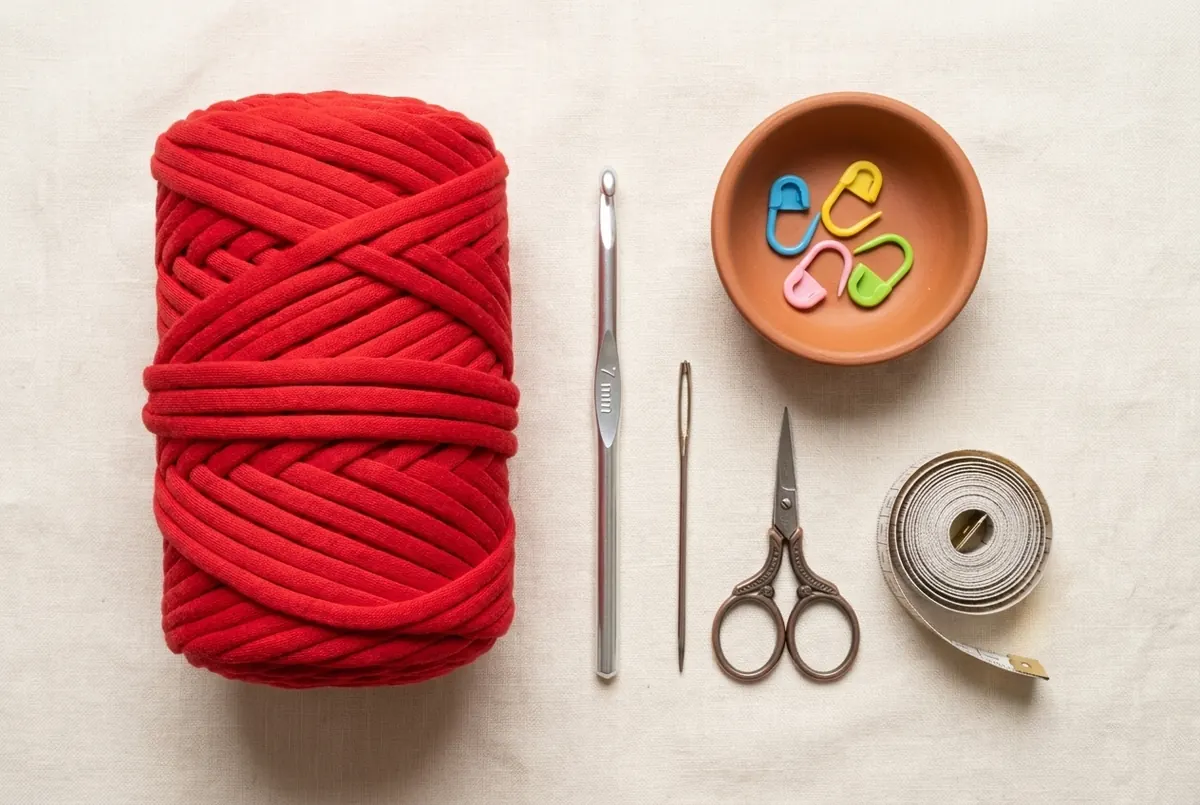
- Yarn: approximately 120 m (131 yd) of medium-thick T-shirt yarn.
- Hook: 7 mm. Try 8 mm for very firm yarn or 6–6.5 mm for thin, stretchy yarn.
- Markers: four locking stitch markers, plus one contrasting round marker if available.
- Finishing tools: large blunt tapestry needle, sharp scissors, and optional tape measure.
Crochet Oval Shoulder Bag Pattern Abbreviations
Instant Digital PDF · Pattern Only
Keep the complete bag guide beside your hook
The printable edition keeps every base count, marker position, handle step, and finishing checkpoint together without scrolling.
Steps 1–3: Build the Crochet Oval Shoulder Bag Pattern Base
Crochet Oval Shoulder Bag Pattern Step 1 — Chain 17
Make a slip knot with the 7 mm hook and chain 17 without pulling the chains tight. Starting in the second chain from the hook, work 1 sc in each of the next 15 chains. Work 3 sc in the final chain to turn the corner. Rotate the foundation so the unused loops face upward, then work 1 sc in each of the next 14 loops and 2 sc in the final loop. Place the round marker in the first stitch. You should have 34 stitches.
Crochet Oval Shoulder Bag Pattern Step 2 — Widen the Ends
Continue in a spiral. Round 2: 2 sc in the first stitch, sc in the next 14 stitches, 2 sc in each of the next 3 stitches, sc in the next 14 stitches, and 2 sc in each of the final 2 stitches. Count 40 stitches. The increases should cluster only at the short ends of the oval.
Crochet Oval Shoulder Bag Pattern Step 3 — Turning Ridge
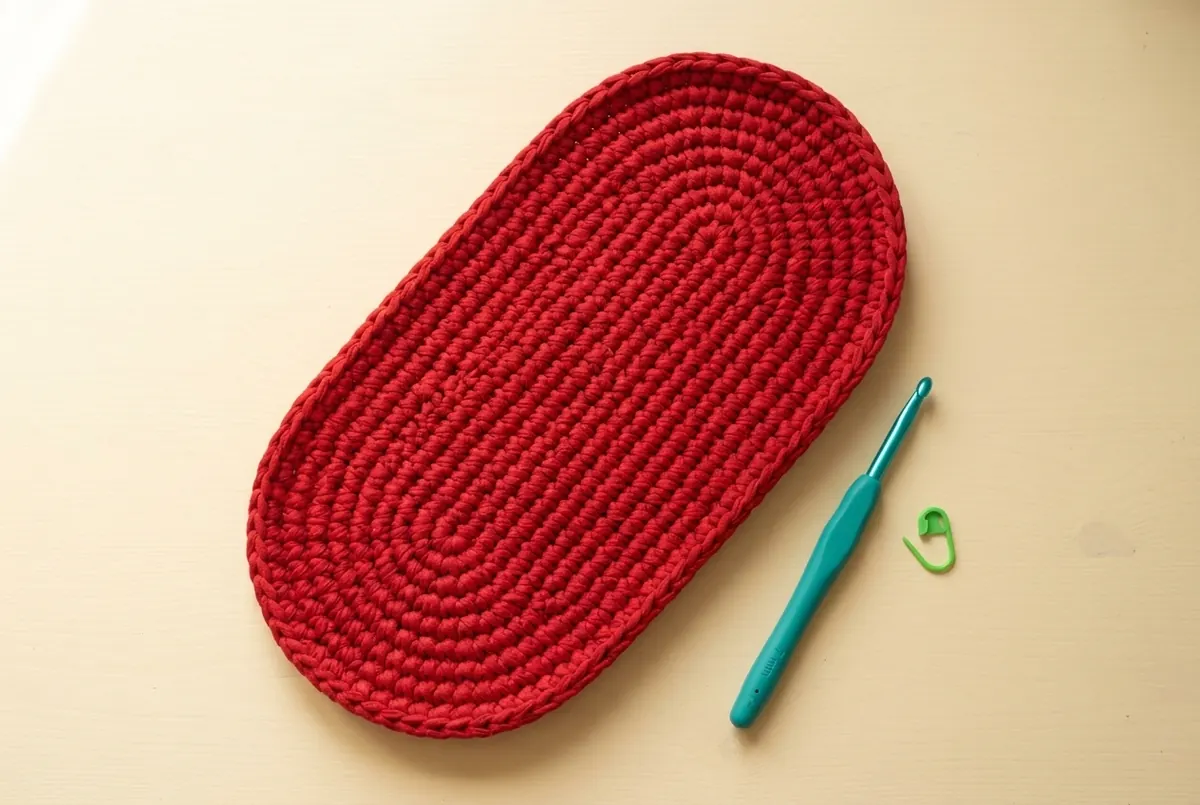
Round 3 is worked in the back loop only. Sc BLO in the next 17 stitches, 2 sc BLO in each of the next 2 stitches, sc BLO in the next 18 stitches, 2 sc BLO in each of the next 2 stitches, then sc BLO in the final stitch. You now have 44 stitches. The unused front loops form a subtle ridge that separates the base from the later shaping.
Count before continuing
The crochet oval shoulder bag pattern depends on matched increase zones. Fold the base in half lengthwise; the curved ends should align. If one end is longer, frog the last round and correct it now. The difference becomes much more obvious once the sides stand upright.
Steps 4–5: Shape the Bag and Crochet the Body
Crochet Oval Shoulder Bag Pattern Step 4 — Increase to 56 Stitches
Work three more shaping rounds through both loops. Round 4: sc 19, inc in each of the next 2 stitches, sc 20, inc in each of the next 2 stitches, sc 1 — 48 stitches. Round 5: sc 21, inc in each of the next 2 stitches, sc 22, inc in each of the next 2 stitches, sc 1 — 52 stitches. Round 6: sc 23, inc in each of the next 2 stitches, sc 24, inc in each of the next 2 stitches, sc 1 — 56 stitches. Move the marker after the first stitch of every round.
These rounds gently lengthen the curved ends without making the straight sides flare. If your stitch marker shifts visually, trust the stitch count rather than the seam line. T-shirt yarn can twist and make a straight spiral seam look diagonal even when the count is correct.
Crochet Oval Shoulder Bag Pattern Step 5 — Eight Body Rounds
Sc in every stitch around for eight complete rounds, keeping 56 stitches. Do not join unless you prefer a visible seam; the original method uses a continuous spiral. After Round 14, the body should stand on its own with a rounded lower edge and a level top opening. Add even rounds for a taller crochet oval shoulder bag pattern, but remember that every extra round uses more yarn and slightly increases handle strain.
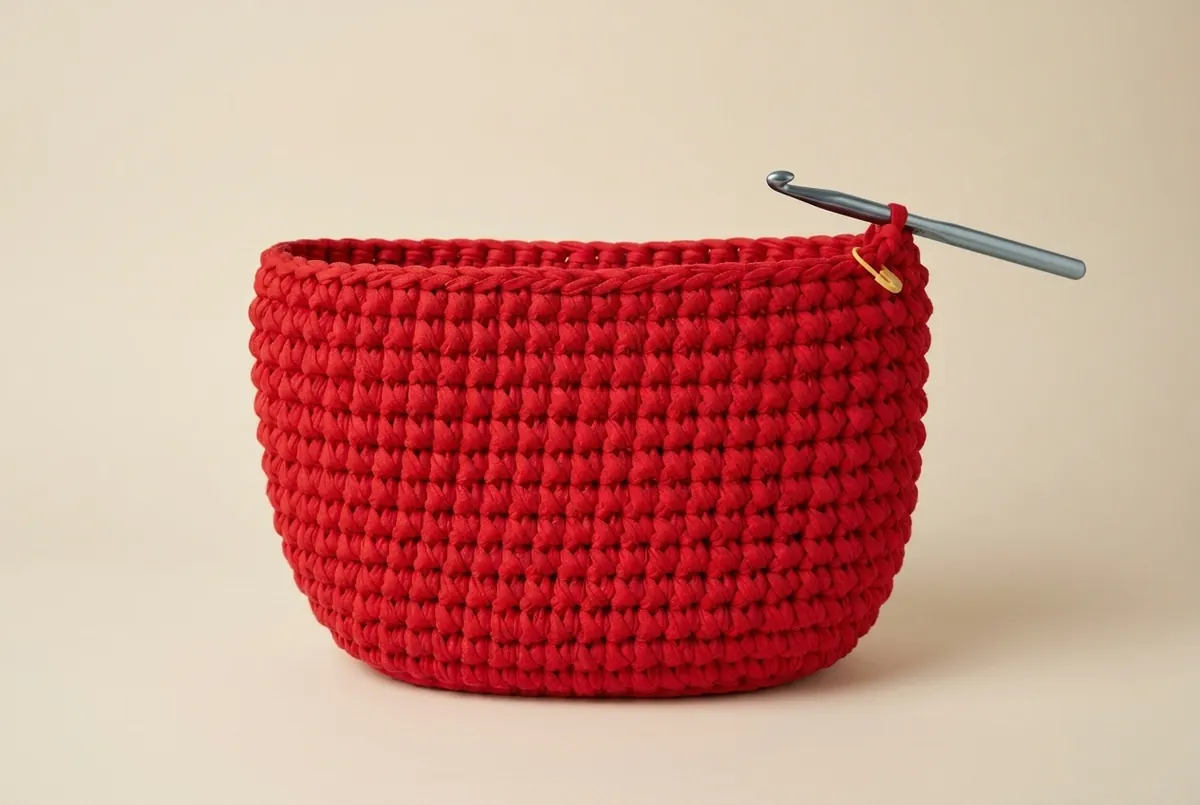
Pause and place the bag on a table. Smooth the sides without stretching. The top edge should sit roughly parallel to the base. If one side is higher, you may have accidentally worked into the slip-stitch area or skipped the marked first stitch. Correct the last round before placing handle markers.
Instant Digital PDF · Pattern Only
Want the condensed row-by-row version?
Download the printable crochet oval shoulder bag pattern with the base math, handle map, customization table, and finishing checklist.
Steps 6–7: Mark and Crochet the Integrated Handles
Crochet Oval Shoulder Bag Pattern Step 6 — Place Handle Markers
With the first stitch of the round still marked, count carefully around the 56-stitch rim. Place four additional markers in stitches 6, 15, 34, and 43. The sections between stitches 6–15 and 34–43 become the two handle openings. The longer 19-stitch sections form the front and back rim.
Lay the bag flat and compare the markers from both sides. Each handle pair should sit directly opposite the other pair. This check is more reliable than eyeballing the curve, especially when the working yarn pulls one side inward.
Crochet Oval Shoulder Bag Pattern Step 7 — Chain and Anchor Handles
- Sc to the marker at stitch 6.
- Chain 38 for the first handle. Keep every chain the same size and avoid twisting.
- Anchor the chain with 1 sc in the marked stitch 15.
- Sc across the next 19 rim stitches to marker 34.
- Chain 38 for the second handle and anchor it with 1 sc in marked stitch 43.
- Sc across the remaining rim stitches to the beginning of the round.
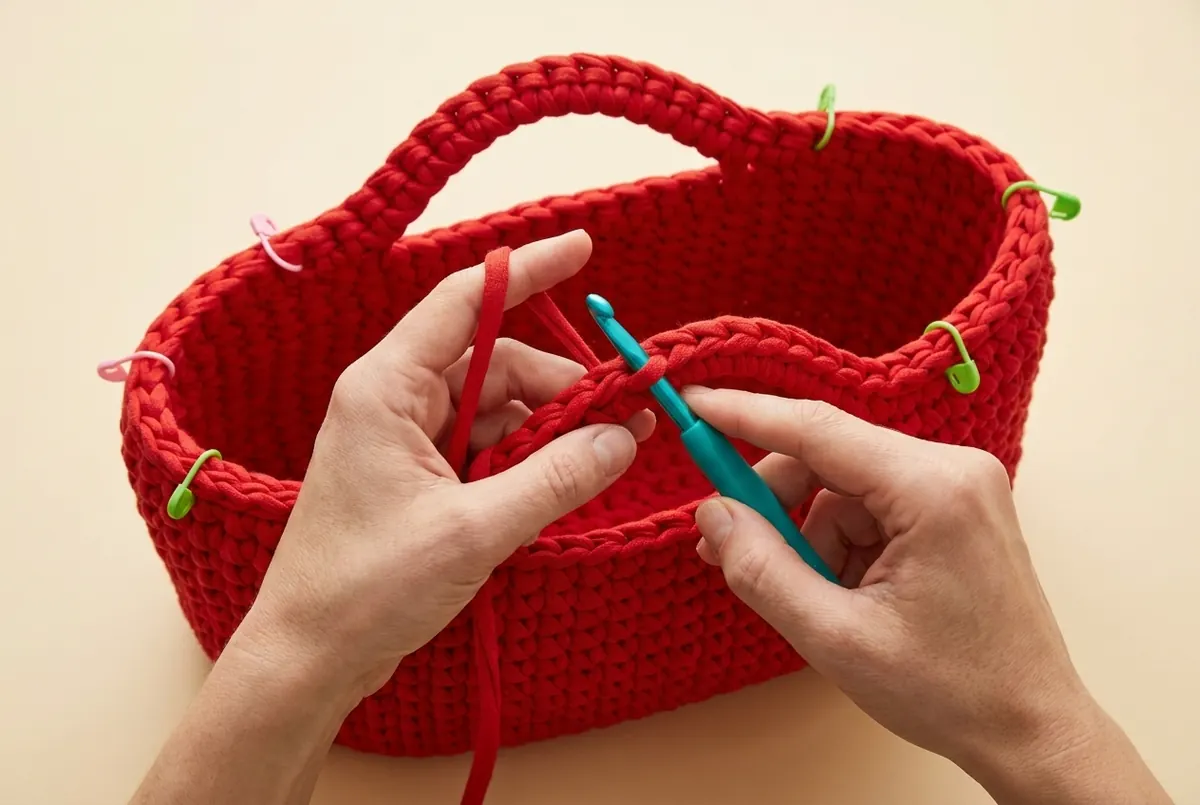
For the reinforcement round, skip one rim stitch at the base of the first handle and work sc BLO along the entire handle chain. Continue in sc along the rim until you reach the second handle, skip one rim stitch, and work sc BLO along that handle as well. Finish the remaining rim stitches. This extra line of crochet gives the handles enough body for everyday use without needing separate straps.
Customize handle length safely
Thirty-eight chains create a short shoulder handle with most medium T-shirt yarns. Before anchoring, hold the chain against the bag and test the drop. Add or remove the same number of chains on both handles. If you make much longer straps, add a second reinforcement round or insert non-stretch cotton tape inside the handle to control growth.
Step 8: Finish the Crochet Oval Shoulder Bag Pattern Cleanly
After the final rim stitch, make an invisible join. Cut the yarn with a 25–35 cm tail and pull the tail completely through the active loop. Skip the next stitch, insert the hook from top to bottom under both loops of the following stitch, catch the tail, and pull it through. Insert the hook down through the top of the last completed stitch and pull the tail to the inside. Adjust the loop until it matches the neighboring stitch tops.
Thread the tail onto a large blunt needle. Weave horizontally through several dense stitches, reverse direction, and weave back through a different path. T-shirt yarn is slippery, so a short straight weave can work loose. Trim only after gently stretching the area to confirm the tail remains secure.
Professional finishing checklist
- Both handles contain the same number of chains and reinforcement stitches.
- Handle anchor points align when the bag is folded in half.
- The top rim is level and does not pull inward between handles.
- The base lies flat without ripples or a central ridge.
- Every marker has been removed and every tail is secure.
- The bag is rested or lightly steamed before final measurements are recorded.
Customize the Crochet Oval Shoulder Bag Pattern
Change the width
For a wider bag, add foundation chains before beginning. Each extra chain adds one straight-section stitch on each side of the oval, so the finished circumference increases by two stitches. Keep the curved-end increase strategy unchanged. For a smaller bag, remove chains, but do not shorten the foundation so much that the two curved ends collide.
Change the height
The easiest adjustment is adding or removing even body rounds before the handle markers. Count yarn carefully: chunky T-shirt yarn disappears faster than it seems. One additional round requires roughly the circumference of the bag plus working allowance. If you have less than two full rounds of yarn remaining, begin the handles rather than risking yarn chicken.
Add a lining or closure
A cotton lining prevents keys and small objects from stretching the crochet. Cut two fabric pieces from the bag outline with seam allowance, sew them together, and hand-stitch the lining below the rim. A magnetic snap should be installed in the lining—not directly through the T-shirt yarn—so repeated opening does not distort the stitches.
Try another color or yarn
Rust, black, cream, olive, and cobalt all suit the clean oval shape. Avoid combining T-shirt yarns with noticeably different widths in the same crochet oval shoulder bag pattern; the gauge shift creates bumps. If you need more yarn, splice at the side by overlapping tails inside several stitches instead of tying a bulky knot.
For more bag-making ideas, compare the structure with our terracotta hobo bag pattern, run your yarn through these five crochet bag yarn tests, or explore a different silhouette in the teardrop crochet shoulder bag guide.
Crochet Oval Shoulder Bag Pattern Troubleshooting
The base cups upward
Your tension is too tight, the hook is too small, or one curved-end increase was missed. Count the round and confirm both ends contain the same increase groups. A larger hook often fixes mild cupping with very firm T-shirt yarn.
The base ripples
The hook may be too large, or an extra increase was added on one or both ends. Smooth the base on a table without stretching. If waves remain after Round 3, frog to the incorrect increase round; later body rounds will not flatten it.
The bag twists in a spiral
A slight diagonal seam is normal in continuous single crochet. Severe twisting usually comes from working through only one loop by accident or rotating the project while counting. The BLO instruction applies only to the designated base ridge and handle reinforcement.
One handle is longer
Recount the chains and the stitches worked along each handle. If the counts match, one chain was made looser. Rework the loose handle now; blocking cannot permanently equalize two T-shirt-yarn handles with different tension.
The handles stretch during use
Add another reinforcement round, use a smaller hook for the handle stitches, or sew narrow cotton webbing to the handle underside. Do not load the bag heavily until the anchor stitches have been checked and all yarn tails are fully secured.
Frequently Asked Questions
Is this crochet oval shoulder bag pattern beginner-friendly?
Yes, if you can chain, single crochet, increase, and work into the back loop. The hardest parts are recognizing both sides of the foundation chain and placing the four handle markers accurately.
Can I use regular yarn instead of T-shirt yarn?
You can hold several strands together, but the finished size and firmness will change. Make the oval base first, measure it, and adjust the hook until the fabric is dense without becoming painful to crochet.
How much T-shirt yarn does the bag use?
Plan for approximately 120 m, but keep extra yarn available if your material is wide, your tension is loose, or you add body rounds and longer handles.
Can I make one long shoulder strap?
Yes. Replace the two handle chains with a single longer strap anchored at opposite side points. Reinforce it with at least one full row of single crochet and consider non-stretch tape inside the strap.
Should I block a T-shirt-yarn bag?
Usually a short rest and hand-shaping are enough. If the yarn label allows steam, hover the steamer above the fabric and reshape gently. Never press a hot iron directly onto synthetic T-shirt yarn.
Instant Digital PDF · Pattern Only
Ready to make the complete oval bag?
Download the organized crochet oval shoulder bag pattern with the stitch-count table, marker map, handle options, troubleshooting, and printable finishing checklist.
Your Finished Crochet Oval Shoulder Bag Pattern
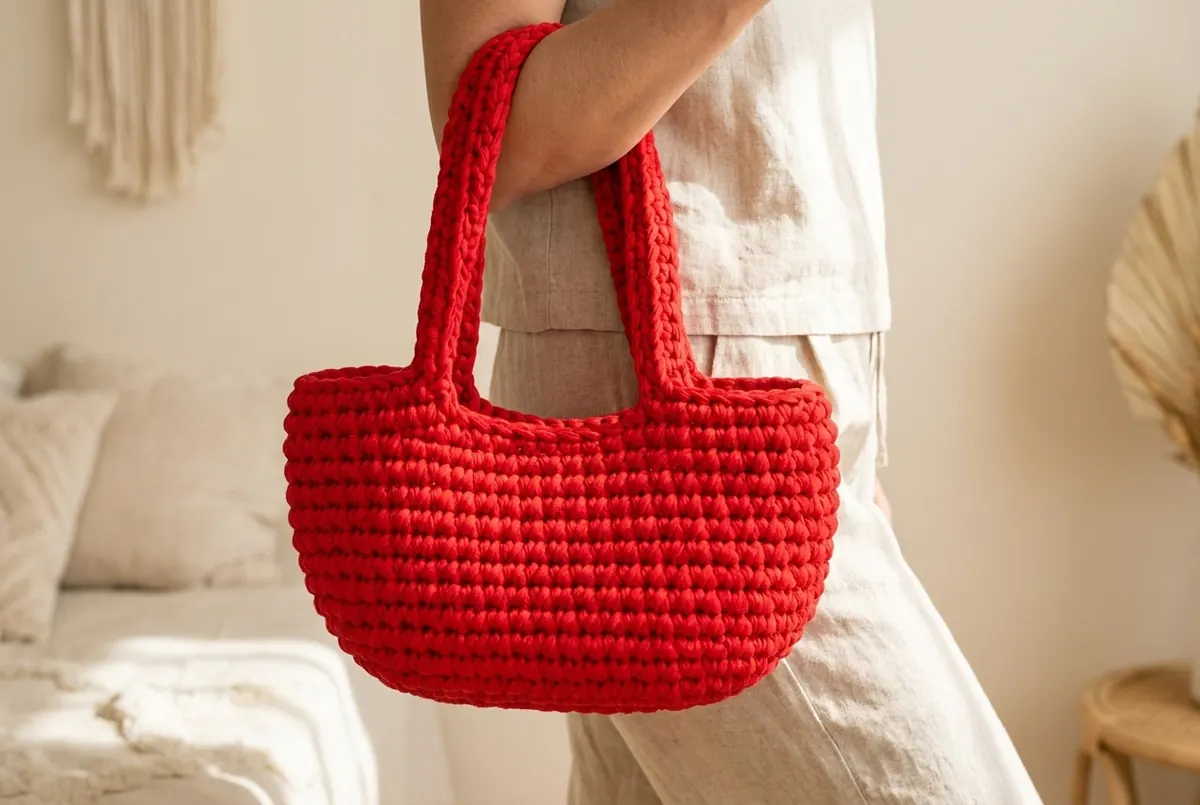
The finished crochet oval shoulder bag pattern combines a stable base, dense one-piece body, and reinforced handles without complicated seaming. The most professional results come from three habits: mark the first stitch, count after every increase round, and test both handles before anchoring them.
Use the first bag as your master sample. Record the exact yarn width, hook size, finished base measurement, body rounds, and handle-chain count. Those notes make the next version faster, more consistent, and much easier to resize for gifts or a coordinated handmade collection.
Reference disclosure: adapted from the user-provided “Oval Bag Crochet Pattern” tutorial attributed to Made by Bee Bags. This article reorganizes and clarifies the method for editorial use; it does not claim the referenced design as an original My Crochet Universe pattern. Generated photographs are visual aids, and written counts control the project.




