

5 Crochet Bag Mistakes (and How to Fix Them Fast)
Diagnose curling bases, loose tension, weak handles, and lost structure
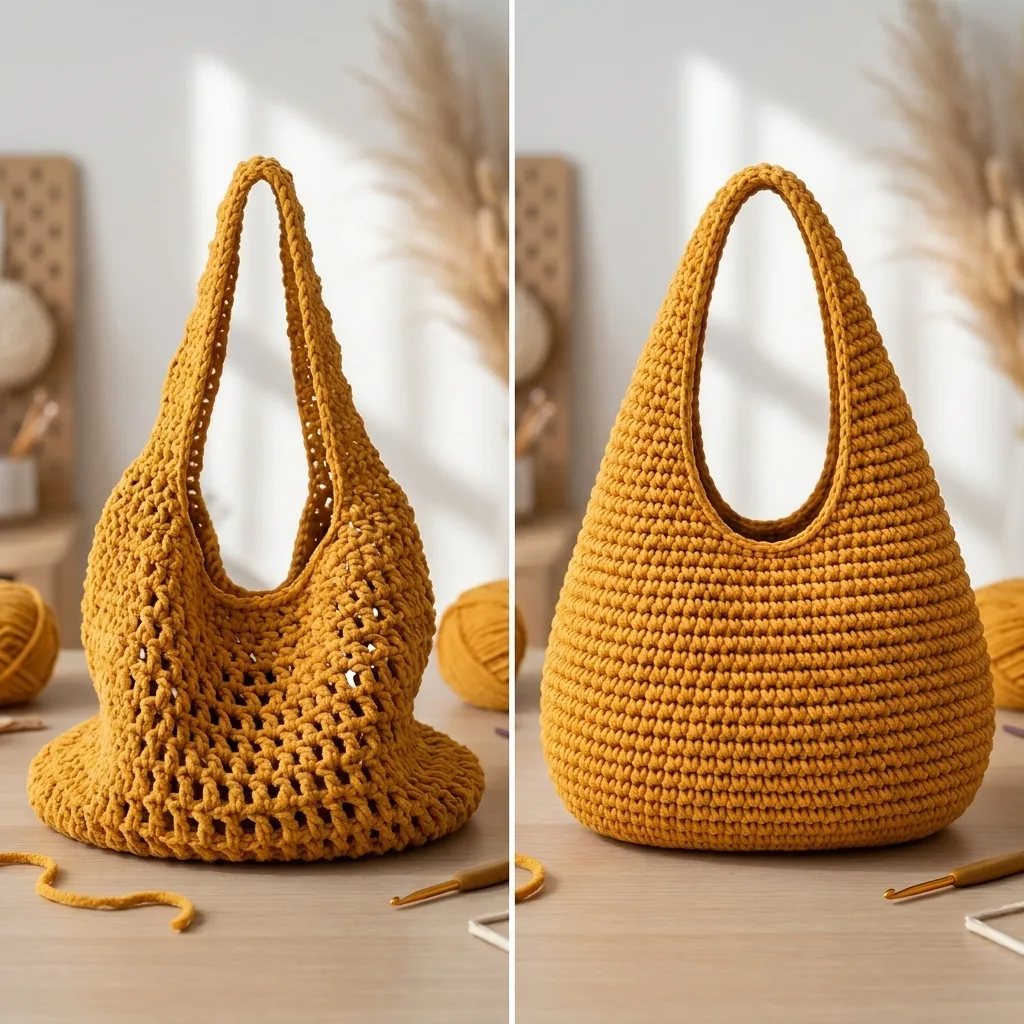
A flat base, dense fabric, smooth taper, and firm handle define the corrected bag.
Most crochet bag mistakes show up as one of four symptoms: a base that curls, sides that ripple, fabric that stretches, or a handle that sags. The good news is that each symptom points to a limited set of causes, so you can diagnose the project before frogging everything.
This guide uses the mustard plush-chenille teardrop bag as the reference. The product specifies a 4.0 mm hook and includes detailed rounds and stitch counts for three sizes. Follow those exact instructions first, then use the troubleshooting checks below to isolate tension, counting, yarn, shaping, and finishing problems.
The 5 Crochet Bag Mistakes That Ruin Your Project
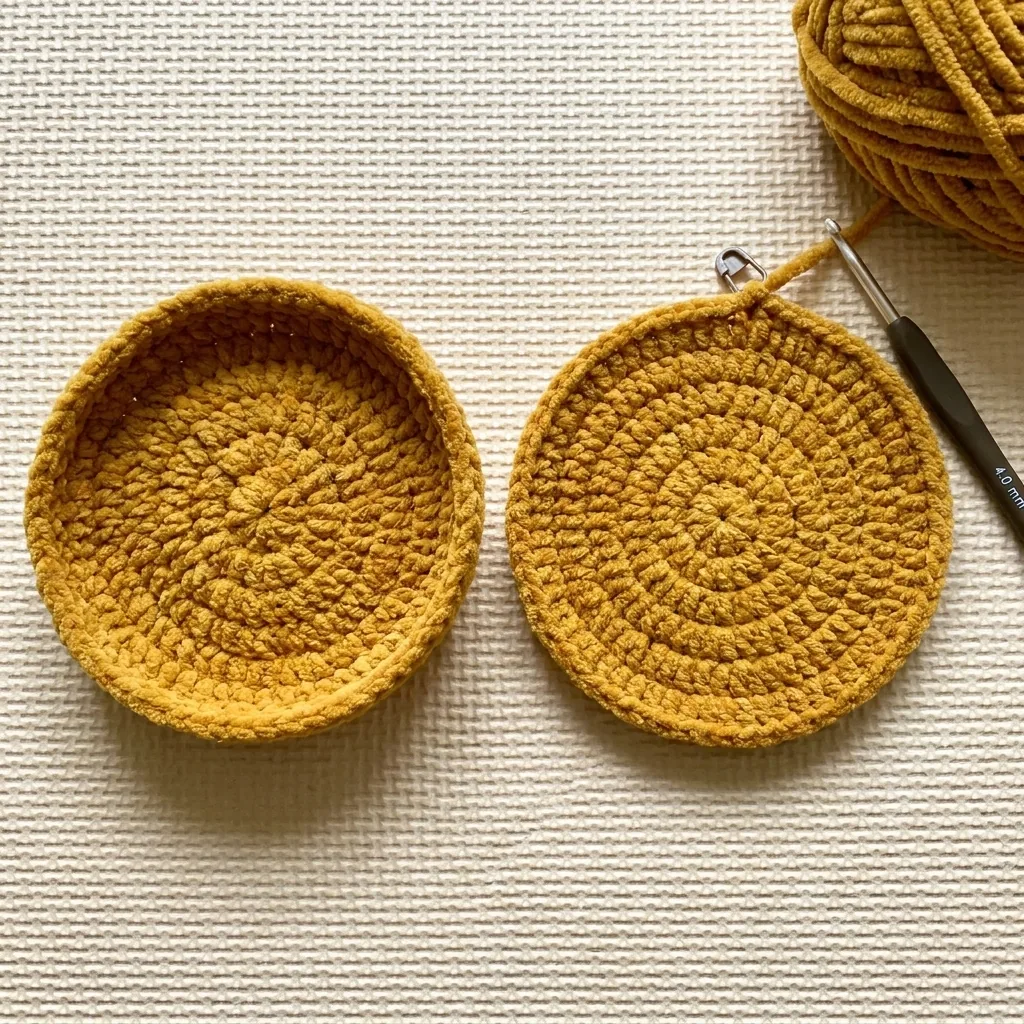
Compare the base on a flat surface before continuing.
These crochet bag mistakes are easiest to correct at the current stage, before the next rounds multiply the problem.
Check Your Gauge Before You Commit
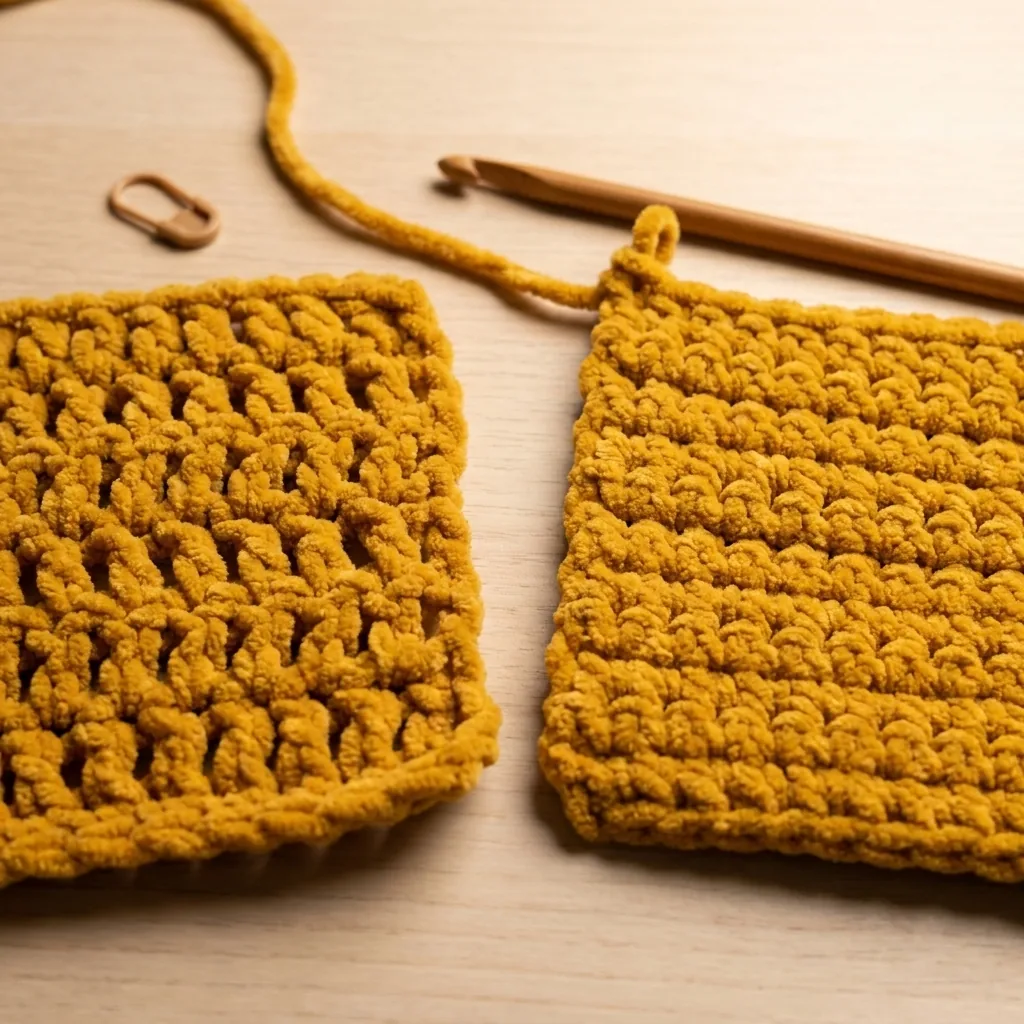
A small swatch reveals gaps and excess stretch early.
These crochet bag mistakes are easiest to correct at the current stage, before the next rounds multiply the problem. Can You Fix a Bag That’s Already Wonky?
A Preflight Checklist Before the First Round
These crochet bag mistakes are easiest to correct at the current stage, before the next rounds multiply the problem.
Preventing crochet bag mistakes is easier than repairing them. Confirm the yarn, 4.0 mm hook, size choice, gauge instructions, and stitch terminology before beginning. Wind or inspect the chenille so knots and damaged sections do not surprise you mid-round. Place a locking marker in the first stitch and keep a simple round tally beside the project.
Make a compact swatch using the pattern stitch. The goal is not maximum stiffness; it is a dense fabric that still bends without exposing large gaps. Compare the swatch with the measurements in the PDF. If the fabric is wrong, change one variable at a time—first technique and tension, then hook only if the measured gauge still differs.
Checkpoints That Catch Problems Early
Lay the base on a flat surface after every few rounds. A correct base should rest without a ruffled edge or a bowl shape. When the walls begin, verify that the marker travels consistently and that the vertical line of the round start does not drift unexpectedly. During tapering, compare opposite sides so the teardrop narrows symmetrically.
Before finishing the handle, place the bag against your shoulder with the opening supported. Check comfort, clearance, and symmetry without applying a heavy load to unfinished joins. Photograph the front and side; a photo often reveals a tilted handle or uneven curve that is harder to notice while holding the work.
Care and Long-Term Structure
These crochet bag mistakes are easiest to correct at the current stage, before the next rounds multiply the problem.
Use a bag organizer or small pouches rather than letting keys pull directly against the stitches. Avoid carrying loads that distort the handle or base. After use, empty the bag and let the fabric return to its natural shape. Store it on a shelf instead of suspending it by the handle.
For cleaning, follow the yarn label and the pattern instructions. Test moisture on leftover yarn first because chenille texture can change with heat or agitation. Never press plush yarn with a hot iron. If the PDF allows gentle shaping, support the bag evenly while it dries and keep the handle in its intended curve.
FAQ
Conclusion
The 5 Crochet Bag Mistakes That Ruin Your Project
Compare the base on a flat surface before continuing.
These crochet bag mistakes are easiest to correct at the current stage, before the next rounds multiply the problem.
Mistake 1: Skipping Stitch Counts
I get it. Counting feels slow when you’re in the zone.
But bags live and die by their base math. Miss one increase on a flat circle and it doesn’t stay invisible — it compounds every round until your “circle” is a taco. Rippling edges and curled bases are almost always a stitch count problem, not a you problem.
The fix: count every single round. Place a stitch marker in the first stitch of each round so you always know where the round starts. Yes, it’s boring. It’s also the difference between a base and a burrito.
Mistake 2: Loose Tension
Bag fabric needs to be dense. Loose, airy fabric feels lovely in a blanket and disastrous in a bag — the moment you put your keys, wallet and a water bottle in, it slumps into a sad puddle.
The fix: use the 4.0 mm hook specified for this product and compare your swatch with the PDF gauge. For a bag, your stitches should feel firm, almost stiff. If you can see light through the fabric when you stretch it, your tension is too relaxed for this project.
Mistake 3: Using the Wrong Hook Size
This one’s related but worth separating. With garments, you follow the label. With bags, the label lies.
A hook that’s too big gives you a floppy bag no matter how carefully you count. Too small and your hands will hate you by round five (and the fabric gets board-stiff — sometimes useful, usually not).
The fix: swatch a small base circle first. Ten minutes of swatching saves ten hours of frogging. Check the gauge guidance from the Craft Yarn Council — then adjust only when your measured gauge differs from the pattern.
Mistake 4: Choosing Stretchy Yarn
Here’s a mistake the yarn shop won’t warn you about: soft, squishy, bouncy yarn stretches under weight. Wool blends, certain acrylics, anything with bounce — your bag grows. Every gravity-filled hour of use, it grows.
The fix: pick fibers with minimal stretch and good stitch definition. T-shirt yarn, chenille and cotton are the heavy hitters for bags. My teardrop bag is chenille specifically because it holds a shape beautifully (and honestly, it hides imperfect stitches like a champ).
Mistake 5: Ignoring the Handle
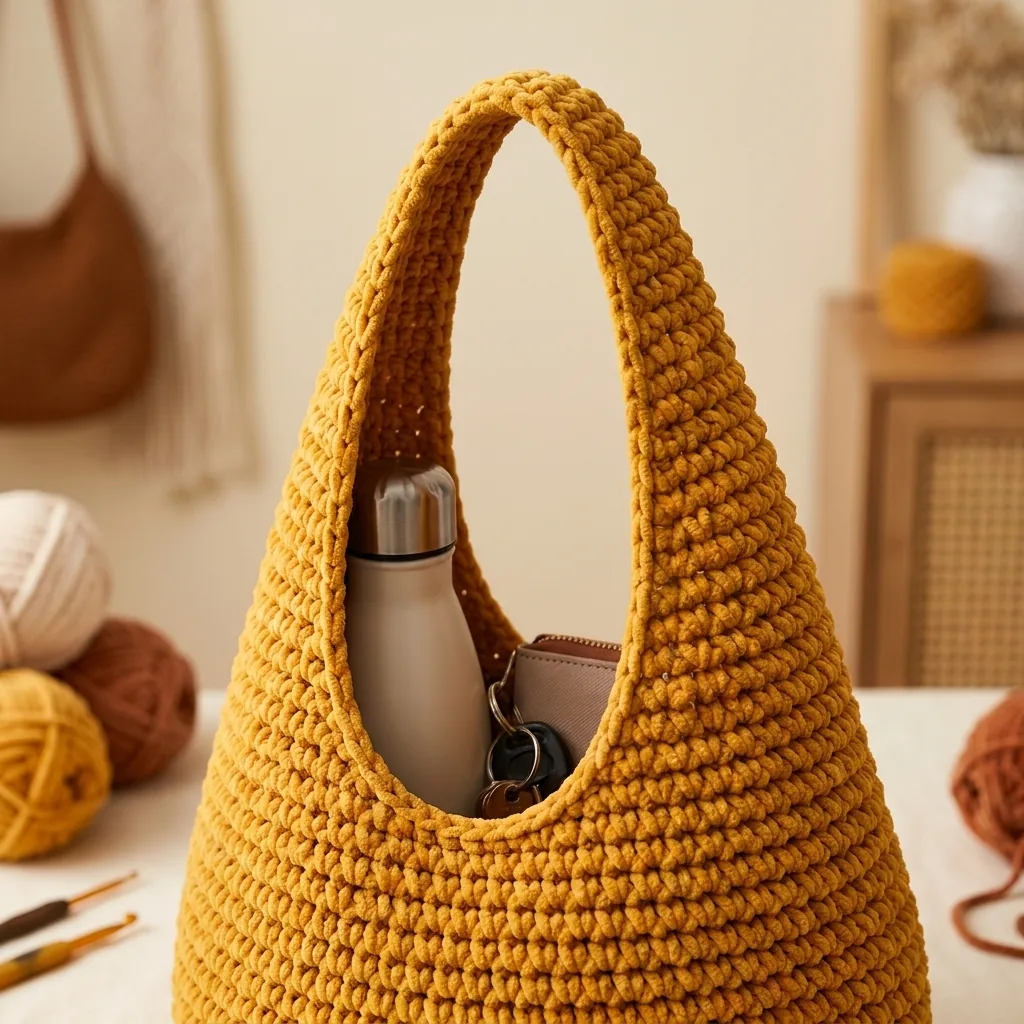
Test the completed handle gradually before daily use.
The handle is the part that fails after you’ve declared victory. You finish the bag, crochet a quick strap, use it twice — and watch it slowly stretch toward the floor.
The fix: make the handle firmer and shorter than feels necessary. Extra rows of single crochet, worked tight. Then load-test it at home: drop a full water bottle in and carry it around for ten minutes. If the handle survives that, it’ll survive real life.
Check Your Gauge Before You Commit
A small swatch reveals gaps and excess stretch early.
These crochet bag mistakes are easiest to correct at the current stage, before the next rounds multiply the problem. I know, I know — gauge swatches are the vegetables of crochet.
But for bags it’s genuinely fast. Chain a few stitches, work a small circle in the round using your chosen yarn and hook, and measure the diameter. If your circle is noticeably bigger than the pattern’s stated base size, go down a hook size. Smaller? Go up.
Five minutes. That’s the whole test. And it catches mistakes 3 and 4 (hook size and yarn choice) before they can ruin anything.
Can You Fix a Bag That’s Already Wonky?
Sometimes, yes. Before you frog the whole thing, try these:
Blocking. Wet blocking works wonders on cotton bags. Soak it, press out the water in a towel, shape it by hand and let it dry flat with something weighted inside. Curling bases often relax right out. A base insert. Cut plastic canvas or thick craft store stabilizer to match the base, wrap it in fabric, and slide it in. Instant structure. This saved my Pringle. A fabric lining. A simple sewn lining hides sins, stops stretch and stops small items from poking through stitches. If your bag grew too big, lining plus a base insert brings it back to life. Handle surgery. If the handle already stretched, cut it, re-crochet it shorter and tighter, and reattach. It’s fiddly but far faster than starting over. If the base itself is a taco, though — frog it and restart the base. Some wounds don’t heal.
A Preflight Checklist Before the First Round
These crochet bag mistakes are easiest to correct at the current stage, before the next rounds multiply the problem.
Preventing crochet bag mistakes is easier than repairing them. Confirm the yarn, 4.0 mm hook, size choice, gauge instructions, and stitch terminology before beginning. Wind or inspect the chenille so knots and damaged sections do not surprise you mid-round. Place a locking marker in the first stitch and keep a simple round tally beside the project.
Make a compact swatch using the pattern stitch. The goal is not maximum stiffness; it is a dense fabric that still bends without exposing large gaps. Compare the swatch with the measurements in the PDF. If the fabric is wrong, change one variable at a time—first technique and tension, then hook only if the measured gauge still differs.
Checkpoints That Catch Problems Early
Lay the base on a flat surface after every few rounds. A correct base should rest without a ruffled edge or a bowl shape. When the walls begin, verify that the marker travels consistently and that the vertical line of the round start does not drift unexpectedly. During tapering, compare opposite sides so the teardrop narrows symmetrically.
Before finishing the handle, place the bag against your shoulder with the opening supported. Check comfort, clearance, and symmetry without applying a heavy load to unfinished joins. Photograph the front and side; a photo often reveals a tilted handle or uneven curve that is harder to notice while holding the work.
Care and Long-Term Structure
These crochet bag mistakes are easiest to correct at the current stage, before the next rounds multiply the problem.
Use a bag organizer or small pouches rather than letting keys pull directly against the stitches. Avoid carrying loads that distort the handle or base. After use, empty the bag and let the fabric return to its natural shape. Store it on a shelf instead of suspending it by the handle.
For cleaning, follow the yarn label and the pattern instructions. Test moisture on leftover yarn first because chenille texture can change with heat or agitation. Never press plush yarn with a hot iron. If the PDF allows gentle shaping, support the bag evenly while it dries and keep the handle in its intended curve.
FAQ
Q1. Why is my crochet bag base curling?A: Almost always a stitch count issue — too few increases on a flat circle. Count every round and check that your increase pattern matches the pattern exactly. Tight tension can contribute too.
Q2. How do I stop my crochet bag from slumping?A: Three tools: tighter tension or a smaller hook, a non-stretchy yarn like chenille or t-shirt yarn, and a firm base insert. Together they turn a puddle into a structured bag.
Q3. What hook size should I use for a crochet bag?A: Usually one size below what feels comfortable for that yarn. This product specifies a 4.0 mm hook; another pattern may require a different size. Always swatch a small base circle first.
Q4. Do I really need to line a crochet bag?A: Not always, but lining stops stretch, hides loose ends and keeps small items from escaping through stitches. For daily-use bags, I consider it worth the hour it takes.
Q5. How many rows should a crochet bag handle be?A: Firmer and shorter than you think. I add at least two more rows than feels necessary and load-test with a water bottle before calling it done. Handles relax with use — build in that buffer.
Conclusion
Most crochet bag mistakes boil down to the same root cause: treating bag fabric like blanket fabric. Count carefully, tension up, choose low-stretch yarn, and build a handle with a buffer. Do those four things and your next bag will stand up on its own — no Pringle in sight.
Which of these five has bitten you before? Confess in the comments — and pin this guide so the fixes are handy for your next WIP.
More from My Crochet Universe
Browse crochet patterns, explore amigurumi projects, or discover another project in the free crochet patterns library.
Make the Teardrop Bag
The pattern includes three sizes, step-by-step instructions, detailed rounds and stitch counts, plus guidance for a sturdy seamless finish.




