

My Crochet Universe · Free Tutorial
Honeycomb Hexagon Tote Bag Pattern: 7 Easy Step-by-Step Tutorial
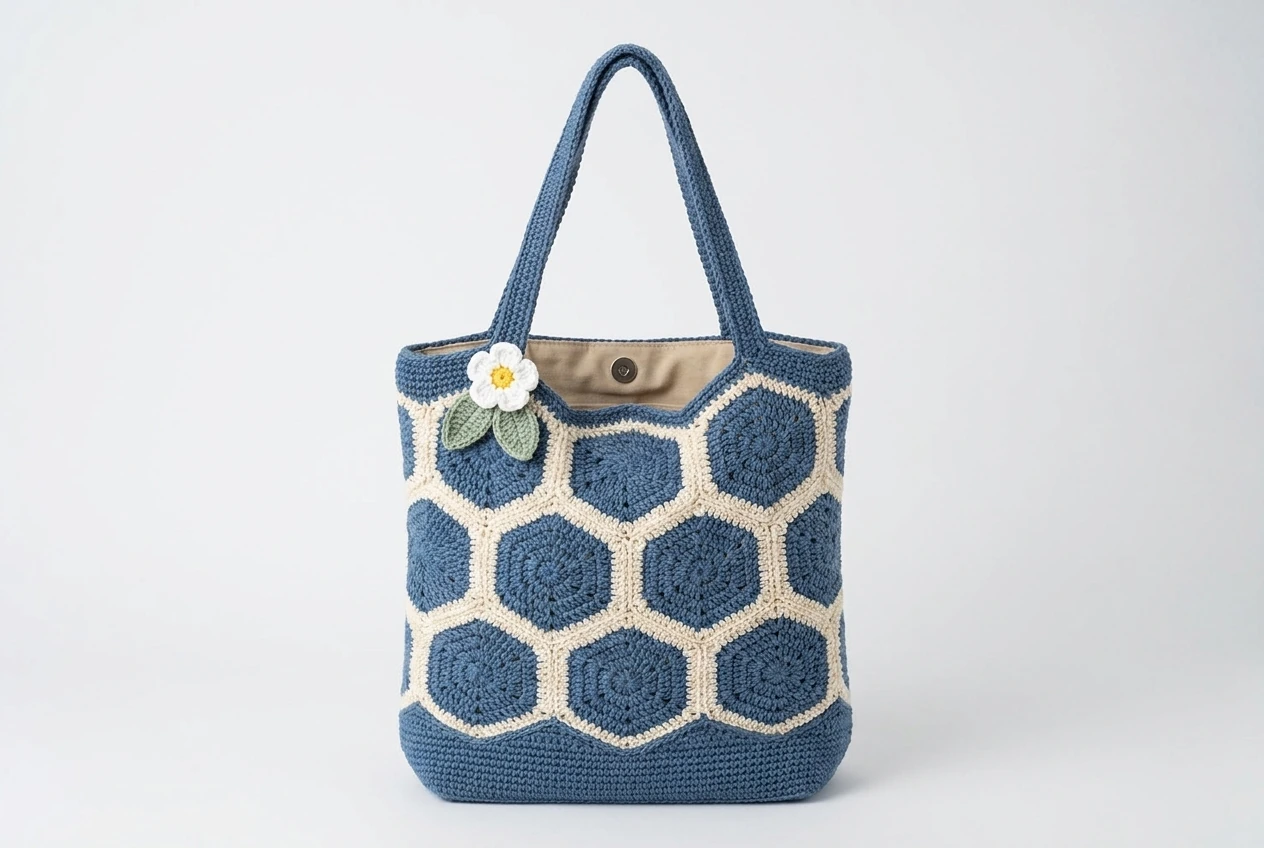
This hexagon tote bag pattern transforms nine denim-blue crochet motifs into a structured everyday bag with cream honeycomb seams. A stable base, dense handles, fabric lining, optional magnetic snap, and a white flower accent give the handmade tote a polished finish.
The tutorial follows the supplied pattern instructions and separates every major stage with a new image or clean schematic. Work the motifs first, check their gauge, join them in the illustrated layout, shape the bag body, attach the bottom, finish the opening, add two handles, and install the lining.
Hexagon tote bag pattern overview
The finished bag measures approximately 13 in (33 cm) wide × 11 in (28 cm) tall × 5 in (13 cm) deep. The handles add about 10 in (25 cm) of drop. Each completed motif should measure about 4.5 in (11.5 cm) point-to-point after light blocking.
Nine identical motifs form the honeycomb body. This hexagon tote bag pattern keeps every motif the same size so the seams align cleanly. The main rounds are denim blue, while the final cream round creates a clear edge for joining. The motif panel wraps into a tube, and a separate blue oval or shaped base closes the bottom.
The hexagon tote bag pattern uses firm cotton or cotton-blend yarn because cotton gives the motifs definition and helps the bag hold its shape. Lining is strongly recommended: it prevents small objects from escaping through the openings and reduces stretching.
Materials, yarn, hook, and gauge

| Material | Recommended amount |
| Denim blue cotton yarn, DK/worsted | 500–550 yd |
| Cream/ivory cotton yarn | 200–220 yd |
| White yarn for petals | 15 yd |
| Yellow yarn for center | 5 yd |
| Sage yarn for leaves | 10 yd |
| Hook | 4.0 mm (US G/6) |
| Lining | About 1/2 yd (0.5 m) cotton or canvas |
| Notions | Tapestry needle, scissors, markers, pins, thread, optional magnetic snap |
Recommended supplies on Amazon
- Denim-blue cotton yarn
- 4 mm crochet hook
- Cotton lining fabric
- Magnetic bag snaps
- Bag-base reinforcement
Affiliate disclosure: qualifying purchases may earn us a commission at no additional cost to you.
For an accurate result, before starting the full hexagon tote bag pattern, make one motif and measure it. A round 1–4 motif should be approximately 4.5 in (11.5 cm) from point to opposite point. If it is too small, try a slightly larger hook; if too large or loose, move down a hook size.
Abbreviations
| ch | chain |
| sc | single crochet |
| hdc | half double crochet |
| dc | double crochet |
| sl st | slip stitch |
| st(s) | stitch(es) |
| sp(s) | space(s) |
| rnd | round |
| MC | denim-blue main color |
| CC1 | cream contrast color |
Part 1: Crochet the hexagon motif — make 9
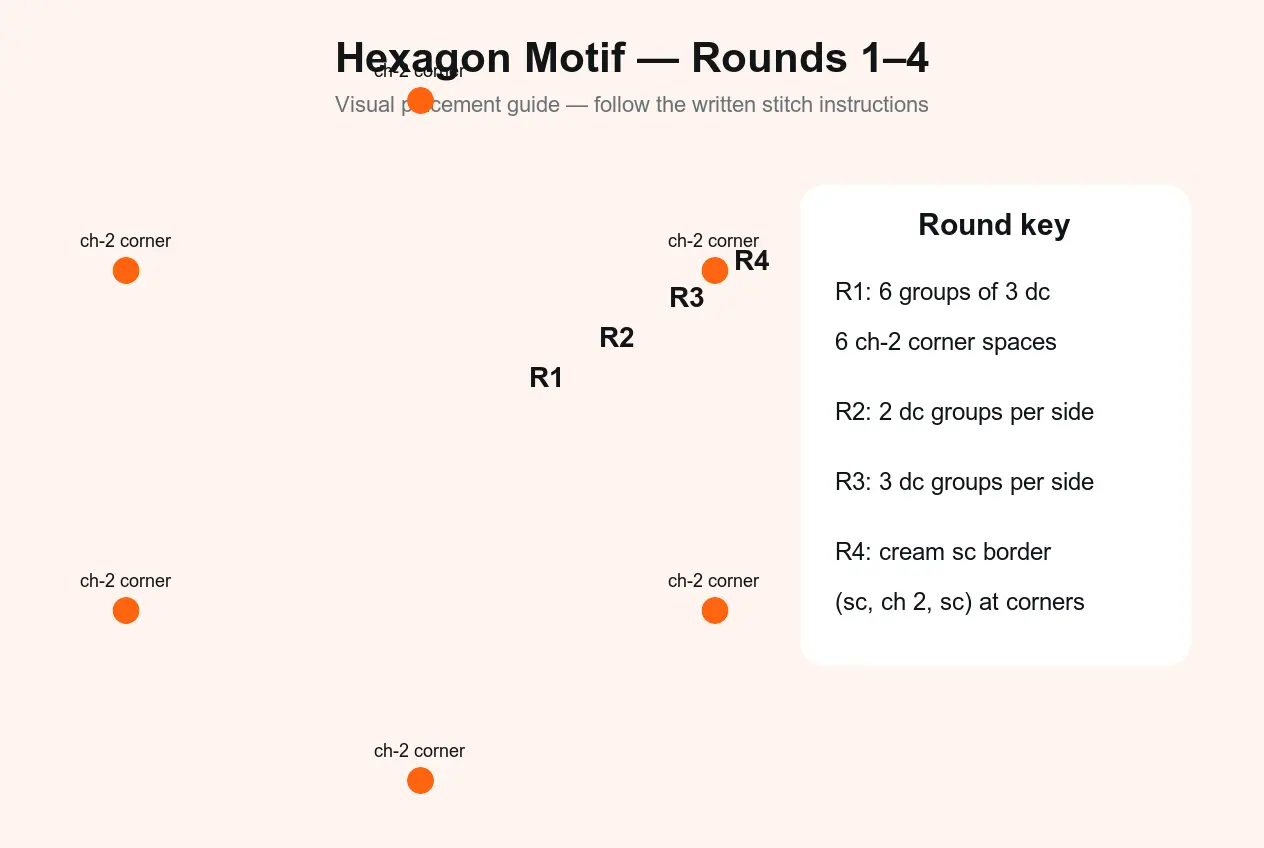
The motif stage is the foundation of the project. Each motif in this hexagon tote bag pattern begins with six groups around a center ring. Chain-2 spaces form the corners. Rounds 2 and 3 expand the six sides, and round 4 adds the cream border.
Round 1 — center and six corners
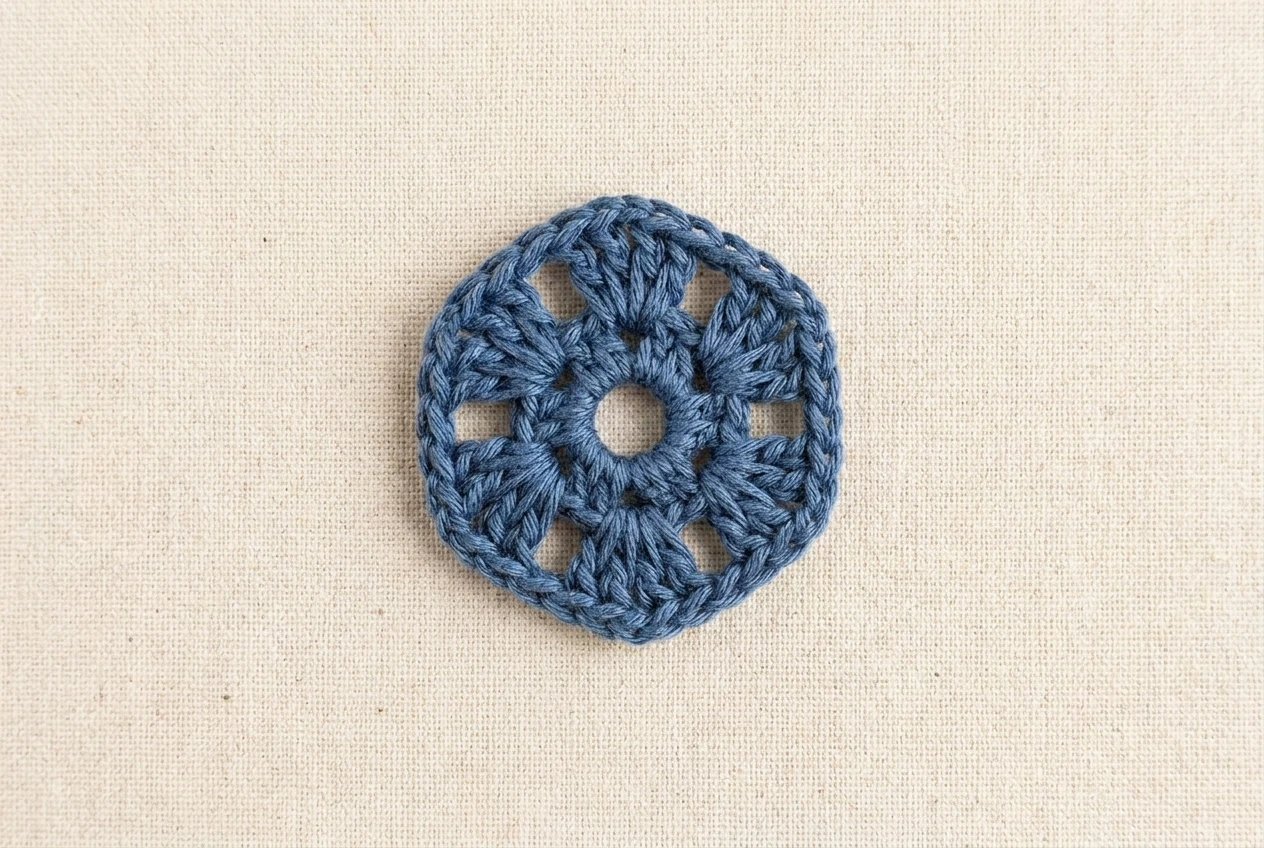
With MC: Ch 6 and join with a sl st to form a ring. Ch 3; this counts as the first dc. Work 2 dc into the ring. Then repeat (ch 2, 3 dc into ring) five times. Ch 2 and join with a sl st to the top of the beginning ch-3.
Round 2 — expand every corner
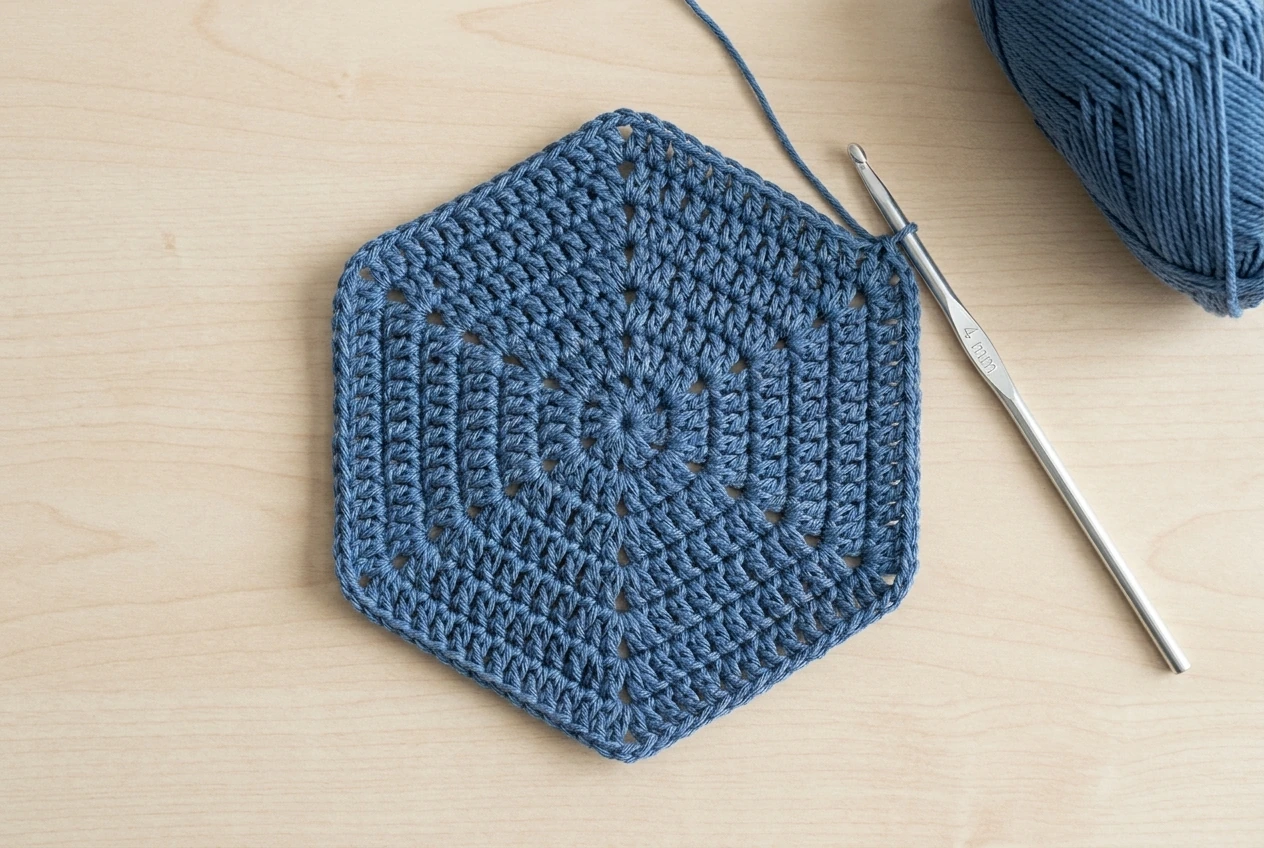
Sl st into the next ch-2 space. Ch 3, then work (2 dc, ch 2, 3 dc) in the same space. In each remaining corner space, work (3 dc, ch 2, 3 dc). Join with a sl st to the top of the beginning ch-3.
Keep all six points visible as you continue the hexagon tote bag pattern. If the motif cups, relax your tension around the corners. If it ripples, check that you have not added an extra group between corners.
Round 3 — build the sides
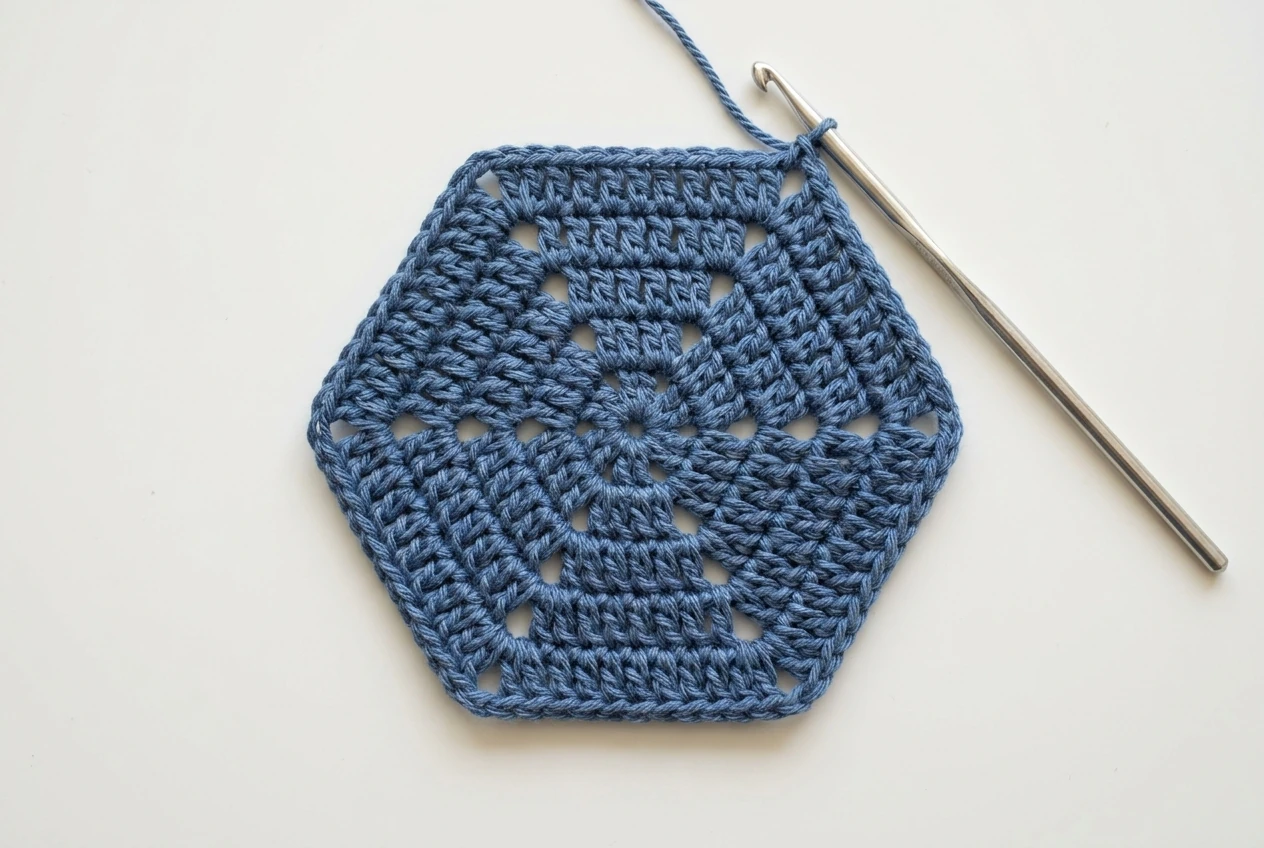
Sl st into the next ch-2 space. Ch 3, then work (2 dc, ch 2, 3 dc) in that corner. Work 3 dc in the next side space. Repeat [(3 dc, ch 2, 3 dc) in corner, 3 dc in next side space] around. Join with a sl st.
Round 4 — cream finishing edge
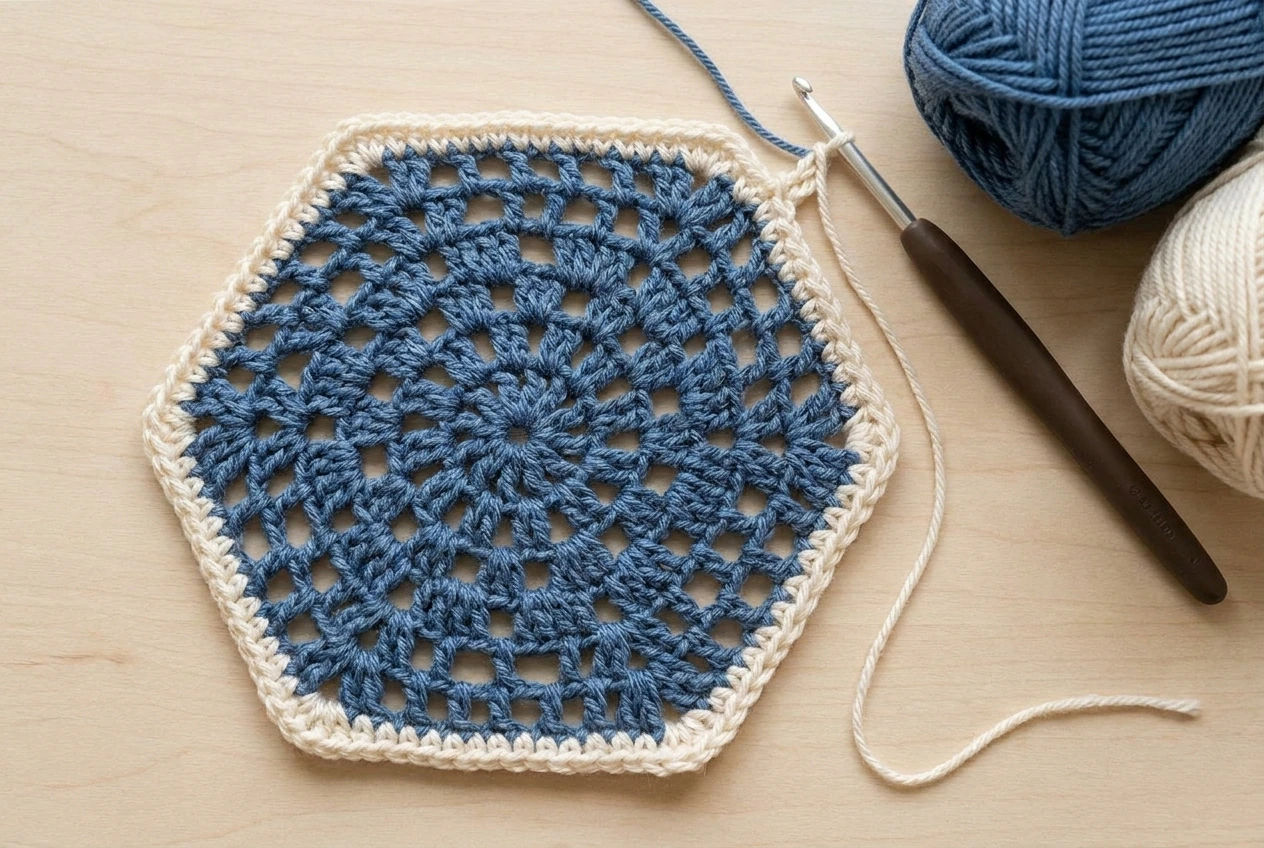
Change to CC1. Join cream in any ch-2 corner space. Ch 1, then work (sc, ch 2, sc) in that same corner. Sc evenly across the side to the next corner. Repeat around, placing (sc, ch 2, sc) in every corner. Join with a sl st to the first sc and fasten off.
Repeat rounds 1–4 until you have nine consistent motifs. Leave a useful cream tail if you plan to whip stitch. Matching motif size matters more than forcing an exact hook tension.
Part 2: Arrange and join the nine motifs
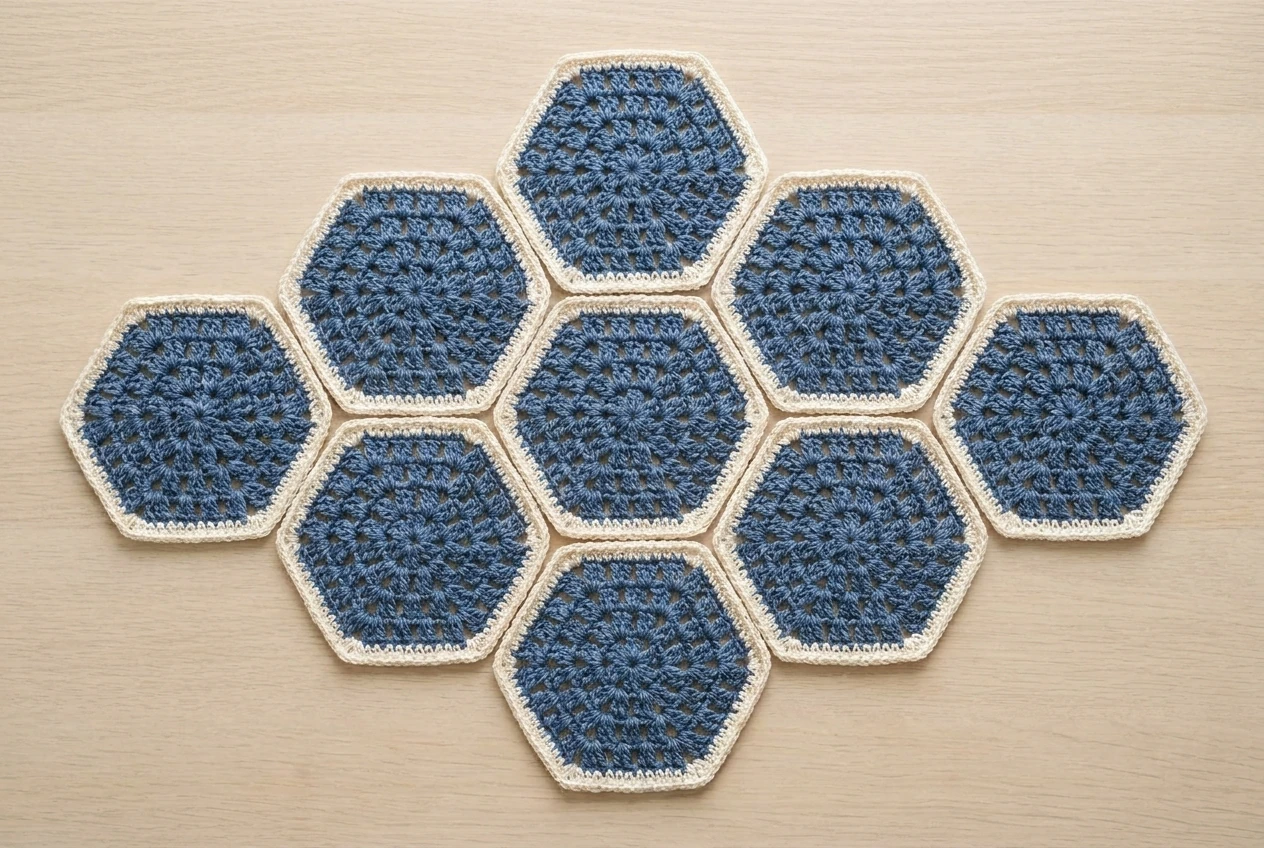
The assembly phase of the hexagon tote bag pattern begins after all nine pieces are complete. Block the motifs lightly to the same 4.5-inch measurement. Arrange them in three offset rows of three. Place the most even motifs at the upper opening and reserve any slightly denser pieces for the lower portion of the bag.
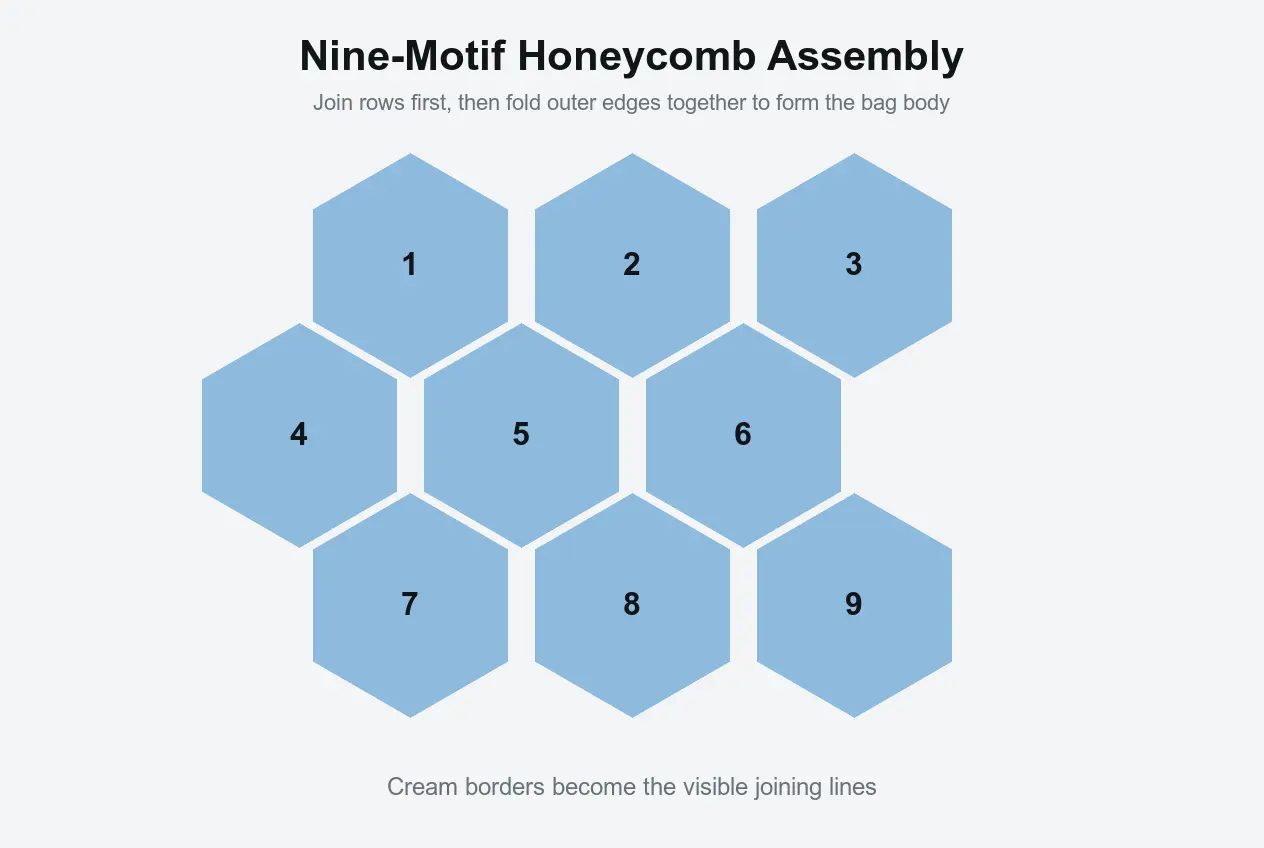
- Join the three motifs in the lower row edge-to-edge using CC1.
- Join the three middle motifs, then the three top motifs.
- Offset the rows according to the honeycomb schematic and connect matching sides.
- Fold the panel so the two outer edges meet at the back.
- Seam the final vertical edges together, leaving the top open.
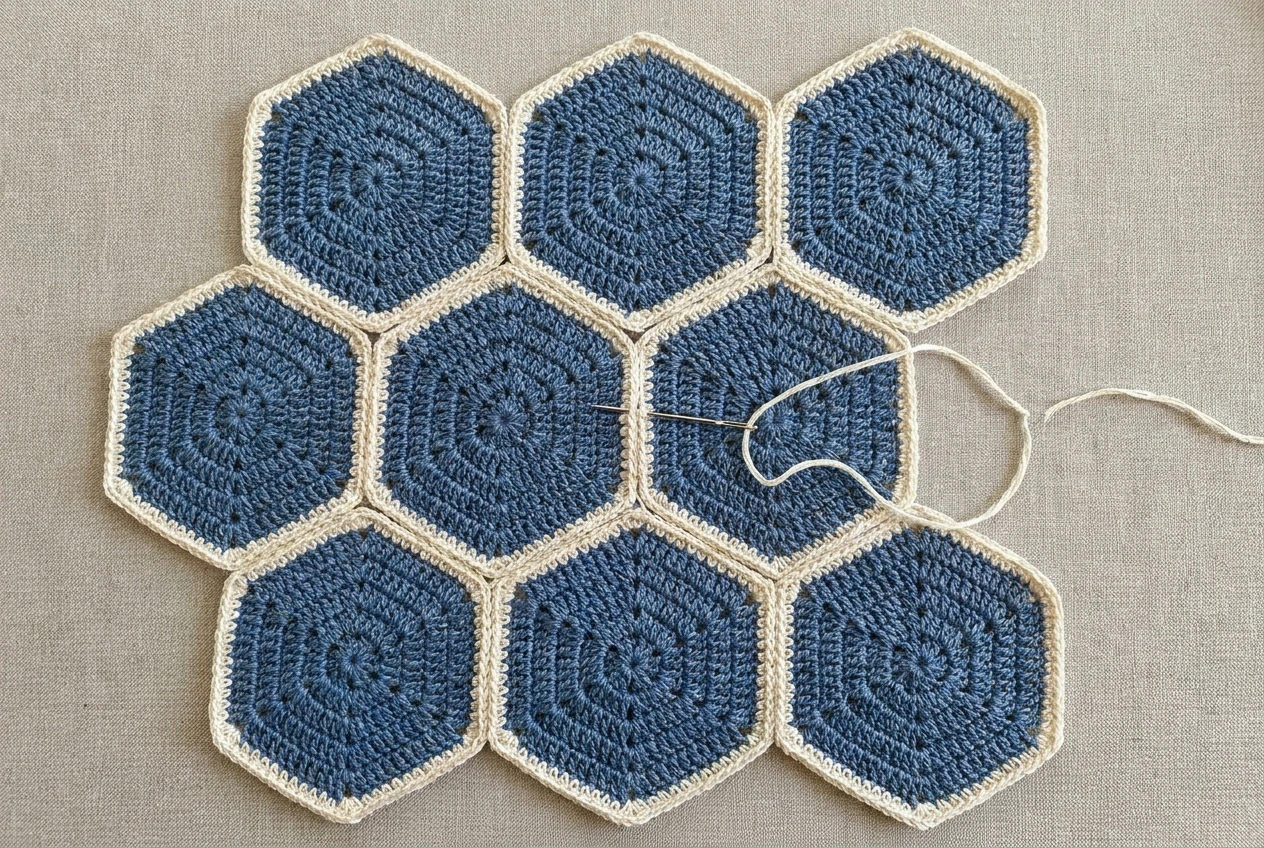
For this hexagon tote bag pattern, the joining tension controls the final structure. For a visible flat join, hold two motifs edge-to-edge with right sides facing up and whip stitch through corresponding cream edge loops. Use even tension: the seam should close the gap without drawing the motifs into a ridge.
An alternative is a single-crochet join. That method adds a stronger raised line. Whichever option you choose, use it consistently across the entire hexagon tote bag pattern.
Part 3: Shape the bag body and add the bottom
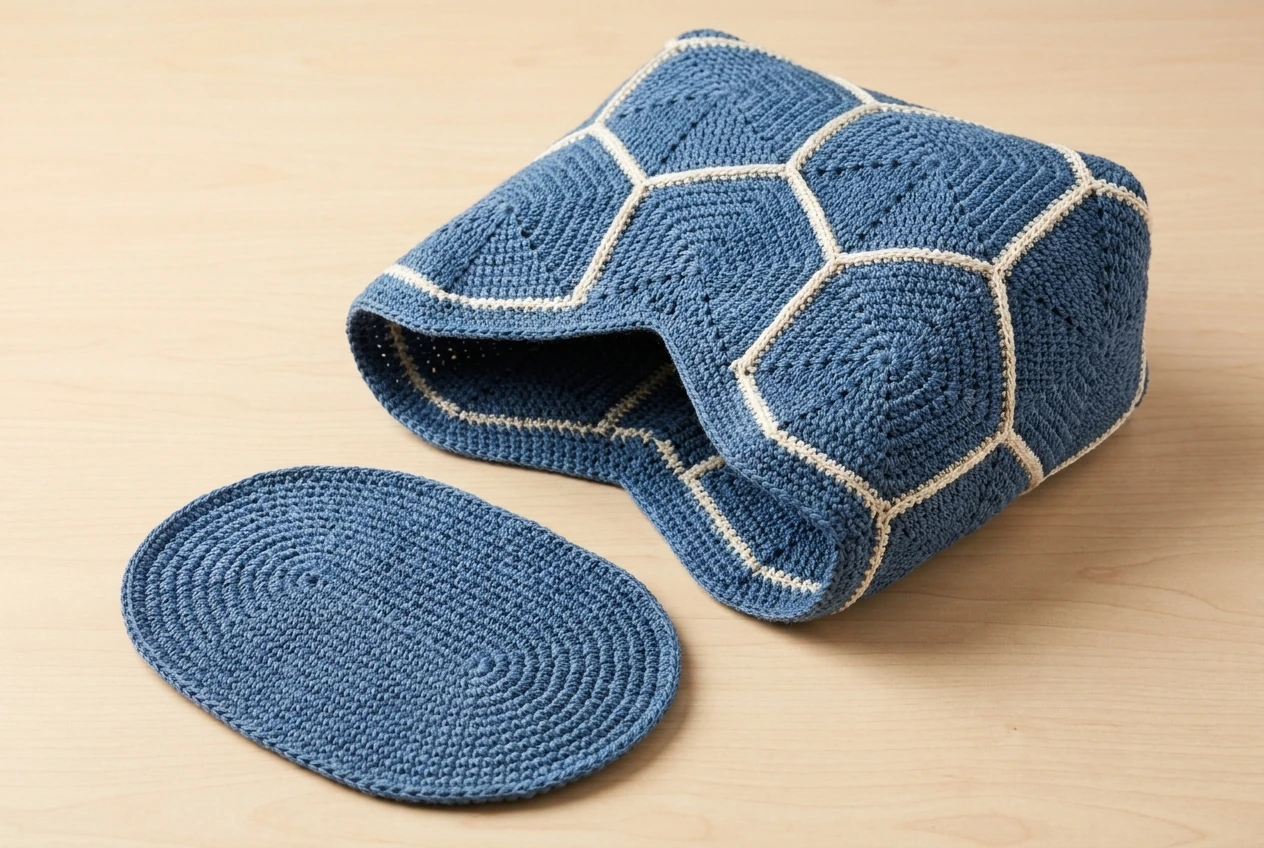
The base gives the hexagon tote bag pattern its carrying capacity. After the back seam is closed, set the body upright and measure the lower opening. Using MC, crochet a flat oval or softly shaped panel approximately 13 × 5 in (33 × 13 cm), adjusting it to match your actual bag circumference.
Pin the base to the lower edge at several points: center front, center back, and both sides. Add more pins between them, distributing any small difference evenly. Seam around the perimeter with CC1. Reinforce the starting and ending area before weaving in the tail.
A practical hexagon tote bag pattern needs a stable bottom. If the crocheted base feels flexible, cut a slightly smaller plastic-canvas or stiff-interfacing insert and place it between the crochet and lining.
Parts 4 and 5: Finish the top and make handles
The opening of the hexagon tote bag pattern needs two firm finishing rounds. Top round 1: Join CC1 at the opening and sc evenly around, smoothing the dips and points created by the motifs. Do not cram too many stitches into the valleys. Join with sl st.
Top round 2: Ch 1 and sc evenly around again. Join, fasten off, and weave in the tail. This double edge gives the opening a stable foundation for the handles and lining.
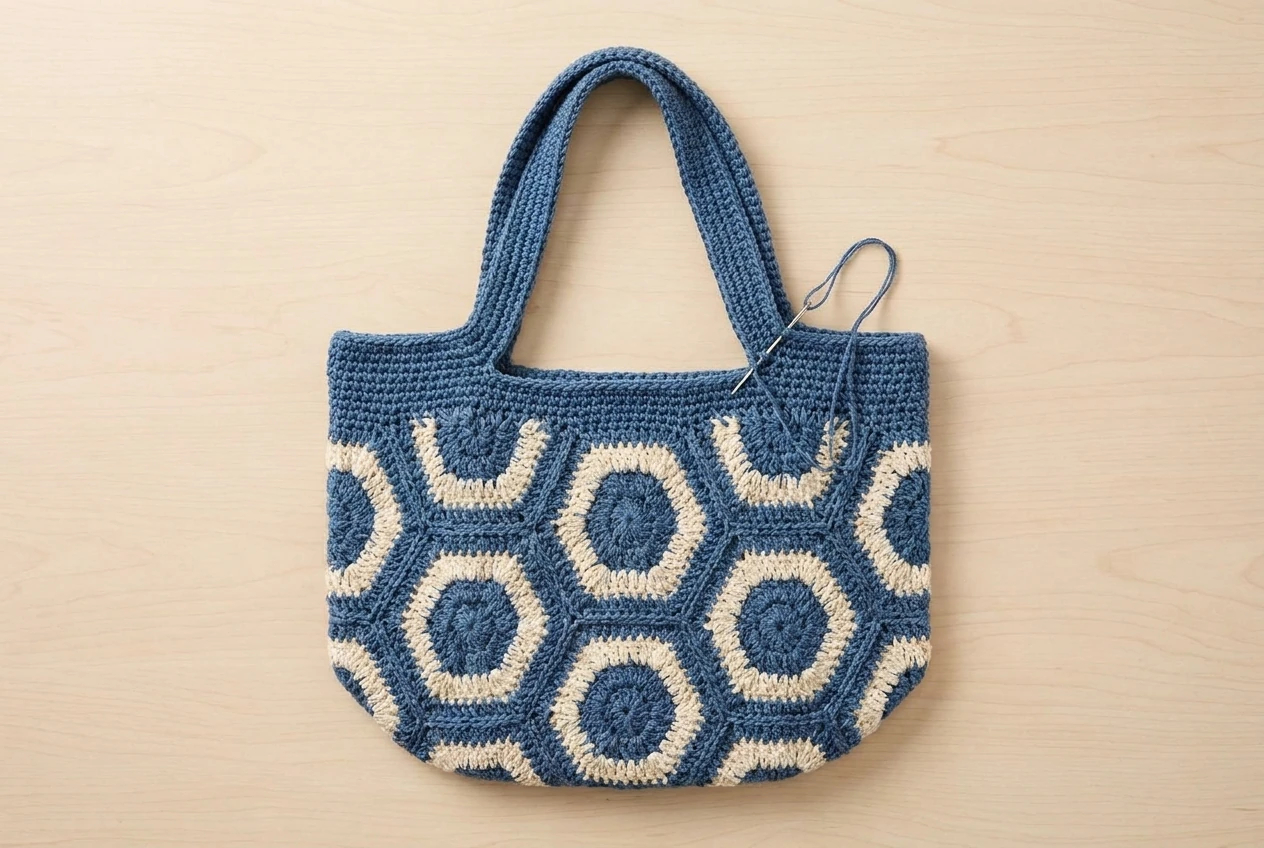
Make two handles with MC: Ch 8. For row 1, sc in the second ch from the hook and in each ch across—7 sts. For rows 2–60, ch 1, turn, and sc across—7 sts per row. Continue until each handle measures about 20 in (51 cm) or your preferred length.
The handles complete the functional structure of the hexagon tote bag pattern. For a rounder handle, fold the strip lengthwise and sl st the long edges together. Position one handle on the front and one on the back with equal spacing. Sew each end firmly to the inside upper edge and reinforce through several rows.
Load-bearing points deserve extra care in this hexagon tote bag pattern. Tug each handle gently after attachment. If the upper edge deforms, add a narrow fabric reinforcement strip behind the lining.
Part 6: Crochet the flower and leaves
The flower gives the hexagon tote bag pattern its signature handmade accent. White petals
Ch 2 and work 8 sc in the second ch from the hook. Join with sl st. For each of the eight stitches, work (ch 3, sl st in the same st) to create eight loop petals. Fasten off with a sewing tail.
Yellow center
Ch 2 and work 6 sc in the second ch from the hook. Join with sl st and fasten off. Sew the yellow circle to the center of the white petal piece.
Sage leaves — make 2
Ch 6. Beginning in the second ch from the hook, work sl st, sc, hdc, dc, then 3 dc in the last chain for the tip. Continue down the opposite side with dc, hdc, sc, and sl st. Fasten off with a tail.
Layer both leaves behind the flower and sew the pieces together. Attach the embellishment near the upper left handle base, as shown in the completed hexagon tote bag pattern sample.
Part 7: Add lining, closure, and final details
- Weave in every loose yarn end and inspect all motif joins.
- Measure the bag interior. Cut two lining panels plus seam allowance; add a pocket now if desired.
- Sew the lining side and bottom seams, leaving the top open.
- Install a magnetic snap or button before placing the lining inside the bag.
- Turn the top lining allowance to the wrong side and pin it just below the crochet edge.
- Hand-sew with small invisible stitches, keeping the needle on the inside of the crochet edge.
- Lightly block the bag and allow it to dry completely before loading it.
A well-fitted lining makes the hexagon tote bag pattern more durable in daily use. The lining should support the body without pulling the motif walls inward. Put a folded towel inside while pinning if you need the tote to hold its shape. Keep the magnetic snap centered between the handles.
Your hexagon tote bag pattern is complete when the base sits flat, the opening is level, both handles have equal drop, the lining is smooth, and the flower sits securely without covering a handle seam.
Size, color, and construction variations
Smaller bag: Use six motifs arranged as two rows of three and reduce the base and handle length proportionally. Larger tote: Add a fourth row of three motifs, then enlarge the base and lining after measuring the assembled body.
Color options: Swap denim and cream for terracotta and ivory, navy and mustard, sage and natural, or alternating blue shades. Keep the final joining round consistent if you want the honeycomb lines to remain prominent.
Hardware options: Replace the crocheted handles with purchased leather or fabric handles. Add a zippered lining pocket, a key loop, or a removable base insert. Omit the flower for a minimal version.
Personalizing the hexagon tote bag pattern is easiest after you understand the original proportions. Any variation should preserve the core logic of the hexagon tote bag pattern: equal motifs, accurate joining, a measured base, a stabilized opening, and reinforced carrying points.
Frequently asked questions
How many hexagons do I need?
The standard tote uses nine identical motifs. Six make a shorter bag, while twelve can make a taller version if the base and lining are adjusted.
Why are my hexagons cupping?
Check that every corner contains the complete corner sequence and relax your tension. Light blocking can correct a small amount of cupping, but missing corner chains must be repaired.
Can I use acrylic yarn?
You can, but cotton or a cotton blend provides better definition and less stretch. If using acrylic, add firm lining and base reinforcement.
Is the fabric lining optional?
Technically yes, but it is strongly recommended. It supports the crochet body, protects motif joins, and keeps small items inside.
How can I make the handles stronger?
Use dense stitches, fold and seam the straps lengthwise, reinforce each attachment point, and sew a support strip behind the lining.
The finished hexagon tote bag pattern is sturdy enough for everyday essentials when the base, handles, and lining are reinforced. Save this hexagon tote bag pattern for a focused motif project that combines crochet, assembly, and simple sewing. Work carefully through one stage at a time, compare your motif against the clean schematic, and measure the assembled body before making the base and lining.




