

How to Crochet a Shell-Stitch Sun Cap in 10 Steps
A shell-stitch sun cap combines an openwork crown, a curved dense brim, and a button-back opening in one carefully sequenced summer project. This ten-step roadmap follows the supplied seven-page premium PDF from the magic-ring start to final blocking. It helps you understand the build before you commit yarn, while the official pattern remains the authority for every stitch count and size-specific instruction.
The pattern is written in US terminology for adult S/M, fitting approximately 53–56 cm, and L/XL, fitting approximately 58–60 cm. If you plan to make one for someone else, browse the crochet sun cap pattern gift guide before choosing color and size. Do not claim UV protection: this openwork crochet accessory is decorative and the PDF provides no tested sun-protection rating.
In this article
- Step 1: Start the Crown From a Magic Ring
- Step 2: Work the First Shell Round
- Step 3: Increase From 8 to 16 Shells
- Step 4: Build the Brick-Style Crown Sides
- Step 5: Convert the Shells to a Dense Band
- Step 6: Mark the Front and Create the Back Opening
- Step 7: Crochet the Curved Brim
- Step 8: Add the Optional Stiffened Brim
- Step 9: Make the Back Strap and Attach the Button
- Step 10: Cover the Crown Button and Block
Step 1: Start the Crown From a Magic Ring
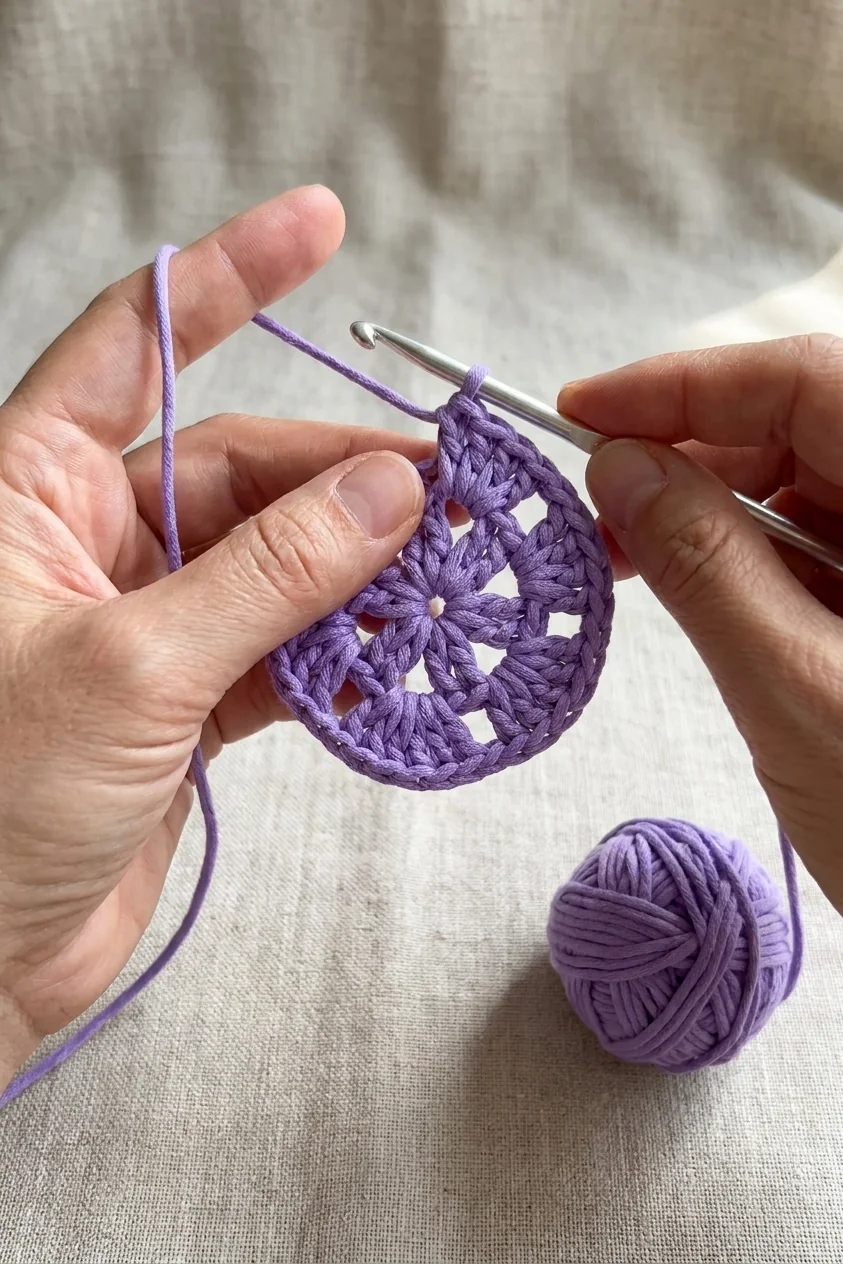
With lavender CYC #3 DK cotton and a 4.0 mm / G-6 hook, begin with a magic ring. Chain three, work two double crochets, then repeat chain two and three double crochets seven times. Chain two and join. The first round ends with eight groups and eight chain spaces.
The chain three counts as the first double crochet. Tighten the ring enough to close the center while keeping the stitches free to pivot. Place a join marker so the start of each joined round remains visible.
Shell-stitch sun cap checkpoint
Confirm the stitch or shell count from the official PDF, record your actual gauge, and correct any ruffling, inward pull, or asymmetry before continuing.
Pause at this point and examine step 1: start the crown from a magic ring in natural light. Count the repeat, compare both sides, and note the active size before moving on. A removable marker and a one-line project note prevent small orientation errors from becoming several rounds of rework.
The supporting visual is an independently generated instructional reference based on the supplied finished-cap image. It is not a cropped pattern page and should not replace the official written instructions. Your yarn, tension, and blocking method may produce a slightly different texture while still meeting the verified measurements.
Step 2: Work the First Shell Round
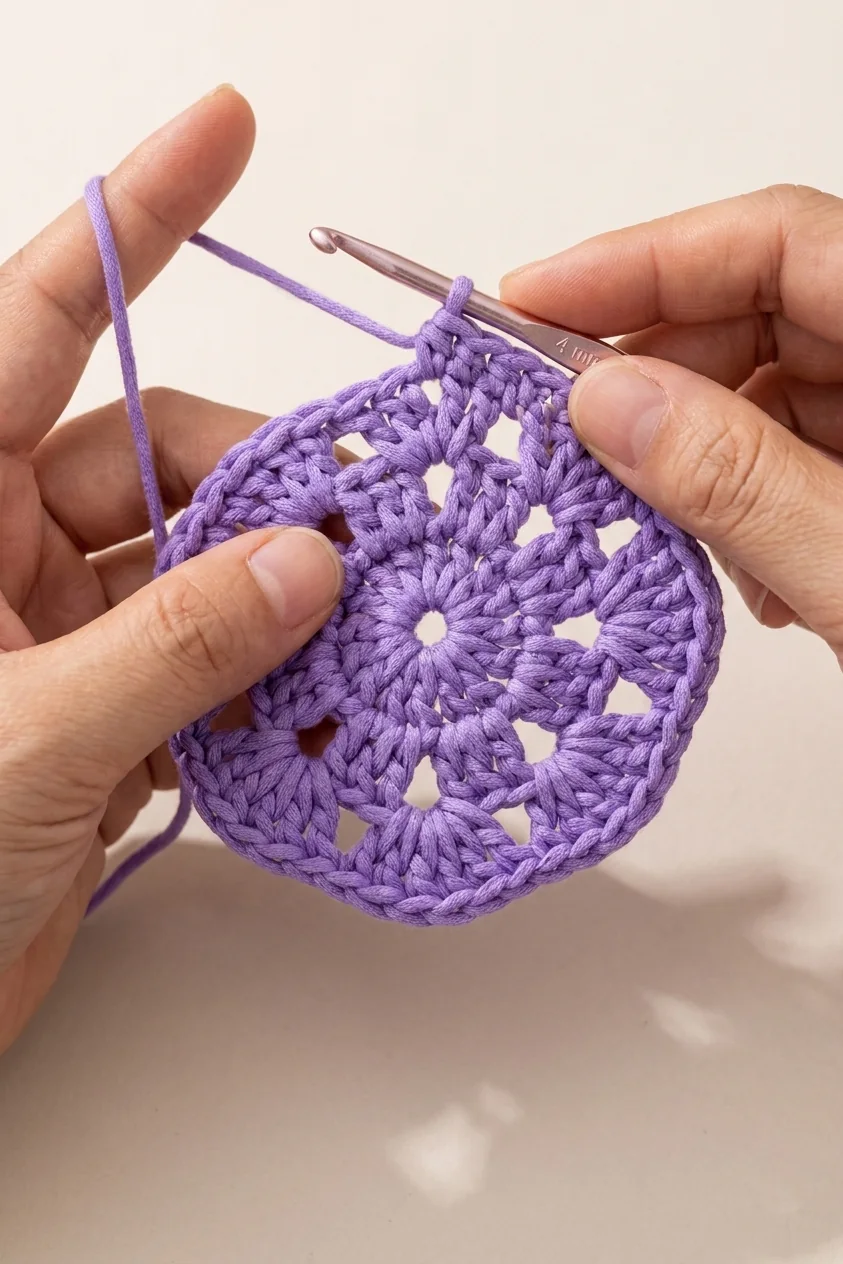
Slip stitch to the next chain-two space. Work five double crochets and chain one in that space, then repeat in every remaining space. Join after the eighth shell. In this pattern, a shell means five double crochets in the same space.
Count shell units rather than individual double crochets. Eight evenly spaced shells create the foundation for the single controlled doubling round that follows.
Shell-stitch sun cap checkpoint
Confirm the stitch or shell count from the official PDF, record your actual gauge, and correct any ruffling, inward pull, or asymmetry before continuing.
Pause at this point and examine step 2: work the first shell round in natural light. Count the repeat, compare both sides, and note the active size before moving on. A removable marker and a one-line project note prevent small orientation errors from becoming several rounds of rework.
The supporting visual is an independently generated instructional reference based on the supplied finished-cap image. It is not a cropped pattern page and should not replace the official written instructions. Your yarn, tension, and blocking method may produce a slightly different texture while still meeting the verified measurements.
Step 3: Increase From 8 to 16 Shells
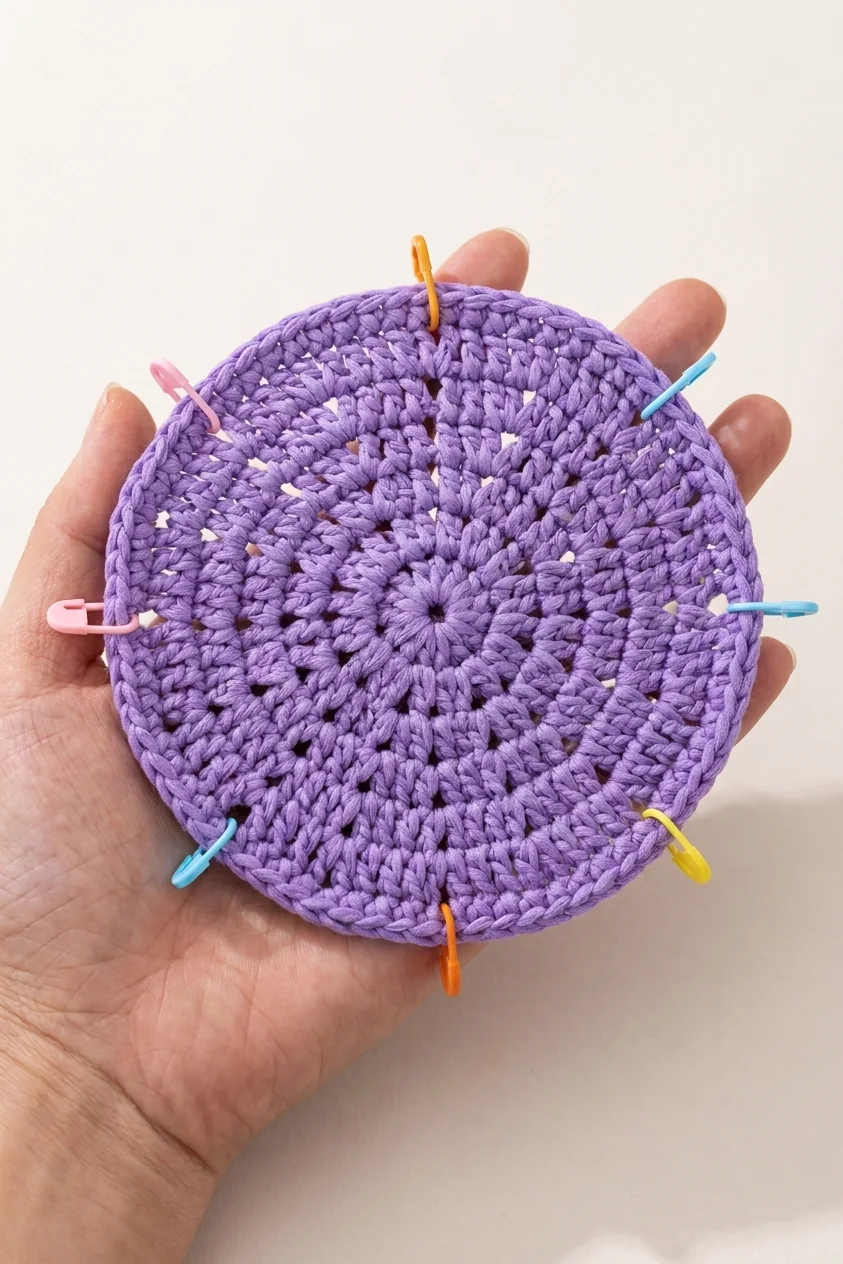
Before Round 3, mark the join and all eight increase points. In every marked chain-one space, work shell, chain one, shell, chain one. Each previous space now supports two shells, so the round finishes with sixteen shells.
Spread the work flat and check that all increases are present. Missing one point distorts the later dome; adding an extra one encourages ruffling. Keep the markers until the count is confirmed.
Shell-stitch sun cap checkpoint
Confirm the stitch or shell count from the official PDF, record your actual gauge, and correct any ruffling, inward pull, or asymmetry before continuing.
Pause at this point and examine step 3: increase from 8 to 16 shells in natural light. Count the repeat, compare both sides, and note the active size before moving on. A removable marker and a one-line project note prevent small orientation errors from becoming several rounds of rework.
The supporting visual is an independently generated instructional reference based on the supplied finished-cap image. It is not a cropped pattern page and should not replace the official written instructions. Your yarn, tension, and blocking method may produce a slightly different texture while still meeting the verified measurements.
Step 4: Build the Brick-Style Crown Sides
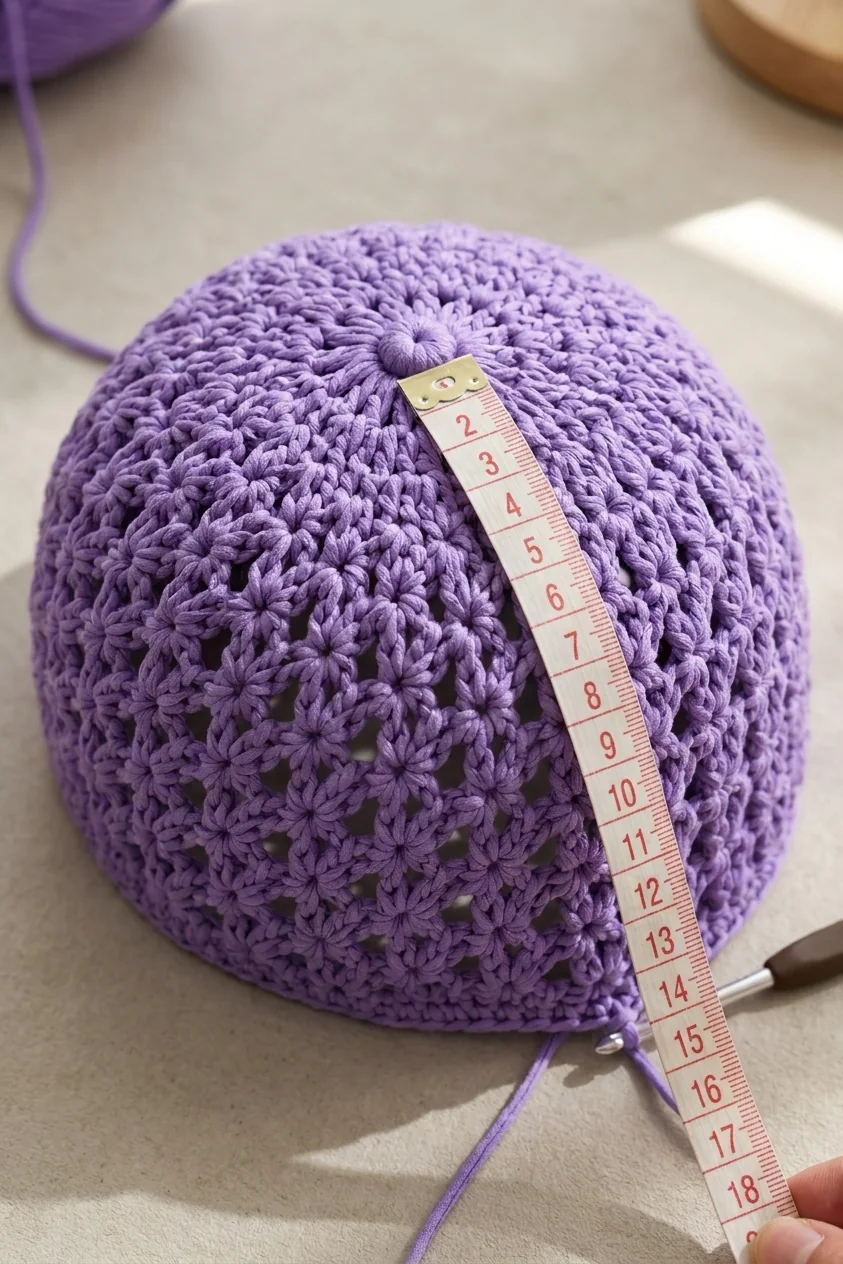
For Round 4 and following rounds, chain one, work a shell in the next chain-one space, chain one, skip the next shell, and repeat. Alternate shells over previous chain spaces and then centered over previous shells. This offset creates the brick-style mesh.
Maintain sixteen shells in each even round. Continue until the crown measures approximately 17 cm / 6.75 in from the center top, ending after a complete round. The PDF notes that the actual round count must be recorded after physical gauge testing.
Shell-stitch sun cap checkpoint
Confirm the stitch or shell count from the official PDF, record your actual gauge, and correct any ruffling, inward pull, or asymmetry before continuing.
Pause at this point and examine step 4: build the brick-style crown sides in natural light. Count the repeat, compare both sides, and note the active size before moving on. A removable marker and a one-line project note prevent small orientation errors from becoming several rounds of rework.
The supporting visual is an independently generated instructional reference based on the supplied finished-cap image. It is not a cropped pattern page and should not replace the official written instructions. Your yarn, tension, and blocking method may produce a slightly different texture while still meeting the verified measurements.
Step 5: Convert the Shells to a Dense Band
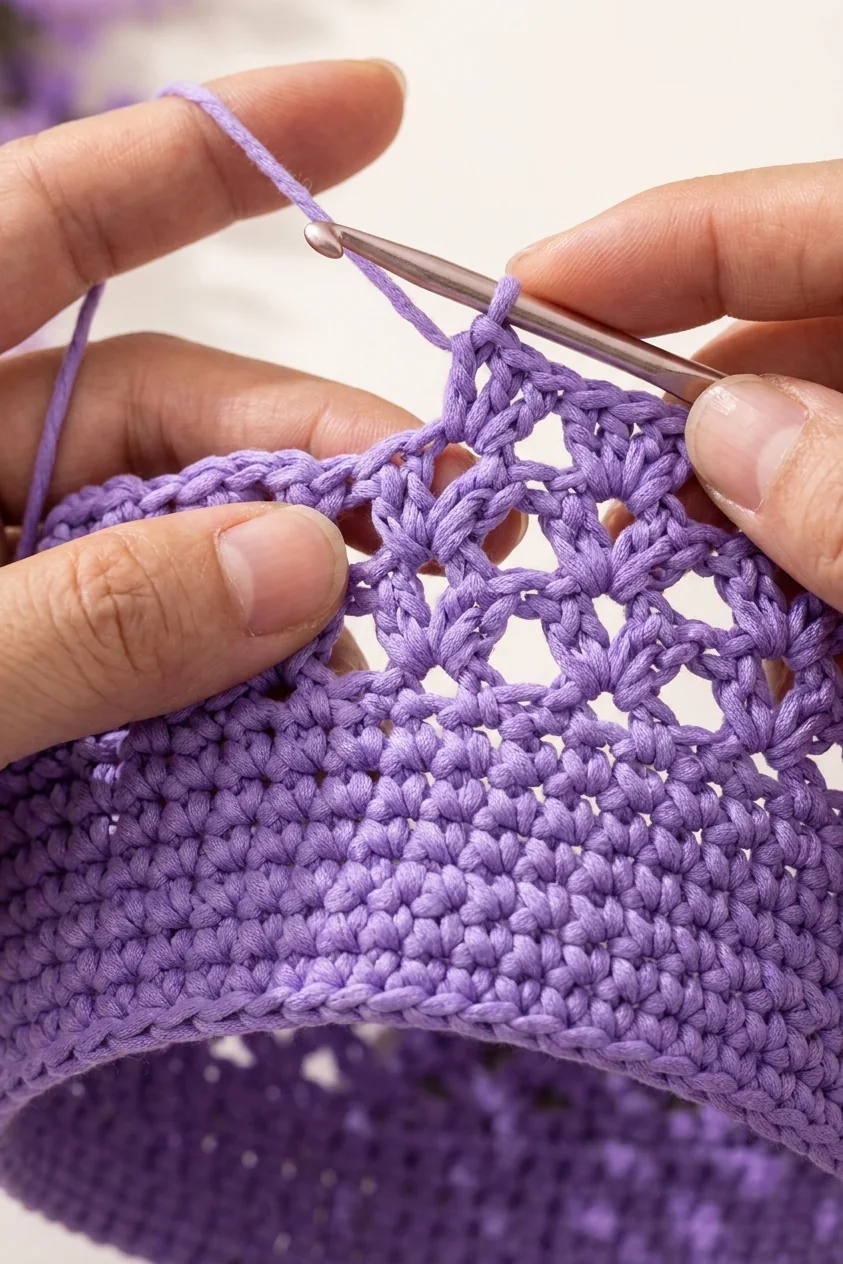
For S/M, work exactly seven single crochets across each of the sixteen shell units for 112 stitches. For L/XL, alternate eight and seven single crochets across the units for 120 stitches. Join, then work two plain single-crochet band rounds at the same count.
Distribute stitches consistently across every shell instead of crowding extra stitches near joins. The transition should lie smooth without flaring or pulling the open crown inward.
Ready to make the cap?
The listing contains the complete illustrated digital pattern, size-specific stitch counts, and construction sequence. It is a pattern, not a finished hat.
Shell-stitch sun cap checkpoint
Confirm the stitch or shell count from the official PDF, record your actual gauge, and correct any ruffling, inward pull, or asymmetry before continuing.
Pause at this point and examine step 5: convert the shells to a dense band in natural light. Count the repeat, compare both sides, and note the active size before moving on. A removable marker and a one-line project note prevent small orientation errors from becoming several rounds of rework.
The supporting visual is an independently generated instructional reference based on the supplied finished-cap image. It is not a cropped pattern page and should not replace the official written instructions. Your yarn, tension, and blocking method may produce a slightly different texture while still meeting the verified measurements.
Step 6: Mark the Front and Create the Back Opening
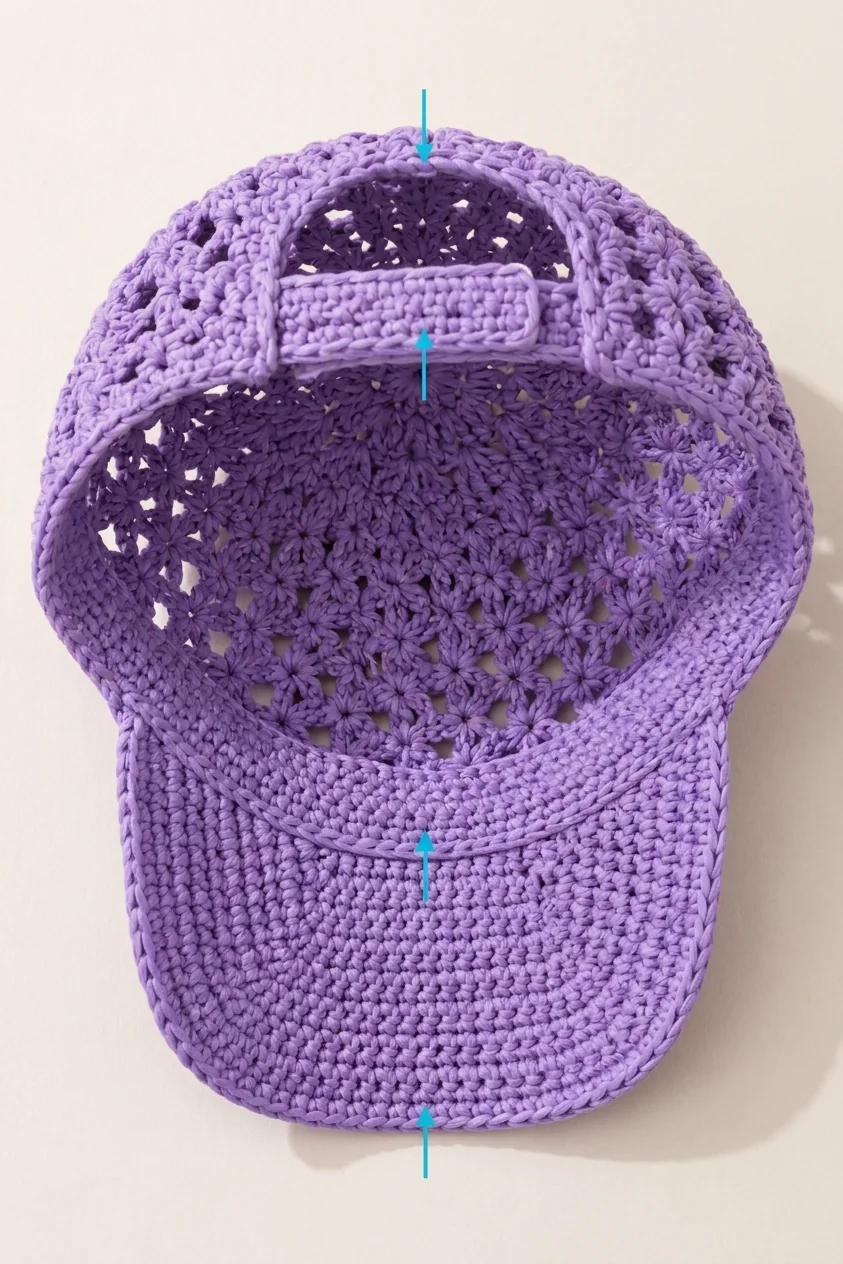
Center and mark 34 consecutive front stitches for the brim. Center and mark sixteen back stitches to leave unworked. The remaining 96 (104) stitches become the front-and-side opening-height rows.
Single crochet across all stitches except the marked back sixteen, then turn. Repeat flat single-crochet rows through Row 6 and fasten off. The unworked stitches and six-row strip create an opening intended to measure approximately 8 × 6 cm after finishing.
Shell-stitch sun cap checkpoint
Confirm the stitch or shell count from the official PDF, record your actual gauge, and correct any ruffling, inward pull, or asymmetry before continuing.
Pause at this point and examine step 6: mark the front and create the back opening in natural light. Count the repeat, compare both sides, and note the active size before moving on. A removable marker and a one-line project note prevent small orientation errors from becoming several rounds of rework.
The supporting visual is an independently generated instructional reference based on the supplied finished-cap image. It is not a cropped pattern page and should not replace the official written instructions. Your yarn, tension, and blocking method may produce a slightly different texture while still meeting the verified measurements.
Step 7: Crochet the Curved Brim
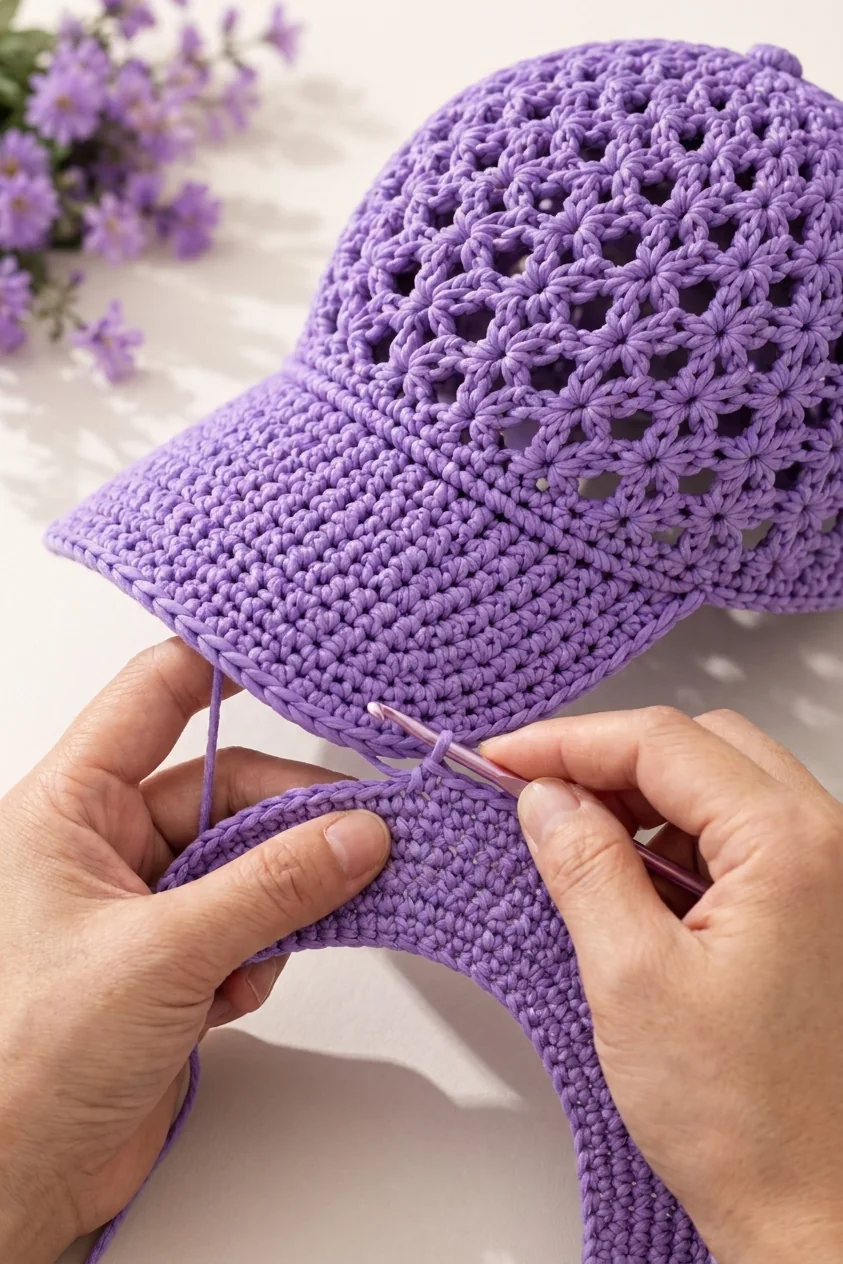
Work Row 1 across the marked front 34 stitches. On Rows 2, 4, and 6, work two single crochets in both the first and last stitches; work Rows 3, 5, and 7 evenly. The counts progress from 34 to 36, 38, and finally 40 stitches.
Do not fasten off after Row 7. Work a single-crochet edge down one side, around the outer curve, and up the other side. The paired edge increases create controlled width while keeping the brim centered.
Shell-stitch sun cap checkpoint
Confirm the stitch or shell count from the official PDF, record your actual gauge, and correct any ruffling, inward pull, or asymmetry before continuing.
Pause at this point and examine step 7: crochet the curved brim in natural light. Count the repeat, compare both sides, and note the active size before moving on. A removable marker and a one-line project note prevent small orientation errors from becoming several rounds of rework.
The supporting visual is an independently generated instructional reference based on the supplied finished-cap image. It is not a cropped pattern page and should not replace the official written instructions. Your yarn, tension, and blocking method may produce a slightly different texture while still meeting the verified measurements.
Step 8: Add the Optional Stiffened Brim
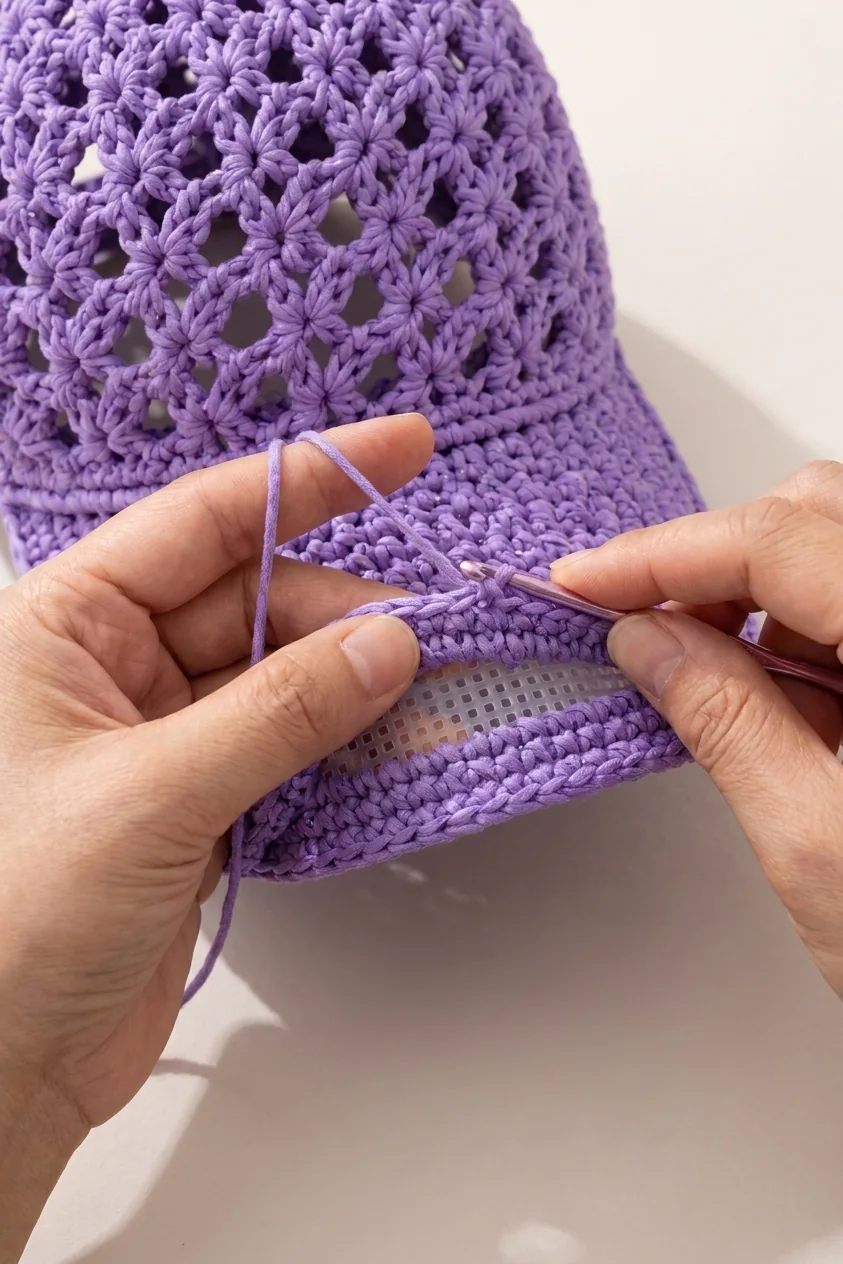
For the firmest option, crochet a second brim identical to Rows 1–7. Cut plastic canvas slightly smaller than the crochet shape and round every corner. Place it between the wrong sides of both brim layers.
Work the perimeter edge through both layers, fully enclosing the insert. Inspect the entire edge so no point or cut plastic is exposed. Alternatives in the PDF are a 3.5 mm hook for denser fabric or fabric stiffener applied after blocking.
Shell-stitch sun cap checkpoint
Confirm the stitch or shell count from the official PDF, record your actual gauge, and correct any ruffling, inward pull, or asymmetry before continuing.
Pause at this point and examine step 8: add the optional stiffened brim in natural light. Count the repeat, compare both sides, and note the active size before moving on. A removable marker and a one-line project note prevent small orientation errors from becoming several rounds of rework.
The supporting visual is an independently generated instructional reference based on the supplied finished-cap image. It is not a cropped pattern page and should not replace the official written instructions. Your yarn, tension, and blocking method may produce a slightly different texture while still meeting the verified measurements.
Step 9: Make the Back Strap and Attach the Button
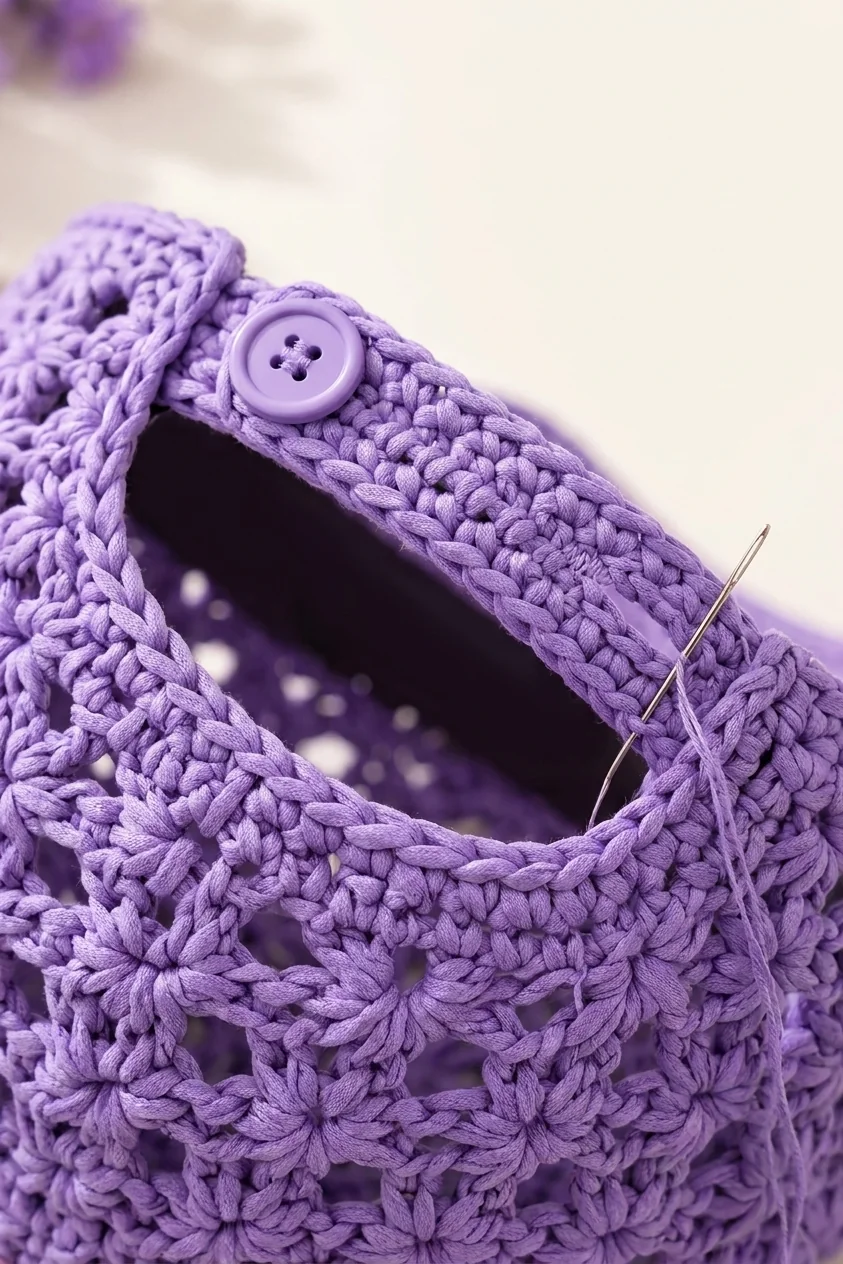
Chain ten and single crochet from the second chain for nine stitches. Row 2 is three single crochets, chain two, skip two, then four single crochets. On Row 3, single crochet across and place two single crochets in the buttonhole space.
Sew the strap base to one upper corner of the opening and the 15 mm button to the opposite corner, aligned with the hole. The pattern places the button about 6 cm / 2.5 in above the lower band edge. Pull-test the attachment.
Shell-stitch sun cap checkpoint
Confirm the stitch or shell count from the official PDF, record your actual gauge, and correct any ruffling, inward pull, or asymmetry before continuing.
Pause at this point and examine step 9: make the back strap and attach the button in natural light. Count the repeat, compare both sides, and note the active size before moving on. A removable marker and a one-line project note prevent small orientation errors from becoming several rounds of rework.
The supporting visual is an independently generated instructional reference based on the supplied finished-cap image. It is not a cropped pattern page and should not replace the official written instructions. Your yarn, tension, and blocking method may produce a slightly different texture while still meeting the verified measurements.
Step 10: Cover the Crown Button and Block
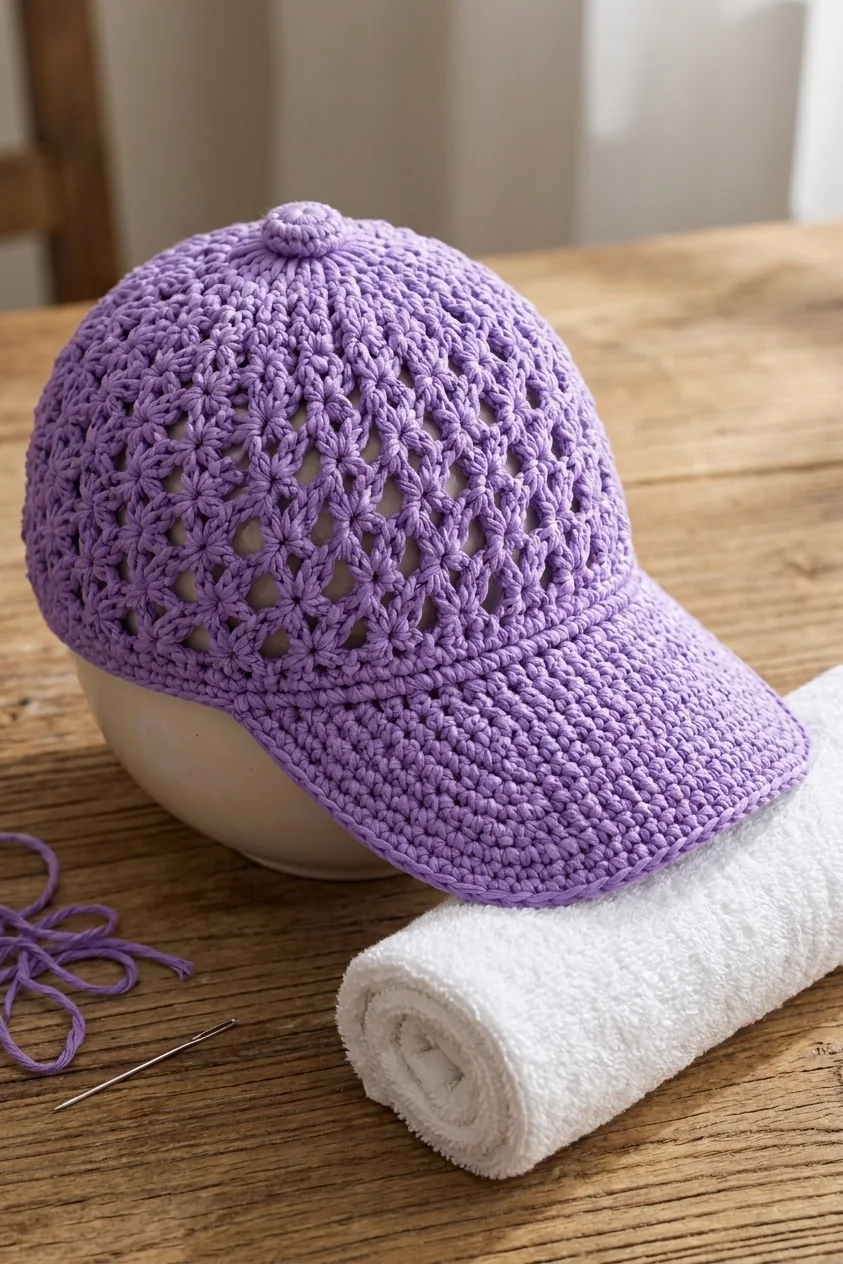
Make the top button in four rounds: six single crochets in a magic ring; increase to twelve; single crochet around; then single-crochet-two-together every other stitch to return to six. Insert a small wad of matching yarn scraps, close through the front loops, and sew firmly over the crown center.
Wet-block the crown over a bowl or balloon close to target circumference. Shape the brim over a rolled towel while damp and apply stiffener only if desired. After full drying, verify circumference, 17 cm crown depth, 7 × 17 cm brim, and 8 × 6 cm opening.
Shell-stitch sun cap checkpoint
Confirm the stitch or shell count from the official PDF, record your actual gauge, and correct any ruffling, inward pull, or asymmetry before continuing.
Pause at this point and examine step 10: cover the crown button and block in natural light. Count the repeat, compare both sides, and note the active size before moving on. A removable marker and a one-line project note prevent small orientation errors from becoming several rounds of rework.
The supporting visual is an independently generated instructional reference based on the supplied finished-cap image. It is not a cropped pattern page and should not replace the official written instructions. Your yarn, tension, and blocking method may produce a slightly different texture while still meeting the verified measurements.
Ready to make the cap?
The listing contains the complete illustrated digital pattern, size-specific stitch counts, and construction sequence. It is a pattern, not a finished hat.
Testing and publication note
The PDF says the crown shell gauge and finished measurements remain designer-confirmation items. Both sizes must be physically crocheted, blocked, and measured before the pattern is marketed as fully tested. Record actual yardage plus a 10–15% purchasing buffer.
Frequently Asked Questions
What skill level is needed?
The project combines joined rounds, shells, flat rows, shaping, optional enclosed support, a buttonhole, and blocking. A confident beginner may follow it carefully, but skill labels are subjective.
Can I substitute another DK yarn?
Swatch both dense single crochet and shell mesh, check blocked measurements, and assess drape. The written sample specifies smooth DK cotton.
How can I reduce a floppy brim?
Choose the optional plastic-canvas layer, a smaller hook for denser fabric, fabric stiffener after blocking, or a double layer. Test the chosen method before final assembly.
Can I scale it for a child?
No child grading is supplied. Do not infer child sizing or safety from the two adult sizes.
Does the cap provide sun protection?
No tested UV or protection rating is provided. Treat it as a decorative adult accessory, not protective equipment.
Final Checklist
- ✓ Crown holds sixteen shells without ruffling.
- ✓ Blocked dense gauge is 20 sc × 10 rows per 10 cm / 4 in.
- ✓ Brim is centered on 34 front stitches.
- ✓ Button and covered apex are firmly attached.
- ✓ Insert, if used, is fully enclosed.
- ✓ Final measurements are checked after complete drying.




