

My Crochet Universe · Woodland Crochet Series
17-Step Crochet Red Panda Mushroom Pattern: A Complete Step-by-Step Guide
Follow a complete 17-step crochet red panda mushroom pattern with exact rounds, striped tail, mushroom, acorn hat, assembly photos, and finishing checks.
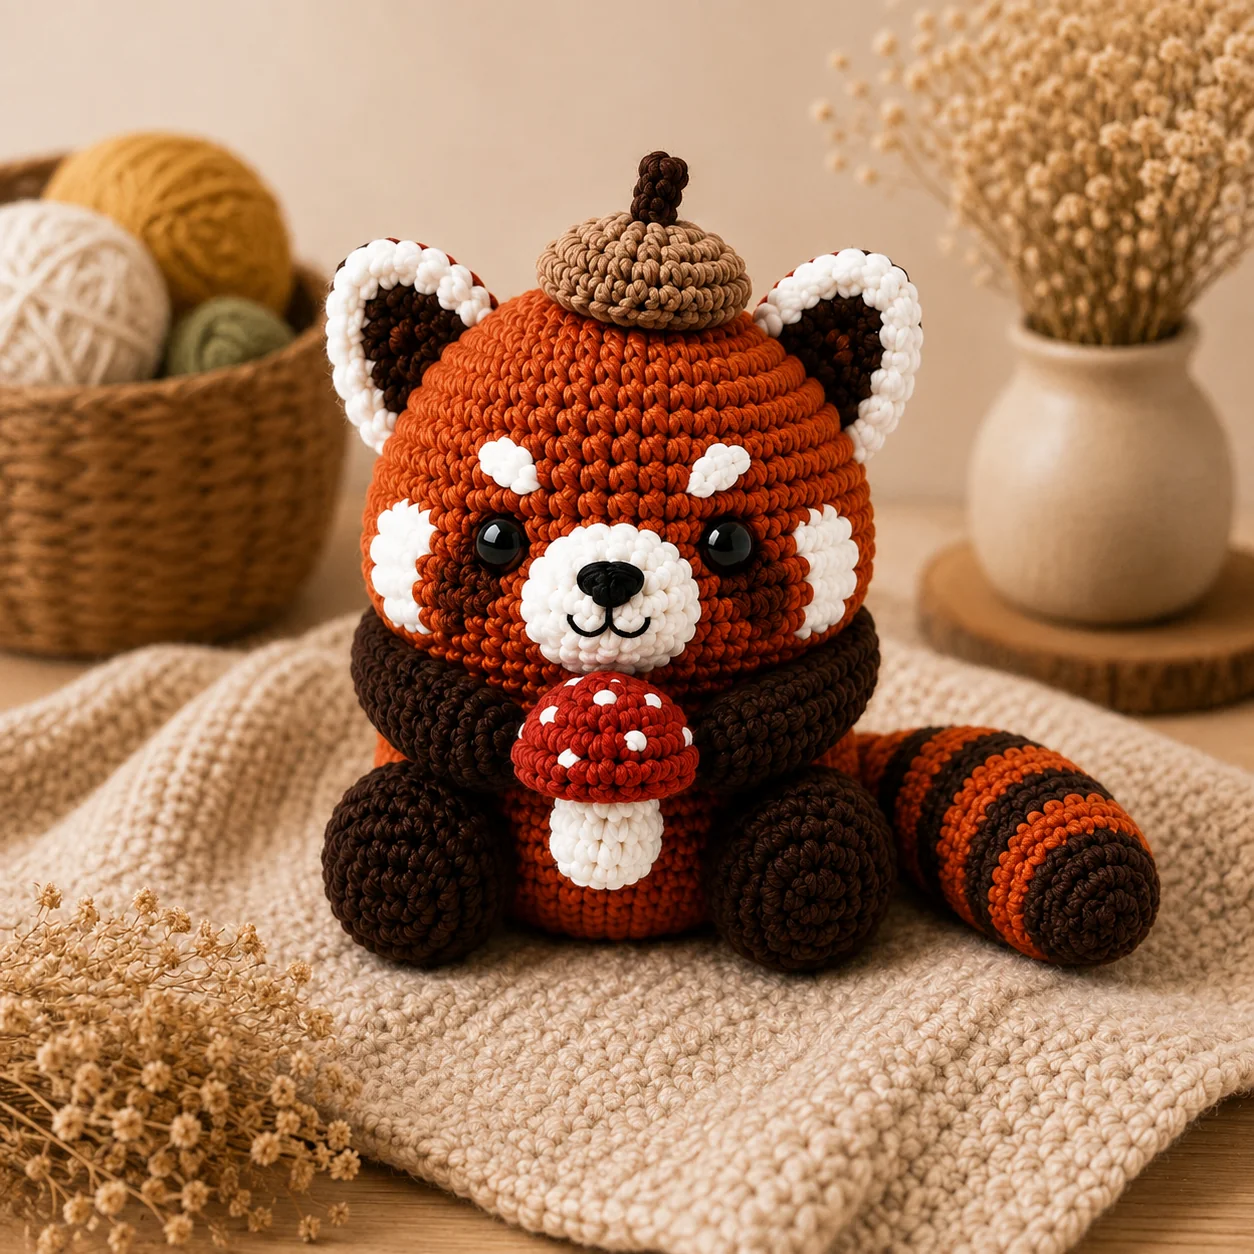
This crochet red panda mushroom pattern turns the complete supplied source into a readable WordPress tutorial. It keeps every construction stage, the mushroom, striped tail, acorn hat, assembly checks, and the source specification note together.
Materials and preparation
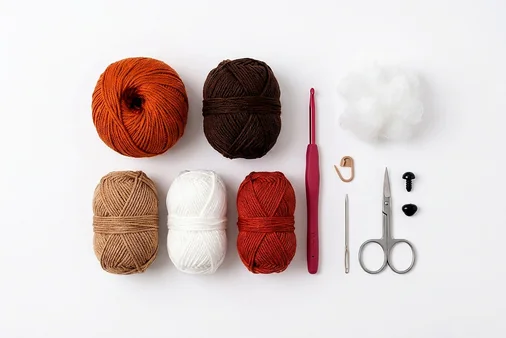
- 60–70 g burnt-orange category-4 cotton or acrylic yarn
- 35–40 g dark chocolate-brown yarn
- 20–25 g white yarn
- 10–15 g warm beige yarn
- 10–15 g brick-red yarn
- Black embroidery thread
- 8–10 mm safety eyes and optional 8–9 mm safety nose
- 30–40 g polyester fiberfill
- 3.0–3.5 mm hook, marker, yarn needle, scissors, pins, optional 3–4 cm base disk
Step 1: General notes
Use a 3.0–3.5 mm hook and work in continuous spiral rounds unless stated otherwise. Mark the first stitch and move the marker after every round. Maintain tight, even tension so fiberfill cannot show. The source also mentions plush chenille yarn with a 4.0 mm hook and a 25–30 cm result; the detailed worsted-weight version below produces approximately 12–15 cm.
Step 2: Body: lower section
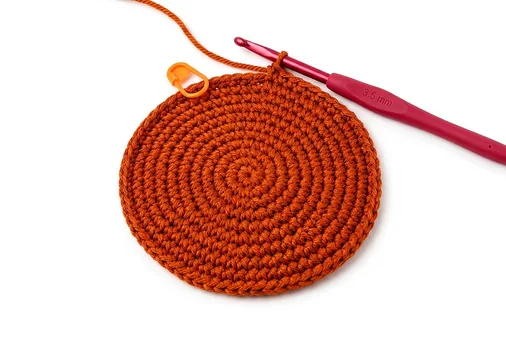
With burnt-orange worsted yarn, make a magic ring. Rnd 1: 6 sc. Rnd 2: inc around to 12. Rnd 3: (sc 1, inc) six times to 18. Continue the same six-increase rhythm: Rnd 4 to 24, Rnd 5 to 30, Rnd 6 to 36, and Rnd 7 to 42. Work Rnds 8–15 evenly at 42 stitches. The diameter should be approximately 6–7 cm.
Step 3: Body: upper section and closing
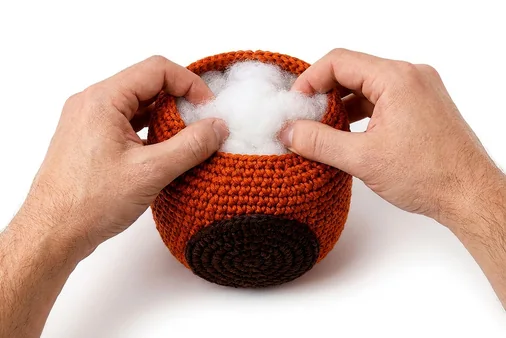
Rnd 16: (sc 5, dec) six times, 36. Rnd 17: (sc 4, dec) six times, 30. Insert the optional 3–4 cm cardboard or flat plastic base disk and begin firm stuffing. Rnd 18: (sc 3, dec) six times, 24. Rnd 19: (sc 2, dec) six times, 18. Rnd 20: (sc 1, dec) six times, 12. Fasten off with a long sewing tail and shape a flat neck area.
Step 4: Head: increasing and straight rounds
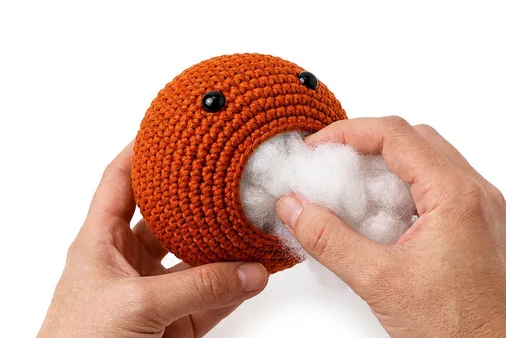
With burnt orange, make a magic ring. Increase from 6 stitches in Rnd 1 to 12, 18, 24, 30, 36, and 42 by Rnd 7. Work Rnds 8–13 evenly at 42 stitches. The head should measure roughly 7–8 cm across. Keep the front centered for later eyes and facial patches.
Step 5: Head: shaping and closing
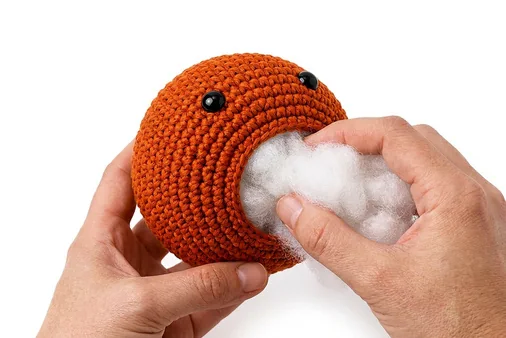
Decrease to 36 on Rnd 14, 30 on Rnd 15, and 24 on Rnd 16. Install 8–10 mm safety eyes between Rnds 10 and 11, approximately 7–8 stitches apart, and begin firm stuffing. Decrease to 18, 12, and 6 over Rnds 17–19. Thread the tail through the front loops of the final six stitches, pull closed, secure, and hide the end.
Step 6: Back legs and feet
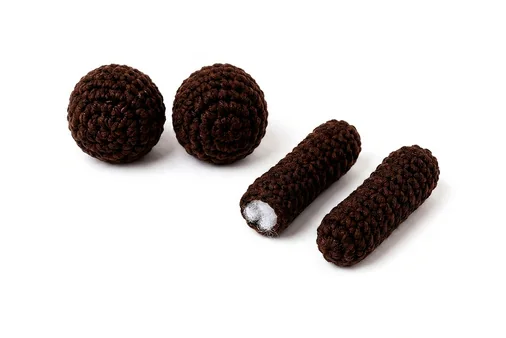
With dark chocolate-brown yarn, make two. Rnd 1: 6 sc. Rnd 2: (sc 1, inc) three times, 9. Rnd 3: (sc 2, inc) three times, 12. Work Rnds 4–6 evenly and stuff lightly. Rnd 7: (sc 2, dec) three times, 9. Rnd 8: dec three times, sc 3, leaving 6. Finish stuffing, fasten off with a sewing tail, and close as needed.
Keep all 17 pattern steps beside your hook
Keep the complete crochet red panda mushroom pattern, stitch counts, assembly sequence, and finishing notes together in the printable digital guide.
Step 7: Arms
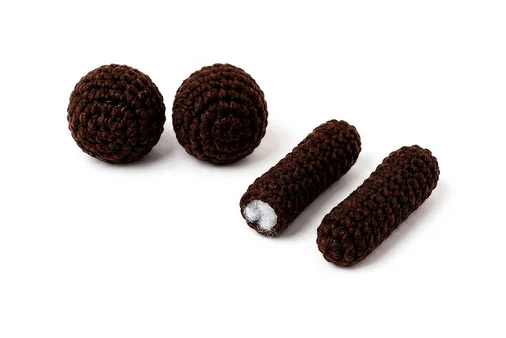
With dark brown, make two flexible arms. Rnd 1: 6 sc. Rnd 2: (sc 2, inc) twice, 8. Work Rnds 3–8 evenly at 8 stitches. Lightly stuff only the final 2–3 rounds so each arm can curve around the mushroom. Fasten off with long tails and flatten the openings without closing them completely.
Step 8: Striped tail
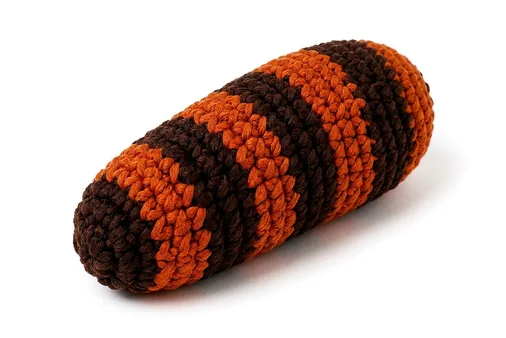
Start in burnt orange. Increase a magic ring from 6 to 12 to 18 over three rounds, then work Rnds 4–8 evenly. Rnd 9 decreases to 12; Rnd 10 stays 12. Increase to 15 on Rnd 11, work even on Rnd 12, increase to 18 on Rnd 13, and work Rnds 14–15 evenly while stuffing. Work orange Rnds 16–18, switch to brown for Rnds 19–21, then alternate two orange and two brown rounds until 11–12 cm. End brown, reduce to about 9–10 stitches, close, and curve the stuffed tail.
Step 9: Ears
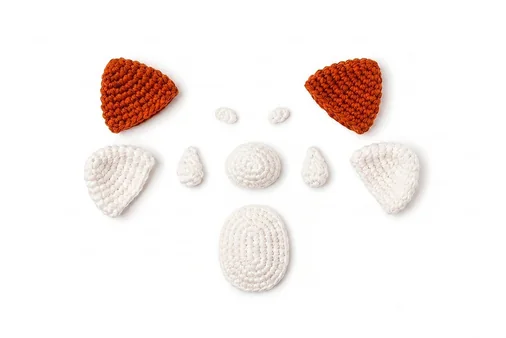
Make two orange outer ears. Ch 2; work rows of 2, 3, 4, 6, then 6 stitches, turning each row. Crochet one even sc border around the triangle, placing about 2 sc at corners, join, and leave a sewing tail. Make two white inner ears using Rows 1–4 only, ending at 6 stitches, then edge once. Sew each inner ear centrally, leave an orange border, and pinch the base inward.
Step 10: Facial and belly details
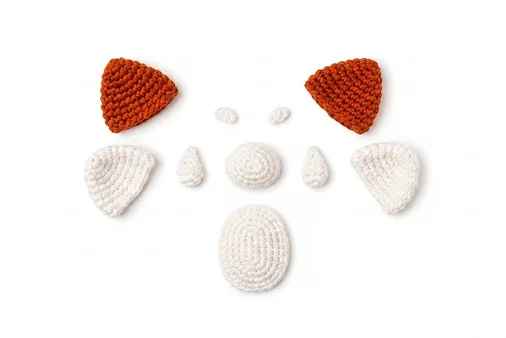
For each white cheek patch, work 4 sc in a magic ring, then (sc 1, inc) twice to 6; pinch into a teardrop. For the belly patch, increase 6 to 8 to 10 and leave a sewing tail. For the muzzle, increase 6 to 12 to 15, work one even round, lightly stuff, and leave a tail. Optional eyebrows are two-stitch white ovals made from ch 3.
Step 11: Mushroom accessory
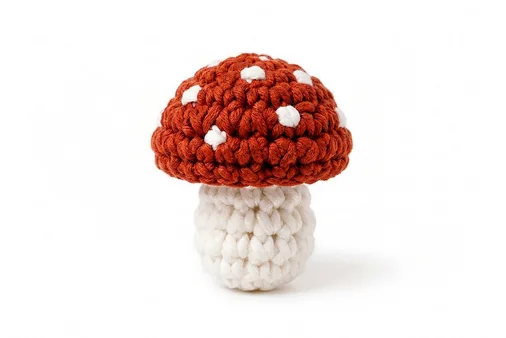
For the white stem: work 6 sc, one even round, increase to 8, work two rounds, lightly stuff, decrease to 6, and leave a flat top. For the brick-red cap: increase 6, 12, 18, 24; work Rnd 5 in back loops only; decrease to 18 on Rnd 6. Lightly stuff, sew the centered stem below, and add white French-knot or surface-knot spots.
Step 12: Acorn hat
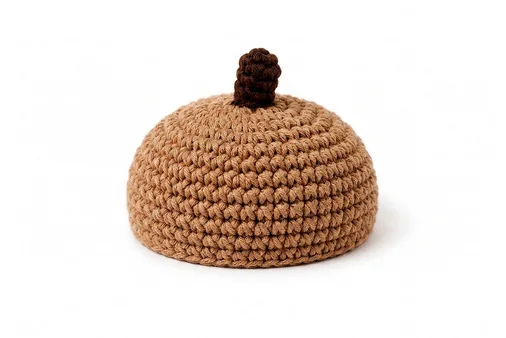
For the warm-beige cap, increase a magic ring from 6 to 12, 18, and 24; work one even round, then decrease to 18. Stuff lightly and leave a sewing tail. For the dark-brown nub, ch 5, sc 4 on Row 1, then make two decreases on Row 2. Roll into a small cone, seam it, and attach it centrally to the cap.
Keep all 17 pattern steps beside your hook
Keep the complete crochet red panda mushroom pattern, stitch counts, assembly sequence, and finishing notes together in the printable digital guide.
Step 13: Attach belly patch and back legs
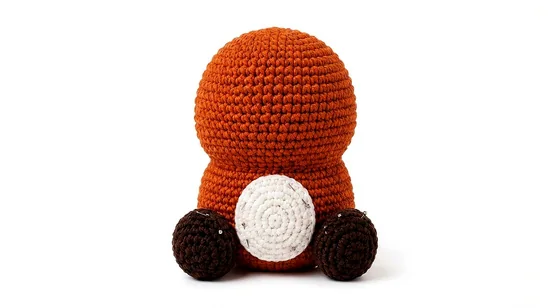
Center the white belly patch with its lower edge 2–3 rounds above the body base and sew it into an oval. Place the two back feet on either side so their rounded faces point forward and help the figure sit. Pin first, test balance, then sew securely. Redistribute stuffing if the body leans.
Step 14: Join head to body
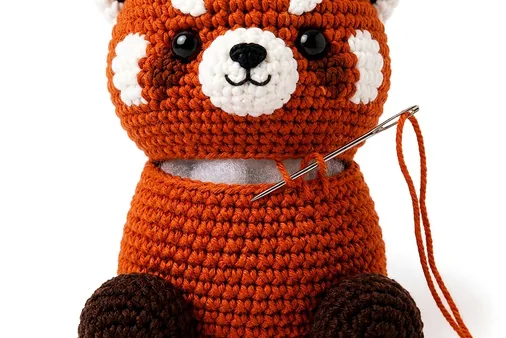
Pin the head evenly over the body opening, keeping the facial center aligned. Use the long body tail to sew one head stitch to one body stitch all around. Pull firmly enough to prevent wobbling, but do not distort either sphere. Add small amounts of stuffing through the final gap before closing the neck completely.
Step 15: Assemble the face
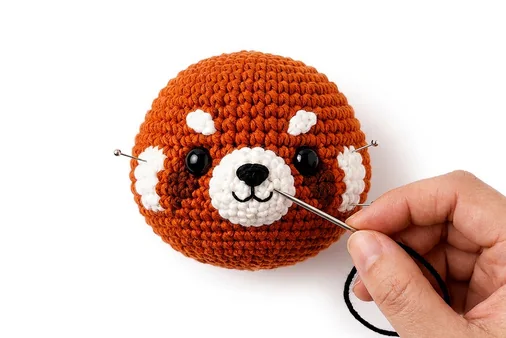
Sew the lightly stuffed muzzle between and 1–2 rounds below the eyes. Position the cheek patches to either side, slightly below the eye line and angled upward; add optional eyebrow spots above. Embroider a small triangular black nose, a short vertical line, and a shallow U-shaped smile. Keep both sides symmetrical.
Step 16: Attach ears, arms, and mushroom
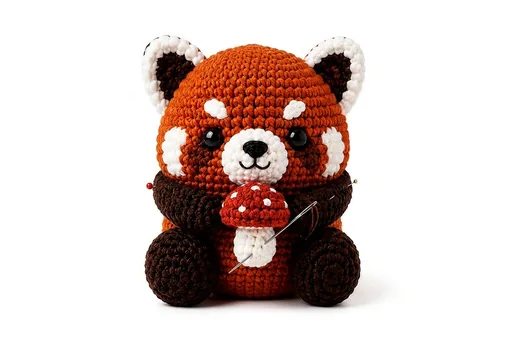
Pin the ears around Rnds 4–7 from the crown, angled slightly forward, then sew the pinched bases. Attach the arms just below the head with their hands crossing in front. Place the mushroom between them and sew through both the arms and mushroom stem so the accessory stays secure without becoming distorted.
Step 17: Attach tail, hat, and finish
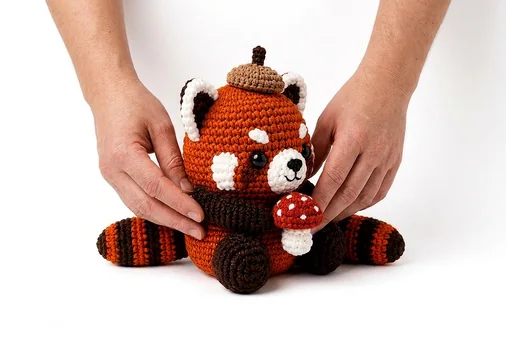
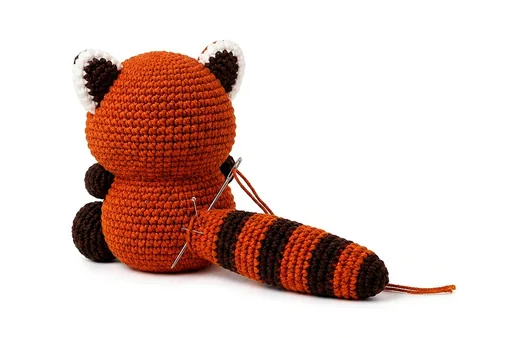
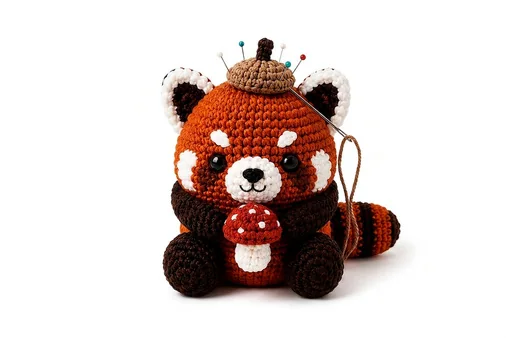
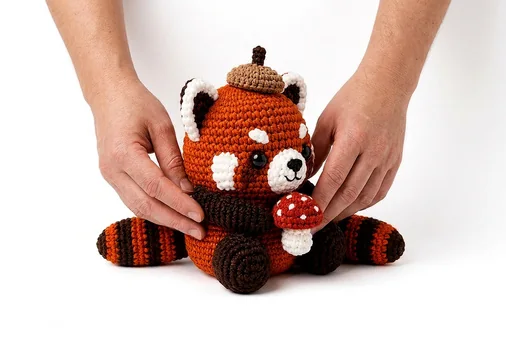
Sew the striped tail low at the back with horizontal stripes and the tip resting slightly on the surface for balance. Sew the acorn hat securely at the crown, centered or intentionally offset. Weave in every end, massage the stuffing into a smooth shape, and confirm the 12–15 cm figure sits unsupported. Adjust the feet or tail if it tips.
Final quality checklist
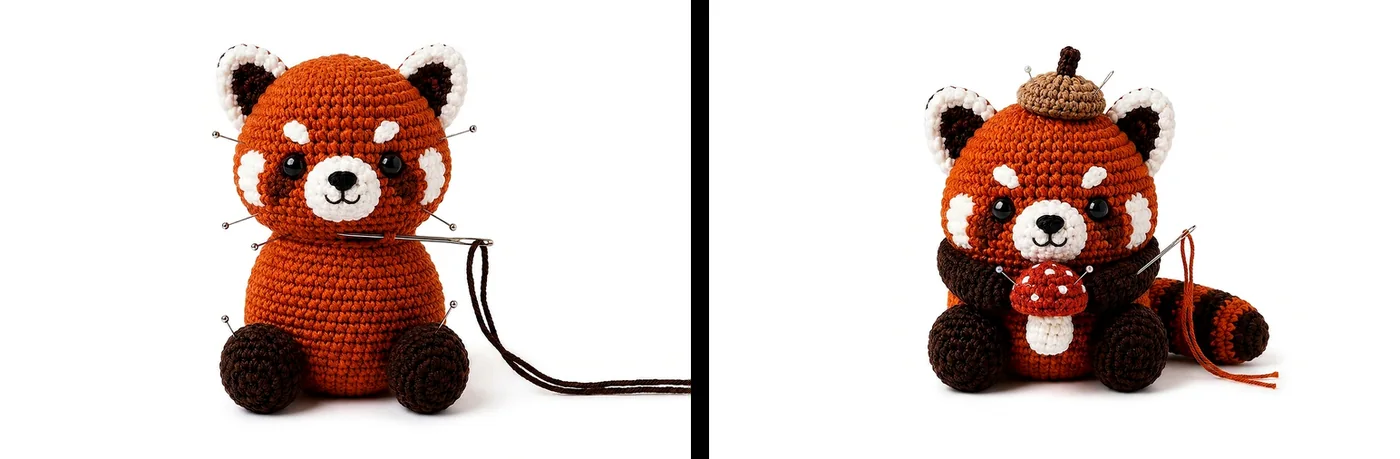
- Body and head are firmly stuffed and securely joined
- Eyes and facial patches are centered
- Ears show an even white inner layer and orange border
- Arms curve around the mushroom without crushing it
- Tail stripes sit horizontally and help balance
- Acorn hat does not wobble
- All yarn tails are hidden and the figure sits steadily
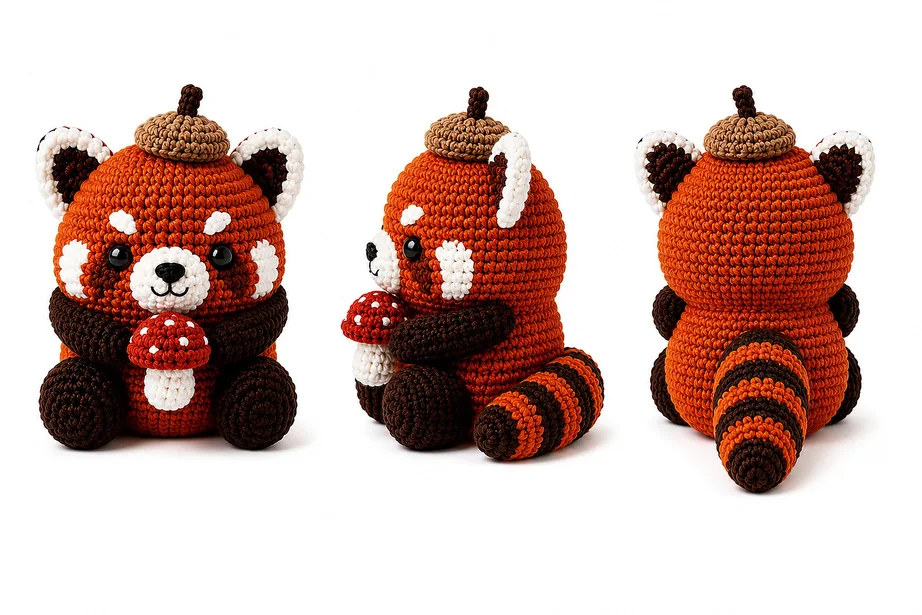
Before calling the crochet red panda mushroom pattern complete, inspect the figure from the front, side, and back. Check that the mushroom remains centered, the striped tail supports the seated pose, and the acorn hat feels intentional rather than loose.
Crochet the complete red panda, mushroom, and acorn hat
Keep the complete crochet red panda mushroom pattern, stitch counts, assembly sequence, and finishing notes together in the printable digital guide.
Frequently asked questions
What yarn does the crochet red panda mushroom pattern use?
How tall is the finished red panda?
Are the pieces worked in joined rounds?
Is this safe for a baby?
Why does the tail rest on the surface?
Continue the woodland series
Crochet red panda mushroom pattern works best when every technical and visual choice supports the reader’s intent.
Use this crochet red panda mushroom pattern as a practical reference rather than repeating generic woodland advice.
Readers searching for crochet red panda mushroom pattern should find a clear answer, useful images, and a direct next step.
The strongest crochet red panda mushroom pattern content combines accurate details with natural language and helpful visual examples.
Before publishing, confirm that the crochet red panda mushroom pattern phrase remains readable and relevant in context.
Crochet red panda mushroom pattern works best when every technical and visual choice supports the reader’s intent.
Use this crochet red panda mushroom pattern as a practical reference rather than repeating generic woodland advice.




