

MY CROCHET UNIVERSE · WINTER AMIGURUMI MASTERCLASS
Crochet Snowman Amigurumi Pattern: Full Guide
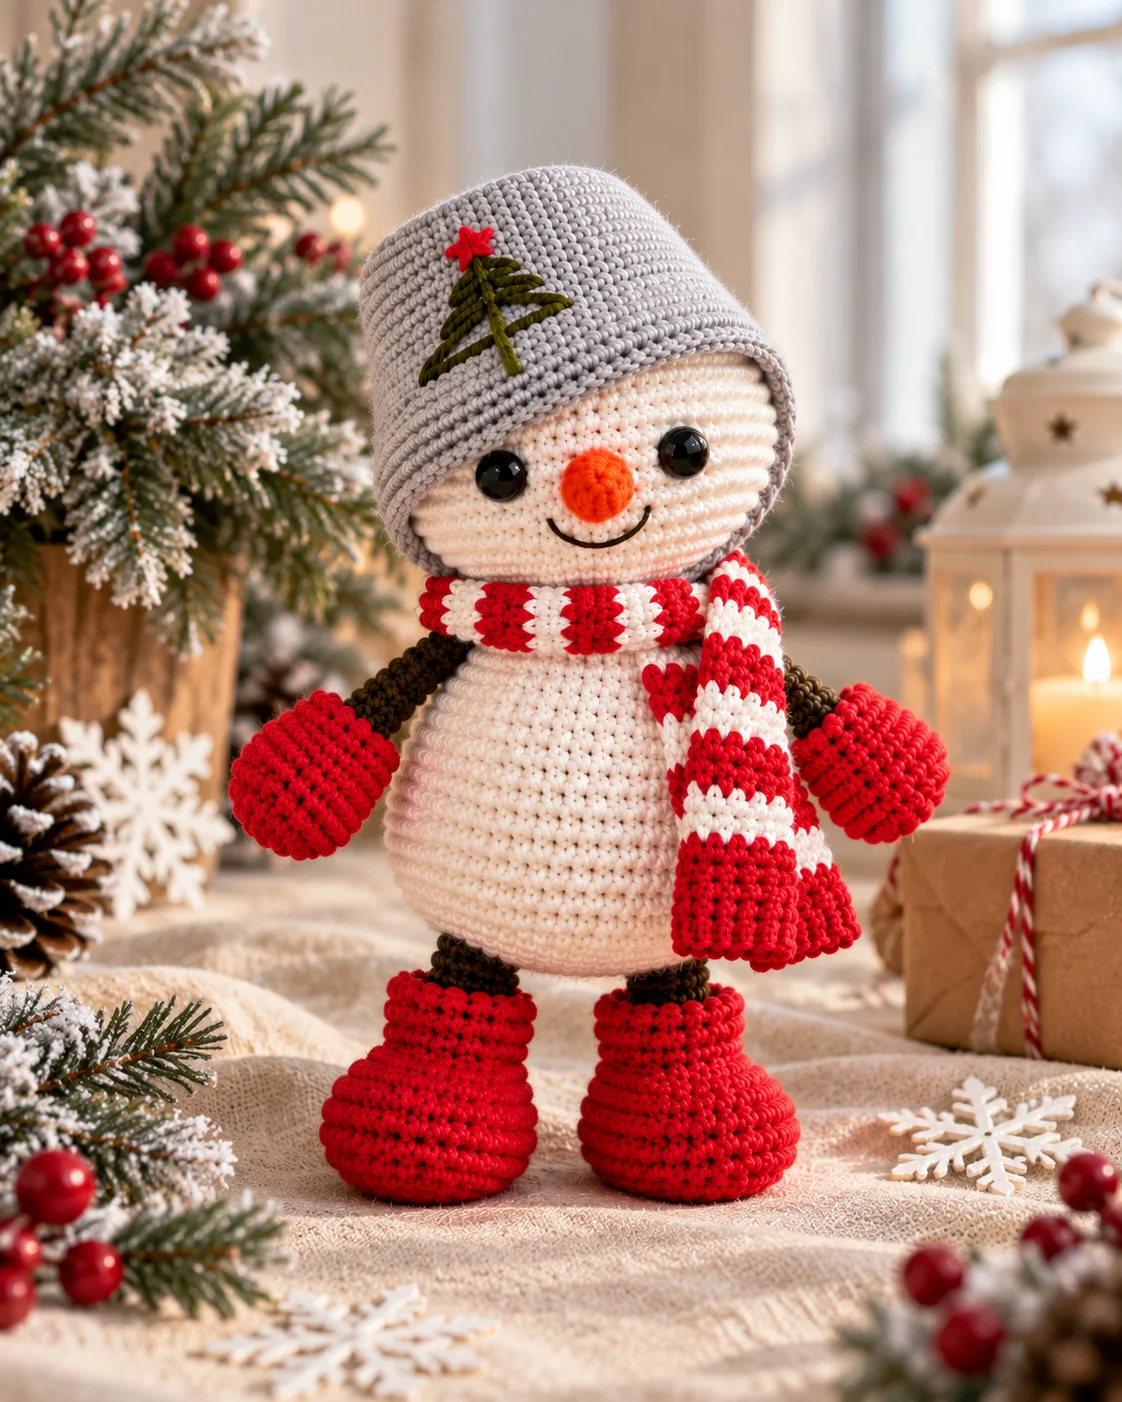
This crochet snowman amigurumi pattern builds the body and head as one continuous piece. The legs and arms are crocheted into the body, so the carrot nose is the only part that must be sewn on. Red boot and mitten cuffs, a striped scarf, and a handled bucket hat complete the winter look.
The complete pattern has been translated into professional English using standard US crochet terms. Every image in this guide is a newly generated, watermark-free editorial product photograph or step visual. The branded reference photograph is not used or edited.
Finished size and skill level
Using YarnArt Jeans and a 2.5 mm hook, the finished snowman measures approximately 19 cm / 7.5 in tall including the bucket hat. This intermediate pattern uses continuous rounds, decreases, front and back loops, a treble-crochet bobble, crocheted limb joins, safety eyes, stuffing, and simple embroidery.
Crochet Snowman Amigurumi Pattern Materials
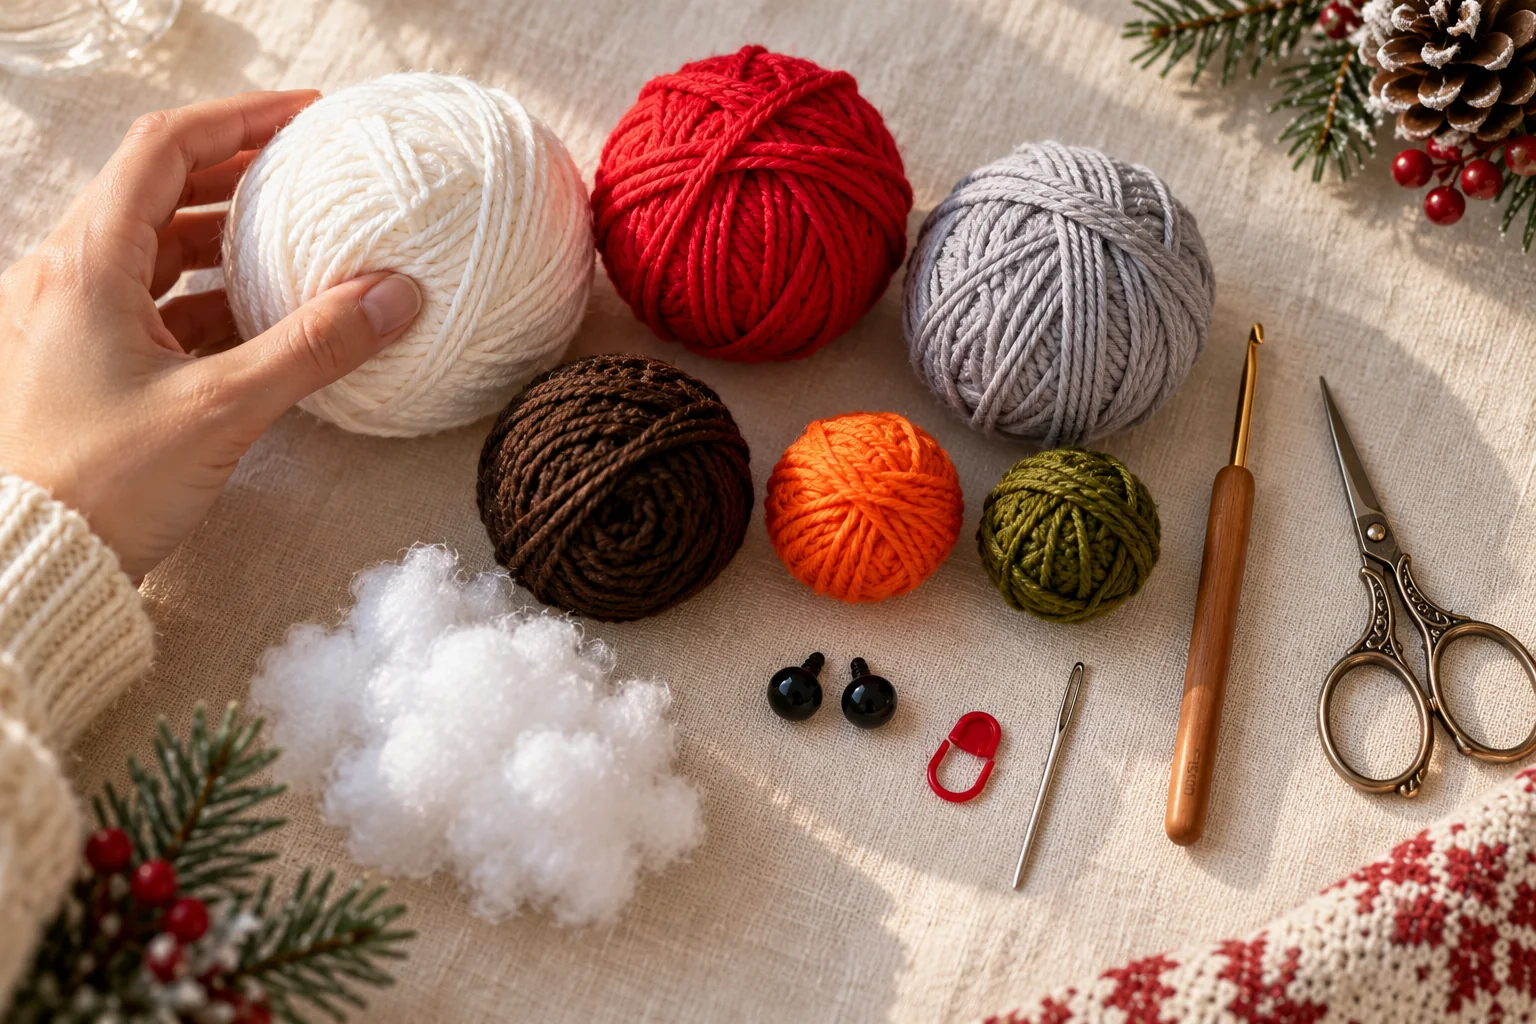
- YarnArt Jeans, approximately 50 g / 160 m per ball: white 01, red 90, brown 40, gray 46, orange 85, and olive 82.
- 2–2.5 mm crochet hook.
- Polyester fiberfill.
- Tapestry needle, scissors, and stitch marker.
- 8 mm safety eyes or sew/glue-on half beads. Embroidered eyes are recommended for a child under age three.
| Abbreviation | Meaning |
|---|---|
| MR | magic ring |
| ch / sl st | chain / slip stitch |
| sc | single crochet |
| inc / dec | 2 sc in one stitch / invisible single-crochet decrease |
| tr | treble crochet |
| bobble | 3 unfinished tr worked in one stitch and joined with one final yarn-over |
| BLO / FLO | back loop only / front loop only |
Before you begin
Work in continuous spiral rounds unless instructed otherwise. Place a marker in the first stitch and move it after every round. Make both legs and both arms in parallel to keep their lengths and shaping identical.
Boots, Legs, and Red Cuffs
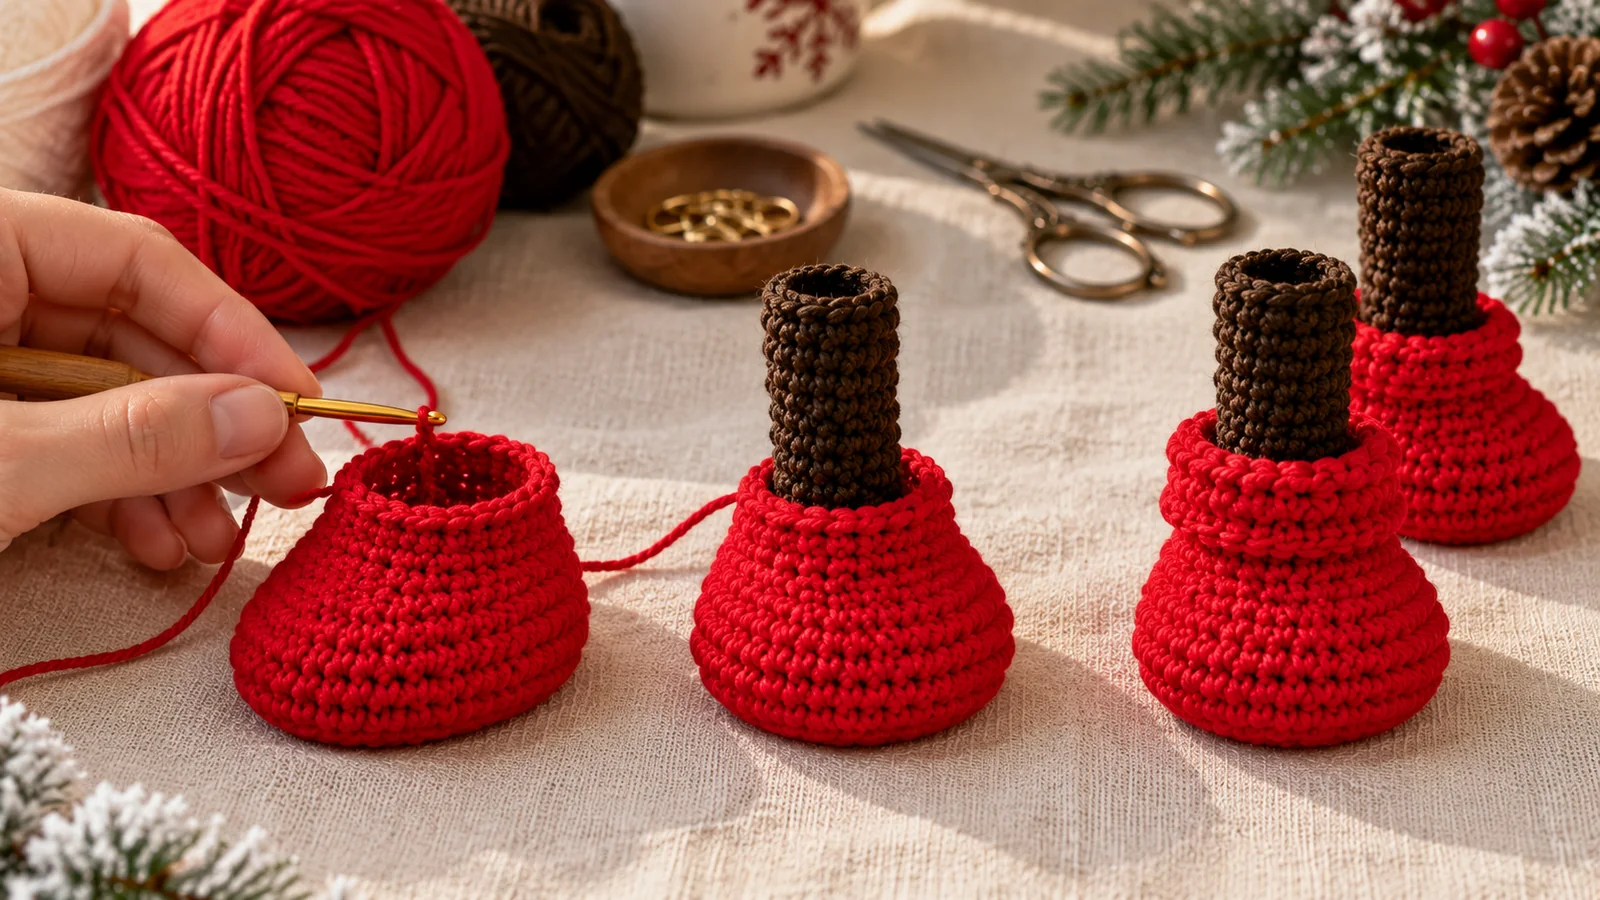
Legs — Make 2
| Round | Instructions | Count |
|---|---|---|
| R1 | With red, MR, 6 sc. | 6 |
| R2 | Inc in every stitch. | 12 |
| R3 | Repeat (sc, inc) ×6. | 18 |
| R4 | Repeat (2 sc, inc) ×6. | 24 |
| R5–8 | Sc around. | 24 |
| R9 | 6 dec, 10 sc, dec. | 17 |
| R10 | 4 dec, 3 sc, dec, 4 sc. Do not cut the red yarn. | 12 |
| R11 | Attach brown at the heel and work 12 sc through the BLO of R10. Stuff only the boot. | 12 |
| R12 | 6 dec. | 6 |
| R13–20 | Sc around. Fasten off brown and hide the tail. | 6 |
| Cuff 1 | Return to the unused red yarn and work 12 sc through the FLO of R10. | 12 |
| Cuff 2 | Sc around. Fasten off and hide the tail. | 12 |
Mittens, Arms, Thumb Bobbles, and Cuffs
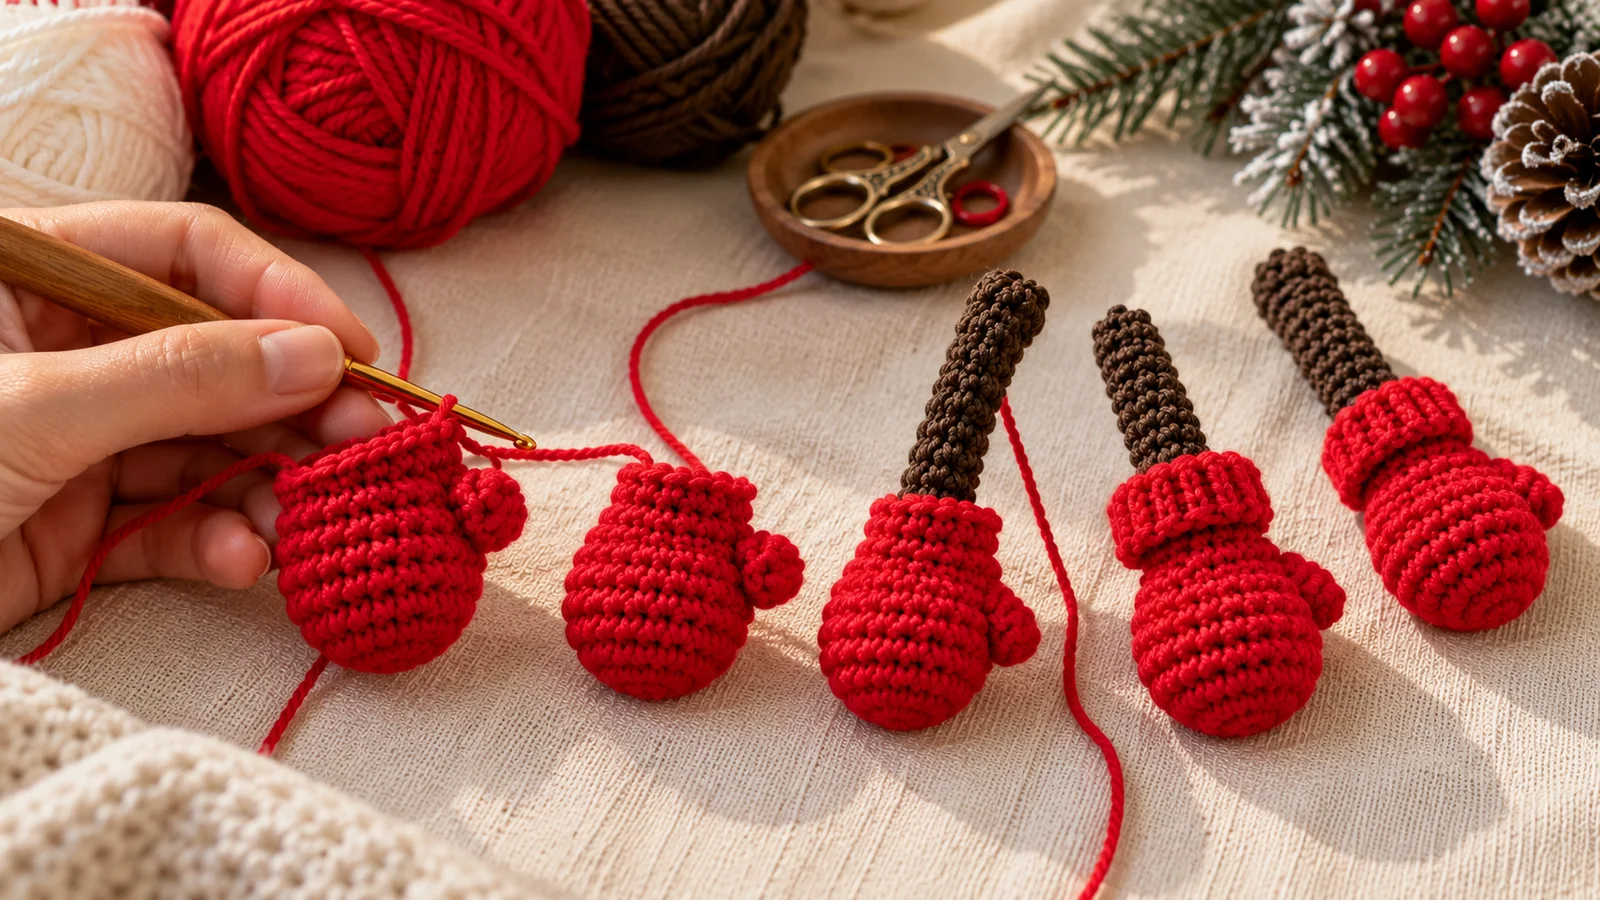
Arms — Make 2
| Round | Instructions | Count |
|---|---|---|
| R1 | With red, MR, 6 sc. | 6 |
| R2 | Inc around. | 12 |
| R3 | Repeat (inc, 5 sc) ×2. | 14 |
| R4 | Sc around. | 14 |
| R5 | Repeat (inc, 6 sc) ×2. | 16 |
| R6 | Repeat (dec, 6 sc) ×2. | 14 |
| R7 | Repeat (dec, 5 sc) ×2. | 12 |
| R8 | Make one bobble from 3 tr in the first stitch, then 11 sc. | 12 |
| R9 | Sc around. Do not cut red. | 12 |
| R10 | Attach brown and work 12 sc through the BLO of R9. Stuff only the mitten. | 12 |
| R11 | 6 dec. | 6 |
| R12–19 | Sc around. Fasten off brown and hide the tail. | 6 |
| Cuff | Return to red and work one round of 12 sc through the FLO of R9. Fasten off. | 12 |
White Body Base and Leg Attachment
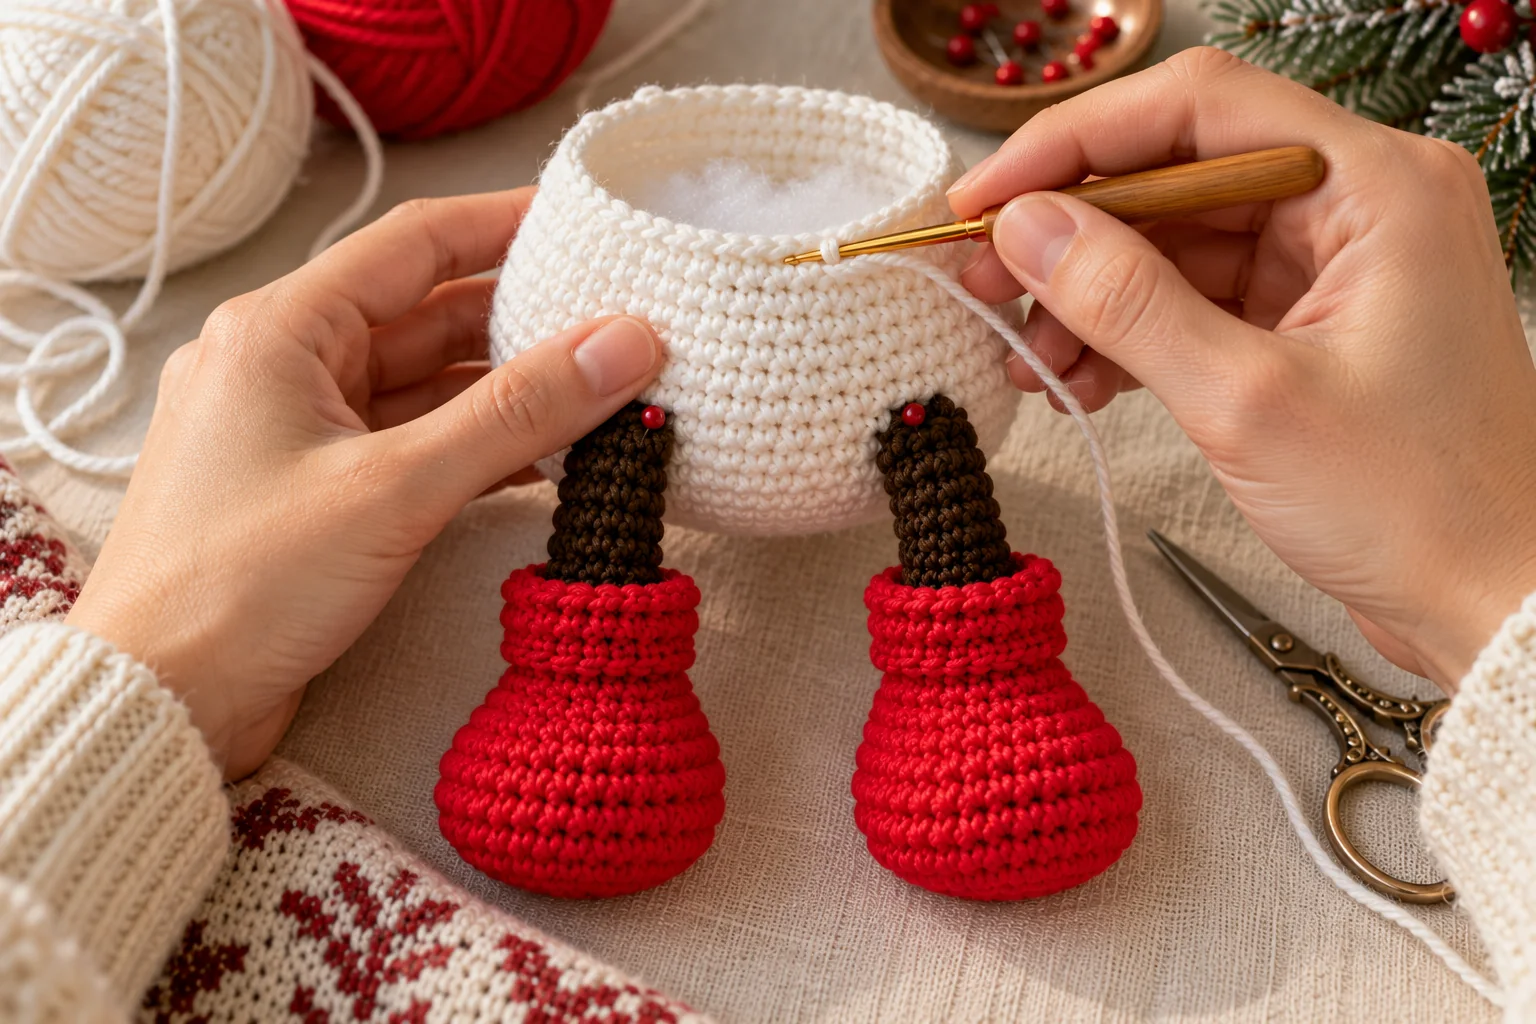
Body — Rounds 1–27
| Round | Instructions | Count |
|---|---|---|
| R1 | With white, MR, 6 sc. | 6 |
| R2 | Inc around. | 12 |
| R3 | Repeat (sc, inc) ×6. | 18 |
| R4 | Repeat (2 sc, inc) ×6. | 24 |
| R5 | 1 sc, repeat (inc, 3 sc) ×5, inc, 2 sc. | 30 |
| R6 | Repeat (4 sc, inc) ×6. | 36 |
| R7 | 2 sc, repeat (inc, 5 sc) ×5, inc, 3 sc. | 42 |
| R8 | Repeat (6 sc, inc) ×6. | 48 |
| R9 | 3 sc, repeat (inc, 7 sc) ×5, inc, 4 sc. | 54 |
| R10 | Sc around. | 54 |
| R11 | Choose the direction of the toes. Work 24 sc, crochet 3 sc through Leg 1 and the body together, 24 sc, then 3 sc through Leg 2 and the body together. | 54 |
| R12–18 | Sc around. | 54 |
| R19 | Repeat (7 sc, dec) ×6. | 48 |
| R20 | 3 sc, repeat (dec, 6 sc) ×5, dec, 3 sc. | 42 |
| R21 | Repeat (5 sc, dec) ×6. | 36 |
| R22 | 3 sc, repeat (dec, 4 sc) ×5, dec, 1 sc. | 30 |
| R23 | 1 sc, repeat (dec, 3 sc) ×5, dec, 2 sc. | 24 |
| R24 | Inc around. Begin stuffing gradually. | 48 |
| R25 | Repeat (7 sc, inc) ×6. | 54 |
| R26–27 | Sc around. | 54 |
Torso Shaping and Arm Attachment
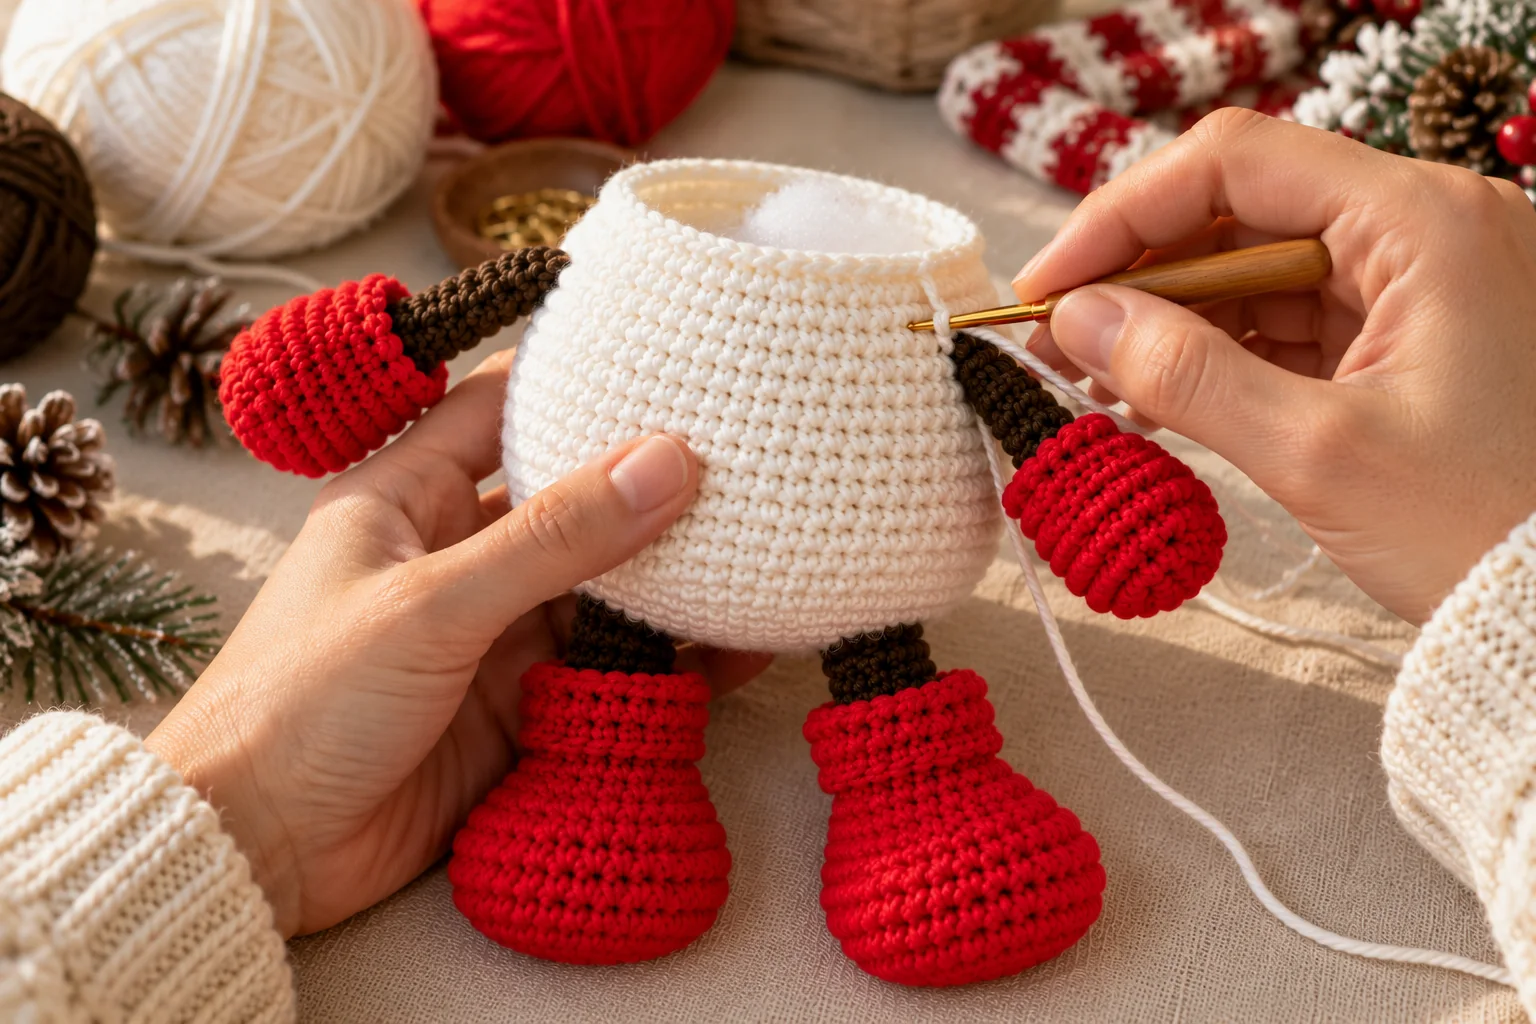
Body — Rounds 28–38
| Round | Instructions | Count |
|---|---|---|
| R28 | Repeat (7 sc, dec) ×6. | 48 |
| R29 | Repeat (4 sc, dec) ×8. | 40 |
| R30 | Attach both arms using the same method as the legs. You may shift each arm one stitch toward the back. Keep approximately 18–20 stitches between the arms at the front while working: 1 sc, repeat (dec, 3 sc) ×7, dec, 2 sc. | 32 |
| R31 | Repeat (2 sc, dec) ×8. | 24 |
| R32 | 12 dec. | 12 |
| R33 | Inc around. | 24 |
| R34 | Repeat (3 sc, inc) ×6. | 30 |
| R35 | Repeat (4 sc, inc) ×6. | 36 |
| R36 | 2 sc, repeat (inc, 5 sc) ×5, inc, 3 sc. | 42 |
| R37 | Repeat (6 sc, inc) ×6. | 48 |
| R38 | 2 sc, repeat (inc, 7 sc) ×5, inc, 5 sc. | 54 |
Printable Amigurumi Pattern
Keep every round and assembly checkpoint together
The printable guide includes the complete snowman, boots, mittens, eye placement, carrot nose, scarf, bucket hat, handle, and all original step illustrations.
Head Shaping and Safety-Eye Placement
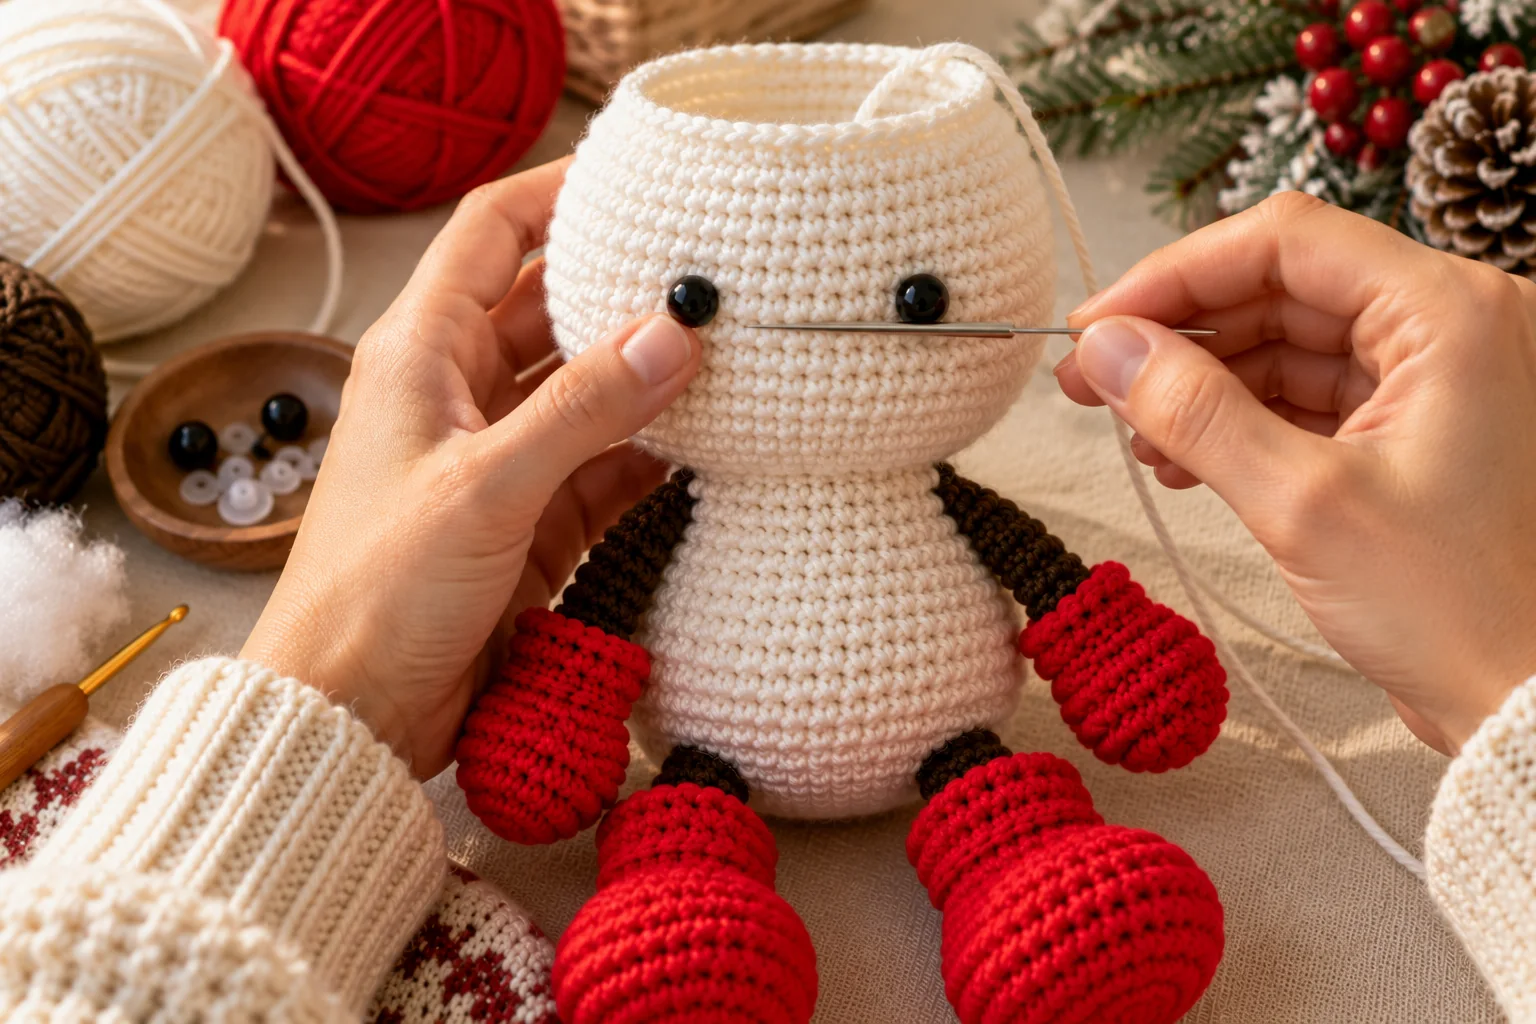
Head — Rounds 39–55
| Round | Instructions | Count |
|---|---|---|
| R39–47 | Sc around. Install safety eyes between R42 and R43, with 8 sc between eye centers. | 54 |
| R48 | Repeat (7 sc, dec) ×6. | 48 |
| R49 | 3 sc, repeat (dec, 6 sc) ×5, dec, 3 sc. | 42 |
| R50 | Repeat (5 sc, dec) ×6. | 36 |
| R51 | 3 sc, repeat (dec, 4 sc) ×5, dec, 1 sc. | 30 |
| R52 | 1 sc, repeat (dec, 3 sc) ×5, dec, 2 sc. | 24 |
| R53 | Repeat (2 sc, dec) ×6. | 18 |
| R54 | Repeat (sc, dec) ×6. | 12 |
| R55 | 6 dec. Finish stuffing, cut the yarn, thread the tail through the remaining front loops, pull closed, and hide the tail. | 6 |
Child-safety note
Safety eyes and glued half beads are not suitable for children under age three. For a nursery-safe snowman, embroider the eyes securely with black yarn.
Carrot Nose and Striped Scarf
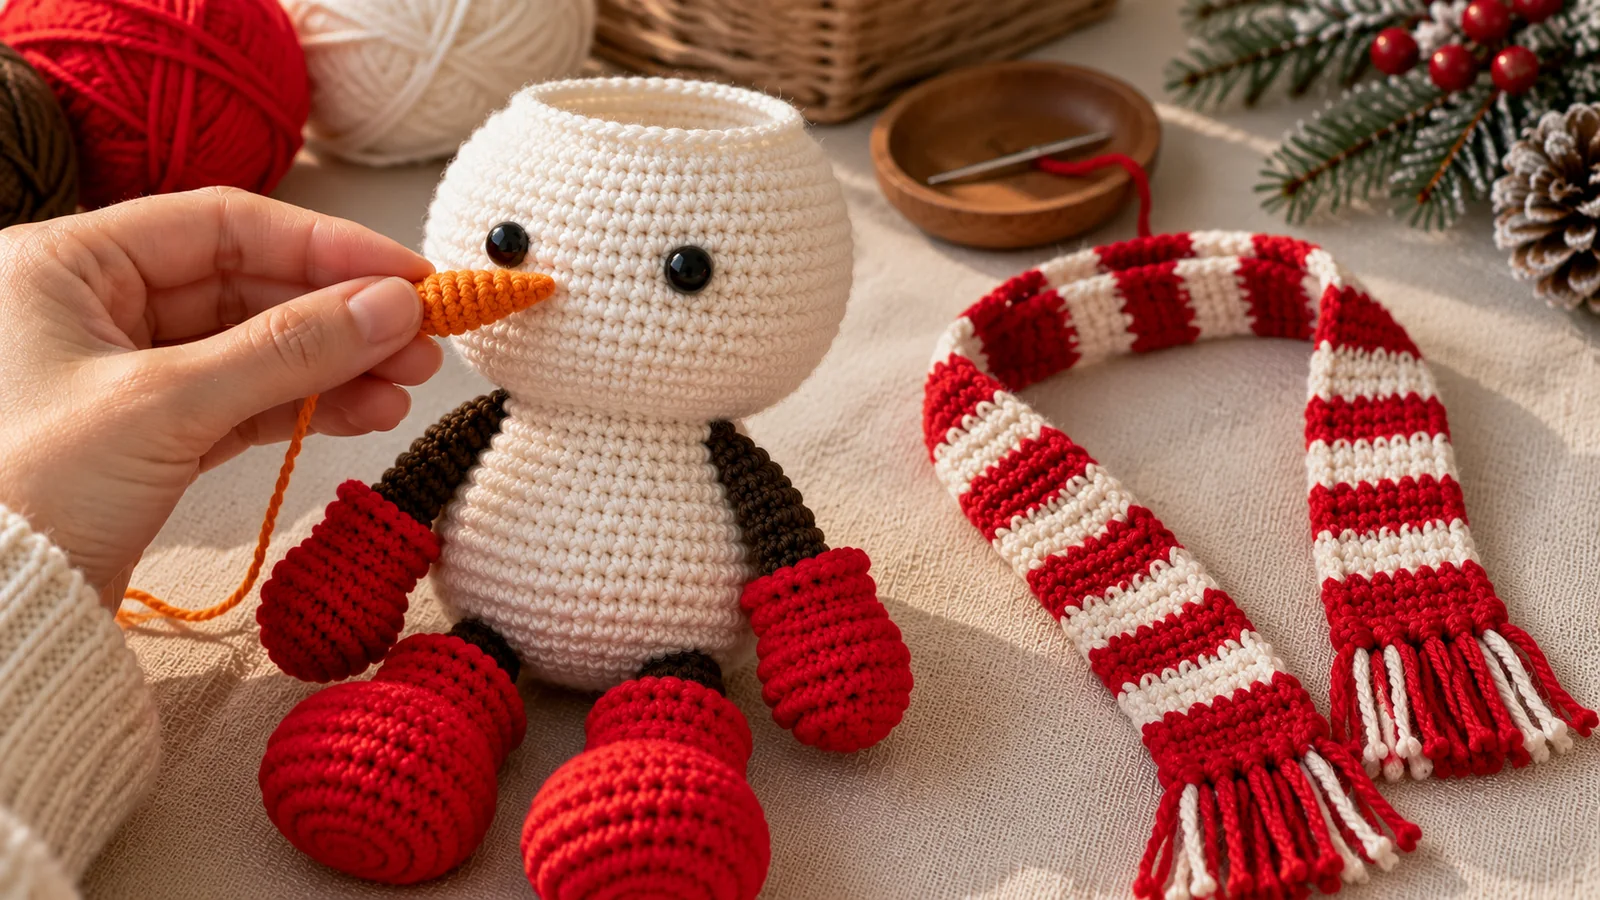
Orange Carrot Nose
| Round | Instructions | Count |
|---|---|---|
| R1 | With orange, MR, 3 sc. | 3 |
| R2 | Inc in every stitch. | 6 |
| R3 | Sc around. | 6 |
| R4 | Repeat (inc, 2 sc) ×2. Fasten off with a long sewing tail. | 8 |
Lightly stuff the wider base of the nose. Pin it between the eyes, spanning approximately head Rounds 40–42, then sew around the final edge with small orange stitches.
Red-and-White Scarf
Work in turned rows. Ch 4 plus one turning chain. Begin with four red rows. Continue by alternating two red rows and two white rows along the remaining length, then finish with four red rows. Make the scarf approximately 40 cm / 16 in long. If preferred, knit a 1×1 rib scarf eight stitches wide and approximately 50 cm / 20 in long. Add tassels or pompoms to the ends if desired.
Gray Bucket Hat and Handle
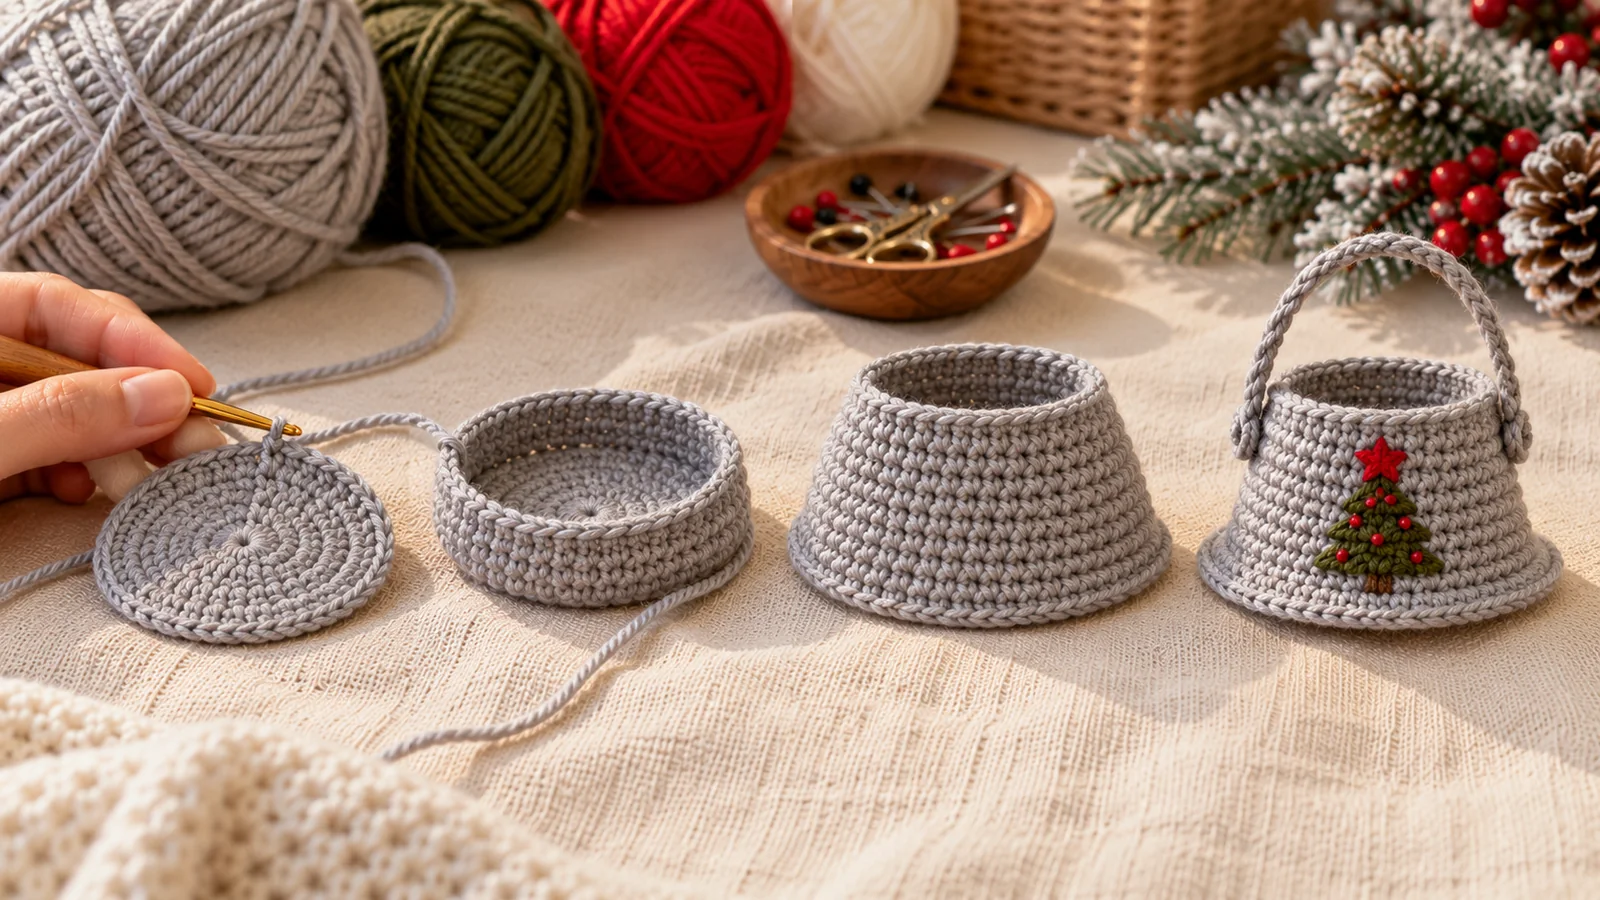
Bucket Hat
| Round | Instructions | Count |
|---|---|---|
| R1 | With gray, MR, 7 sc. | 7 |
| R2 | Inc around. | 14 |
| R3 | Repeat (sc, inc) ×7. | 21 |
| R4 | Repeat (2 sc, inc) ×7. | 28 |
| R5 | BLO sc around. | 28 |
| R6–7 | Sc around. | 28 |
| R8 | Repeat (3 sc, inc) ×7. | 35 |
| R9–10 | Sc around. | 35 |
| R11 | Repeat (4 sc, inc) ×7. | 42 |
| R12–13 | Sc around. | 42 |
| R14 | Repeat (5 sc, inc) ×7. | 49 |
| R15–16 | Sc around. | 49 |
| R17 | Repeat (6 sc, inc) ×7. | 56 |
| R18–19 | Sc around. | 56 |
| R20 | Repeat (7 sc, inc) ×7. | 63 |
| R21–23 | Sc around. | 63 |
| R24 | Sl st around. Do not fasten off. | 63 |
| Handle | Ch 30. Test the bucket on the snowman and make sure the chain reaches around the lower head as a handle. Fasten off and sew the free end opposite the starting point. | 30 ch |
Decorate the bucket with olive embroidery, such as a small Christmas tree topped with a red star. You can also add a red or white cross-stitch border. The bucket may be worked in another color or striped.
Embroidery and Final Finishing
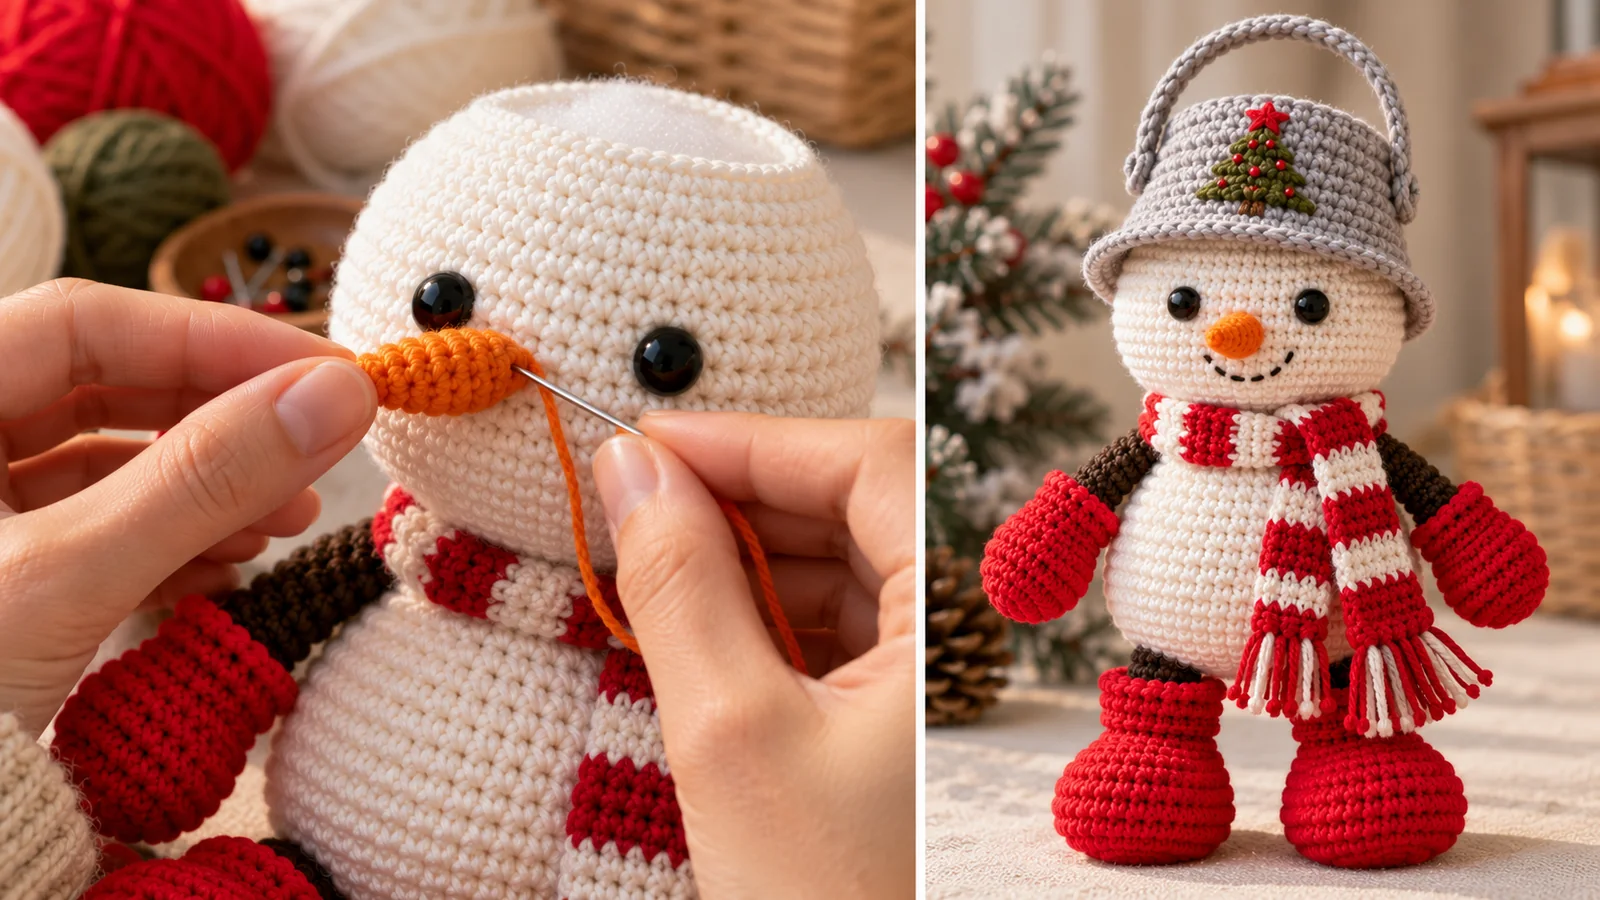
- Shape the stuffed body and head so the increase and decrease lines sit evenly.
- Sew the carrot nose between head Rounds 40 and 42, centered below the eyes.
- Use brown or black sewing thread to embroider a fine dotted smile.
- Fold the red boot and mitten cuffs into shape and check that both sides match.
- Wrap the scarf around the neck without pulling tightly. Arrange one end down the front and one to the side.
- Fit the bucket over the head and arrange its chain handle around the lower head or behind the snowman.
- Weave in all remaining yarn ends and redistribute the stuffing before the final photographs.
Frequently Asked Questions
Is this crochet snowman amigurumi pattern beginner-friendly?
It is best for an intermediate crocheter. The pattern uses continuous rounds, invisible decreases, a treble-crochet bobble, BLO/FLO work, crocheted limb joins, and safety-eye placement.
Which parts need sewing?
The legs and arms are crocheted directly into the body, and the head continues from the torso. Only the carrot nose must be sewn on; the scarf and bucket are removable accessories.
When do I install the eyes?
Install 8 mm safety eyes between head Rounds 42 and 43 with eight single crochets between their centers.
Why are the boots and mittens only partly stuffed?
Stuffing only the red boot and mitten sections keeps the narrow brown legs and arms flexible and avoids an overly bulky limb join.
Can I make the snowman larger?
Yes. Use thicker yarn with a proportionally larger hook. Keep the same round counts and scale the eye size, nose stuffing, scarf, and bucket accordingly.
Can I use the watermarked reference photograph?
This package does not use or alter the branded reference photograph. It includes newly created, watermark-free replacement visuals for the finished snowman and every construction step.
Can I change the accessories?
Yes. Work the scarf and bucket in any coordinated colors. The bucket can be striped, embroidered, or finished with a contrasting cross-stitch border.
Printable Amigurumi Pattern
Keep every round and assembly checkpoint together
The printable guide includes the complete snowman, boots, mittens, eye placement, carrot nose, scarf, bucket hat, handle, and all original step illustrations.
Finish Your Crochet Snowman Amigurumi Pattern
A neat crochet snowman amigurumi pattern depends on consistent tension, paired limbs of equal length, centered eyes, and gradual stuffing. Count every round, compare matching pieces, and pin the nose before sewing.
Record your yarn, hook size, finished height, eye spacing, scarf length, and bucket fit. Those notes make it easy to crochet a coordinated snowman family in new winter colorways.
Professionally translated and adapted from user-supplied pattern instructions. The package uses newly generated editorial photographs and does not include or modify the branded source photograph. Confirm your rights before republishing or selling the underlying pattern.




