

My Crochet Universe · Full Tutorial
Crochet Deer Baby Booties Pattern: Little Antler Booties Tutorial
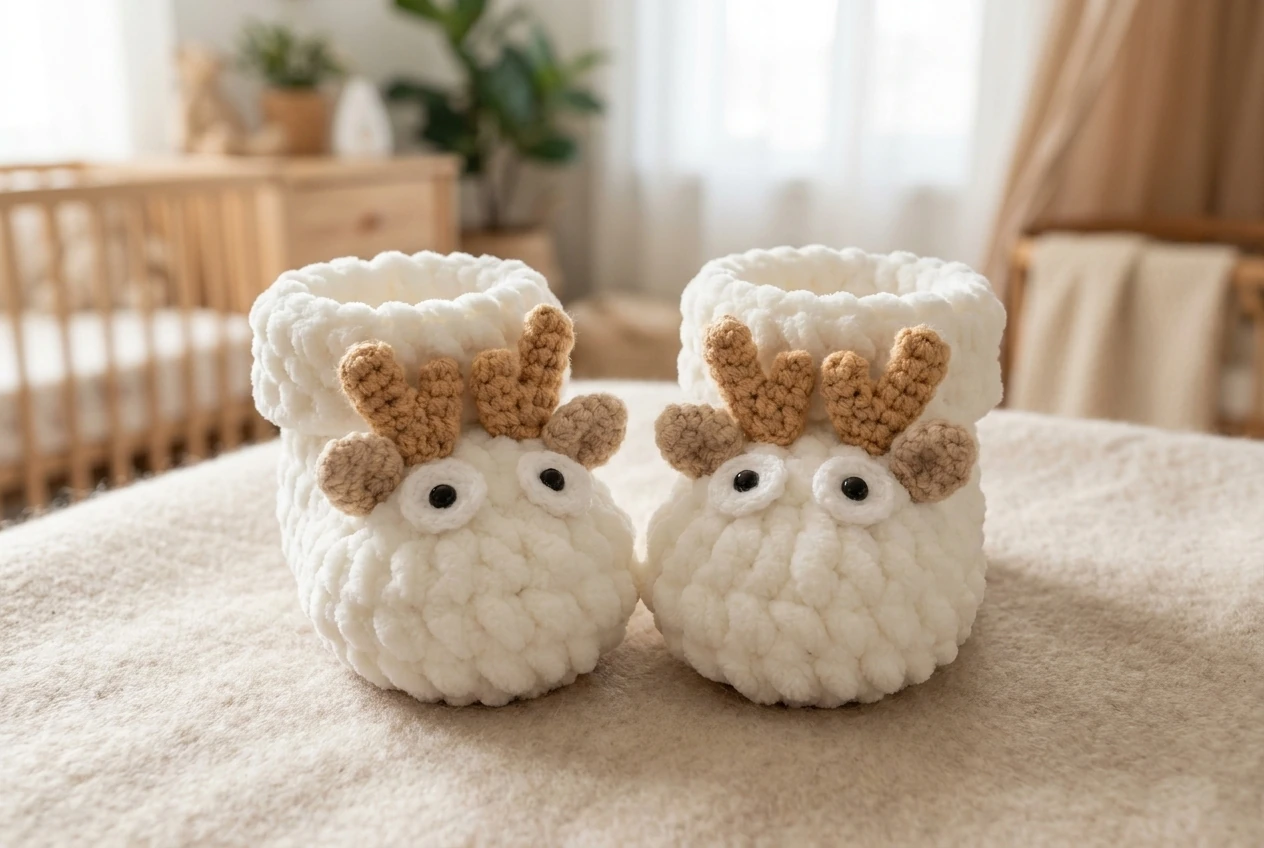
This crochet deer baby booties pattern turns soft white chenille yarn into a playful pair of woodland shoes with dimensional tan antlers, beige ears and expressive embroidered eyes. Every image in this tutorial was generated specifically for this project; the older reference photos and chart are not included in the article or ZIP.
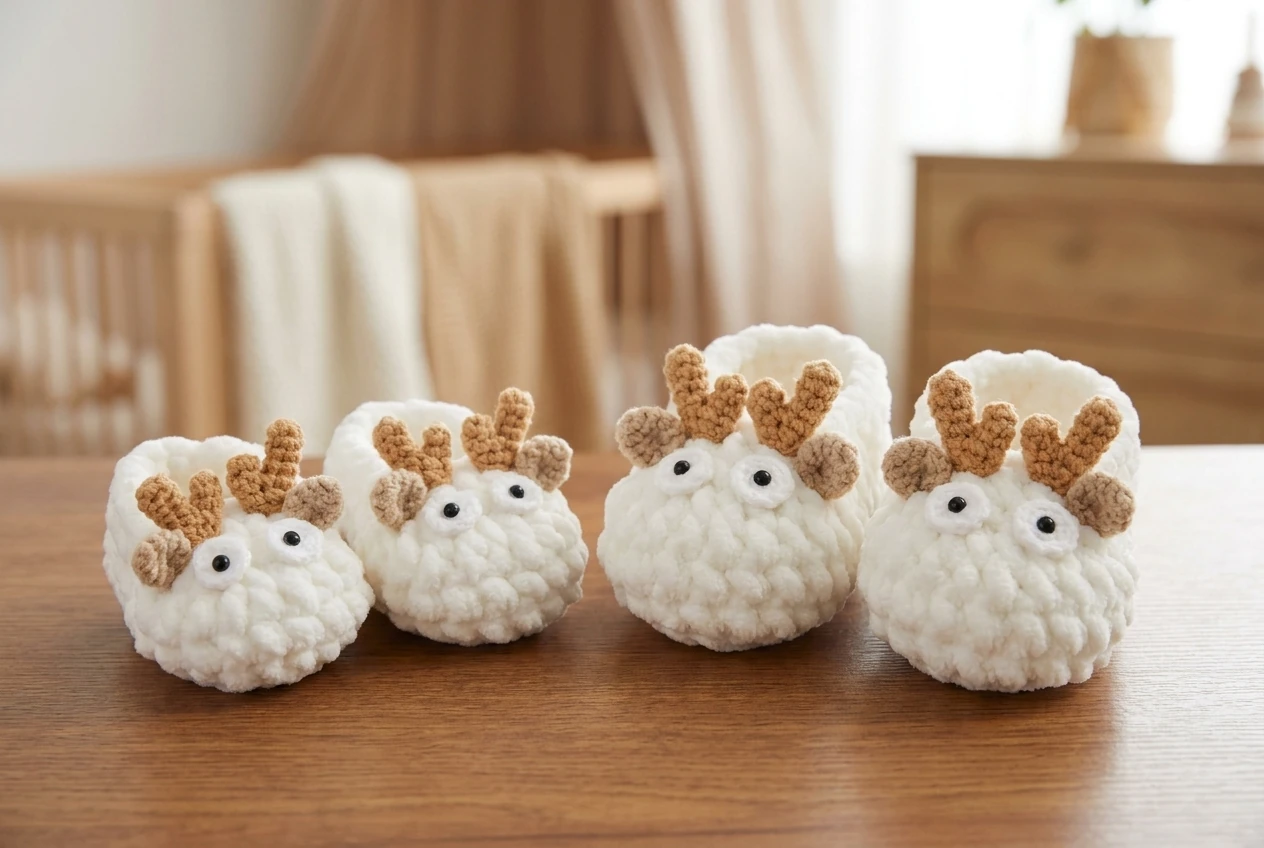
The bootie body is worked around both sides of a foundation chain to create an oval sole, then shaped upward in joined rounds. A back-loop-only round forms a clean fold line, while carefully positioned decreases round the toe. The antlers, ears and eye circles are made separately and sewn on at the end. The crochet deer baby booties pattern includes complete counts for 0–6 and 6–12 months.
Sizes, skill level and construction
Skill level is beginner–intermediate. You should be comfortable with basic increases and decreases, joined rounds, back-loop-only stitches and simple appliqué assembly. Both booties are identical, so there is no separate left and right foot.
| Size | Foundation | Round totals |
|---|---|---|
| 0–6 months | Ch 9 | 21, 29, 29, 21, 18 |
| 6–12 months | Ch 11 | 25, 33, 33, 25, 22 |
Age labels are only estimates. Babies vary considerably, and yarn thickness changes finished length. Measure the intended foot and compare it with the relaxed sole before shaping. That measurement keeps the crochet deer baby booties pattern comfortable instead of relying on age alone. The crochet deer baby booties pattern is designed as a soft pre-walking accessory, not protective footwear.
Materials and abbreviations
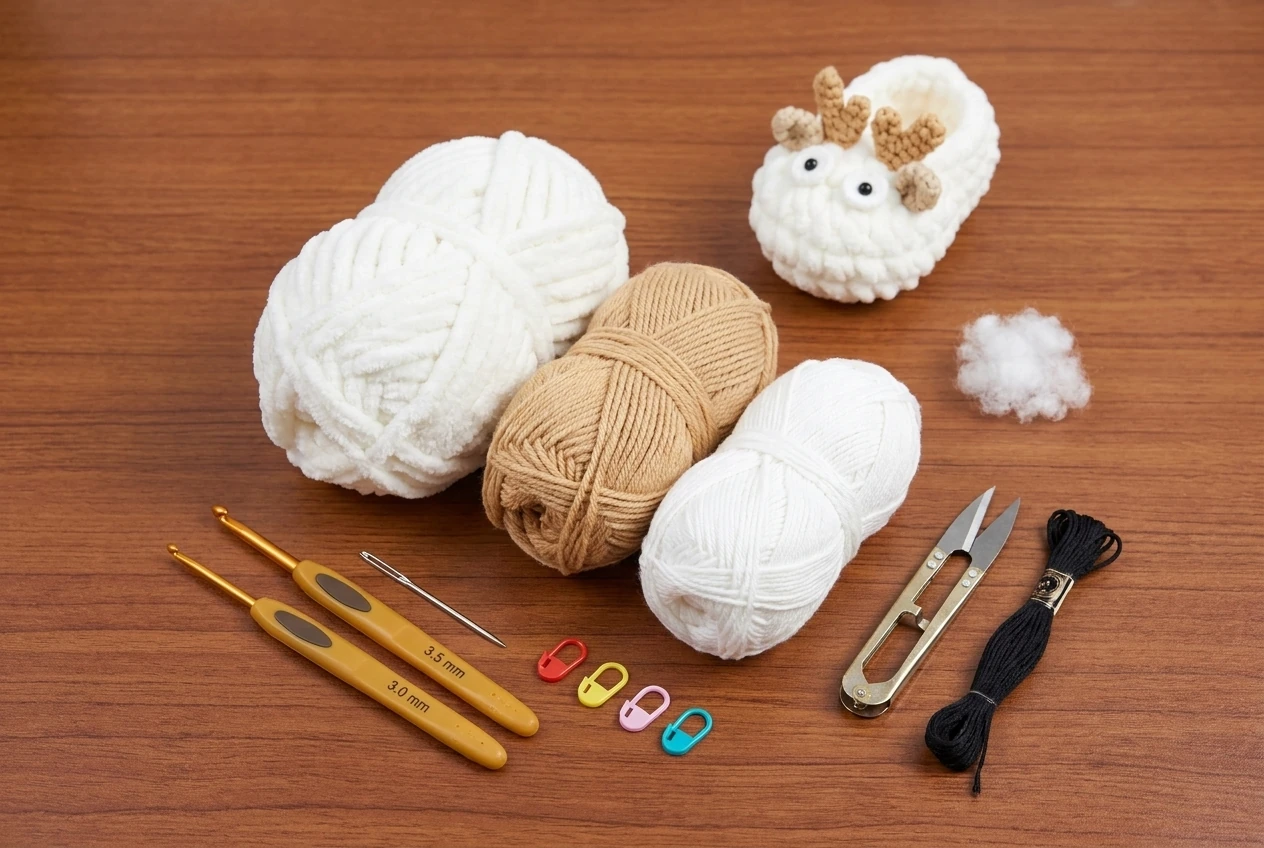
- 80–100 g white bouclé or chenille baby yarn
- 10–15 g total tan and beige smooth worsted yarn
- Small amount of white smooth yarn for four eye circles
- Black embroidery floss for pupils
- 3.0–3.5 mm hook, adjusted to the yarn
- Tapestry needle, scissors and stitch markers
- Small amount of polyester fiberfill for antlers only
Chenille hides individual stitches, so count with your fingers and place a marker in the first stitch of every round. Use smooth yarn for the small antlers, ears and eyes; it gives the appliqués definition and makes secure sewing easier. For the crochet deer baby booties pattern, embroidered pupils are preferred over detachable plastic eyes.
US abbreviations
ch chain; sl st slip stitch; sc single crochet; hdc half double crochet; dc double crochet; inc two stitches in one stitch; sc2tog, hdc2tog and dc2tog are decreases; BLO means back loop only.
Part 1: Build the oval shoe body
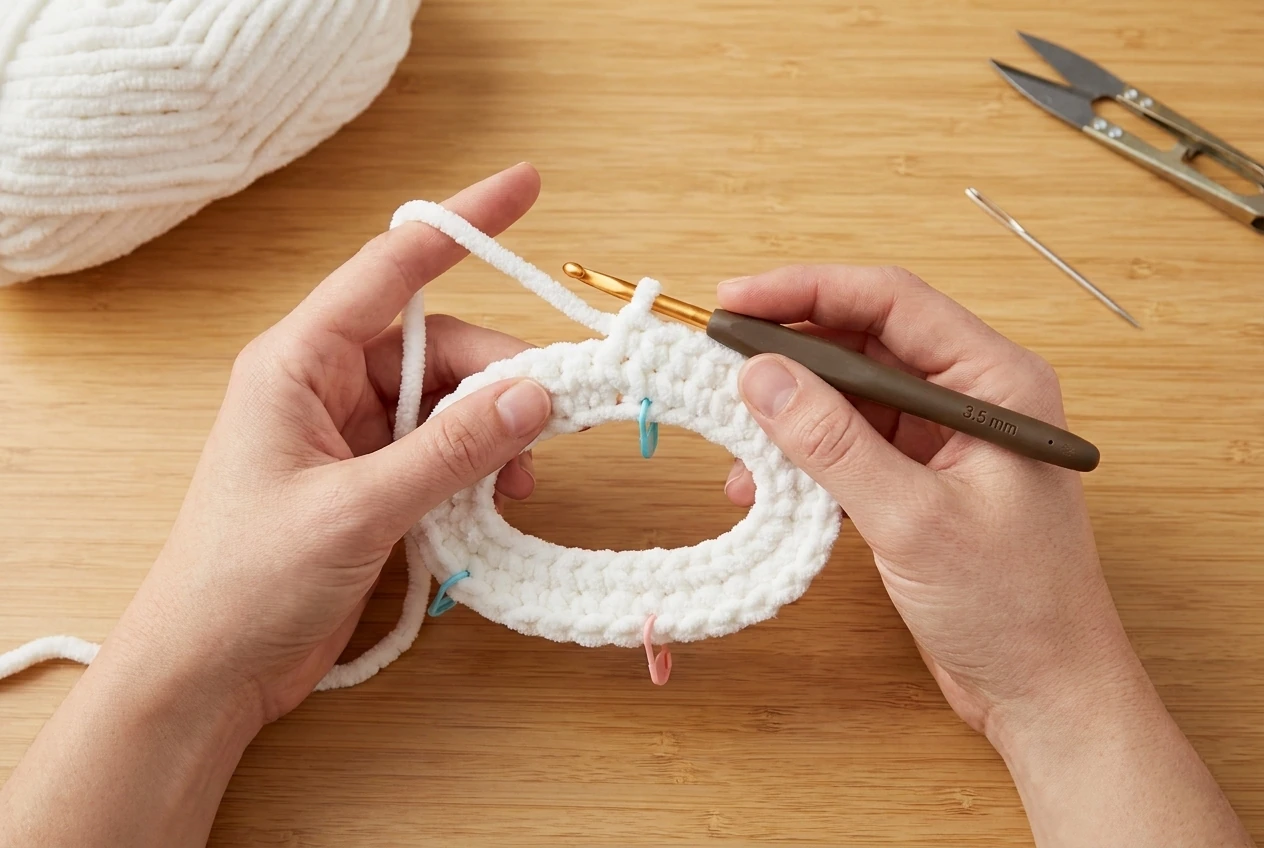
Begin each shoe with a foundation chain. Work down the first side, place five stitches in the final chain to turn the toe, rotate the work, then crochet along the unused loops on the opposite side. The increases at both ends make a flat oval without a separate seam.
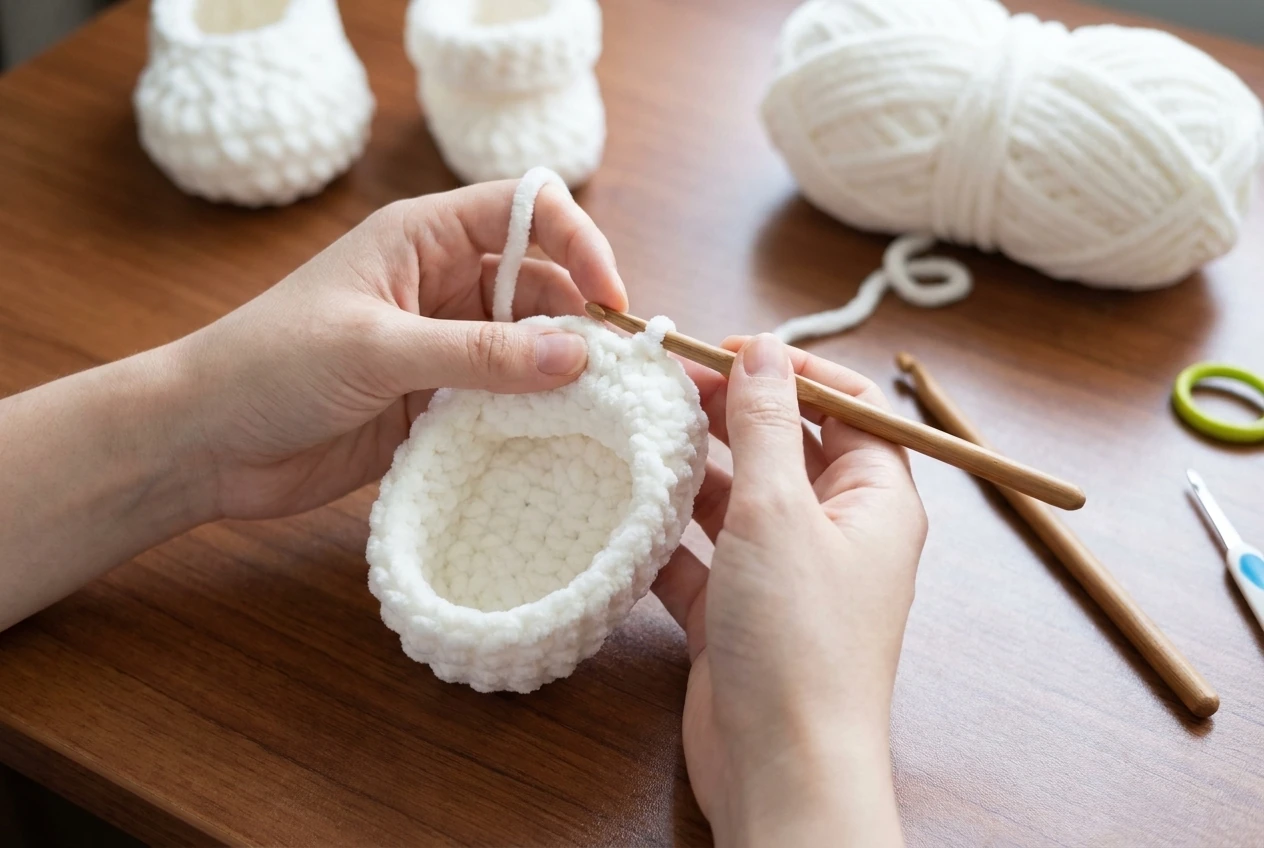
Join every round with a slip stitch. The beginning chain does not count as a stitch. In this crochet deer baby booties pattern, joined rounds keep the toe shaping centered and make it easier to identify the back of the shoe. Move the marker immediately after each join. Accurate round placement is especially important in the crochet deer baby booties pattern because all toe decreases must remain centered.
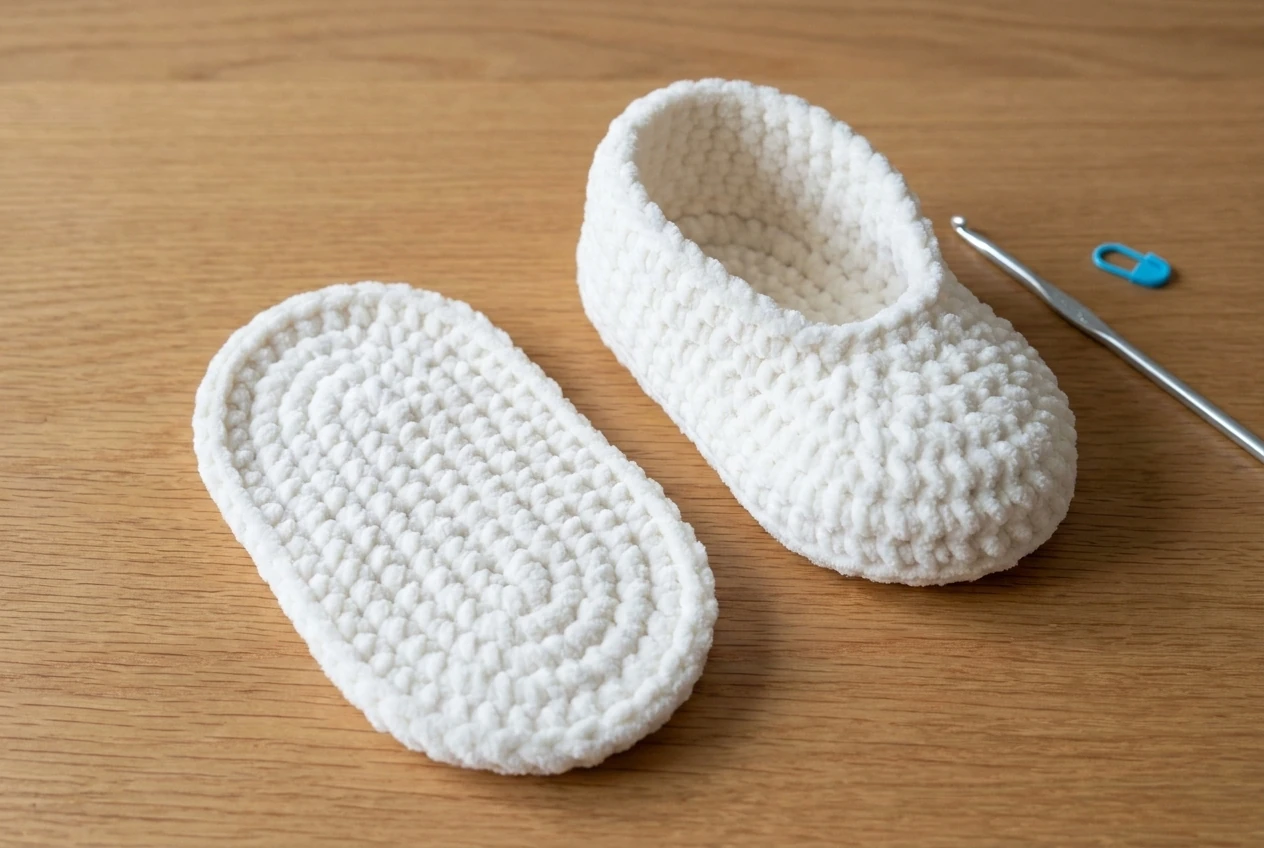
Round 3 is worked in back loops only with no increase. This leaves a visible front-loop ridge and encourages the sides to turn upward. Later, the same line helps form the soft cuff and gives the crochet deer baby booties pattern a defined shoe silhouette.
Size 0–6 months: make two bodies
Round 1 — 21 stitches
Chain 9. Work 2 sc in the second chain from the hook, sc in the next 6 chains, then 5 sc in the final chain. Rotate. Sc in the next 6 remaining loops and 2 sc in the last loop. Join to the first stitch with a slip stitch.
Round 2 — 29 stitches
Chain 1. Sc in the first stitch, 2 sc in the next stitch, sc in the next 3, hdc in the next 2, dc in the next stitch, then work 2 dc in each of the next 5 stitches. Dc in the next stitch, hdc in the next 2, sc in the next 3 and 2 sc in each of the final 2 stitches. Join.
Round 3 — 29 stitches
Chain 1. Working in back loops only, sc in every stitch around. Do not increase or decrease. Join with a slip stitch. Check the total before continuing the crochet deer baby booties pattern.
Round 4 — 21 stitches
Chain 1. Sc2tog, sc in the next 6, hdc2tog, dc2tog four times, hdc2tog, sc in the next 7 and sc2tog. Join. Keep the grouped double-crochet decreases centered over the toe. This shaping gives the crochet deer baby booties pattern its rounded front without narrowing the heel.
Round 5 — 18 stitches
Chain 1. Sc in the next 7, hdc2tog, dc2tog, hdc2tog and sc in the next 8. Join and fasten off, leaving a weaving tail. The opening should remain flexible and the toe should be rounded rather than sharply pinched.
Size 6–12 months: make two bodies
Round 1 — 25 stitches
Chain 11. Work 2 sc in the second chain, sc in the next 8, then 5 sc in the last chain. Rotate. Sc in the next 8 remaining loops and 2 sc in the final loop. Join.
Round 2 — 33 stitches
Chain 1. Sc in the first stitch, 2 sc in the next, sc in the next 3, hdc in the next 3, dc in the next 2, then 2 dc in each of the next 5 stitches. Dc in the next 2, hdc in the next 3, sc in the next 3 and 2 sc in each of the last 2 stitches. Join.
Round 3 — 33 stitches
Chain 1 and sc through the back loop of every stitch. Join without increasing. Lay both bodies side by side so the fold lines match; consistency makes the finished crochet deer baby booties pattern look like a true pair.
Round 4 — 25 stitches
Chain 1. Sc2tog, sc in the next 8, hdc2tog, dc2tog four times, hdc2tog, sc in the next 9 and sc2tog. Join and count before working the final round. Matching totals ensure that both shoes in the crochet deer baby booties pattern have equal openings.
Round 5 — 22 stitches
Chain 1. Sc in the next 9, hdc2tog, dc2tog, hdc2tog and sc in the next 10. Join and fasten off. Gently shape the heel and toe with your fingers; do not steam yet.
Part 2: Crochet and assemble the antlers
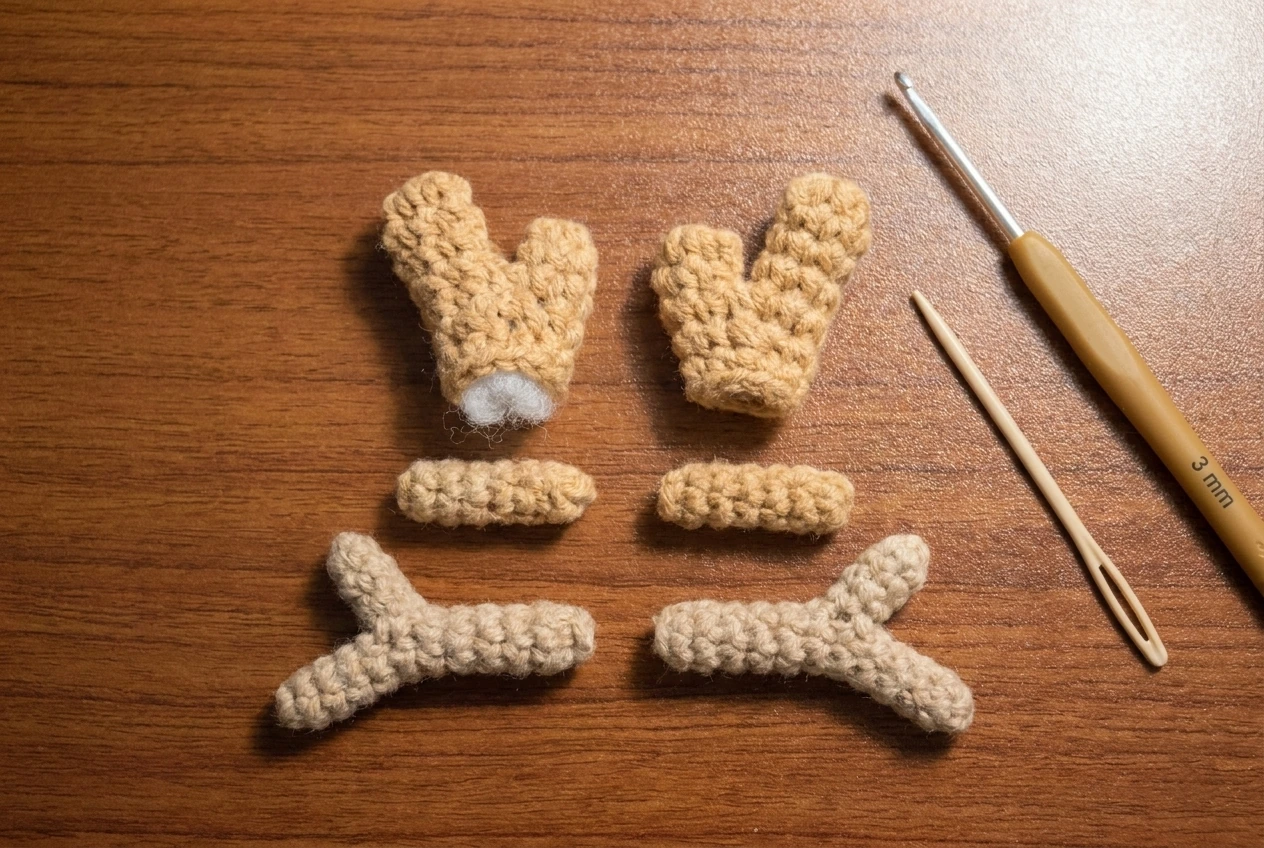
Each bootie needs two assembled antlers. Preparing every component before assembly makes the crochet deer baby booties pattern easier to balance visually. Each antler has a main horn plus one short and one long twig. For two booties, prepare four main horns, four short twigs and four long twigs. Small pieces are easy to lose, so keep each set together.
Short twig
Work 4 sc in a small magic ring or tiny joined round. Work one more round of 4 sc. Fasten off with a sewing tail. The short twig in the crochet deer baby booties pattern is a compact two-round tube.
Long twig
Work 5 sc in a small ring. Continue for four rounds total with 5 sc in every round. Fasten off with a sewing tail. Add only a tiny wisp of fiberfill; overstuffing makes the piece rigid and difficult to sew.
Main horn
Create a small starting ring with 9 sc. On the next round, repeat sc in the next stitch and sc2tog three times, finishing with 6 stitches. Fasten off with a long tail. Sew one short and one long twig to the side of the main horn at outward angles.
Stitch through the full thickness of each branch several times, knot securely on the hidden side and bury the tail inside. The antlers are decorative. Every branch in the crochet deer baby booties pattern must withstand a firm tug before the booties are used.
Part 3: Make the ears and embroidered eyes
Ears — make four
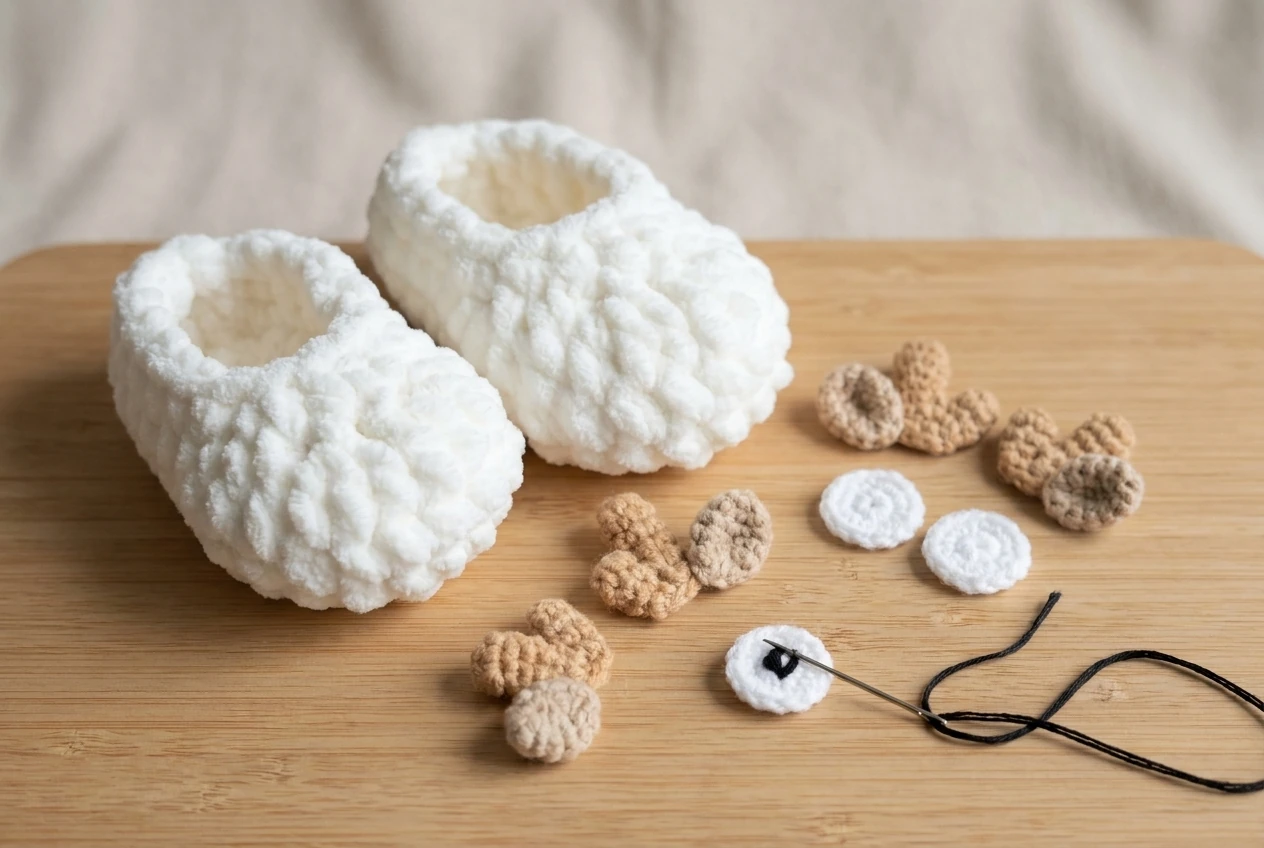
Round 1: work 4 sc in a magic ring. Round 2: repeat sc in the next stitch and 2 sc in the next stitch twice, ending with 6. Round 3: work 2 sc in every stitch for 12. Round 4: sc in each stitch. Round 5: sc2tog six times for 6. Fasten off with a long sewing tail.
Leave ears flat for a subtle shape, or add a tiny amount of stuffing for a rounded ear. Pinch the base before sewing so each ear points outward. Consistent ear placement gives the crochet deer baby booties pattern a clear woodland expression. Make all four ears before attaching any of them, then choose the closest matching pairs.
Eye circles — make four
Round 1: work 6 sc in a magic ring. Round 2: work 2 sc in every stitch for 12. Join and fasten off with a long white tail. Embroider a compact black pupil through the center of each circle, securing the floss on the back.
Do not use glued eyes. For very young babies, detachable safety eyes can present a choking hazard even when marketed for crafts. This version of the crochet deer baby booties pattern intentionally uses embroidery so no hard plastic eye is included.
Part 4: Assemble the deer face
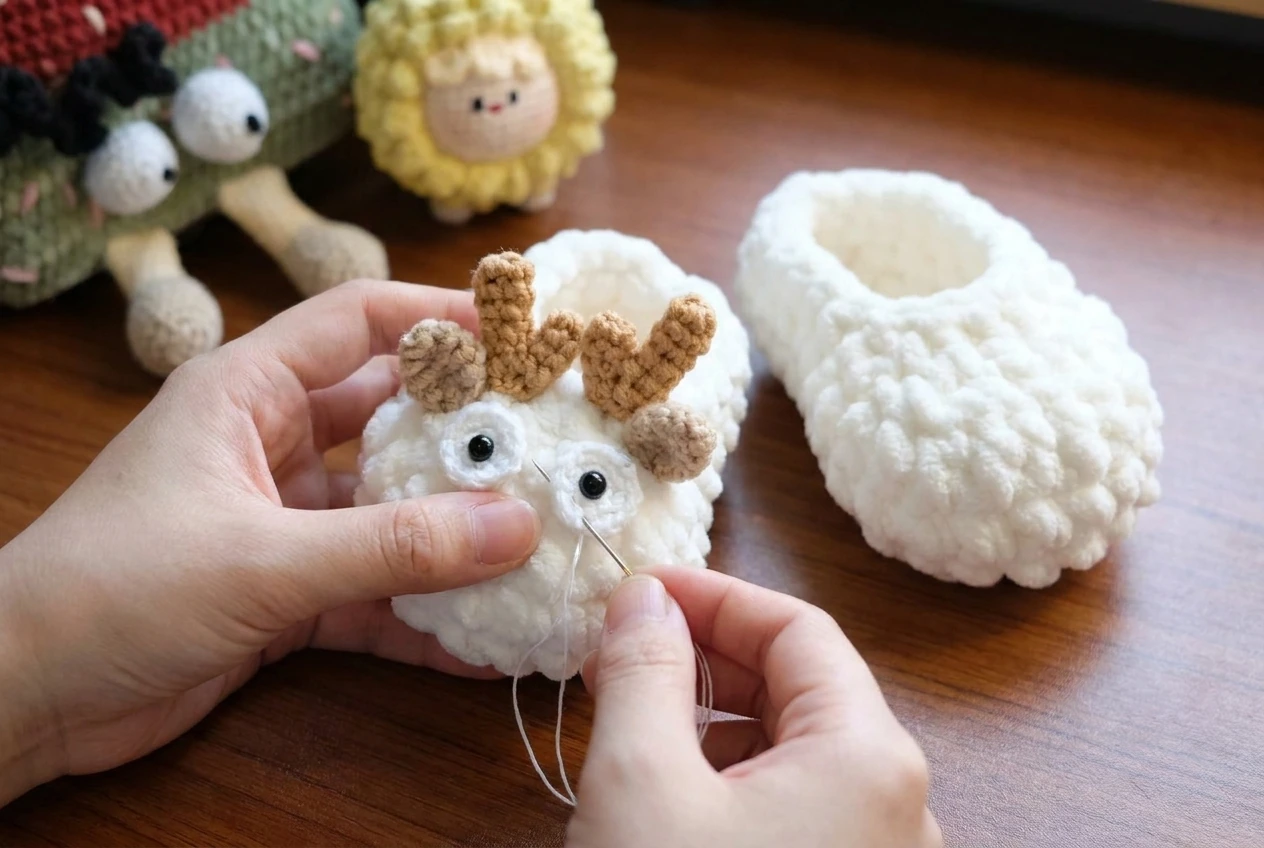
- Weave the body ends and shape both shoes.
- Fold the upper edge along the back-loop transition.
- Pin two eye circles evenly across each toe.
- Sew each eye around its full perimeter.
- Position one ear outside each eye and stitch through its base.
- Place the antlers above and slightly behind the ears.
- Sew every antler base with several passes through the shoe fabric.
- Bury all tails inside and inspect for loose loops.
Work on the two booties alternately: pin the eyes on both, compare, then sew; repeat for ears and antlers. This method prevents one face from drifting higher than the other. In the crochet deer baby booties pattern, the inner antlers sit slightly closer together than the ears, creating a clear deer silhouette.
Avoid sewing through only the fuzzy surface fibres. Insert the needle around the underlying crochet stitches so the appliqués are structurally anchored. After assembly, turn each bootie inside out and confirm that no long thread floats could catch a toe. A smooth interior is an essential finishing standard for the crochet deer baby booties pattern.
Fit, finishing and care
Slide a paper foot template or flexible measurement card into each bootie. The sole should lie flat without forcing the toe. Confirm that the cuff stretches comfortably and returns to shape. If one shoe is larger, lightly reshape it rather than tightening the opening with a hard seam.
Hand wash the completed crochet deer baby booties pattern in cool water with mild detergent. Press moisture out in a towel, reshape the shoes by hand and dry flat. Do not tumble dry unless every yarn label specifically permits it.
Store the booties where the antlers cannot be crushed. If they flatten, massage the fiberfill back into place. Inspect the embroidered eyes and every decorative seam before each use, especially after washing. Regular inspection supports safer supervised use of the crochet deer baby booties pattern.
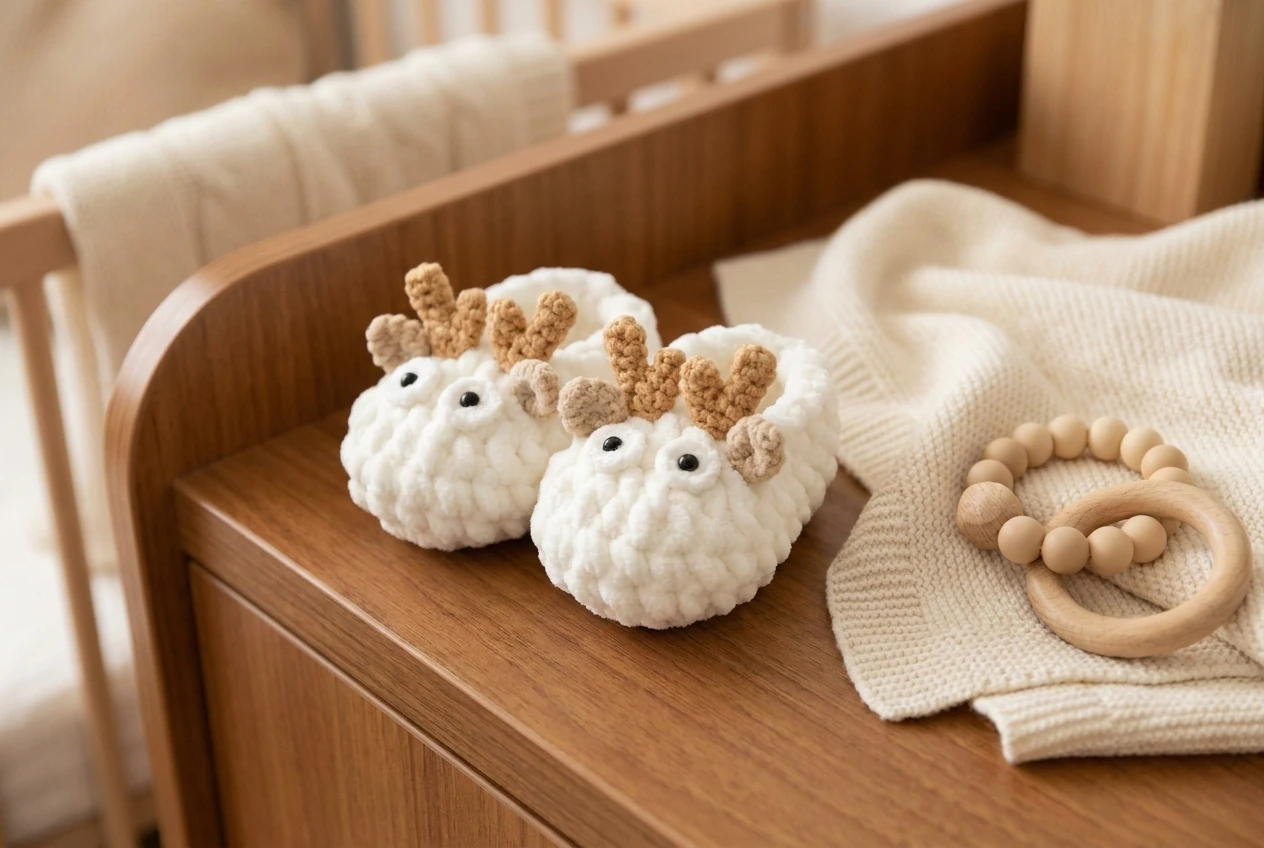
Important baby safety notes
Use only with attentive adult supervision.
- Prefer embroidered pupils; do not glue on facial pieces.
- Check every antler, ear and eye before use.
- Remove the booties immediately if any thread or part loosens.
- Do not use during sleep or leave in a cot or crib.
- These are soft pre-walking booties, not shoes for standing or outdoor walking.
- Confirm fit so toes are not compressed and circulation is unrestricted.
A handmade item cannot be made safe by appearance alone. Secure construction, suitable materials, correct sizing and supervision are all essential. If the booties will be gifted, include these care and safety notes with the crochet deer baby booties pattern.
Frequently asked questions
Can a beginner make these deer booties?
Yes, if the maker is comfortable counting chenille stitches, joining rounds and working basic decreases. Practice the oval sole with smooth yarn first if needed.
Should I use safety eyes?
Embroidered black pupils are the safer choice for infant accessories. Do not use glued eyes, and follow all applicable product-safety guidance.
Why is Round 3 worked in back loops?
The unused front loops create a ridge that helps the flat oval sole turn upward into the shoe body and defines the cuff transition.
How do I make both booties the same size?
Use the same hook and yarn, count every round, complete corresponding stages back to back and compare the bodies before adding decorations.
Can I make a toddler version?
Yes, but resize by actual sole length rather than age alone. Add foundation length and plain body rounds gradually, then redesign the decrease placement symmetrically.
The finished crochet deer baby booties pattern combines a practical five-round shoe body with tiny sculptural appliqués. Careful counting produces the fit; patient pinning produces the expression; secure embroidery and finishing produce a pair suitable for supervised use.




