

Complete crochet tutorial • US terms
Teardrop Crochet Shoulder Bag Pattern: Easy 9-Step Guide
This teardrop crochet shoulder bag pattern creates a seamless, structured bag from an oval base upward. Work it in continuous single-crochet rounds, shape the front and back openings, then build and join the integrated handle.
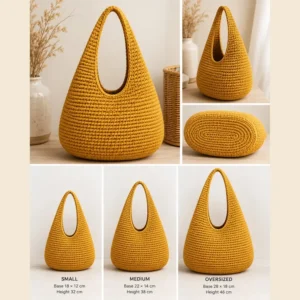
Check gauge, choose a size, and gather materials
Use worsted-weight cotton or cotton-blend yarn with a 4.5 mm (US 7) hook, adjusted for gauge. Also gather a locking marker, tapestry needle, and scissors. Cotton reinforcing cord and a firm base insert are optional.
Gauge: 18 single crochet × 20 rounds = 10 × 10 cm (4 × 4 in) in spiral single crochet. Aim for dense fabric that holds its shape while remaining flexible.
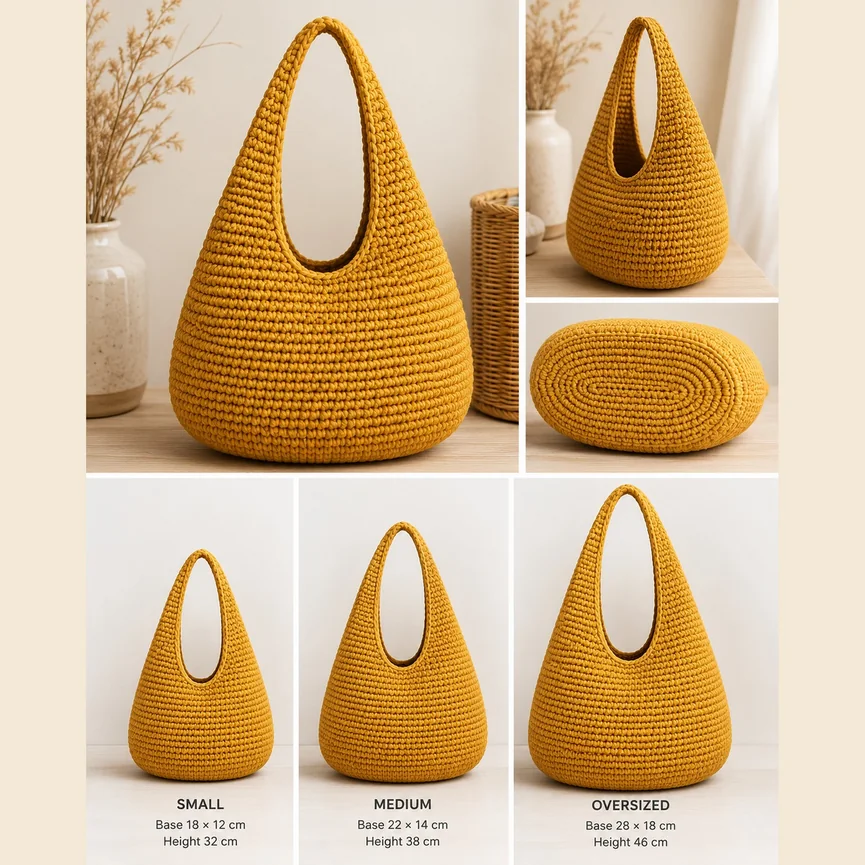
Medium: 550–750 m; base 22 × 14 cm; height 38 cm.
Oversized: 750–1000 m; base 28 × 18 cm; height 46 cm.
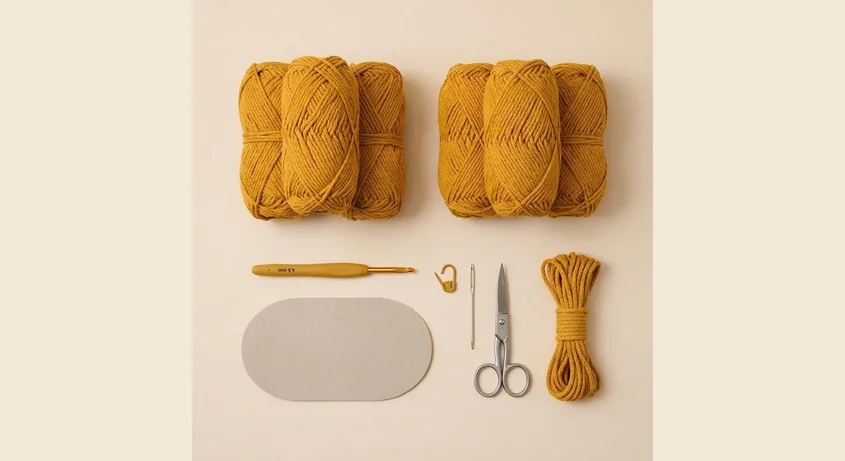
Keep the complete pattern nearby
Open the printable guide for the original round-by-round reference while you work.
Begin the oval base
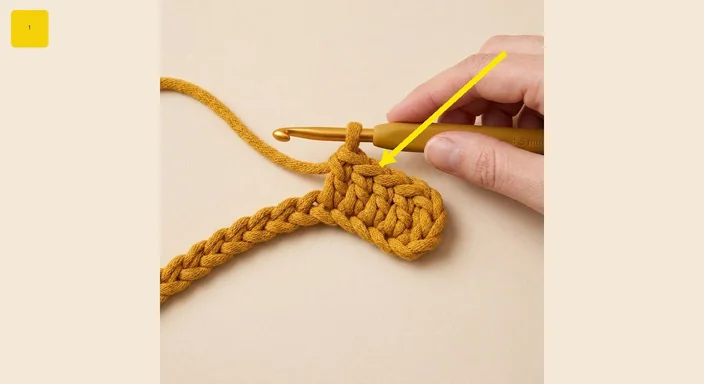
Chain 16 for Small, 20 for Medium, or 26 for Oversized. Working into the back bumps when possible, single crochet in the second chain and across until one chain remains. Work 3 single crochet in the last chain, rotate, and crochet along the free loops on the opposite side.
Round 1 ends with 28 stitches for Small, 36 for Medium, or 48 for Oversized. Place the marker in the first stitch and continue in a spiral without joining.
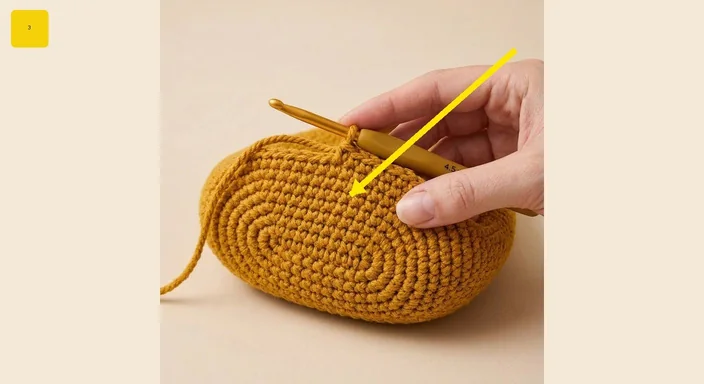
Shape the oval base
Increase around both three-stitch end curves, keeping the long sides even. Follow the PDF until the base reaches 60 stitches for Small, 72 for Medium, or 88 for Oversized. Small finishes after Round 5; the other sizes continue through Round 6.
Check length and width against the size chart. Stop earlier or add one balanced increase round if needed.
Build the straight sides
Work the next round in back loops only to form a crisp turning ridge. Then return to both loops and work plain single-crochet rounds without changing the stitch count. Measure from the base edge: about 17 cm for Small, 21 cm for Medium, or 26 cm for Oversized.
Move the marker every round. Extra stitches create flare; missed stitches pull inward. Check gauge if the fabric ruffles.
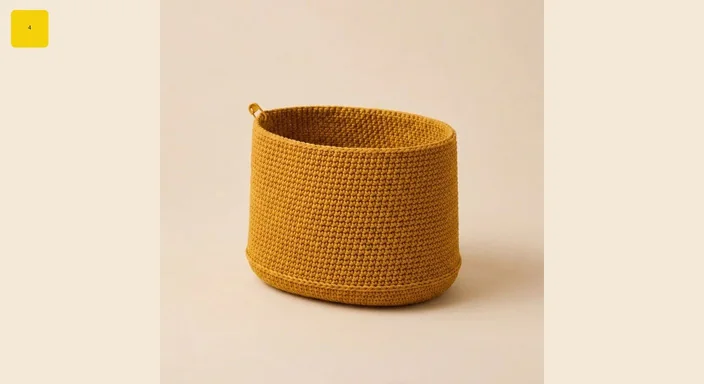
Shape matching front and back openings
Flatten the bag and mark the exact side stitches. Center an 18-stitch opening for Small, 22 stitches for Medium, or 26 stitches for Oversized on both front and back. The side panels contain 12, 14, or 18 stitches respectively.
Work short rows across the front. On every return row, chain 1, decrease over the first two stitches, crochet across, and decrease over the final two. Continue until 8 stitches remain for Small, 12 for Medium, or 16 for Oversized. Fasten off and repeat on the back so both dips match.
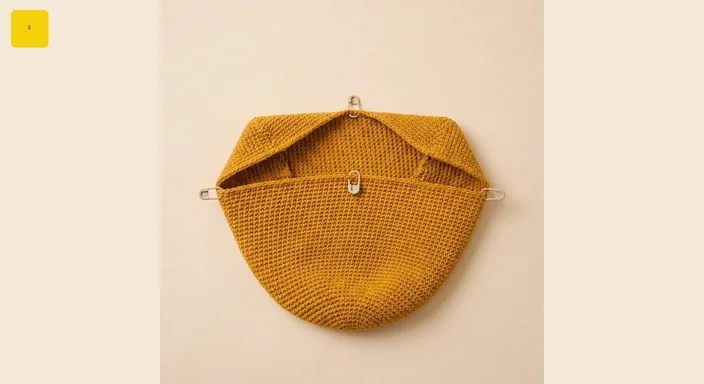
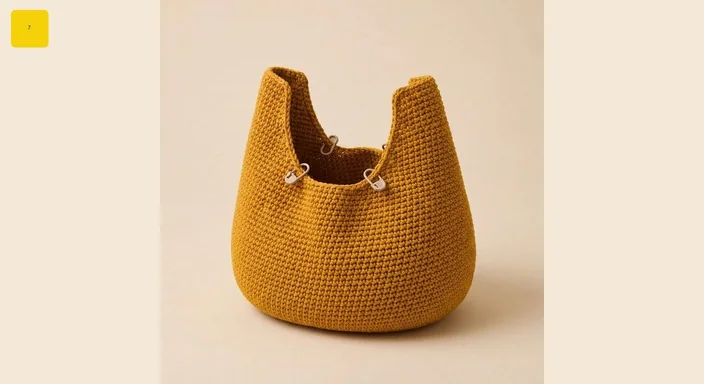
Raise the upper body and refine the taper
Rejoin at the original marker and single crochet around the side panels and narrowed front and back. The transition count is 44 stitches for Small, 52 for Medium, or 68 for Oversized. Work 6–8, 8–10, or 10–12 plain rounds respectively.
Over each of the next two rounds, place one decrease at the beginning and end of both side panels. The new totals are 36, 44, and 56 stitches. Pinch the top edges together to check depth before starting the handle.
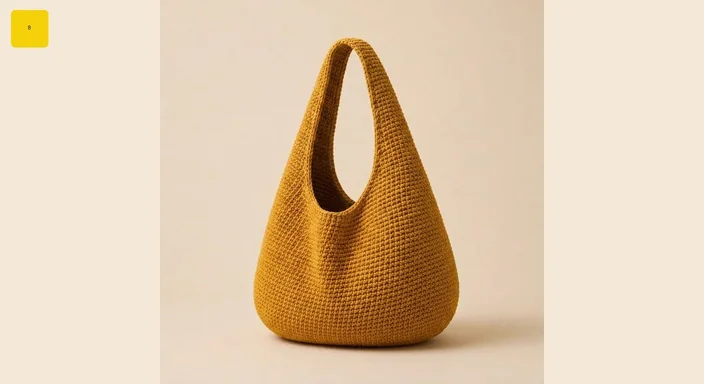
Ready for the handle?
Use the full chart to confirm your size-specific division and finished strap length.
Build and join the handle
Divide the top into front, sides, and back: 10/8/10/8 stitches for Small, 12/10/12/10 for Medium, or 16/12/16/12 for Oversized. Work the front group back and forth until it reaches half the target handle length. Record the row count, then make the back strap with the same number of rows.
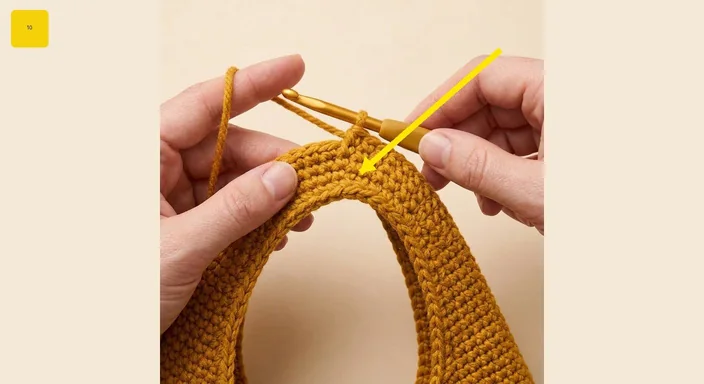
Target full handle lengths are 46–48 cm, 58–60 cm, and 70–74 cm. Hold the strap tops right sides together and single crochet through both layers to seam them.
Edge the handle and opening
Crochet evenly around the complete handle and front/back opening, usually placing one single crochet in each row end. Adjust sparingly if the edge pulls or ripples. Work two more rounds in back loops only for stability. An Oversized or heavily loaded bag may benefit from a final tight slip-stitch round.
Reinforce, block, and check the finished bag
Weave in ends securely. If using reinforcing cord, encase it before the final edge round. For extra base support, cut a firm insert with a small seam allowance, fold the raw edge under, and hand-sew it invisibly to the inner loops of the turning ridge.
Damp-block or lightly steam only if suitable for the yarn. Stuff the rounded base, shape the handle to its final length, and let the bag dry completely. Follow the yarn label and the Craft Yarn Council care symbols. You can also connect readers to get more informations about this pattern.
Choose your size and start crocheting
Keep the printable pattern open for every round, marker position, and stitch count.
Your seamless shoulder bag is complete
The teardrop crochet shoulder bag pattern turns one continuous construction into three practical sizes. Careful counting keeps the oval balanced, matched short rows form the openings, and a stable joined handle completes the sculptural silhouette.
Frequently asked questions
Is the pattern written in US terms?
Yes. It uses US single crochet, slip stitch, increase, sc2tog, back loop only, and continuous-round terminology.
Do I join each round?
No. Work in a spiral unless the edging instructions specifically tell you to join.
How do I stop the bag from stretching?
Match gauge, use the specified yarn type, reinforce the handle if desired, and avoid overloading.
Can I add a base insert?
Yes. A firm fabric or premade oval insert can be hand-sewn inside after the crochet is complete.
Why are the front and back dips uneven?
Recheck marker placement, stitch counts, and decrease rows. Center and work both sections identically.




