

My Crochet Universe · Crescent Handbag Series
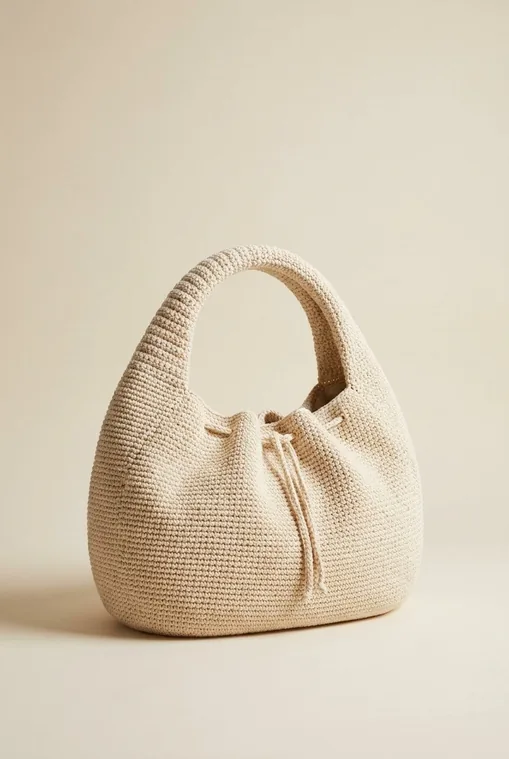
34-Step Crochet Crescent Handbag Pattern: A Complete Step-by-Step Guide
Follow the complete supplied pattern from foundation chain to structured finish, with every round, stitch count, measurement, and construction checkpoint.
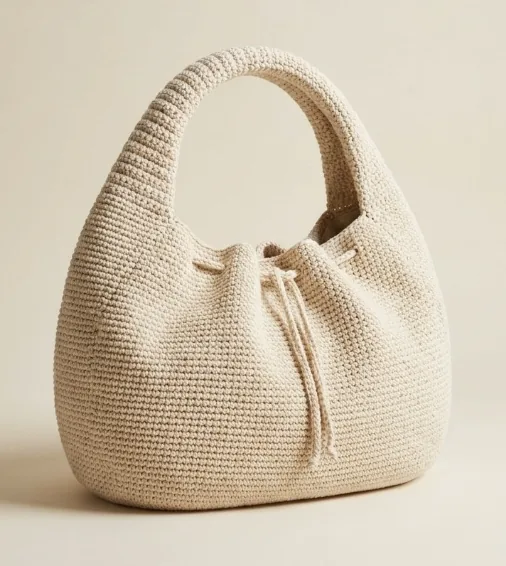
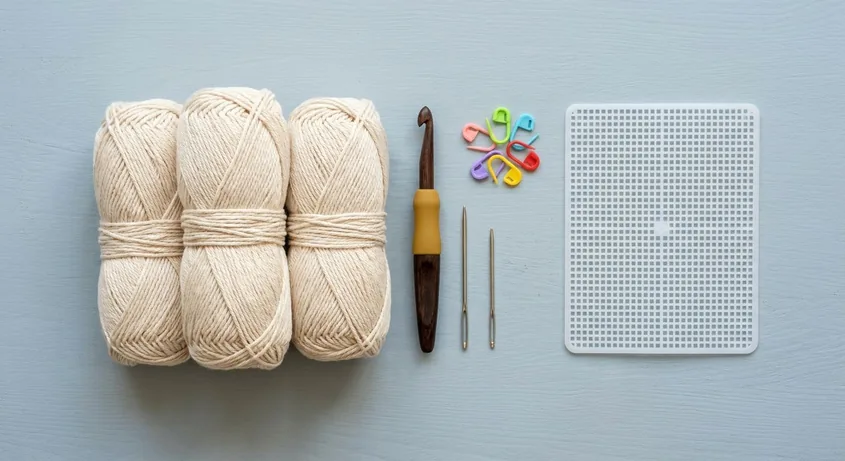
This minimalist handbag uses 350–450 g (approximately 700–900 m) of category 3, 100% cotton yarn, a 3.5 mm hook, yarn and tapestry needles, 4–8 locking markers, and optional base reinforcement and steaming tools.
1. Check gauge and tension
Use tight, even tension so the single-crochet fabric is firm enough to stand. Work in US terms and continuous rounds unless instructed otherwise. Do not join at round ends. Mark the first stitch and move the marker upward. If the fabric feels loose, try a 3.25 mm hook.
2. Crochet the foundation chain
With the main DK cotton and a 3.5 mm hook, chain 21. This forms the long side of the oval base and should measure approximately 12–13 cm. Adjust hook size if needed before continuing.
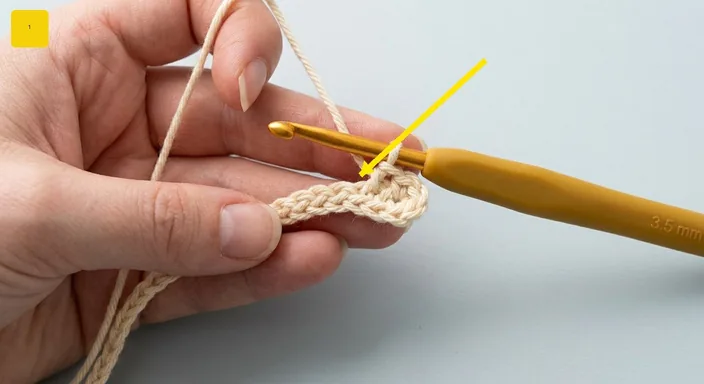
3. Form round 1 of the oval base
Single crochet in the second chain from the hook and mark it as side A. Sc in the next 18 chains, work 3 sc in the last chain, rotate, sc through the next 18 free loops, then work 2 sc into the first chain. Do not join; count approximately 40 stitches.
4. Begin rounding the base
Round 2 ends with 48 stitches. Sc 19 along the long side. Across the first curve, distribute 4 increases with sc and inc worked evenly. Sc 19 across the opposite side, then add 4 increases around the second curve. Move the marker and check for a 13–14 cm oval.
5. Continue widening the oval
Round 3 ends with 56 stitches. Sc 19, place approximately 4 increases around the first curve—about every second stitch—sc 19 across the opposite side, then repeat around the second curve. Flatten the work and redistribute increases slightly if the base begins to cup.
6. Complete the final base expansion
Round 4 ends with 64 stitches. Sc 19, place approximately 4 increases around the first curve—about every third stitch—sc 19 across the opposite side, and repeat the increases around the second curve. The base should measure about 16–17 cm. Correct rippling or cupping while preserving an even count.
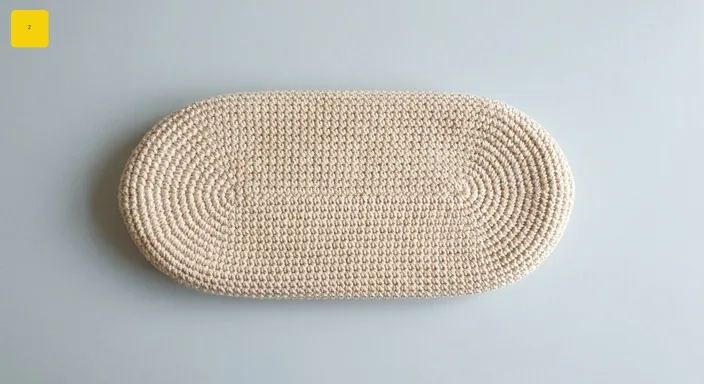
7. Stabilize the base
Round 5 has no increases. Work one sc in each of the 64 stitches through both loops. Confirm the oval lies flat. Light steaming is optional, but do not press the crochet texture.
8. Turn the body upward in BLO
For round 6, work back-loop-only sc in all 64 stitches. The unused loop creates a defined ridge between base and sides and encourages the fabric to turn upward.
9. Build the straight bag body
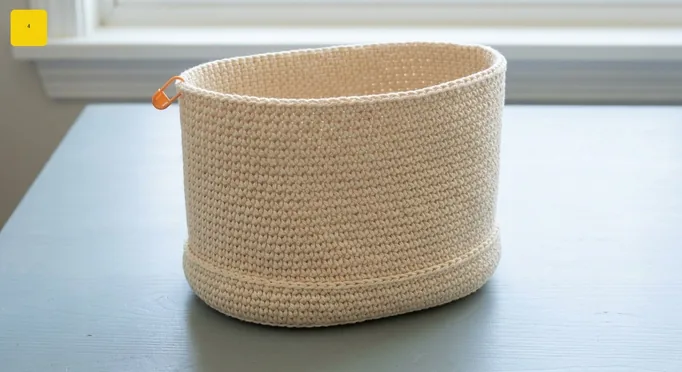
Rounds 7–24 each contain 64 sc. Work 18 plain continuous rounds through both loops. After round 12, height from the base ridge should be about 7–8 cm; after round 24, about 14–15 cm. The widest circumference should be roughly 40–42 cm. Add 2–4 rounds only if a taller body is desired.
10. Create the drawstring eyelets
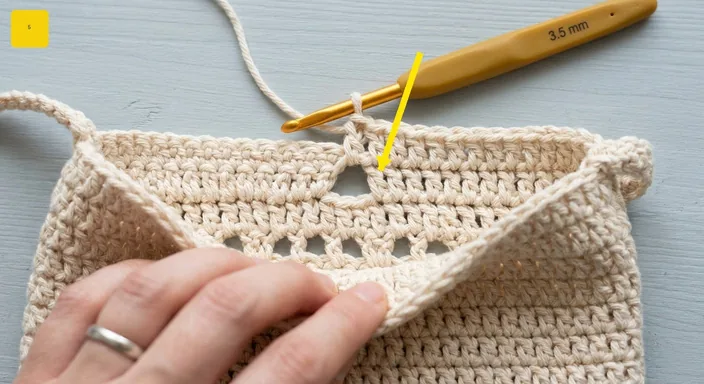
Round 25 keeps 64 positions: repeat sc in the next 6 stitches, chain 1, skip 1 stitch, eight times around, adjusting the final spacing slightly if needed. You should have 56 sc and eight chain-1 spaces. Mark the center-front eyelet and the directly opposite center-back eyelet.
Crochet the complete structured crescent handbag
Keep all 34 steps, stitch counts, measurements, construction photographs, and finishing notes together in the printable PDF.
11. Secure the eyelet round
Round 26: sc in every sc and work one sc into every chain-1 space, not into the skipped stitch below. Count 64 stitches. The eyelets should remain visible when the fabric is gently stretched.
12. Raise the upper body
Rounds 27–32 each contain 64 sc. Work six plain rounds. After round 32, total body height from the base ridge should be approximately 19–20 cm, ready for the opening to taper toward the handle.
13. Mark handle and opening positions
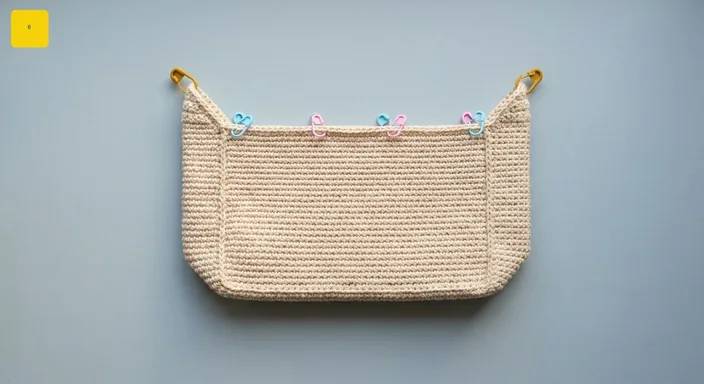
Flatten the bag with center-front and center-back eyelets aligned. Mark 16 front stitches and 16 directly behind for the back opening. The remaining 32 stitches—16 per side—become the handle-side segments. Use contrasting markers and center all four sections.
14. Set the handle sides
Round 33 remains 64 stitches. Starting at side marker A, sc 16 for the first handle-side segment and mark its eighth stitch as the side peak. Sc 16 across the front, sc 16 across the second handle side and mark its peak, then sc 16 across the back. This round establishes shaping locations.
15. Decrease the side segments
Round 34 ends with 60 stitches. Across the first 16-stitch handle side, sc2tog, sc 12, sc2tog to reduce it to 14. Sc 16 across the front. Repeat on the second side, then sc 16 across the back. Keep decreases symmetric around the peaks.
16. Narrow both sides again
Round 35 ends with 56 stitches. On each 14-stitch handle segment, work sc2tog, sc 10, sc2tog to reduce it to 12. Keep both 16-stitch opening sections unchanged.
17. Continue tapering
Round 36 ends with 52 stitches. Reduce each 12-stitch handle side to 10 with sc2tog, sc 8, sc2tog. Work 16 sc across both front and back openings.
18. Finish the pre-handle taper
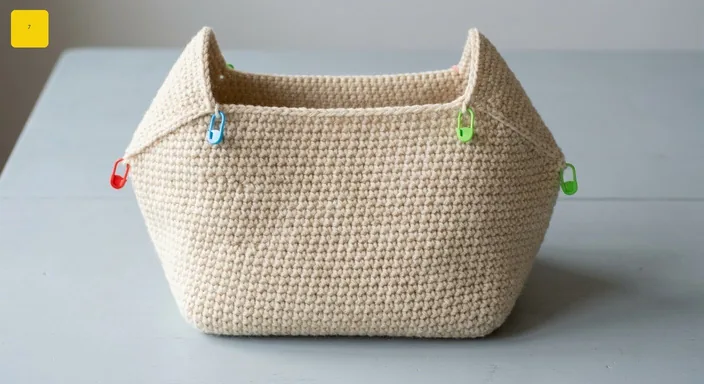
Round 37 ends with 48 stitches. Reduce each 10-stitch handle side to 8 using sc2tog, sc 6, sc2tog. Keep each opening section at 16. The side panels should now pinch inward while the front and back form a soft dip.
19. Stabilize before the handle build
Round 38 has no shaping. Sc in all 48 stitches. Check that the two 8-stitch side segments match and that the 16-stitch front and back openings remain comfortable. Frog and reposition decreases if symmetry is off.
20. Confirm the handle segments
Flatten the bag and identify the two 8-stitch side strips. Mark the first stitch of each and the directly opposite stitch. These side strips will rise toward the circular handle, while the 16-stitch front and back sections will dip beneath it.
21. Build height before the arch
Rounds 39–44 each remain 48 stitches. Work six plain sc rounds while molding the side segments upward and allowing the openings to curve inward. Height from the base should be around 22–23 cm. Add 1–3 plain rounds only if a taller proportion is preferred.
22. Understand the handle formation
The next decreases mainly affect the 16 total handle-side stitches. Gradually reducing them makes the fabric curl inward and meet above the bag. Keep the front and back openings mostly constant and shape both sides with your hands as you work.
23. Start narrowing the handle
Round 45 ends with 44 stitches. On each 8-stitch handle segment, work sc2tog, sc 4, sc2tog to reduce it to 6. Work 16 sc across each opening section.
24. Narrow the handle sides
Round 46 ends with 40 stitches. On each 6-stitch handle segment, work sc2tog, sc 2, sc2tog to reduce it to 4. Keep the front and back sections at 16 each.
Crochet the complete structured crescent handbag
Keep all 34 steps, stitch counts, measurements, construction photographs, and finishing notes together in the printable PDF.
25. Reduce to two-stitch columns
Round 47 ends with 36 stitches. Work sc2tog twice across each 4-stitch handle column to reduce it to 2. Sc 16 across the front and 16 across the back. Encourage both narrow columns to lean inward.
26. Create single handle anchors
Round 48 ends with 32 opening stitches plus one handle anchor at each side. Sc2tog each 2-stitch column to one stitch, work the front and back sections, and place a special marker in each anchor.
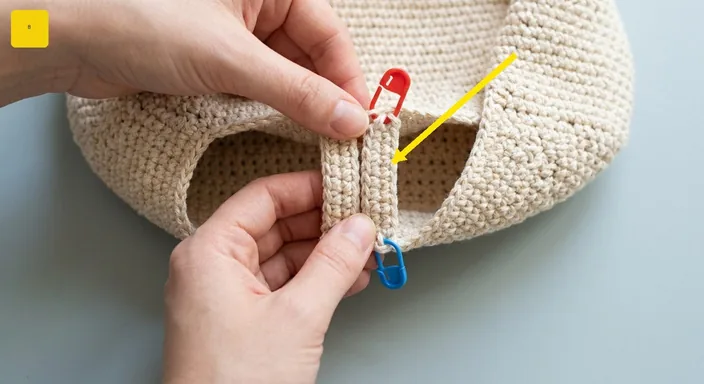
27. Prepare the padded circular handle
From here the handle becomes a dense continuous strap growing around the two anchor points while opening stitches below are skipped. Keep tension snug; use a 3.25 mm hook for the handle if necessary.
28. Establish handle round 1
Insert into the first anchor and sc. Work into 6–8 adjacent stitches on either side to form a small arc. Skip 4–6 stitches across the lowest opening, sc into the second anchor, and work into 6–8 adjacent stitches back toward the start. Aim for an 18–20 stitch ring and mark the first stitch.
29. Build the padded arch
Handle rounds 2–20: sc in every stitch, keeping approximately 18–20 stitches. Roll the strap between your fingers every few rounds. Continue until it nearly meets above the opening with a 4–5 cm gap. Most gauges need about 18–20 rounds, but proportion is more important than the exact number.
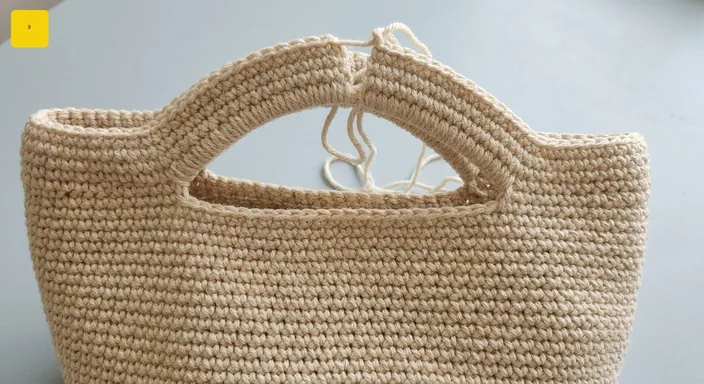
30. Seam and finish the handle
Handle round 21: fold the two edges together at the center top. Join opposing stitches with sc2tog-style pairs until the opening is closed. Fasten off with a 15–20 cm tail, sew any remaining gap, and bury the tail inside the padded arch for a smooth curve.
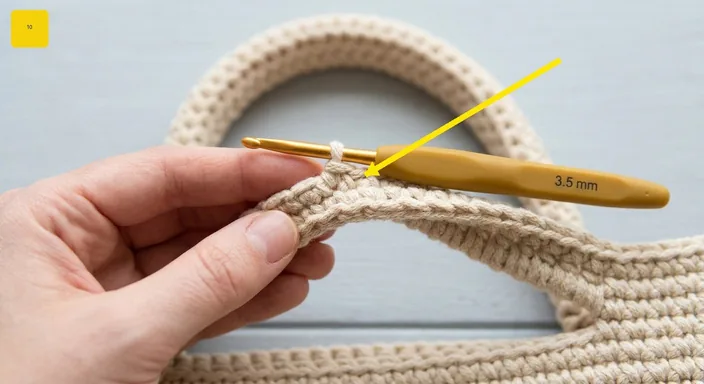
31. Make the drawstring cord
Chain until the cord measures about 90–110 cm, turn, and slip stitch into every chain to create a rounded cord. Weave in both ends. For a thicker cord, hold 2–3 strands together or make a crochet i-cord.
32. Thread the drawstring
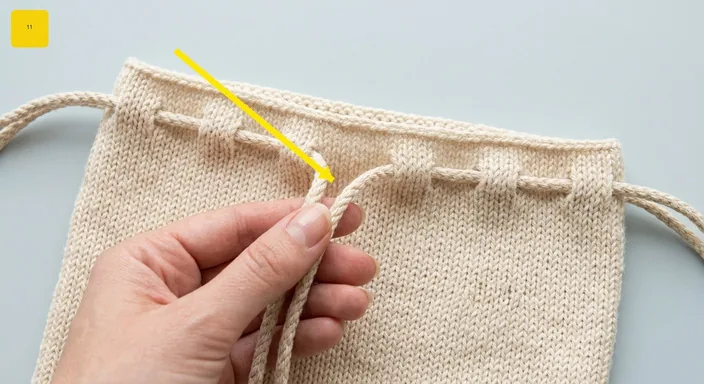
Starting near a side seam, weave the cord over and under through the eight eyelets from round 25. Bring both ends out symmetrically at center front. Pull gently so the top gathers beneath the handle and tie a loose bow or knot.
33. Finish and shape the handbag
Weave in all ends. Stuff with towels and lightly steam from a few centimeters away if the cotton permits; never press directly. Optionally tack a cut-to-size plastic mesh or firm felt insert inside the base. Final targets: base 16–18 cm, widest width 24–28 cm, and base-to-handle height 24–28 cm.
34. Care for long-term structure
Store the bag lightly stuffed with tissue or fabric and avoid heavy loads that could stretch the handle. Spot-clean or hand-wash gently in cool water, then reshape and dry while stuffed. If the bag feels too soft, add a fabric lining or removable inner pouch.
Crochet the complete structured crescent handbag
Keep all 34 steps, stitch counts, measurements, construction photographs, and finishing notes together in the printable PDF.




