

Crochet Starfish Charm: Step-by-Step Amigurumi Guide
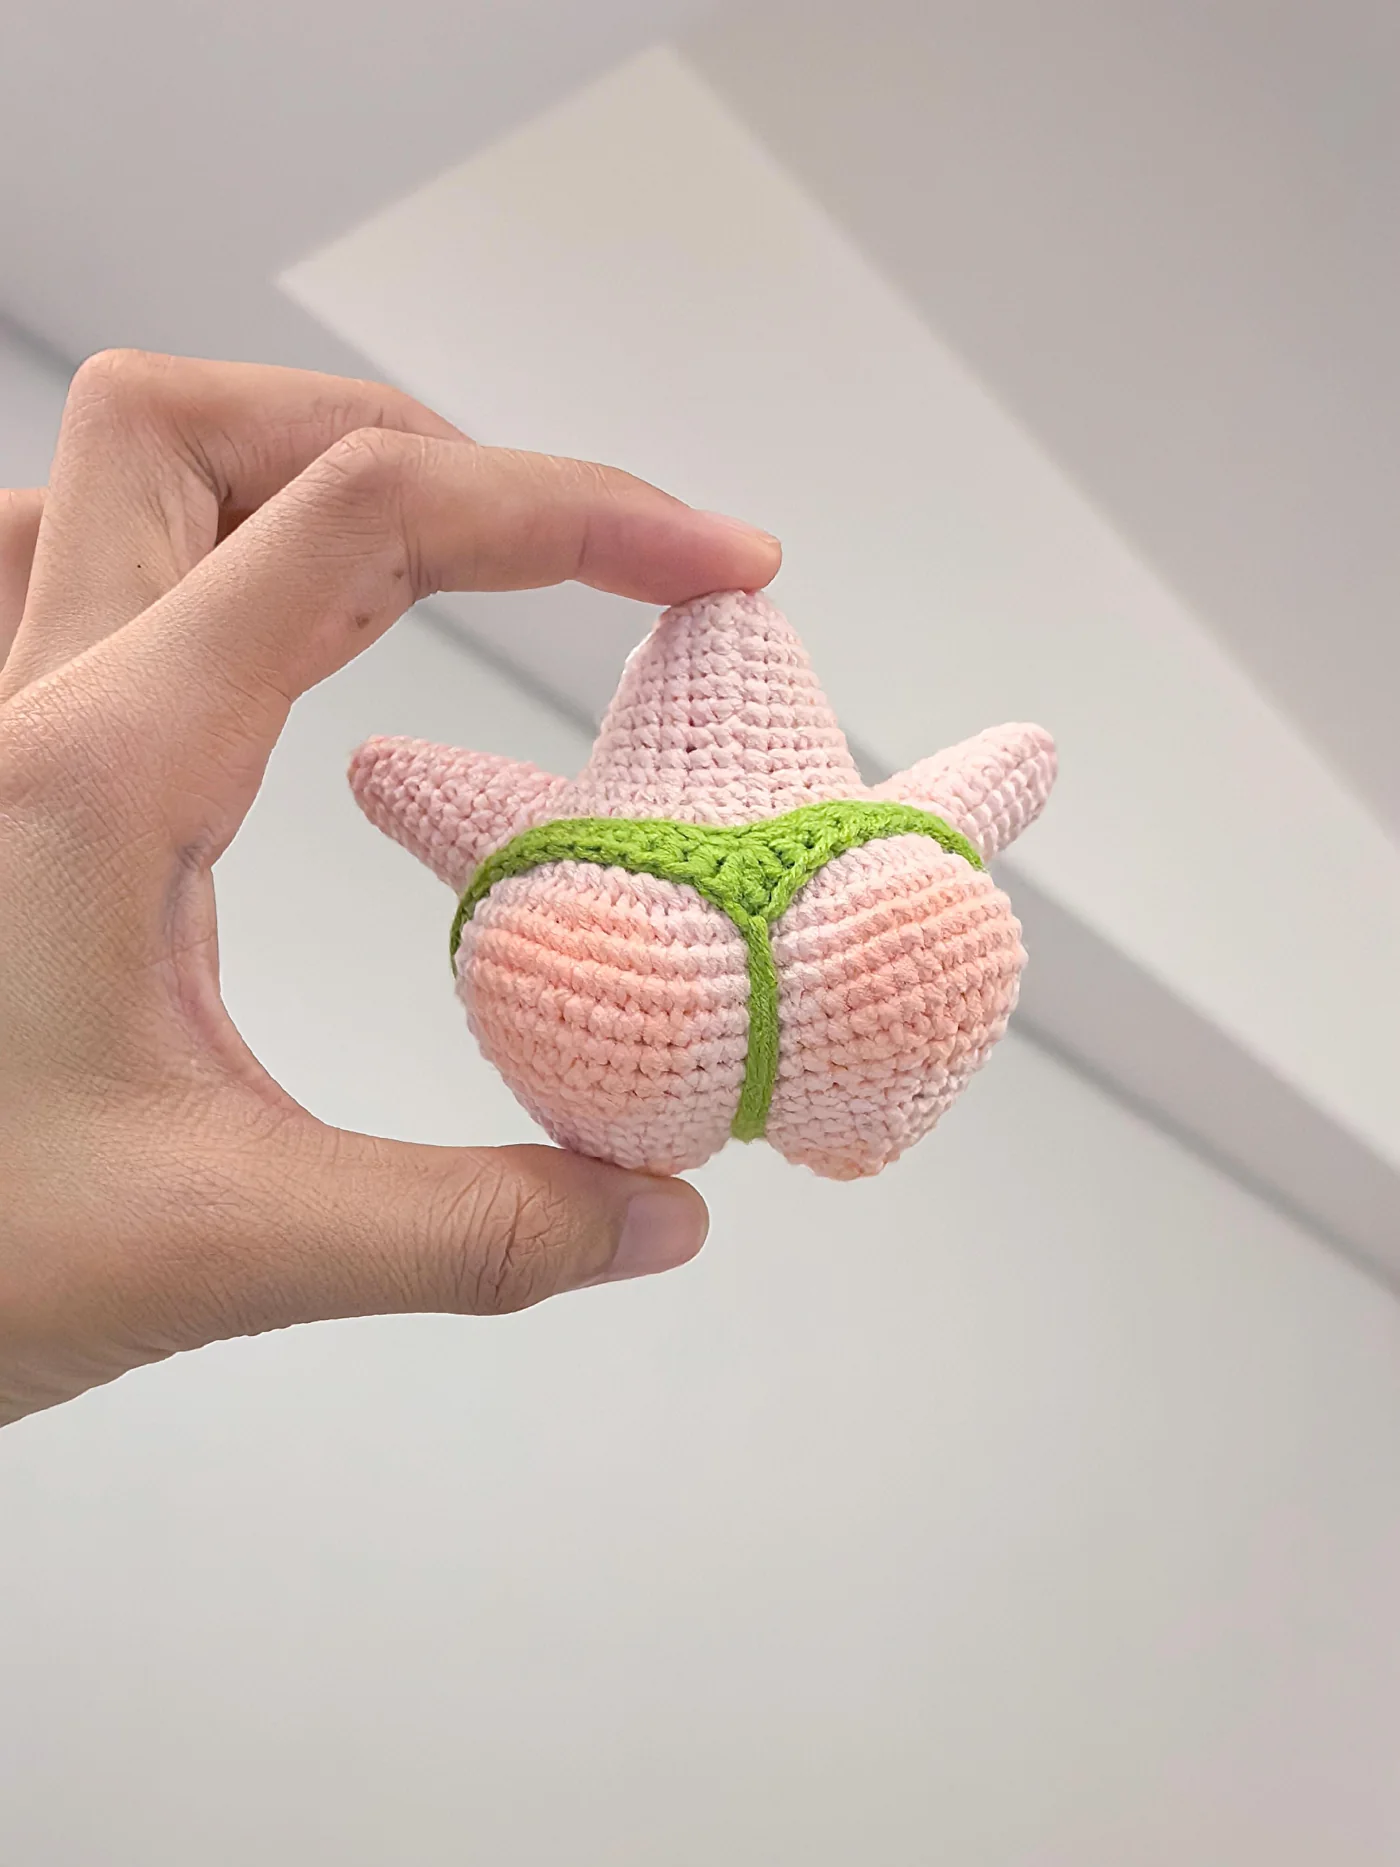
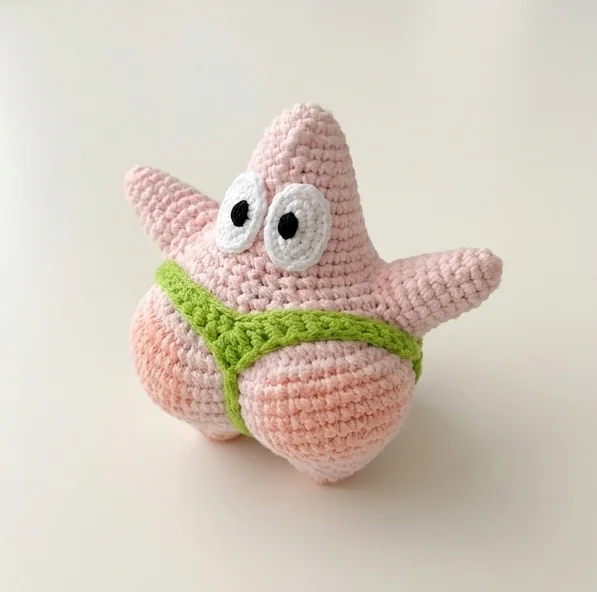
This crochet starfish charm has a tapered pink head, tiny cone arms, two generously rounded lower points, and a bright green or yellow waistband. The supplied photographs show its front, side, and back, so the shape is easier to understand than from a single finished picture.
Follow the chart-based rounds below in US crochet terms, then use the finishing checkpoints for the eyes, garment, and optional loop. This crochet starfish charm is an untested interpretation, not a physically verified pattern. Where the chart leaves a construction detail unclear, the guide names that assumption rather than presenting it as fact.
Table of Contents
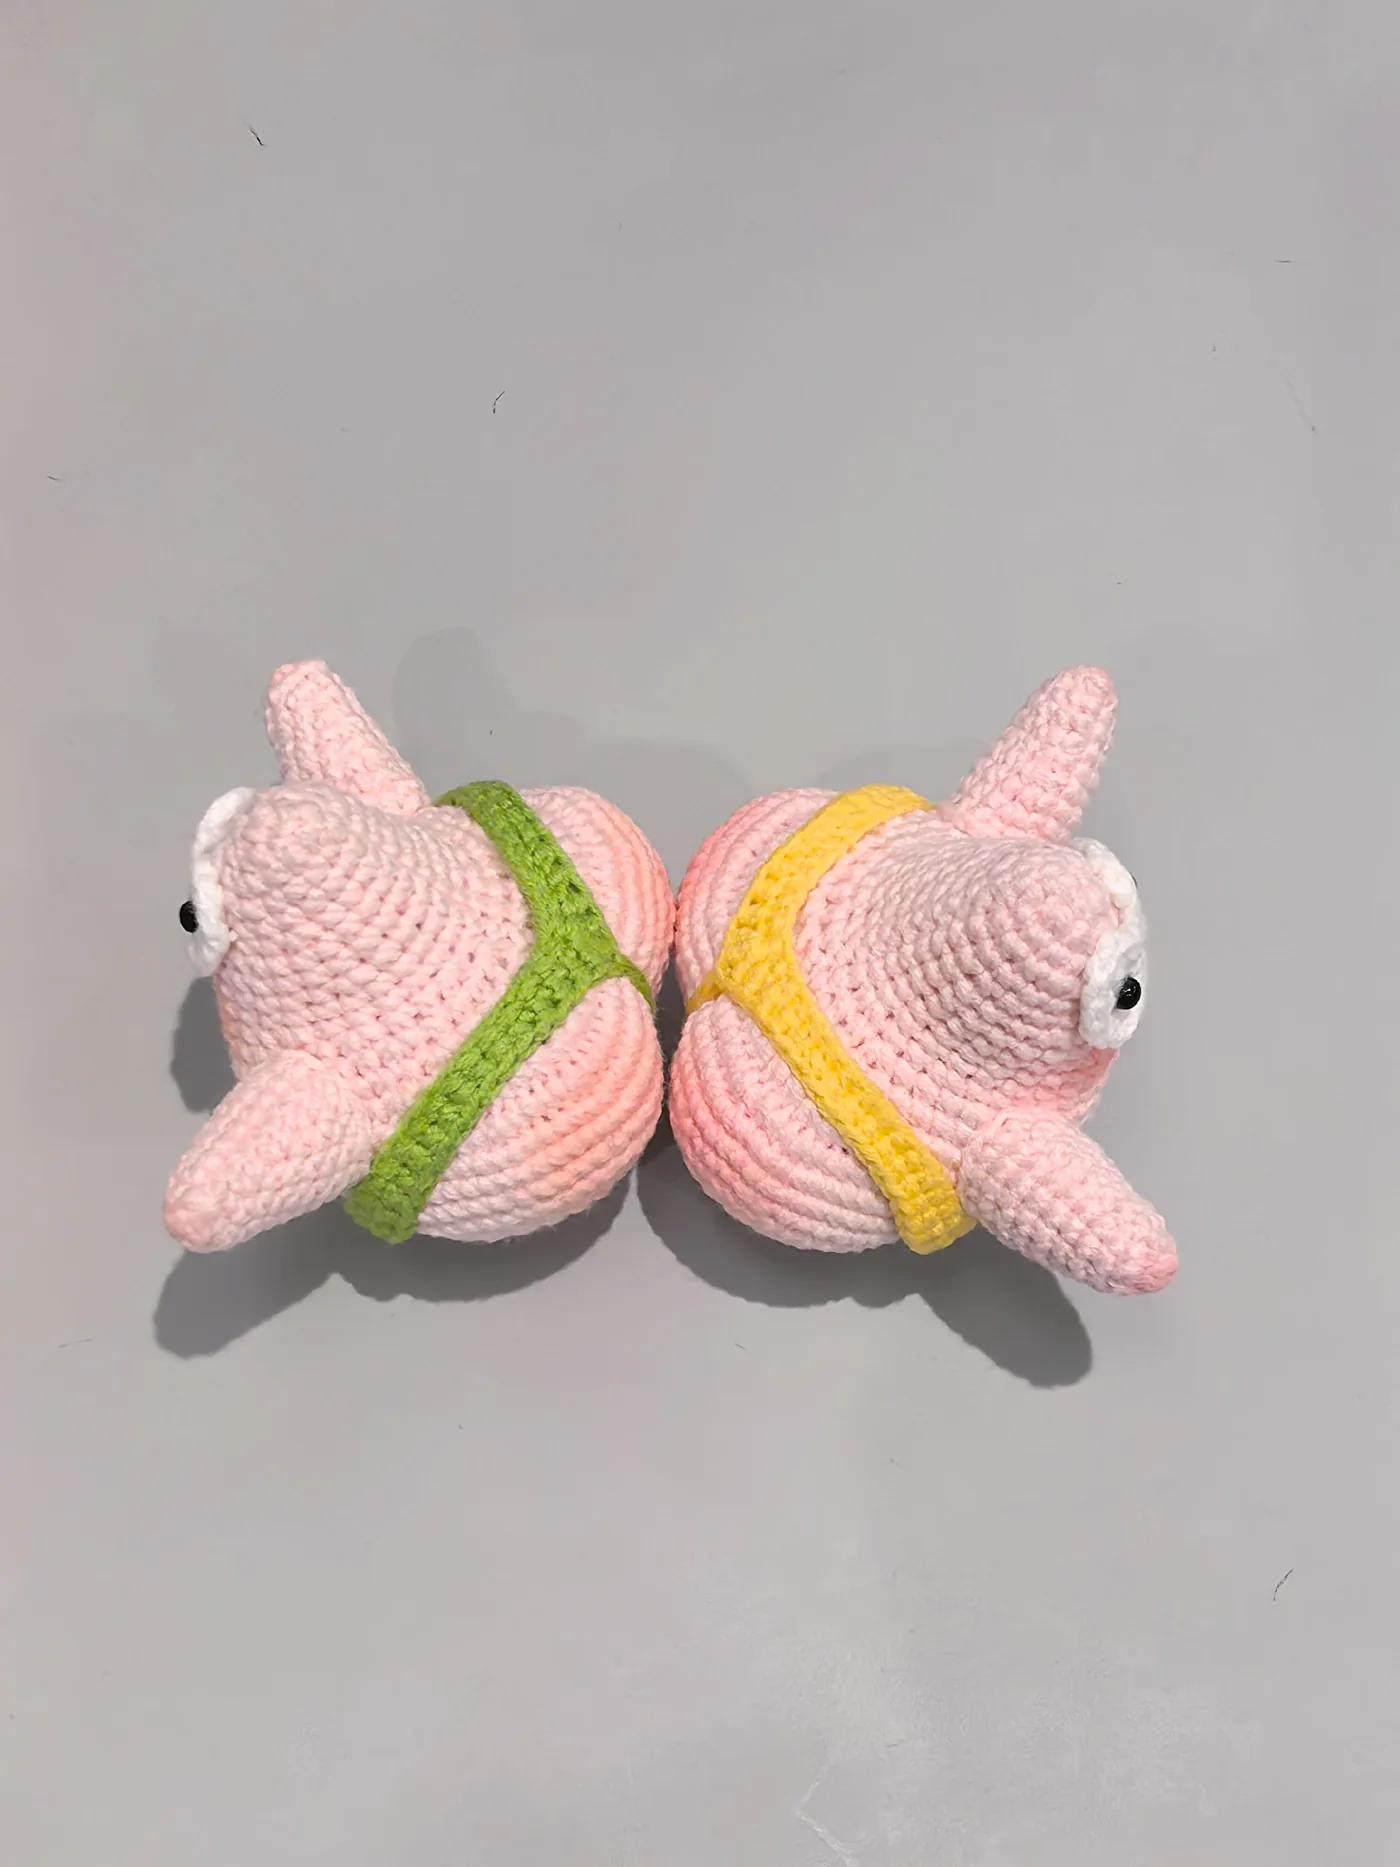
Before Starting Your Crochet Starfish Charm
The crochet starfish charm photos establish visible colors and proportions, but cannot prove internal joins or exact dimensions. The chart uses shorthand without a full legend. Here X means sc, V means increase, A means a two-stitch decrease, W means three stitches in one, and M is interpreted as a three-stitch decrease to preserve the printed counts.
Treat the crochet starfish charm as an adult decorative accessory, not an infant toy. Hard eyes, detachable parts, stuffing, and hanging loops can create hazards. Embroidered pupils are an alternative, not a safety certification. The photos show a charm on a vehicle handlebar; do not copy that placement during riding or attach it where it can interfere with steering, throttle, braking, or other controls.
Materials and US Crochet Terms
For a first crochet starfish charm sample, try smooth sport or DK cotton and a compatible 2.5–3 mm hook. These are starting suggestions, not yarn specifications recovered from the photos. Choose a hook that gives a firm fabric without making your hands strain. Check for gaps before committing to a fully stuffed piece.
- Pink yarn for body and arms; white for eyes; green or yellow for the garment.
- Black embroidery thread or yarn for pupils; a little darker pink for optional embroidery.
- Polyester toy filling, a blunt yarn needle, scissors, stitch markers, and a compatible hook.
- Optional short hanging cord for an adult display piece only; no exact cord length is supplied.
| Term | Meaning in this guide |
|---|---|
| sc / dc / hdc / tr | US single / double / half double / treble crochet |
| inc | 2 sc in the same stitch unless a different stitch is named |
| dec | sc2tog: consume 2 stitches, make 1 |
| dec3 | sc3tog: consume 3 stitches, make 1; interpretation of M |
| 3-sc group | 3 sc into one stitch; interpretation of W |
| ch / sl st / MR | Chain / slip stitch / magic ring |
| [ … ] × n | Repeat the bracketed sequence n times |
Work body, legs, and arms in continuous rounds, marking the first real stitch. Do not add a joining slip stitch or chain unless instructed. The spiral method is a stated working convention because the chart does not specify joins. Keep counting separate from shaping: even a visually neat crochet starfish charm can hide an extra stitch.
Step 1: Crochet Starfish Charm Head and Upper Body
Begin the crochet starfish charm in pink with a magic ring. Work six sc into it, tighten, and mark the first stitch. The ring method is a practical interpretation of the chart’s six-stitch start. Leave enough tail to weave securely through the fabric later; do not rely on a single loose knot.
| Round | Instruction | Count |
|---|---|---|
| 1 | 6 sc in MR | 6 |
| 2 | inc in each stitch | 12 |
| 3 | 3 sc, [sc, inc] × 3, 3 sc | 15 |
| 4 | 3 sc, [sc, inc, sc] × 3, 3 sc | 18 |
| 5 | sc around | 18 |
| 6 | 3 sc, [3 sc, inc] × 3, 3 sc | 21 |
| 7 | 3 sc, [2 sc, inc, 2 sc] × 3, 3 sc | 24 |
| 8 | sc around | 24 |
| 9 | 3 sc, [5 sc, inc] × 3, 3 sc | 27 |
| 10 | sc around | 27 |
| 11 | 3 sc, [3 sc, inc, 3 sc] × 3, 3 sc | 30 |
| 12 | [sc, inc, sc] × 2, 18 sc, [sc, inc, sc] × 2 | 34 |
| 13 | [3 sc, inc] × 2, 18 sc, [3 sc, inc] × 2 | 38 |
The increases are deliberately unevenly distributed; this is not a generic flat circle. Keep the three plain stitches at both ends of the early rounds exactly where written. Before continuing your crochet starfish charm, check the tip and compare both sides without stretching the work into the shape you hope to see.
Step 2: Shape the Rounded Lower Body
The next crochet starfish charm rounds expand the lower body, then draw it inward toward the leg division. Count carefully at round 15, which contains two three-stitch groups as well as ordinary increases. Use extra markers at major groups if the long sequence is difficult to track.
| Round | Instruction | Count |
|---|---|---|
| 14 | [sc, inc, sc] × 2, 9 sc, [sc, inc] × 4, 9 sc, [sc, inc, sc] × 2 | 46 |
| 15 | 3 sc in next st, inc, [sc, inc] × 3, 12 sc, [sc, inc, sc] × 2, 12 sc, [inc, sc] × 3, inc, 3 sc in last st | 60 |
| 16 | 4 sc, 6 inc, 40 sc, 6 inc, 4 sc | 72 |
| 17 | 6 sc, [2 sc, inc, 2 sc] × 2, 40 sc, [2 sc, inc, 2 sc] × 2, 6 sc | 76 |
| 18 | 37 sc, (2 sc, hdc) into next st, (hdc, 2 sc) into next st, 37 sc | 80 |
| 19 | 24 sc, dec, sc, dec, 8 sc, dec3, dec3, 8 sc, dec, sc, dec, 24 sc | 72 |
| 20 | [2 sc, dec, 2 sc] × 3, 36 sc, [2 sc, dec, 2 sc] × 3 | 66 |
| 21 | 29 sc, dec, 4 sc, dec, 29 sc | 64 |
| 22 | 5 sc, 7 dec, 5 sc, [2 sc, dec] × 4, 5 sc, 7 dec, 5 sc | 46 |
| 23 | 15 sc, [2 sc, dec] × 4, 15 sc | 42 |
| 24 | 2 sc, [sc, dec] × 4, 14 sc, [dec, sc] × 4, 2 sc | 34 |
For dec3, insert the hook and pull up a loop in each of the next three stitches, then yarn over and pull through all four loops. For an ordinary dec, pull up a loop in each of two stitches and draw through all three loops. Add filling gradually while your crochet starfish charm still has a wide opening; leave room for the leg bridge.
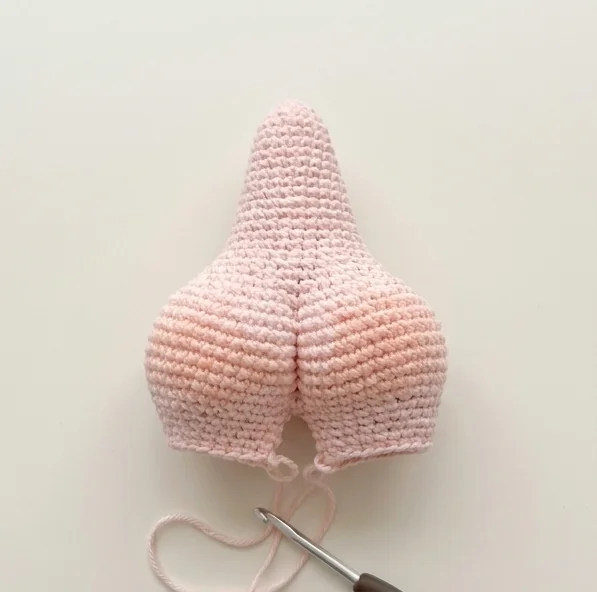
Step 3: Split and Close the Two Legs
After round 24, the crochet starfish charm has thirty-four stitches. Mark two groups of seventeen around the opening. The chart says to chain three, fold across, join to the opposite side, and work each leg separately. It does not identify the exact seam landmarks; align the division with the desired body symmetry before joining.
Proposed bridge method: ch 3 from the current stitch and join to the point seventeen stitches away without counting the slip stitch as a new stitch. Work one leg around its seventeen body stitches plus the three bridge chains. The other leg of the crochet starfish charm uses the remaining seventeen stitches and the opposite side of the same bridge. Each leg round therefore has twenty stitch positions.
| Leg round | Left leg | Right leg |
|---|---|---|
| 25–26 | 20 sc each round | 20 sc each round |
| 27 | sc, [dec, sc] × 4, 7 sc = 16 | 7 sc, [sc, dec] × 4, sc = 16 |
| 28 | [dec, sc] × 4, 4 sc = 12 | 5 sc, [dec, sc] × 3, dec = 12 |
| 29 | 6 dec = 6 | 6 dec = 6 |
Stuff both lower points before the final decrease round, checking that the filling is distributed evenly. Fasten off with a tail, pass it through the front loops of the six remaining stitches, and draw closed. Sew any small bridge gap separately without pulling a hard ridge across the center of your crochet starfish charm.
Step 4: Make Two Tapered Arms
Make both crochet starfish charm arms in pink. Begin with four sc in a magic ring, then follow the chart’s small increases. The tips should remain soft rather than being forced into stiff cones with excessive stuffing. Leave a sewing tail at the open sixteen-stitch edge.
| Round | Instruction | Count |
|---|---|---|
| 1 | 4 sc in MR | 4 |
| 2 | 4 inc | 8 |
| 3 | [3 sc, inc] × 2 | 10 |
| 4 | sc around | 10 |
| 5 | [4 sc, inc] × 2 | 12 |
| 6 | sc around | 12 |
| 7 | [5 sc, inc] × 2 | 14 |
| 8 | sc around | 14 |
| 9 | [6 sc, inc] × 2 | 16 |
| 10 | sc around; fasten off with a tail | 16 |
Pin the arms to the sides after the body is stuffed. The source gives no attachment round, so choose symmetrical positions by comparing the photos and checking the front view. Sew around each open edge with small stitches, catching the body fabric without dragging stuffing to the surface.
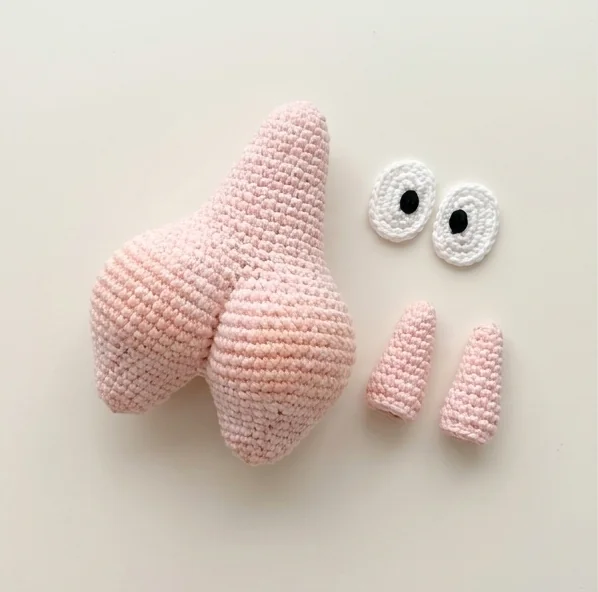
Step 5: Crochet and Attach the Eyes
For each crochet starfish charm eye, make six sc in a white magic ring. The second source round reads V, FV, 2V, FV, V. Here FV is interpreted as two dc into one stitch; the other increases are sc increases. That interpretation creates twelve stitches from six and gives the eye extra height at two positions.
| Eye round | Instruction | Count |
|---|---|---|
| 1 | 6 sc in MR | 6 |
| 2 | sc inc, dc inc, 2 sc inc, dc inc, sc inc | 12 |
A dc increase means two complete double crochets in the same stitch, not a dc decrease. Fasten off with a sewing tail and make a second eye. Embroider black pupils before sewing on the white pieces. The real photos show shiny components, but embroidery avoids adding those particular detachable hard parts.
Pin the eyes near the top-front of the crochet starfish charm and check their expression from several angles. The chart supplies no exact placement coordinates. Sew the edges securely without flattening the cone. Optional pink cross-shaped or cheek embroidery is visible in the references but has no supplied stitch sequence; treat it as your own finishing choice.
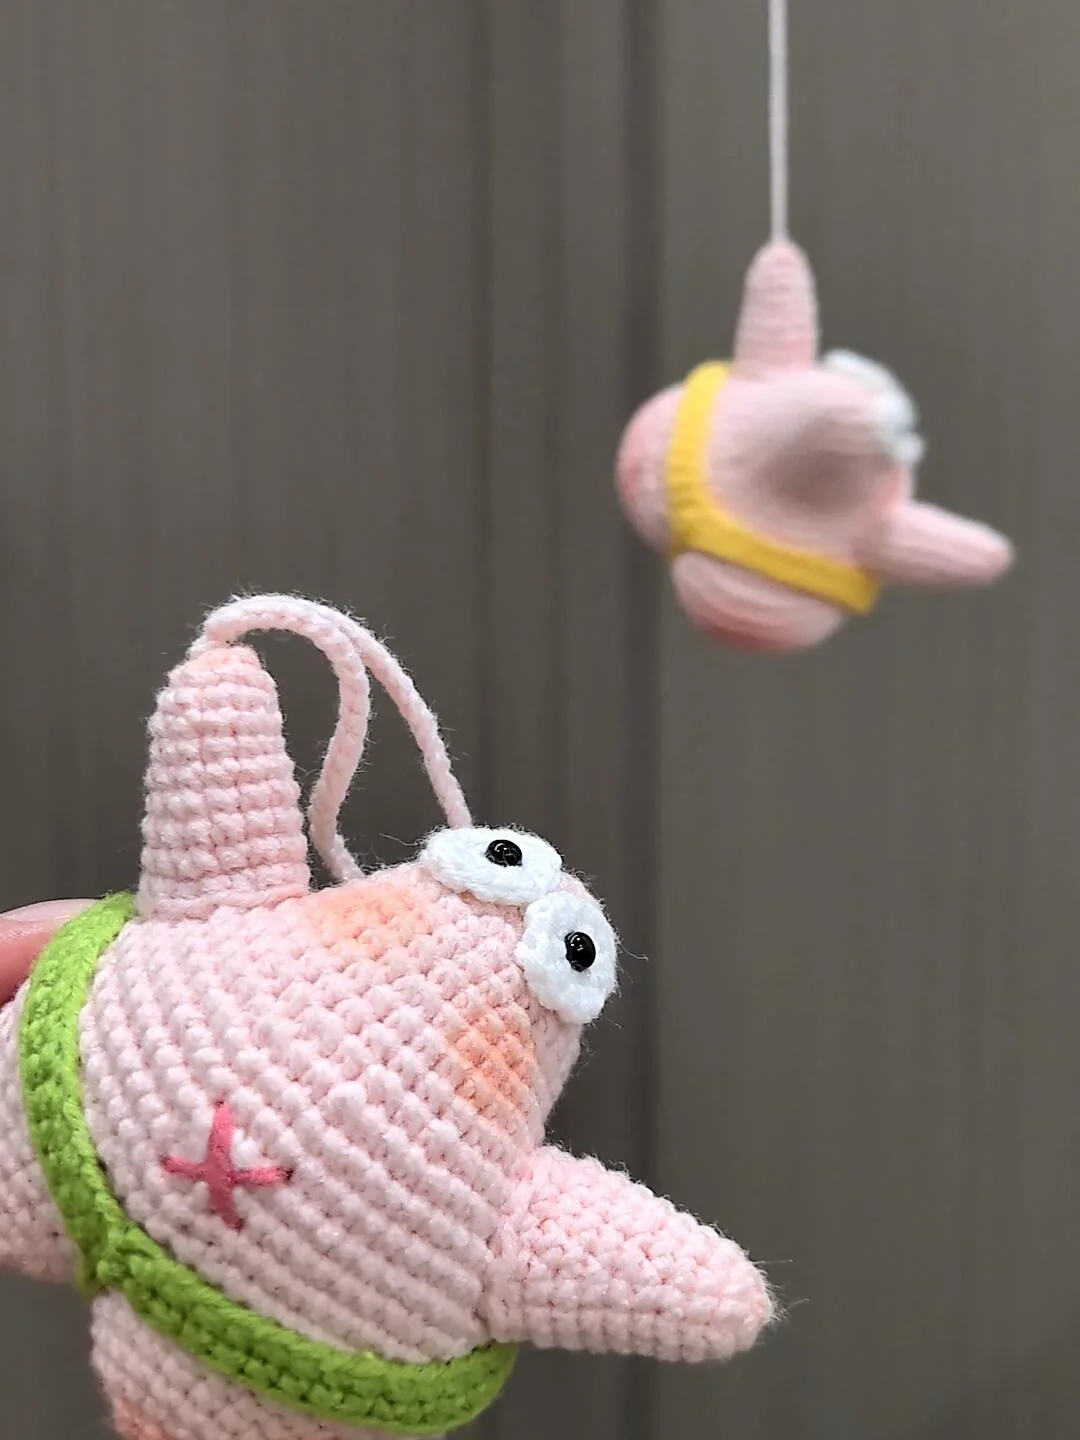
Step 6: Waistband and Center Strap
For the green crochet starfish charm garment, ch 35 and join into a ring without twisting. Work 35 sc around for garment round 1. Treat the thirty-five-chain count as a source reference; it is not guaranteed to fit every yarn and tension combination. Test it around the stuffed sample before fastening permanently.
Round 2: 5 sc, 3 hdc, 7 sc, 2 hdc, (dc, tr, dc) into the next stitch, 2 hdc, 7 sc, 3 hdc, 5 sc. The parenthesized center group uses ONE stitch. This consumes thirty-five stitches and produces thirty-seven, with a taller center tab. T, F, and E are interpreted as US hdc, dc, and tr respectively.
With the band pinned in place on your crochet starfish charm, measure from its center tab between the lower points to the opposite waistband. Chain to that measured span, leaving sewing tails, and check that the chain lies flat without squeezing the filling. Sew its ends to the tab and opposite band, or omit the strap if it distorts the body. Sample-test this addition before describing it as a finished pattern feature.
Step 7: Final Assembly and an Optional Loop
Before finishing your crochet starfish charm, inspect every seam and remove pins. Weave tails in several directions through the fabric rather than cutting them directly beside a knot. Rotate the piece to check arm balance, eye placement, and the center seam. A small difference in stuffing can change the apparent shape more than a photo suggests.
For an adult crochet starfish charm display only, add a short hanging cord to the top using secure stitches across several body stitches. No loop specification or load test is supplied. Do not hang the piece from a throttle, steering control, brake, gear mechanism, or anywhere it could snag or distract. Use a stationary indoor display point instead.
Troubleshooting Your Crochet Starfish Charm
The round count no longer matches
Stop at the first mismatch rather than compensating several rounds later. In round 15, W produces three sc in one stitch. In round 18, each mixed-stitch group goes into one stitch. In round 19, each M consumes three stitches. Check those transitions before frogging more fabric than necessary.
The lower points look uneven
Confirm that both leg openings begin with twenty stitches, including the bridge. Use the separate left and right sequences as written; they are not identical after round 26. Redistribute the filling before adding more. Overstuffing can stretch the fabric and hide the intended central groove.
The garment squeezes or slides
The chart gives a fixed thirty-five-chain foundation, but no gauge. If it does not fit, record the mismatch and make a new measured sample; changing the foundation requires recalculating the next round’s symmetric sections. Do not force the band on or pretend that an untested new count belongs to the source.
Crochet Starfish Charm FAQ
Finish Your Crochet Starfish Charm
A crochet starfish charm depends on careful shaping more than extra decoration. Keep the printed counts beside your WIP, make the interpreted steps slowly, and write down every change you test. Once the seams and fit are satisfactory, share your green or yellow waistband variation and note what worked with your yarn.
More crochet ideas
Terminology resources: Craft Yarn Council US abbreviations and yarn weight standards.




