

My Crochet Universe · Chart-based working guide
Crochet Ruffle Hat: Step-by-Step Character Guide
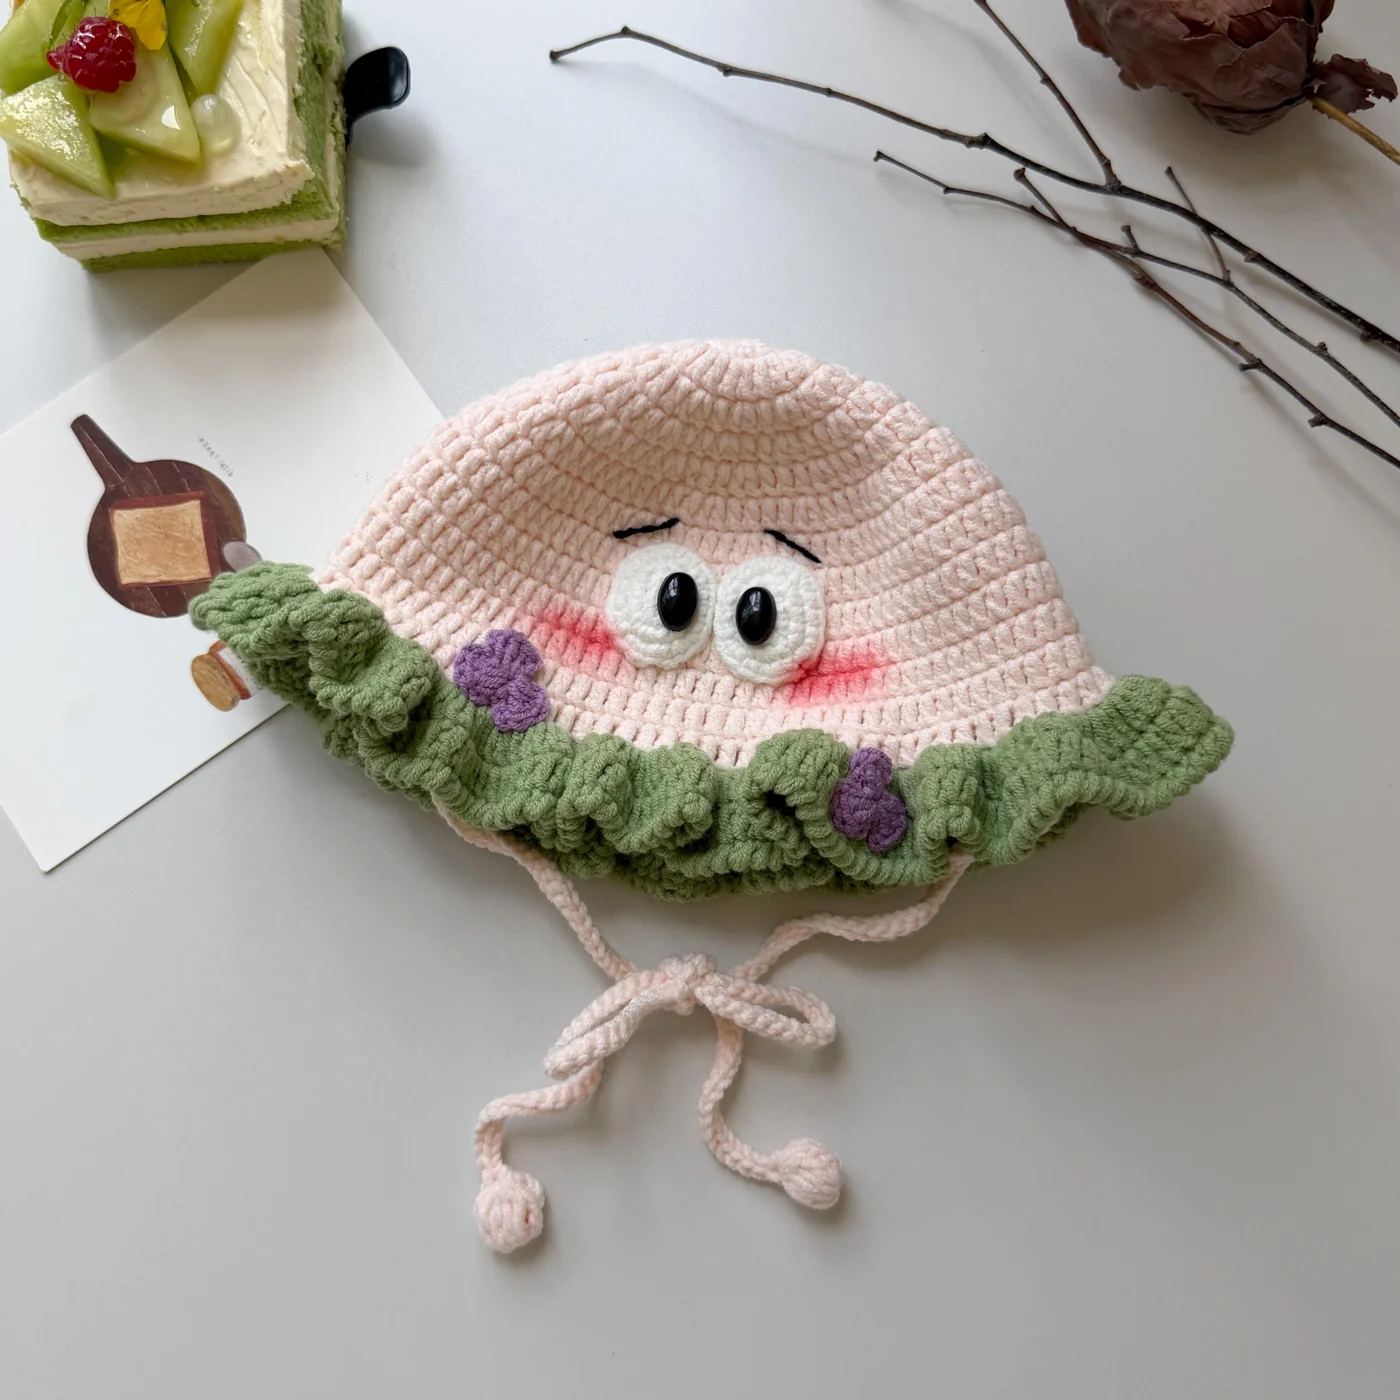
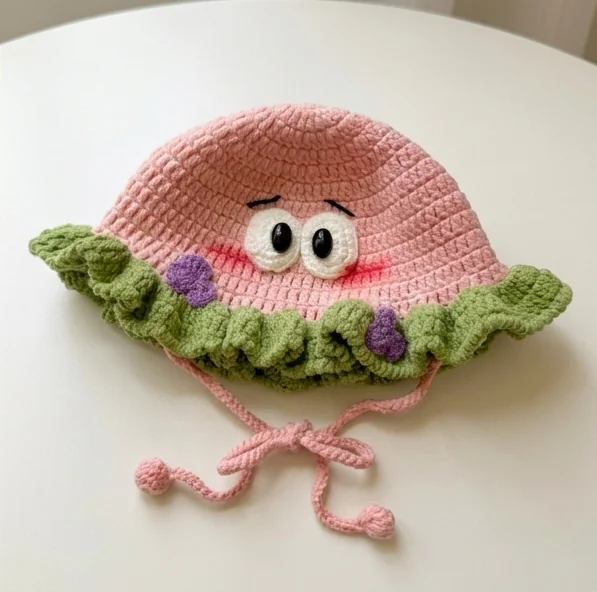
A crochet ruffle hat gets its personality from a soft rounded crown, a gloriously wavy brim, and a face that looks back at you. The reference photos pair a pink crown with a green ruffle and purple flowers; a yellow version has a white brim and little brown spots.
This crochet ruffle hat guide translates the supplied chart into US terms, explains the counts, and separates chart instructions from suggested finishing choices. It is an untested working interpretation, not a promise of exact fit. The matching booties in the photos are not included: no bootie instructions were supplied.
Table of Contents
Before You Begin: Evidence, Fit, and Safety
The crochet ruffle hat photographs show appearance, not hidden seams or reliable scale. Joining rounds, starting the ring, embroidering pupils, and placing facial features below are stated working choices where the chart is silent. AI process illustrations are labeled concepts and cannot verify a stitch count or construction method.
For a child’s version, omit hanging ties, bobble ends, plastic eyes, and other detachable small parts. Embroider facial details instead. This does not certify the hat as child-safe. Use only with appropriate supervision; remove before sleep and whenever a brim could cover the face. Do not use a decorative hat to restrain or secure anything.
Materials and Gauge for a Crochet Ruffle Hat
Choose smooth yarn with enough stitch definition to count double crochets easily. DK or light worsted yarn with a 3.5–4 mm hook is a sample-making suggestion, not a recovered source specification. The photographs alone cannot establish fiber content or hook size. Follow the yarn label and adjust after swatching.
- Pink, pale blush, or yellow yarn for the crown; green or white for the brim.
- Small amounts of white, black, purple, and optional accent colors for the face.
- Compatible hook, stitch markers, measuring tape, blunt yarn needle, and scissors.
- Extra brim yarn: working three stitches into every stitch increases consumption sharply; no measured yardage is available.
Measure the intended wearer for your crochet ruffle hat rather than selecting by age alone. Swatch in joined rounds of dc, relax or wash it according to the yarn label, and measure stitches and rounds over 10 cm. Record that gauge beside your crochet ruffle hat notes. A paper age label cannot compensate for different yarn or tension.
| Crown stop | Source head-circumference reference | Plain body rounds |
|---|---|---|
| Rnd 7 · 84 sts | About 42 cm | 6 |
| Rnd 8 · 96 sts | About 46 cm | 8 |
| Rnd 9 · 108 sts | About 52 cm | 10 |
| Rnd 10 · 120 sts | About 56–58 cm | 11 |
These measurements are approximate references printed in the chart, not measured results from this guide. All four rows need fitting. As a rough planning check, crown diameter is desired hat circumference divided by π; stretch and stitch behavior still require a real sample. Do not force an undersized crown onto a head.
US Stitches and the Source Chart Key
| Notation | US meaning |
|---|---|
| CH / ch | Chain |
| SL / sl st | Slip stitch |
| X / sc | Single crochet |
| T / hdc | Half double crochet |
| F / dc | Double crochet |
| E / tr | Treble crochet |
| V | 2 stitches in one stitch; use the stitch named in that section |
| W | 3 stitches in one stitch |
| K / A | Skip / decrease; not needed in the main crown sequence |
For dc: yarn over, insert the hook, yarn over and pull up a loop; yarn over and pull through two loops twice. A dc increase means two complete dc into the same stitch. Unless a round says otherwise, work through both loops: neither FLO nor BLO is specified in the source.
Working convention for this crochet ruffle hat: join each dc round with a sl st to its first dc. Chain 2 to start the next round and do not count it as a stitch. Put the first dc into the first stitch, not into the joining slip stitch. This keeps the stated counts explicit.
Step 1: Crochet Ruffle Hat Crown
Make a magic ring in the main color. Chain 2 without counting it, then work round 1 below into the ring. Close the ring securely and weave its tail through several stitches later. The chart starts with twelve dc but does not name the ring method; this is a practical starting choice.
| Round | Instruction | Count |
|---|---|---|
| 1 | 12 dc into the ring | 12 |
| 2 | 2 dc in every st | 24 |
| 3 | [dc, dc inc] × 12 | 36 |
| 4 | [dc, dc inc, dc] × 12 | 48 |
| 5 | [3 dc, dc inc] × 12 | 60 |
| 6 | [2 dc, dc inc, 2 dc] × 12 | 72 |
| 7 | [5 dc, dc inc] × 12 | 84 |
| 8 · if needed | [3 dc, dc inc, 3 dc] × 12 | 96 |
| 9 · if needed | [7 dc, dc inc] × 12 | 108 |
| 10 · if needed | [4 dc, dc inc, 4 dc] × 12 | 120 |
Stop increasing at your selected size, after checking the measurement. Each increase round adds twelve stitches. The split repeats on rounds 4, 6, 8, and 10 distribute the increases; they are not extra stitches after an already completed repeat. Count every round before continuing your crochet ruffle hat.
Step 2: Work the Straight Hat Body
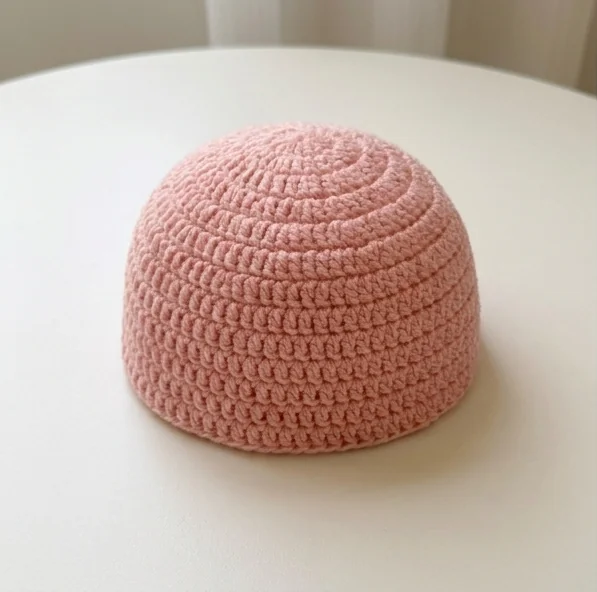
After the selected crown round, work one dc into every stitch without increasing. Use the body-round number in the size table: six, eight, ten, or eleven rounds. These rounds are additional to the crown rounds. Keep joining consistently and move the marker to the first real dc each time.
Check the crochet ruffle hat depth before changing colors. The source suggests adjusting by about one or two rounds when the hat feels too shallow or deep. For your crochet ruffle hat, aim for comfortable coverage with the brim kept away from the eyes. Do not use the face decorations as a reason to compromise fit.
Step 3: Add the Full Ruffled Brim
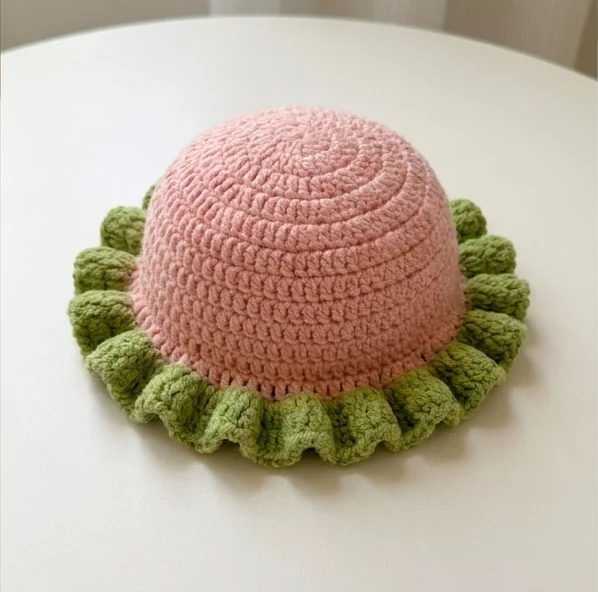
Join green or white at the crochet ruffle hat body edge. The crochet ruffle hat brim expands dramatically on its first round; this is intentional ruffling, not a mistake to flatten out. Keep the color change tidy and leave tails long enough for secure weaving rather than tying a bulky knot at the seam.
| Brim round | Instruction | 84 / 96 / 108 / 120 body sts |
|---|---|---|
| 1 | 3 dc in each body stitch | 252 / 288 / 324 / 360 |
| 2 | 1 dc in each brim stitch | 252 / 288 / 324 / 360 |
| 3 | Reverse sc around, then fasten off | One reverse sc per stitch |
To work reverse sc, also called crab stitch, make sc in the opposite direction from your usual crochet direction. Insert the hook into the next stitch in that direction, pull up a loop, yarn over, and pull through both loops. Practice on a scrap first so the final crochet ruffle hat edge stays flexible.
Do not add increases on brim round 2. Let the fabric fold naturally, then compare the distribution of waves around the hat. Fair warning: this brim eats yarn quickly. Keep enough matching yarn aside before starting rather than playing yarn chicken halfway around the last edge.
Step 4: Make Two Oval Eyes
In white, ch 4. Starting in the second chain from the hook, sc in the next two chains, then work 3 sc into the last chain. Rotate to the unused underside: sc into the middle chain and work 2 sc into the starting chain. You now have eight stitches around the oval.
| Eye round | Instruction | Count |
|---|---|---|
| 1 | Foundation oval as described above | 8 |
| 2 | inc, sc, 3 inc, sc, 2 inc | 14 |
| 3 | sc, inc, sc, [sc, inc] × 3, sc, [sc, inc] × 2 | 20 |
Mark the first sc and work continuously for this proposed eye construction. Make two matching crochet ruffle hat eye ovals; fasten off with sewing tails. For a crochet ruffle hat without hard eye components, embroider black oval pupils onto the white pieces before attaching them. The source photos show glossy eyes, but those are not needed to suggest the expression.
Step 5: Flowers, Brows, and Color Variations
For each crochet ruffle hat flower, make a ring and repeat this group three times into it: ch 3, 2 dc, ch 3, sl st into the ring. Tighten and leave a sewing tail. Make two flowers. This follows the source flower notation; their final size depends on yarn and tension.
Pin the eyes above the ruffle while the crochet ruffle hat rests over a head-sized form, not while someone is wearing it. Sew around each white edge without puckering the crown. Embroider two short angled eyebrows and soft pink cheek marks with yarn; avoid loose loops. Sew flowers securely to the brim after checking the brim’s natural folds.
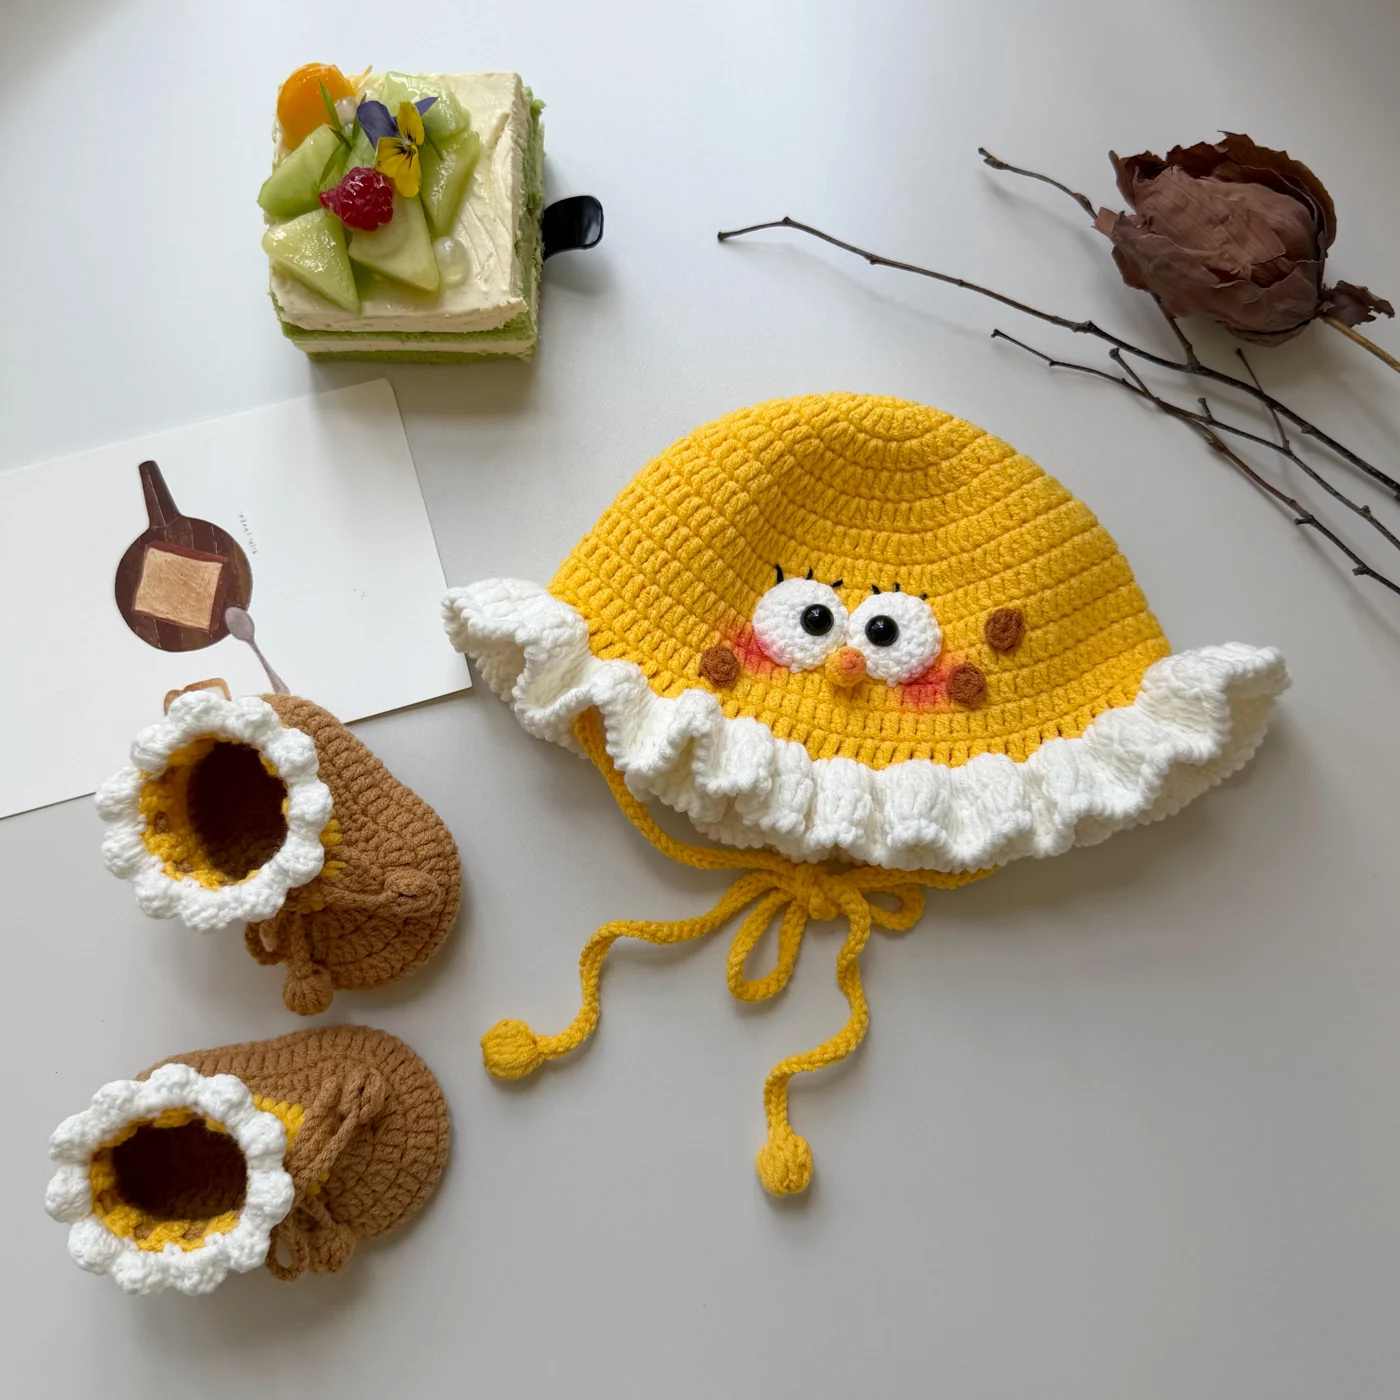
The yellow reference uses a white ruffle, rounder-looking eyes, a small orange nose, and brown spots. The supplied chart does not give that nose or those spot instructions, so they are not presented as recovered pattern steps. Keep the documented pink-and-green version first, or embroider optional accents as your own variation.
Step 6: Optional Adult Ties and Final Checks
Omit the ties and bobble ends entirely for children. For an adult decorative sample only, the source describes two ties with a two-part cluster end and a long chain, joined to the hat and slip-stitched back. Its 100-chain length is a reference count, not a safety or fit requirement.
To interpret the cluster end, ch 4 and make five unfinished dc into the first chain; yarn over and pull through all six loops. Ch 3 and repeat five unfinished dc into the back of its first chain, close the cluster, and sl st back to the first half to bring the halves together. This closing arrangement needs sample testing.
Chain to the chosen adult tie length, attach with a sl st at the side, then sl st back along the chain toward the cluster. Make a matching second tie. Do not use long chains to solve a poor fit. If unsure about construction or use, leave them off your crochet ruffle hat.
- Weave tails securely without creating hard knots inside the crown.
- Check all seams and embroidery for loose loops; remove anything that can detach.
- Confirm that the hat is not tight and the brim stays clear of the face.
- Wash only according to the yarn label; dry flat and reshape the ruffle gently.
- Record hook, yarn, gauge, crown count, body rounds, and any revisions before making another.
Troubleshooting Your Crochet Ruffle Hat
The crown is too small or too large
Check the round count and your gauge before changing the pattern. Different yarn can make the same eighty-four stitches substantially wider or narrower. If the measured fit misses the target, remake the swatch or choose another crown stop; age estimates alone are not a reliable correction.
The brim is barely waving—or overwhelms the hat
Confirm that brim round 1 contains three dc into every body stitch, not three dc spread across three stitches. If the stated construction is still too bulky for your yarn, a different increase rate would be a new adaptation needing its own test. Do not quietly claim it matches the source.
The eyes are uneven or the join drifts
Count each oval before sewing it down and compare both against the same flat surface. On the crochet ruffle hat body, make sure you are not adding stitches into chain-2 or the joining sl st. Frogging one incorrect round is less frustrating than moving the whole face after finishing.
Crochet Ruffle Hat FAQ
Finish Your Crochet Ruffle Hat and Plan the Next Make
The charm of a crochet ruffle hat comes from the contrast: a simple crown, a generous wave of color, and a carefully placed expression. Follow the counts, measure before decorating, and keep a note of anything you revise. Once your sample fits comfortably, share the color combination you chose.
More from My Crochet Universe
For terminology and yarn guidance, see the Craft Yarn Council US abbreviation list and standard yarn weight system.




