

My Crochet Universe · Photo-based tutorial draft
Crochet Monster Key Cover: Step-by-Step Tutorial
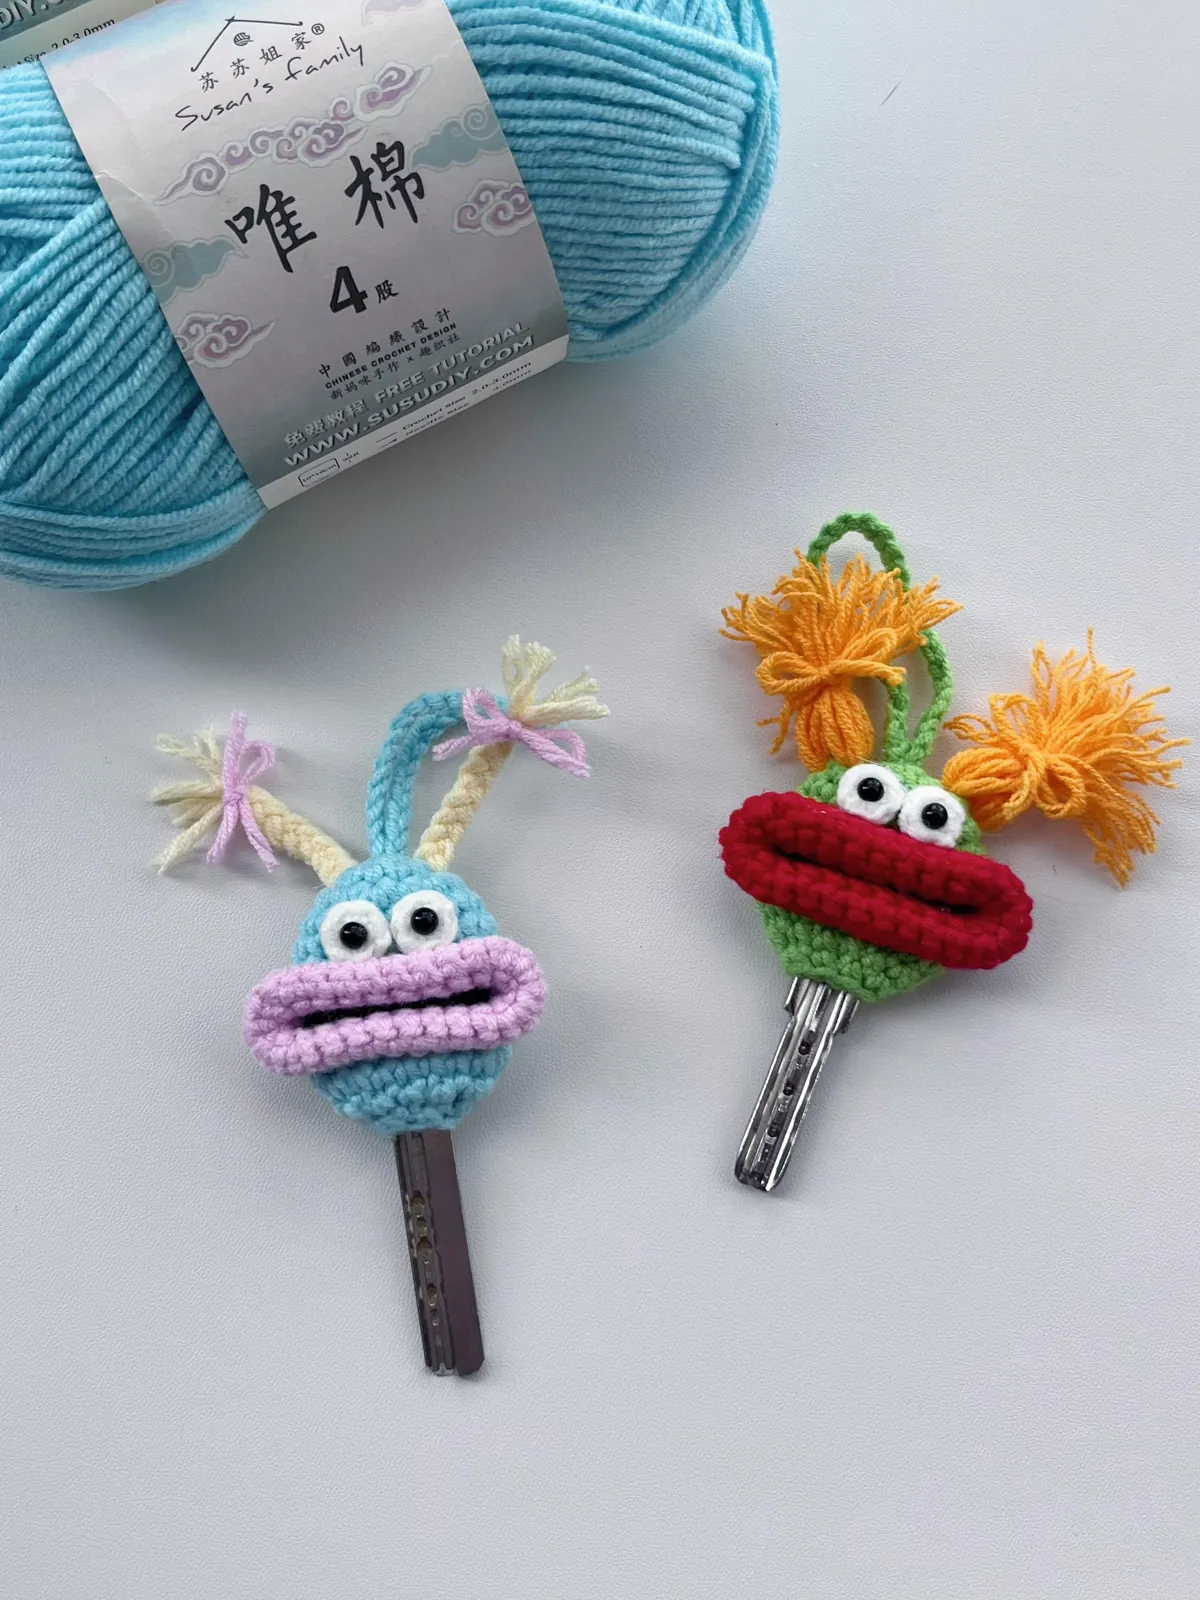
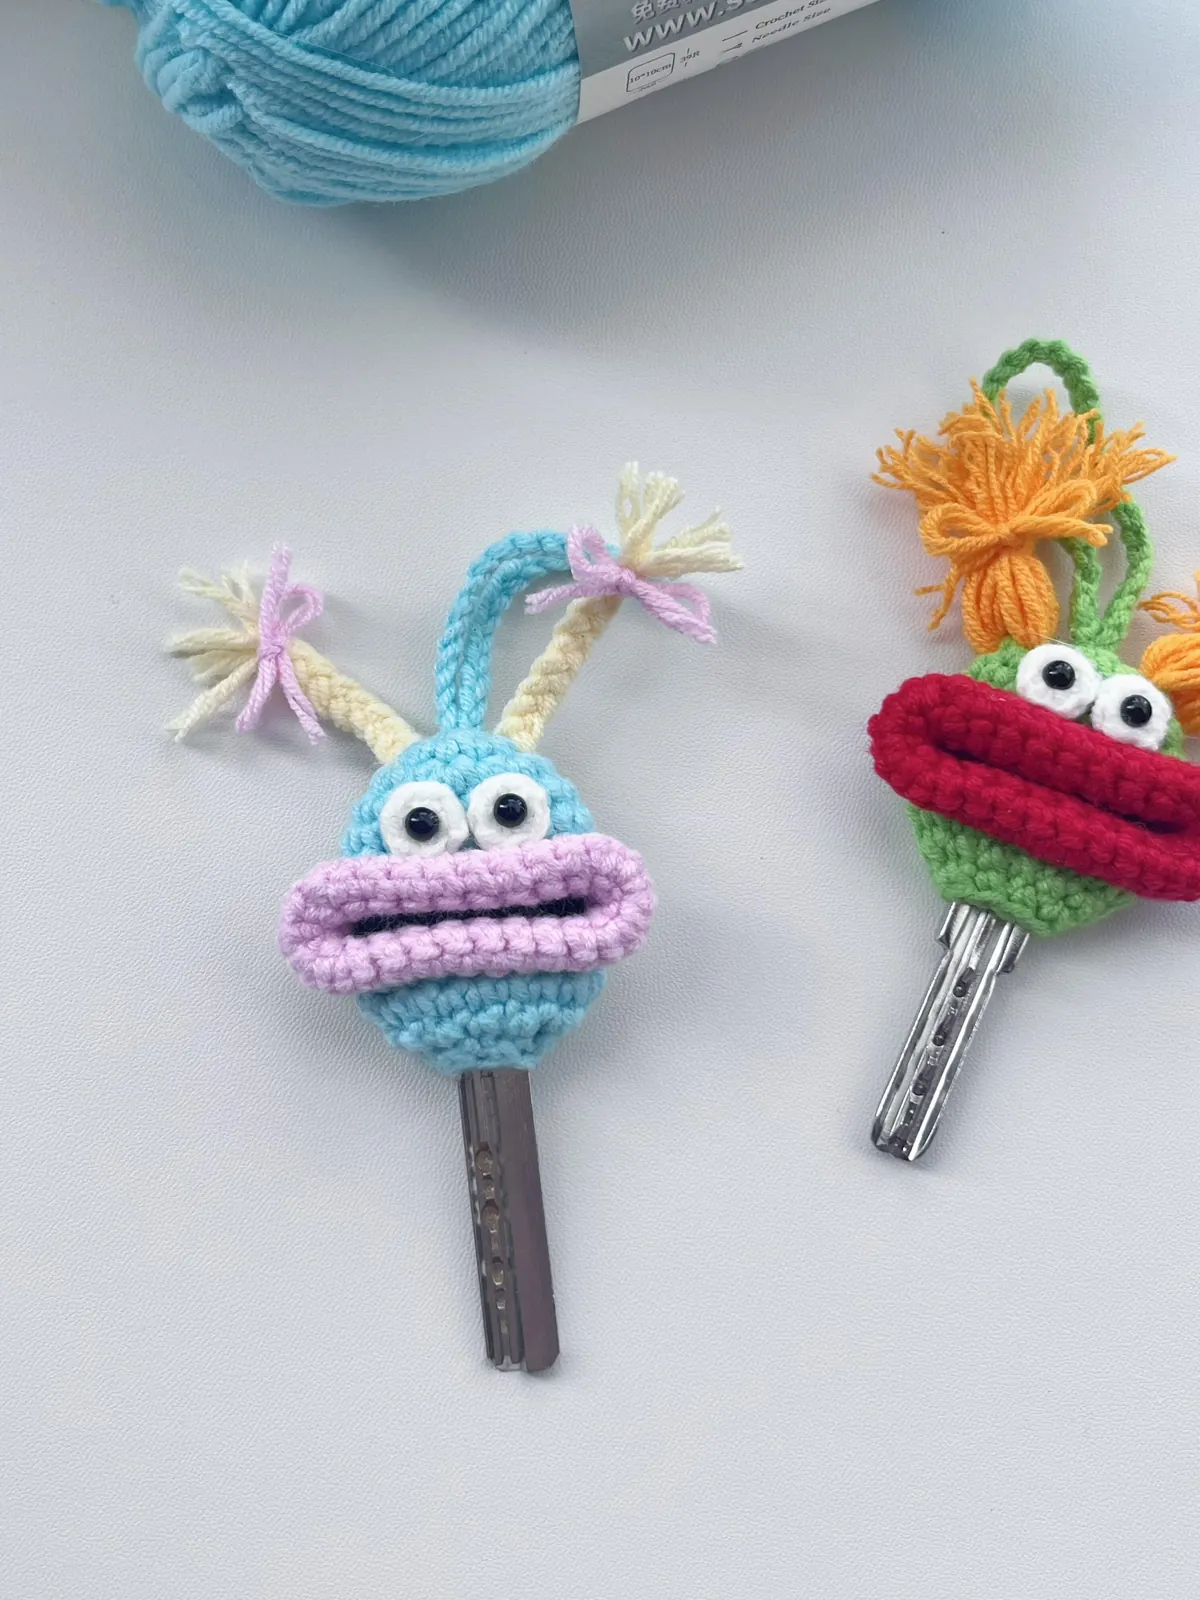
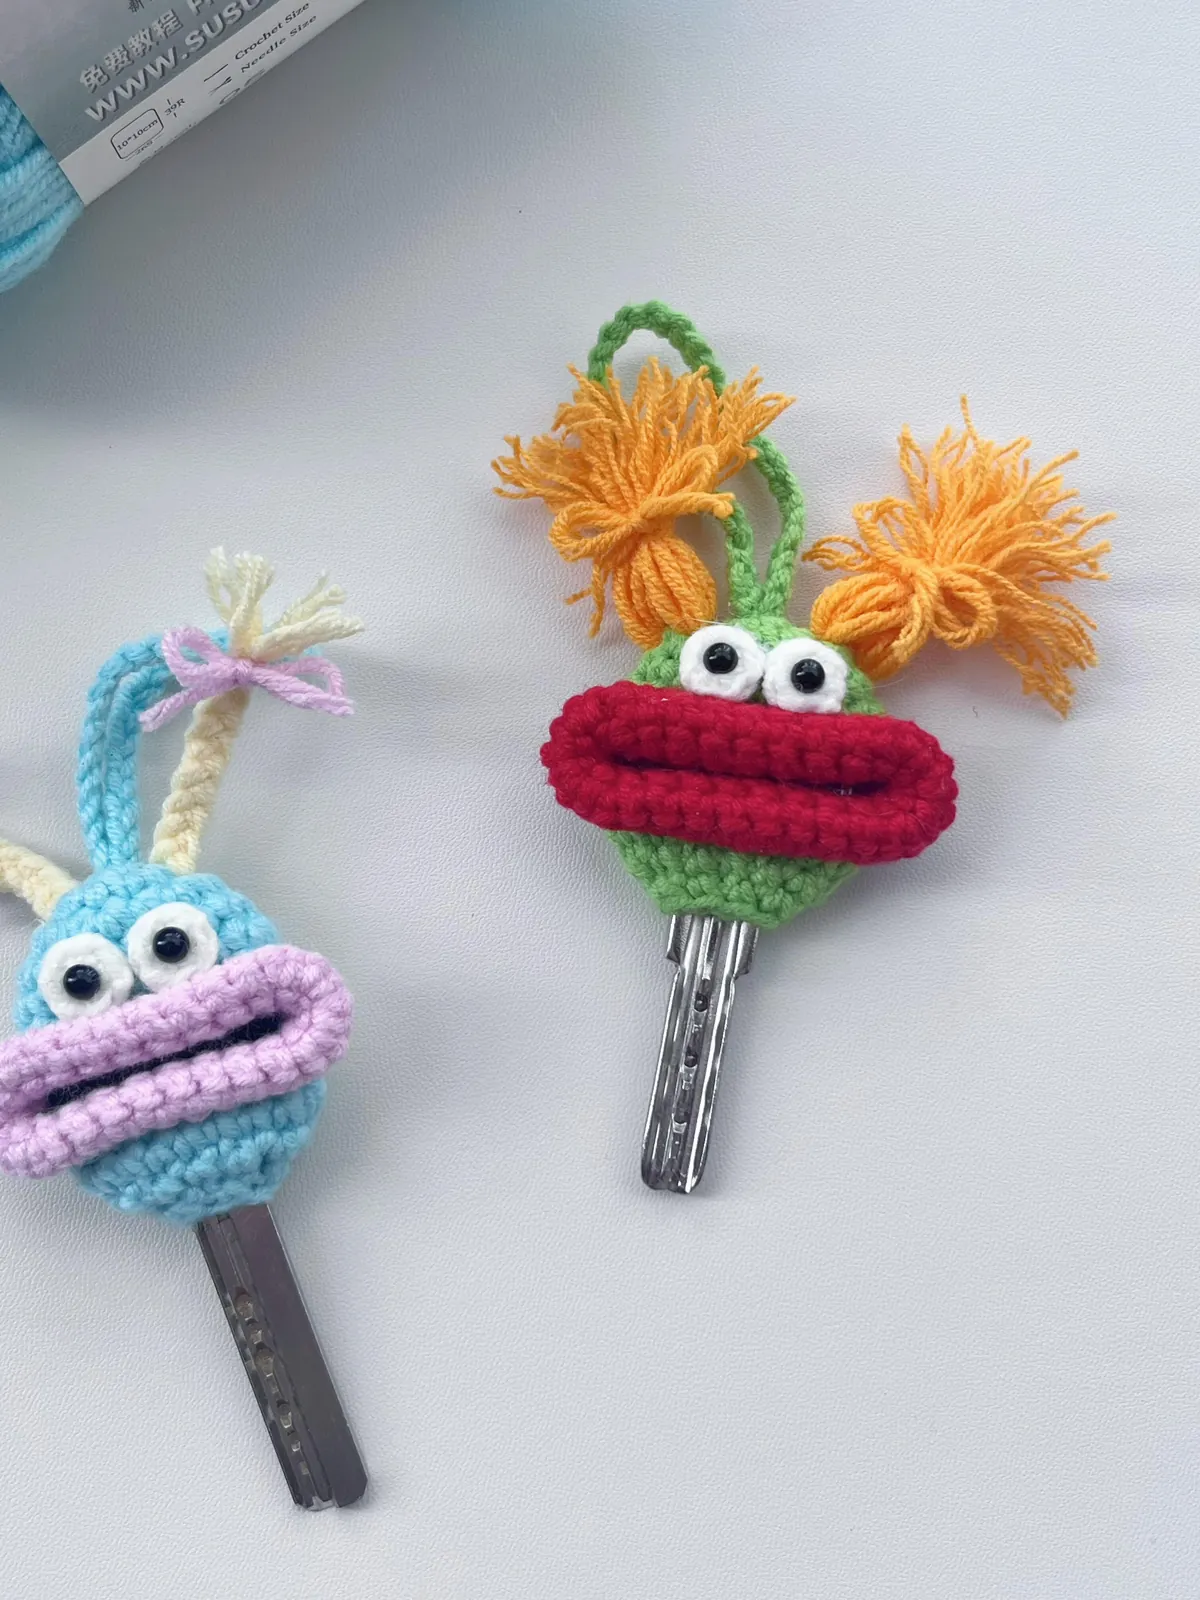
A crochet monster key cover turns an ordinary key into a wonderfully silly little face. The supplied photos show two versions: turquoise with lilac lips and cream braids, and green with red lips and orange hair. That oversized mouth does most of the character work.
This guide explains the sleeve, mouth edging, eyes, braids, and hanging loop using US crochet terms. It is a reconstruction from a supplied chart and finished-item photos, not a tested pattern. Read the correction notes before starting your crochet monster key cover; fit checkpoints matter more than matching the photo exactly.
Table of Contents
Read This First: What Is Confirmed?
The photos establish the color placement and overall appearance of this crochet monster key cover. They cannot establish hidden seams, exact yarn weight, or durability. The chart supplies most stitch sequences, but not every construction detail. Use this draft as a sample-making guide rather than promising an exact-size result.
Two interpretations of the mouth notation are possible: an eight-chain bridge over eight skipped stitches, or an incompletely specified slip-stitch instruction. This guide uses the chain bridge because it creates an opening and preserves eighteen stitch positions. That is an inference, not a confirmed translation of a complete instruction.
Materials and Fit for a Crochet Monster Key Cover
For a first crochet monster key cover sample, choose smooth cotton scraps with a clearly visible stitch definition. Sport or light-DK cotton with a 2–3 mm hook is a suggested starting combination, not a specification recovered from the photos. Adjust the hook until the fabric is firm without becoming rigid.
| Item | What to prepare |
|---|---|
| Main color | Turquoise or green cotton; quantity not measured |
| Contrast colors | Lilac or red for lips; white for eyes; cream or orange for braids |
| Tools | Compatible hook, blunt tapestry needle, scissors, stitch marker |
| Face and fitting | Black embroidery yarn and the actual key; no stuffing |
Measure your key head before crocheting. The sleeve must accommodate its width and thickness, while the blade must remain fully exposed for use. No universal finished size is claimed. For your crochet monster key cover, write down the yarn, hook, key-head dimensions, and sample measurements so you can reproduce a successful fit.
Stitches and Abbreviations
| US term | Meaning |
|---|---|
| ch | Chain |
| sc | Single crochet |
| inc | Work 2 sc into the same stitch |
| dec | Single crochet 2 stitches together |
| sl st | Slip stitch |
| MR / rnd / st | Magic ring / round / stitch |
To work sc, insert the hook, yarn over and pull up a loop, then yarn over and draw through both loops. For an invisible decrease, pick up the front loops of the next two stitches, yarn over and pull through them, then finish as one sc. Mark the first stitch of each round; do not count the marker as a stitch.
Step 1: Crochet Monster Key Cover Body
The crochet monster key cover starts with the closed end of a small sleeve. Work continuously, moving the marker each round. Keep the magic ring secure, and stop to count before continuing. A missed increase here changes the entire face width.
| Round | Instruction | Count |
|---|---|---|
| 1 | 6 sc in MR; tighten the ring | 6 |
| 2 | inc in each st | 12 |
| 3 | [sc, inc] × 6 — proposed correction | 18 |
| 4–6 | sc in every st | 18 each |
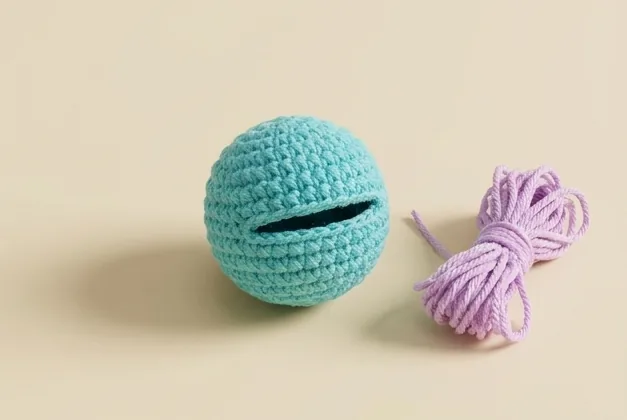
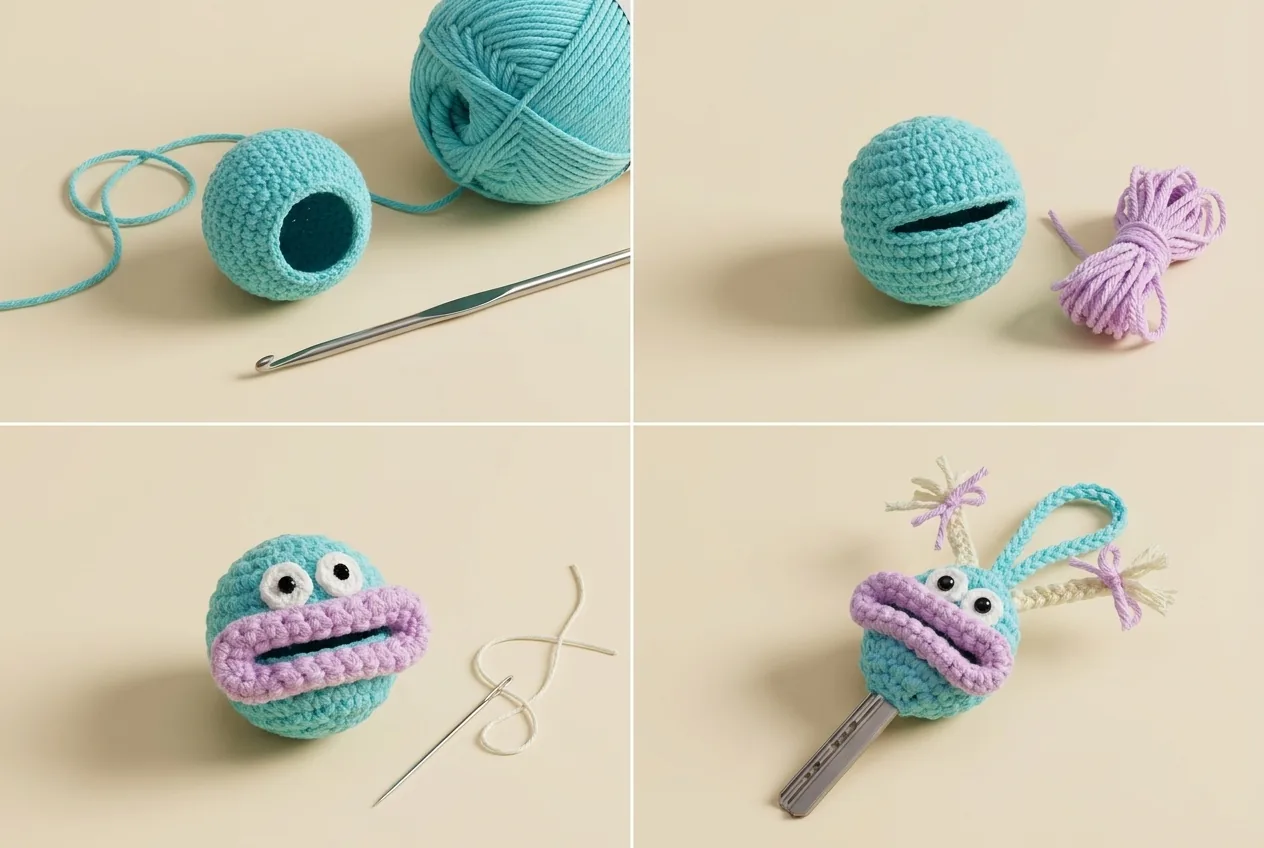
| 7 | 5 sc, ch 8, skip 8 sts, 5 sc — proposed opening | 18 positions |
| 8 | 5 sc, 1 sc in each of 8 chains, 5 sc | 18 |
| 9 | sc in every st | 18 |
| 10 | [sc, dec] × 6; fasten off with a sewing tail | 12 |
After round 7, check that the opening lies across the front of your crochet monster key cover. Crochet into the chains themselves on round 8 rather than making eight stitches around the whole bridge. This keeps the proposed stitch structure explicit. Do not join the mouth slit shut.
After round 10, leave the twelve-stitch lower opening of the crochet monster key cover unclosed. Try passing the key blade through it and positioning the key head inside the sleeve through the larger mouth opening. This insertion route is a construction inference. If the head cannot enter without forcing the fabric, stop and revise the sample before adding the face.
Step 2: Build the Oversized Mouth
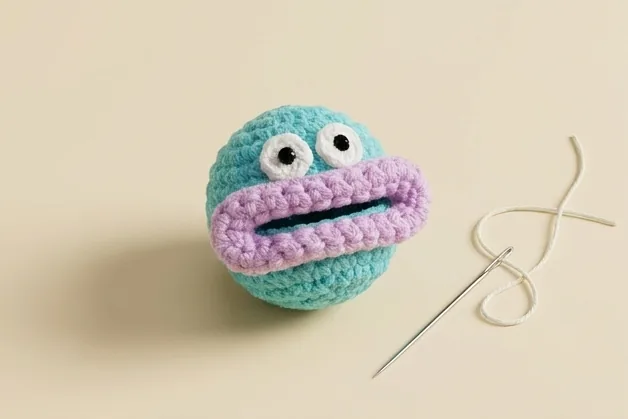
For this crochet monster key cover, join the lip color around the front opening. The chart places the start near stitch five of body round six. The following pickup arrangement is a proposed way to interpret the perimeter: eight positions along the upper edge, one at a short end, eight along the lower edge, and one at the other end.
Mark both end positions on the crochet monster key cover. You need eighteen pickup positions before the first lip round. If the fabric does not provide them cleanly, do not force extra holes into it. Recheck the chain bridge and your body count; an alternative pickup arrangement would need its own tested revision.
| Lip round | Instruction | Count |
|---|---|---|
| 1 | 8 sc, inc, 8 sc, inc | 20 |
| 2 | 8 sc, 2 inc, 8 sc, 2 inc | 24 |
| 3 | 8 sc, 4 inc, 8 sc, 4 inc | 32 |
| 4 | 8 sc, 4 dec, 8 sc, 4 dec | 24 |
The counts balance: the first round adds two stitches, then four, then eight; the final round removes eight. Fasten off and gently roll the rim outward to suggest padded lips. A few discreet tacking stitches may hold the shape, but never sew the opposite edges together. Your crochet monster key cover still needs a usable opening.
Step 3: Add Eyes, Braids, and a Loop
Make two white eye circles
For the crochet monster key cover eyes, work 6 sc in a white MR for each eye, tighten, and fasten off with a sewing tail. These are the eye instructions given in the chart. Embroider a small black pupil onto each circle, then pin both above the lips. Embroidered pupils avoid adding the hard eye components visible in the reference photos, but the key and decorations still make this an adult accessory, not a toy.
Braid two pigtails
For each braid, cut three equal strands of cream or orange yarn and fold them in half. Secure the fold to the sleeve near an upper side, then divide the six ends into three groups of two. Braid evenly, tie the end, and trim the tassel. The chart gives this grouping but no strand length; choose the length on your sample and record it.
Crochet the hanging loop
Chain until the loop suits your intended hanging point. Leave tails and sew both ends into several stitches at the upper back. The chart specifies only a chain of suitable length, so no exact count is claimed. Keep the loop short enough that your crochet monster key cover does not tangle with the lock or neighboring keys.
Step 4: Assembly and Fit Checks
- Lay out the lips and eye circles before committing to permanent seams.
- Sew each eye edge securely, without catching the opposite sleeve wall.
- Attach the two braids symmetrically and reinforce the hanging-loop joins.
- Weave every tail through several stitches on the inside; keep the sleeve hollow.
- Insert the key and verify that the blade, shoulders, and operating surfaces remain clear.
- Test the key gently in its intended lock. Remove the cover if it catches, shifts, or prevents full insertion.
A finished crochet monster key cover should stay in place without restricting the key. Never force the key to compensate for a bulky sleeve. This draft has no verified wash test: remove the metal key before cleaning, follow the yarn label, and reshape the empty sleeve gently while it dries.
Troubleshooting Your Crochet Monster Key Cover
The body is too tight
Check your count first. If eighteen stitches are present but the sleeve still cannot accommodate the key, try a slightly larger hook or different yarn in a fresh sample. Avoid adding unplanned increases midway: the mouth placement depends on the original stitch count.
The mouth curls unevenly
Confirm that increases and decreases sit at the two short ends. Pin the rim before tacking it. If one side bulges more than the other, undo the latest round and recount rather than hiding a stitch error beneath a seam.
The key slips out
A loose lower opening or oversized body may need a smaller-hook sample. Adding stuffing is not a solution: it removes space needed by the key. Any additional retaining stitch is a new modification and must be tested without blocking insertion or removal.
The face looks crowded
Move the crochet monster key cover eyes with pins before sewing them down. Leave a little visible body color above the upper lip. Shorter hair and smaller embroidered pupils can simplify the expression without changing the core sleeve construction.
Frequently Asked Questions
Finish, Record, and Choose Your Next Project
A playful crochet monster key cover is a good reason to use those tiny cotton scraps, but a dependable result comes from counting and checking the fit. Record your successful sample choices, revise anything that obstructs the key, and treat the illustrations as inspiration. Share your color combination after testing it on your own key.




